If you are anything like me you will find that over time your collection of vaping stuff will seem to magically grow by leaps and bounds. Especially if you start to DIY your own juice. And your patience with sorting through jumbled mess in a shoe box will quickly wear thin. With this in mind I came up with a no frills design that anyone can make cheaply (under $10) and very quickly but will allow you to expand as needed.
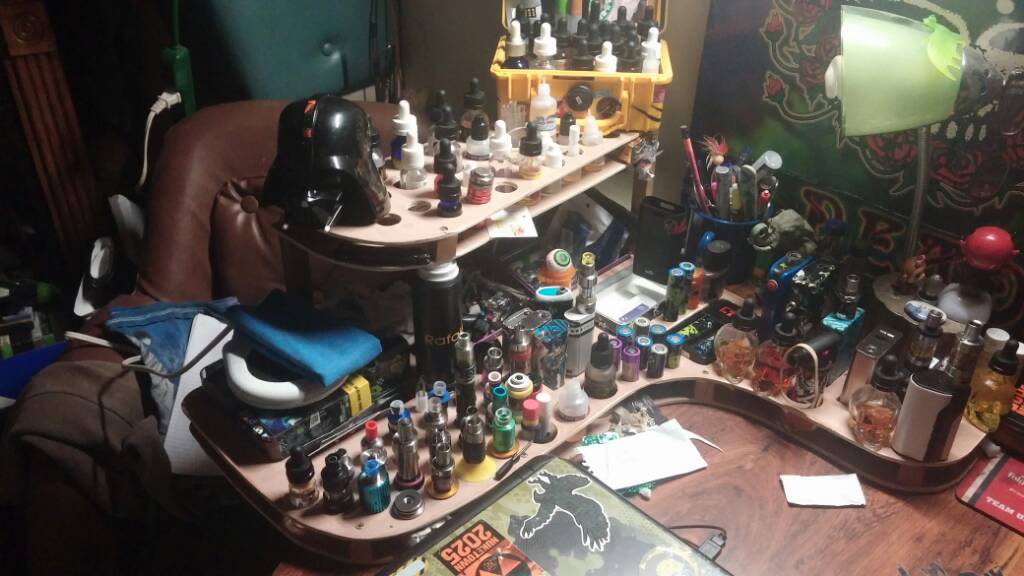
Here Is what we are making. One for Juice bottles and One for Atomizers.

First step is deciding where you are going to place it. Whether in a cabinet, cubbie hole, a desk or table top then measure and write down height,width, and length. Now we drive to Home Depot for the 2 types of wood needed. I already had the materials at home left over from other projects so I just made both. You can do the same or just one or the other.
First the juice bottle one.
You need a 2"x2"x8 foot board (although they actually measure 1 1/2" wide not sure why?) Cost is around $2
Now you decide if you want Home Depot to cut your wood to size which they will they just won't guarantee precision cuts.
Based off of the measurements you took before, If your shelves are going to be less than 36" long then you need 3 of each size if more than 36" then you need 4 of each
2"
4"
6"
8"
If more than 4 shelves high than go up on each piece by 2"
This will form your bases.
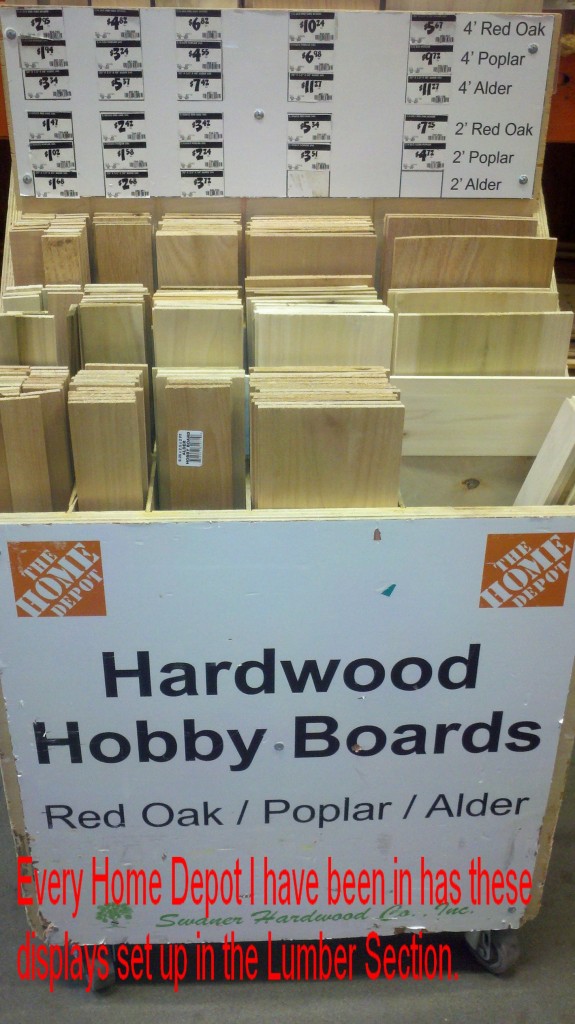
Next look for this cart somewhere in the lumber section.
Look at the 1 1/2" size pieces (poplar is the cheapest) and grab the amount for the number of shelves you plan to make in either the precut sizes or have them cut down to the size needed by Home Depot.
For my 2 units I used (1) 2x2x8 and (4) 1/4x1 1/2x48 hobby boards. The bottle space was 34" long so I needed 3 bases up to 8" high and 4 shelf's 34" long. I used (3) of the remaining 14" hobby boards on the atomizer shelf and cut (2) 6" high bases leaving me with a 10" piece of 2x2x8.
Once back home find a flat place to work and grab any type of glue and start assembling the bases. Starting with the largest 2x2 piece lay it on it's side add glue to one side of next smaller size and stack it on top like so.
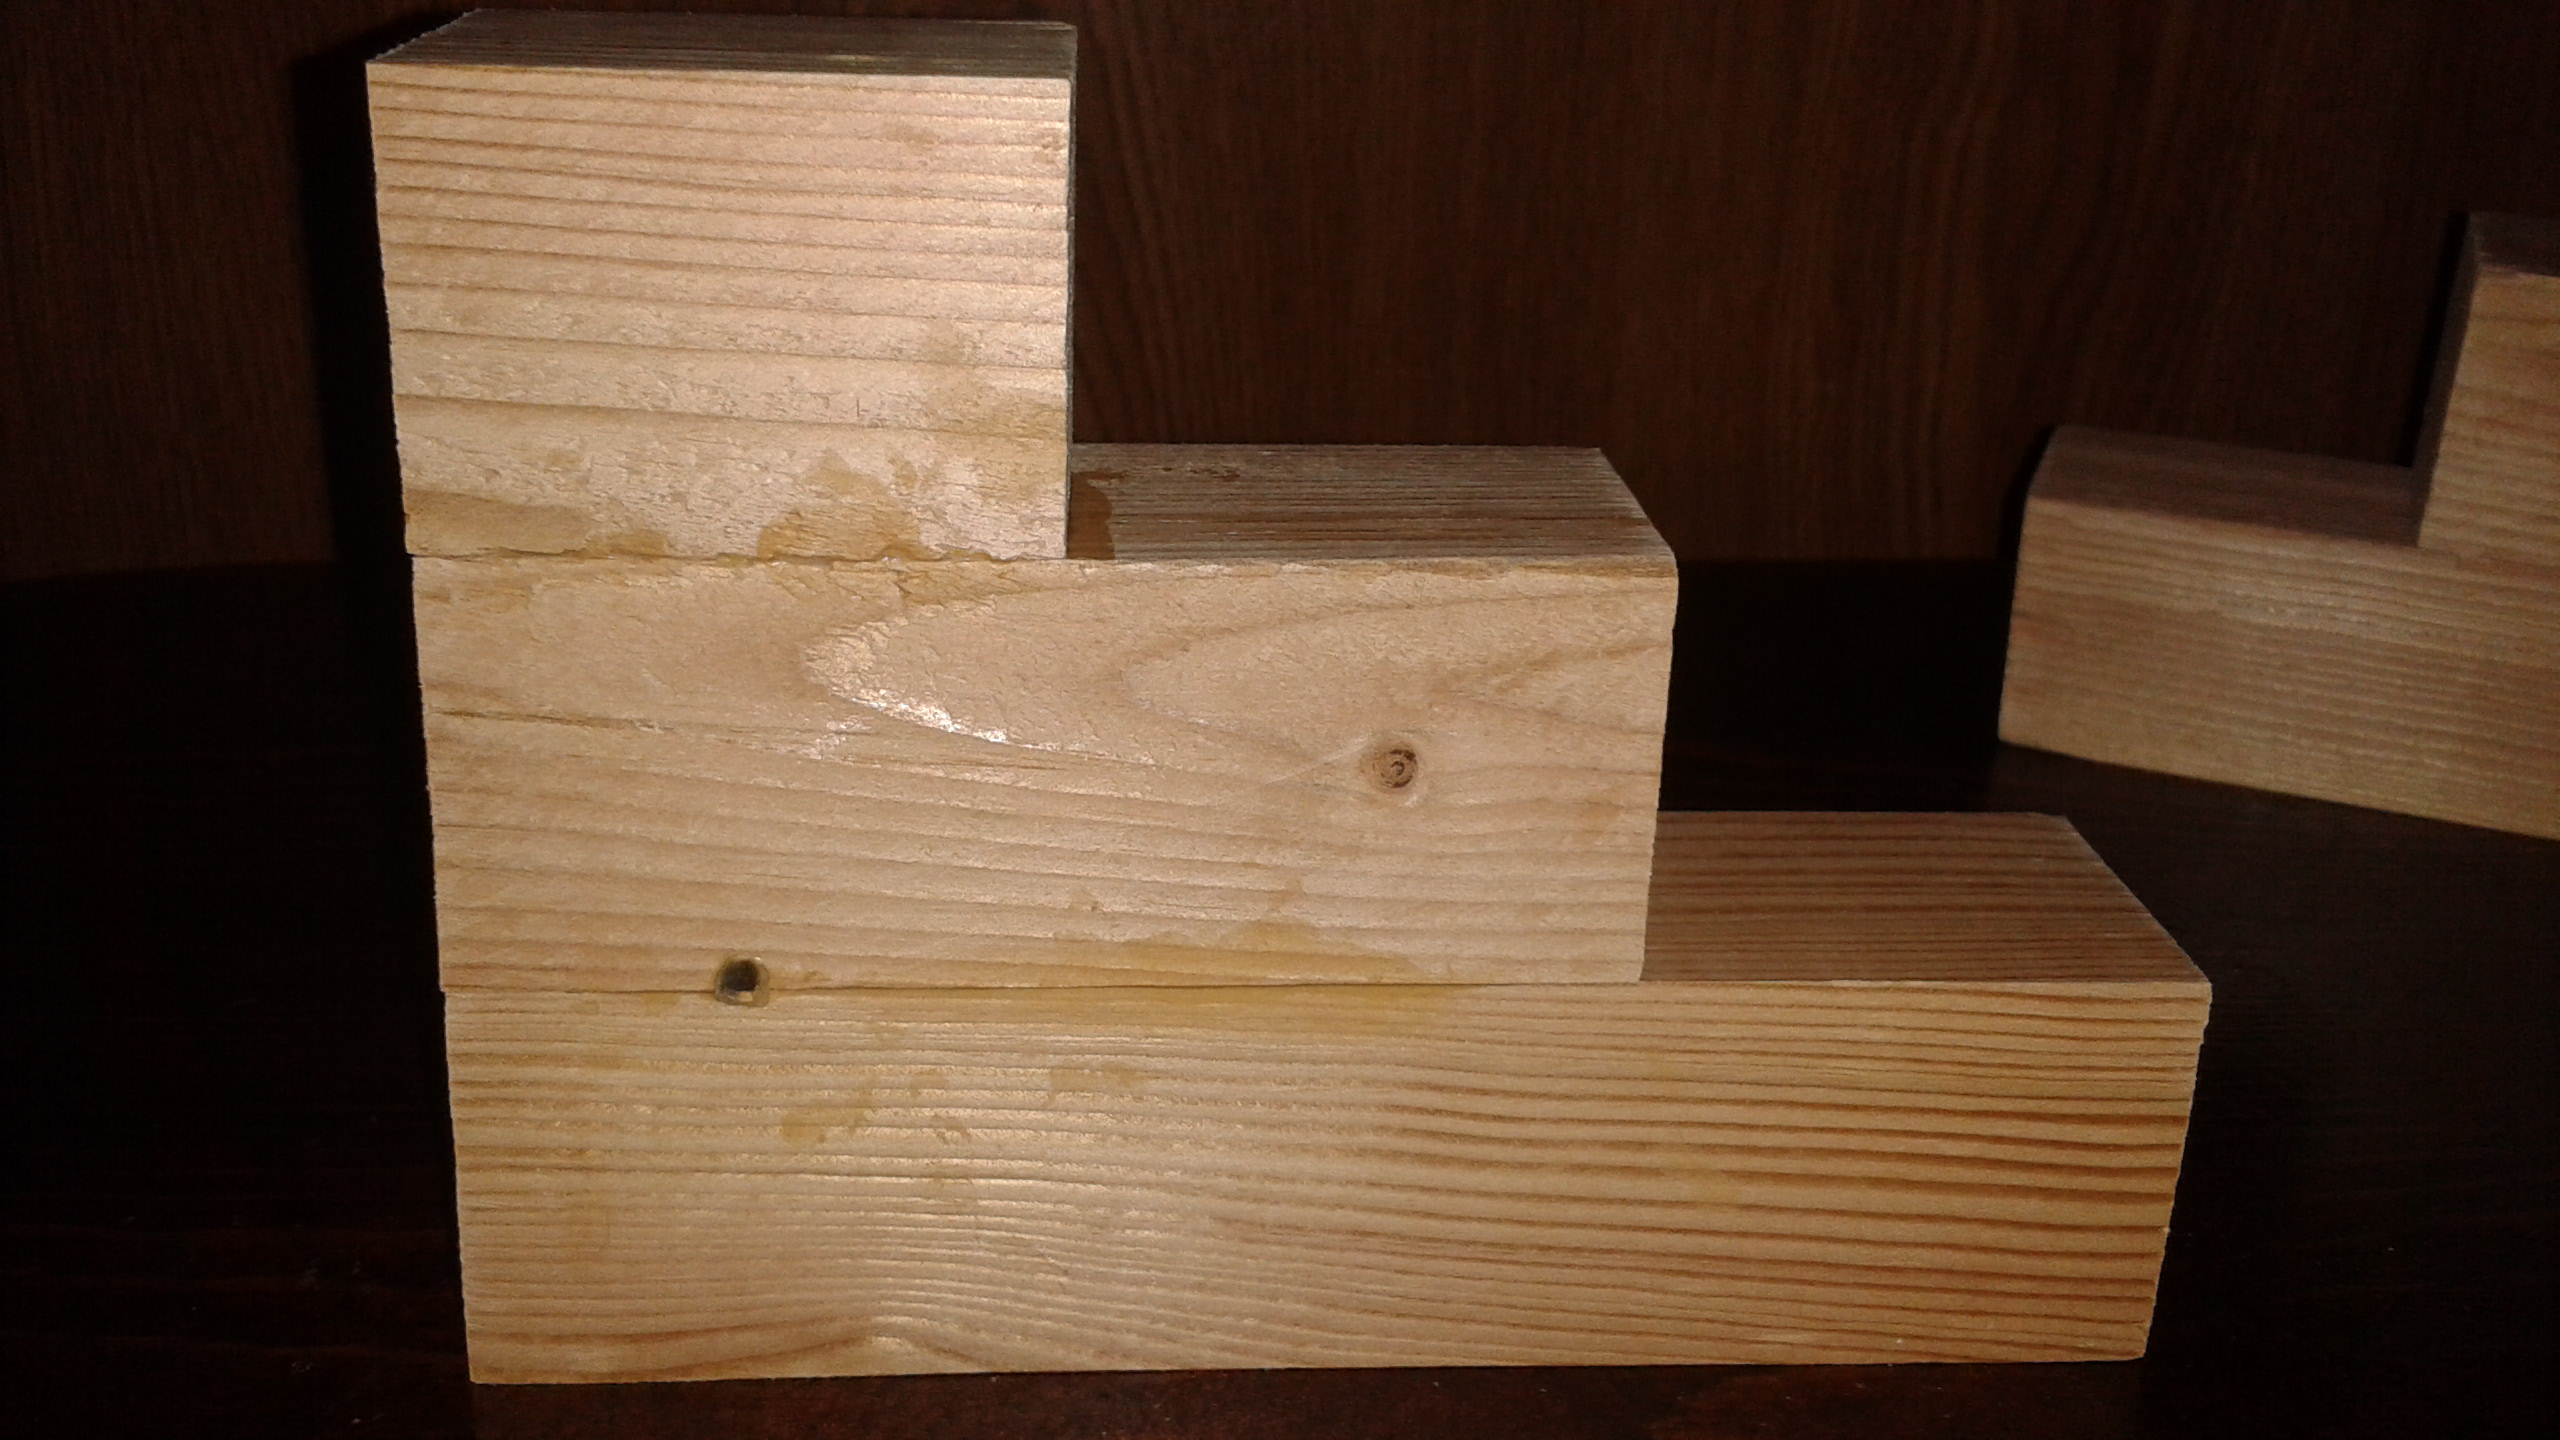
While glue is still wet adjust the pieces so cut edge and sides line up as even as possible. Continue on until all bases are glued. Allow glue to dry for a few minutes.
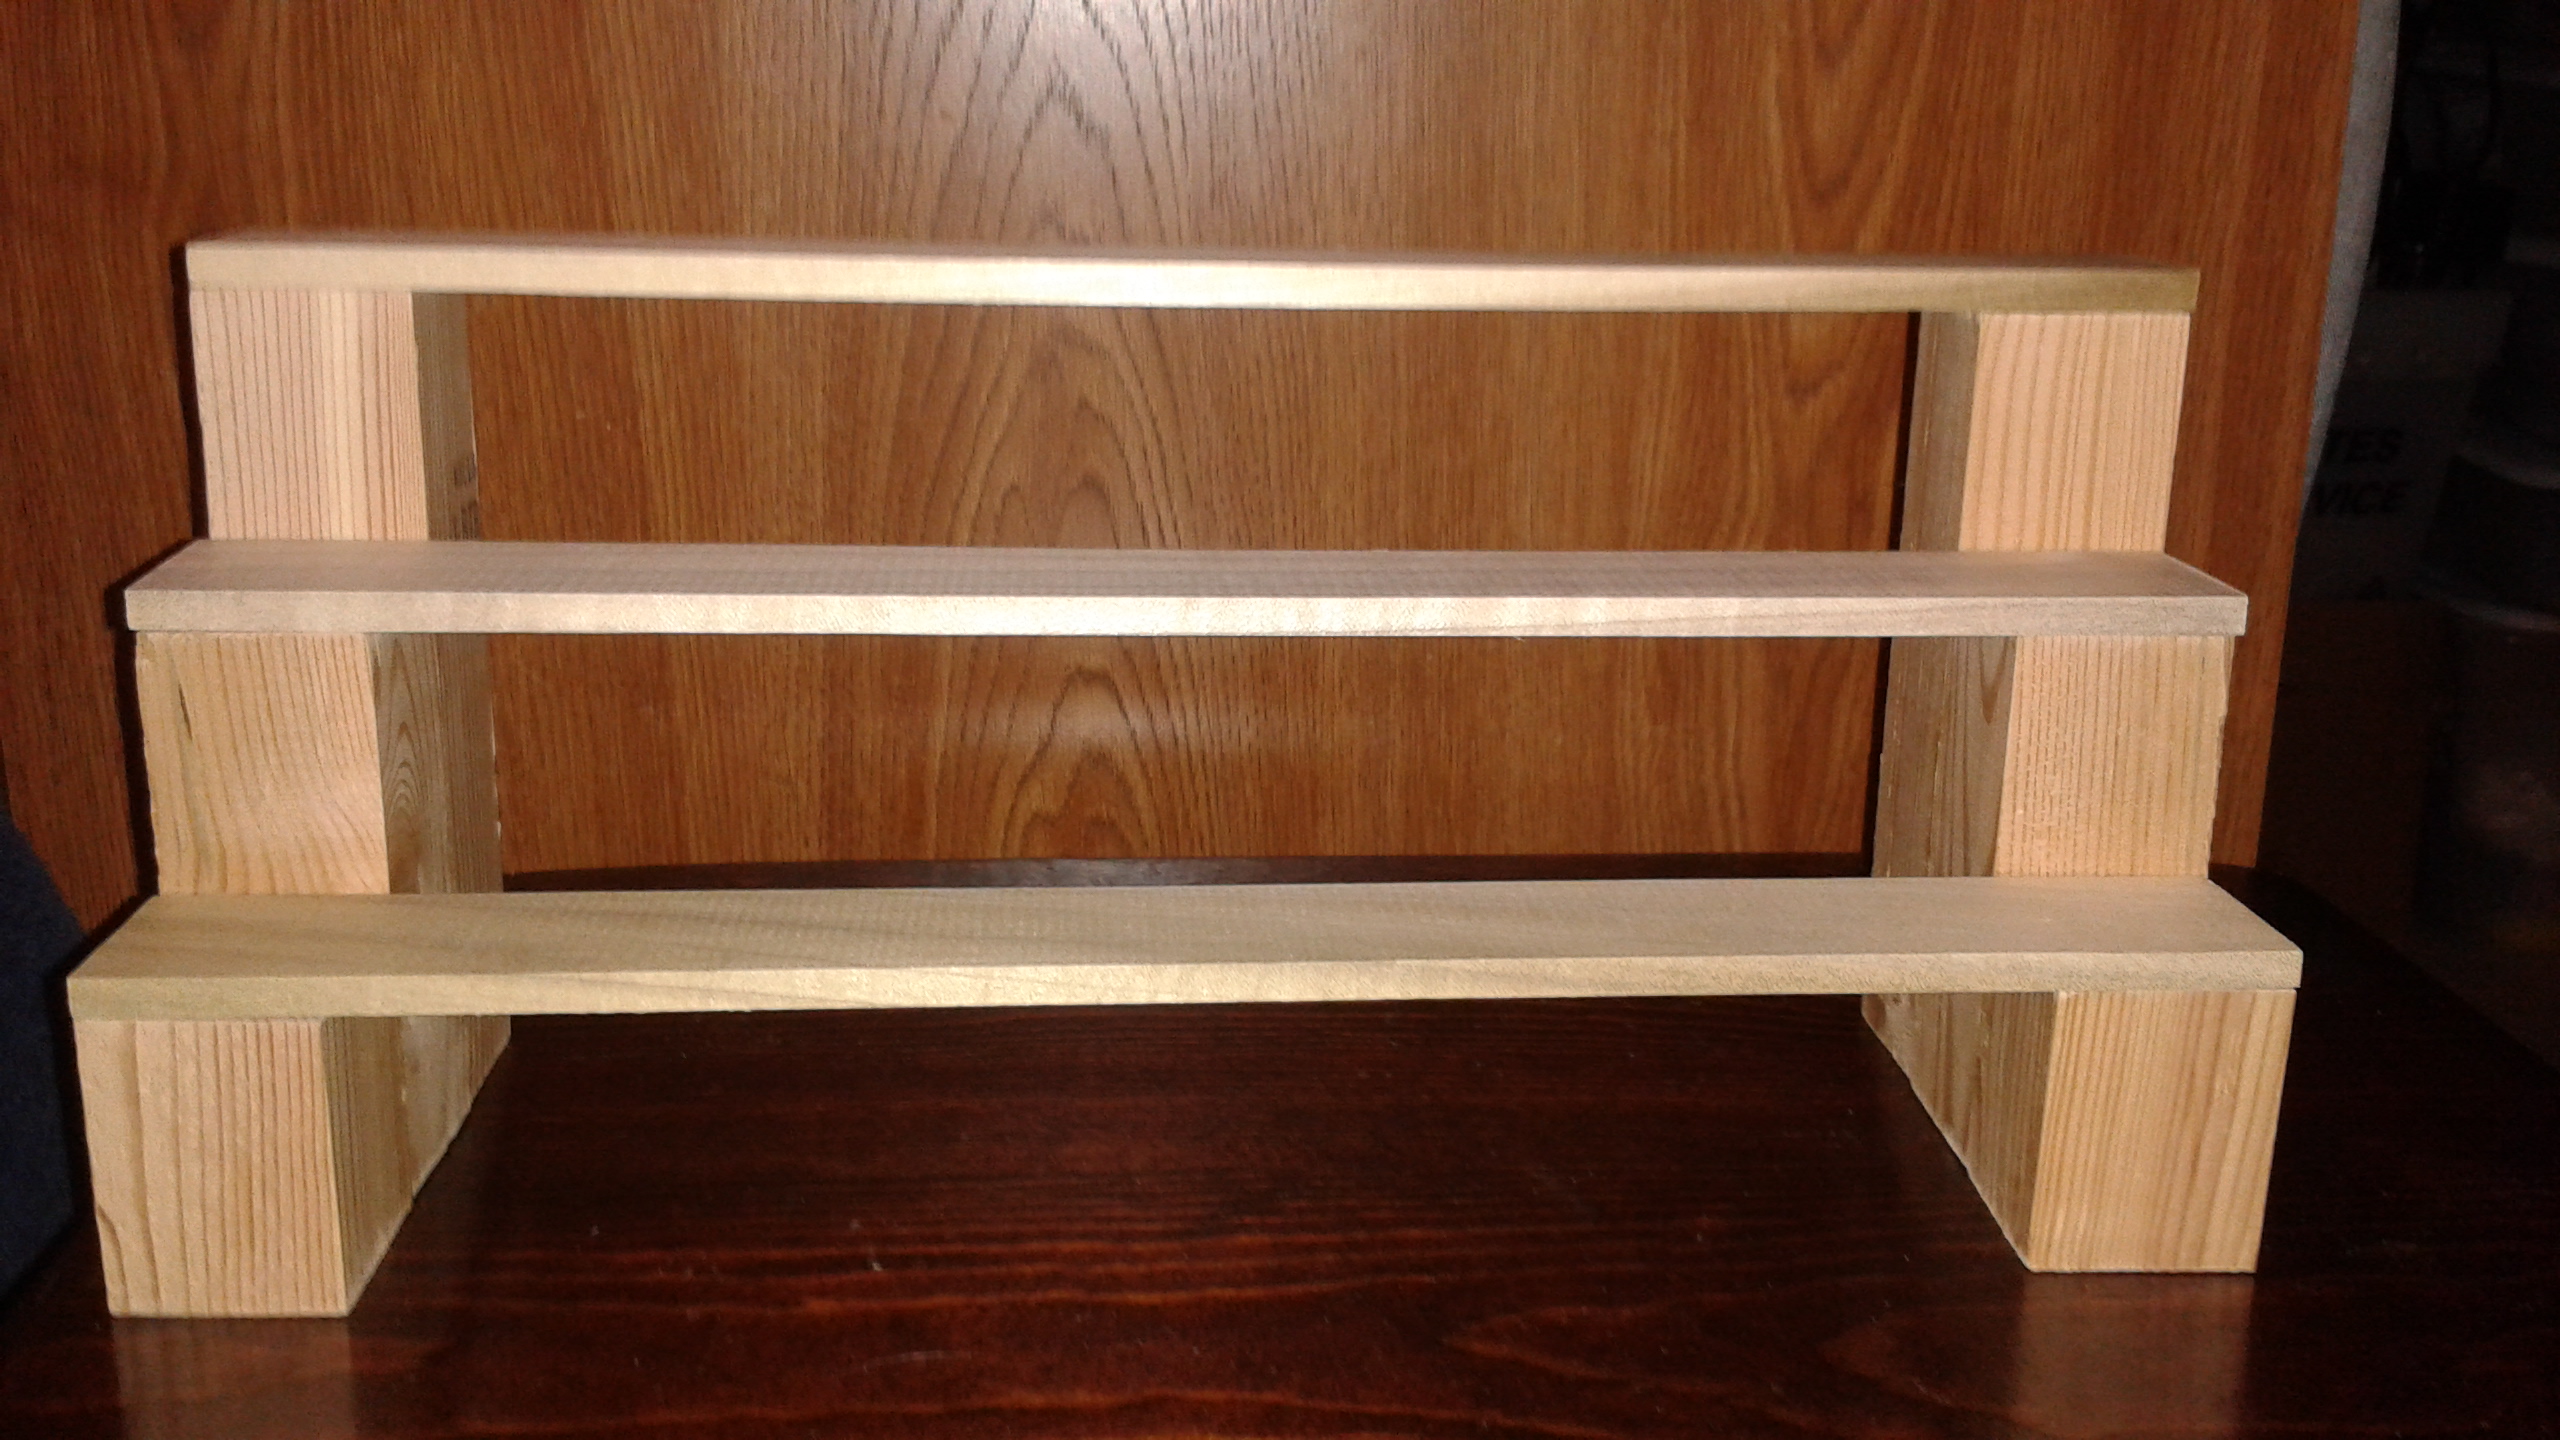
Place bases with cut edge down where you planned for with 3rd one in the middle or 3rd & 4th evenly spaced for longer shelf's. Then place hobby boards on other cut edge like so
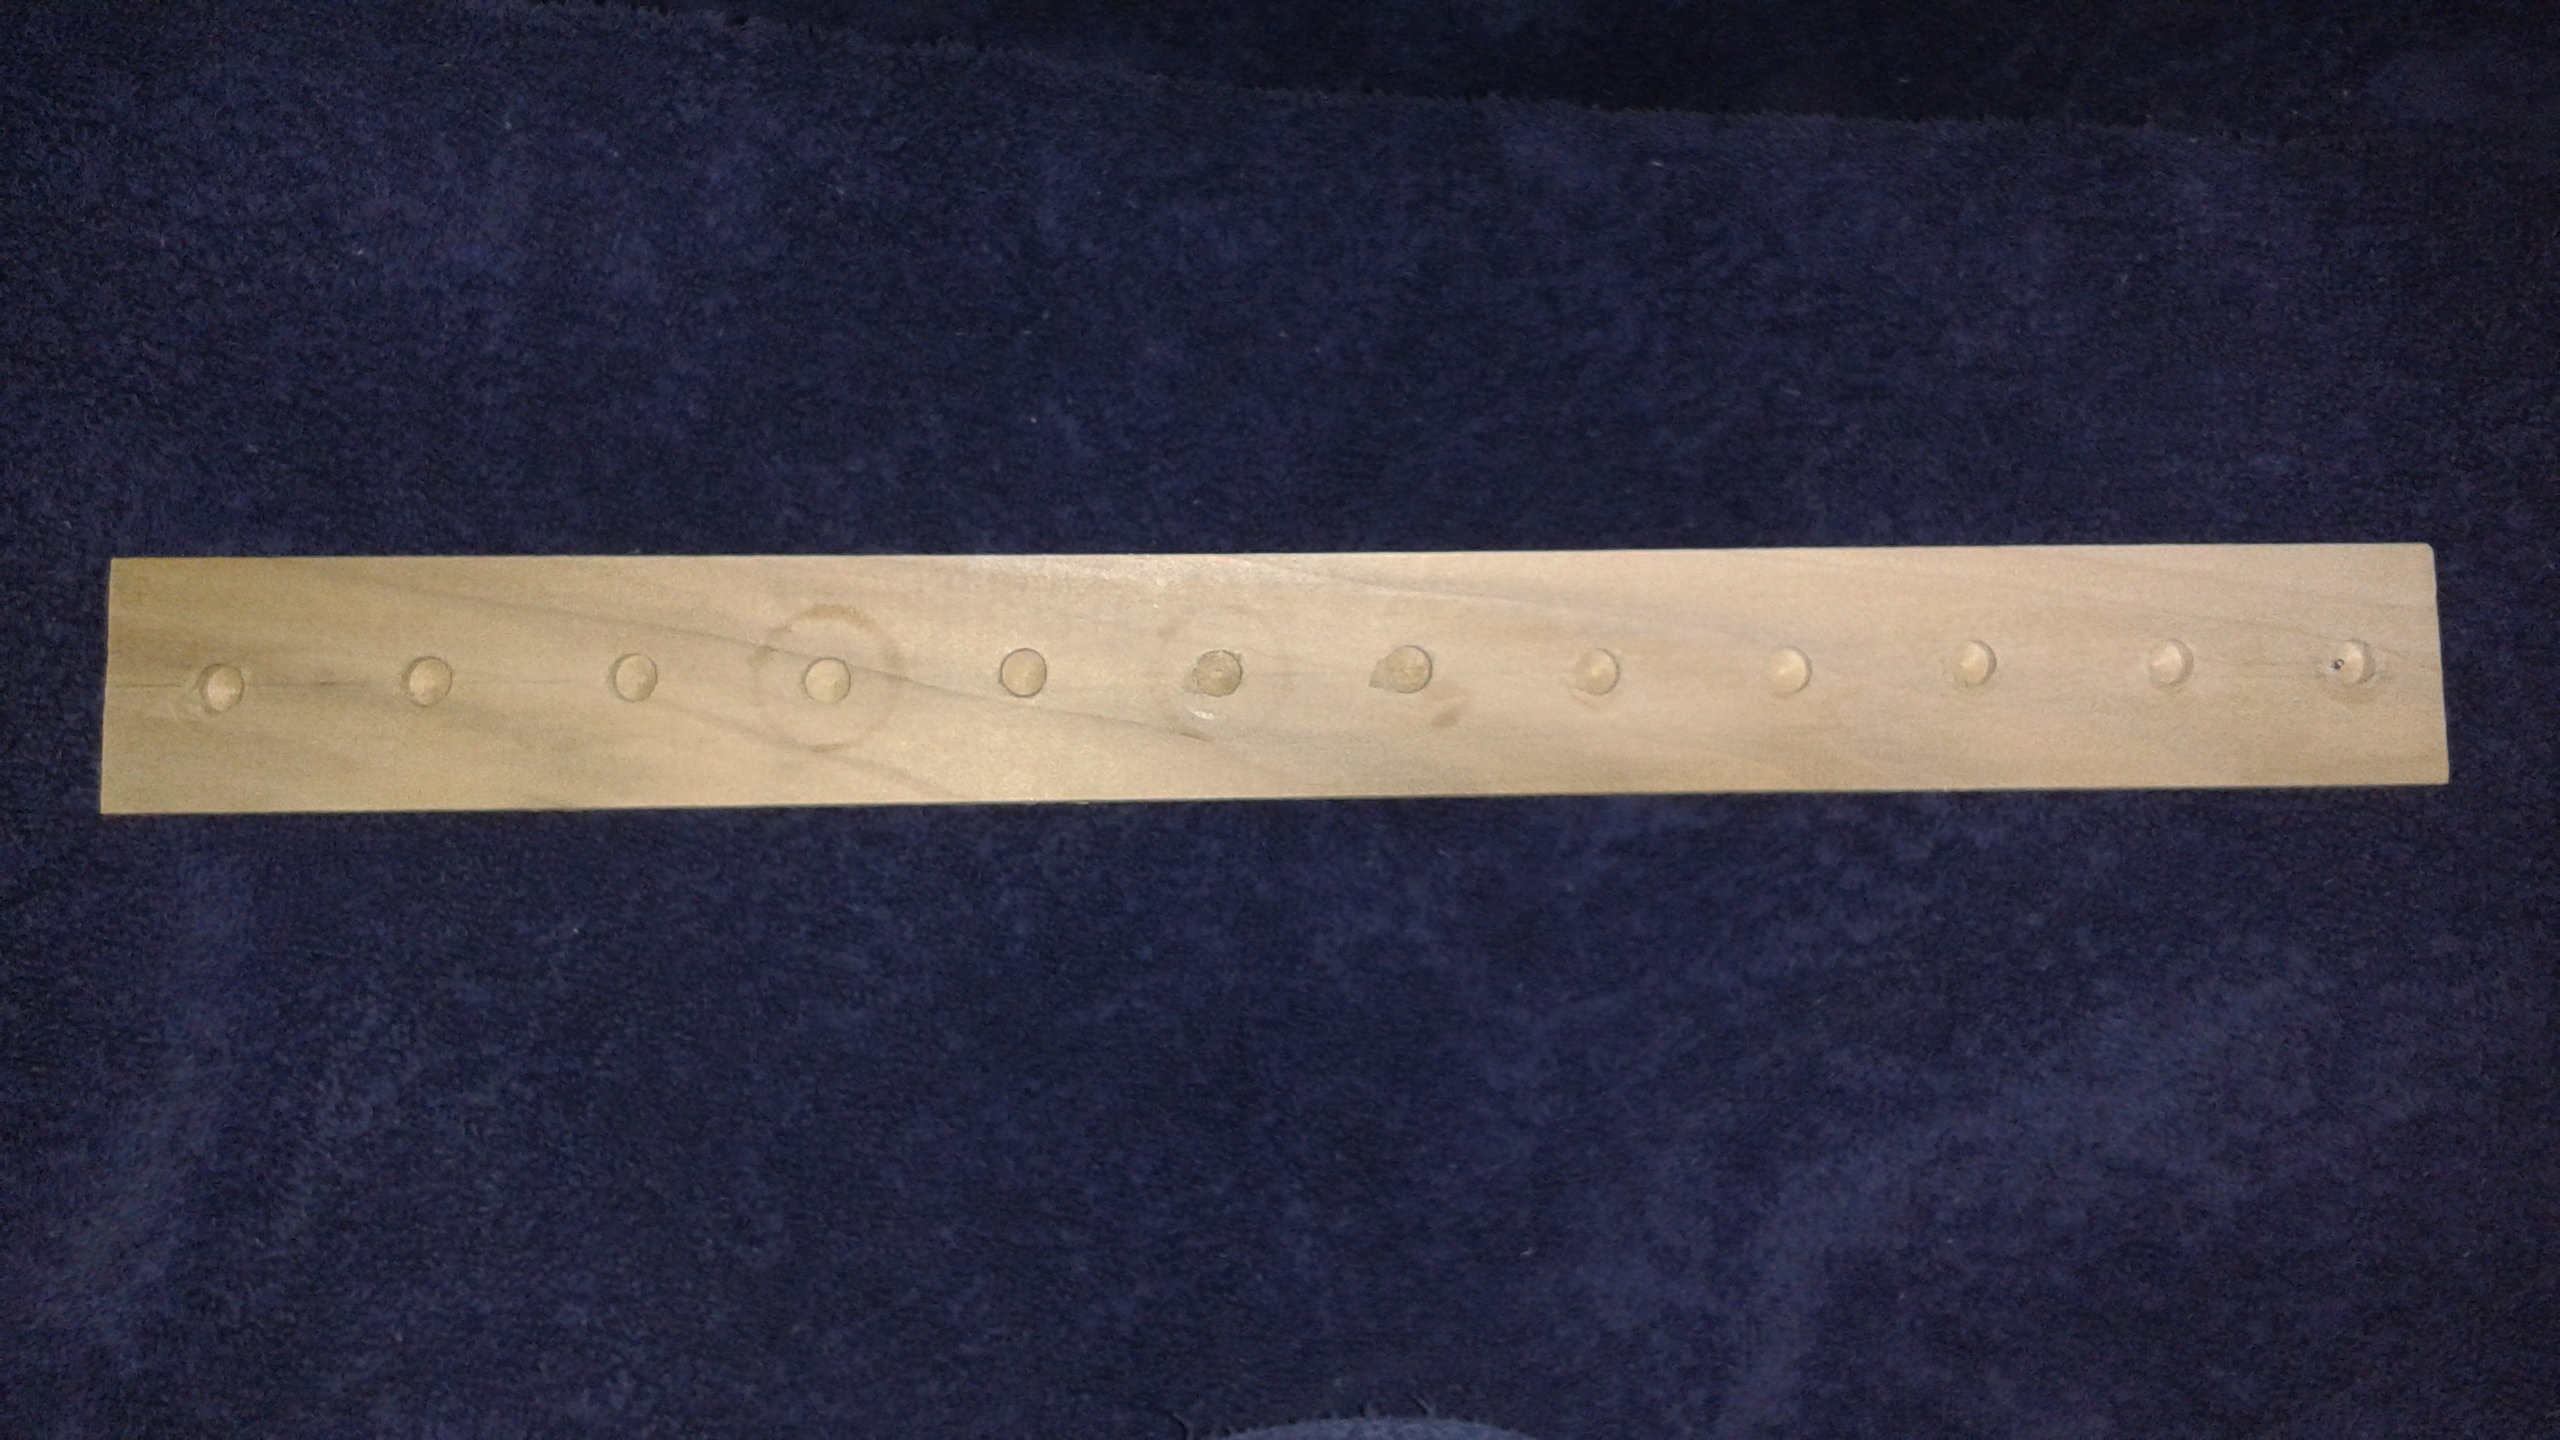
For the atomizer one there is an extra step. Grab a pencil, ruler, and some atomizers. Lay them like so.
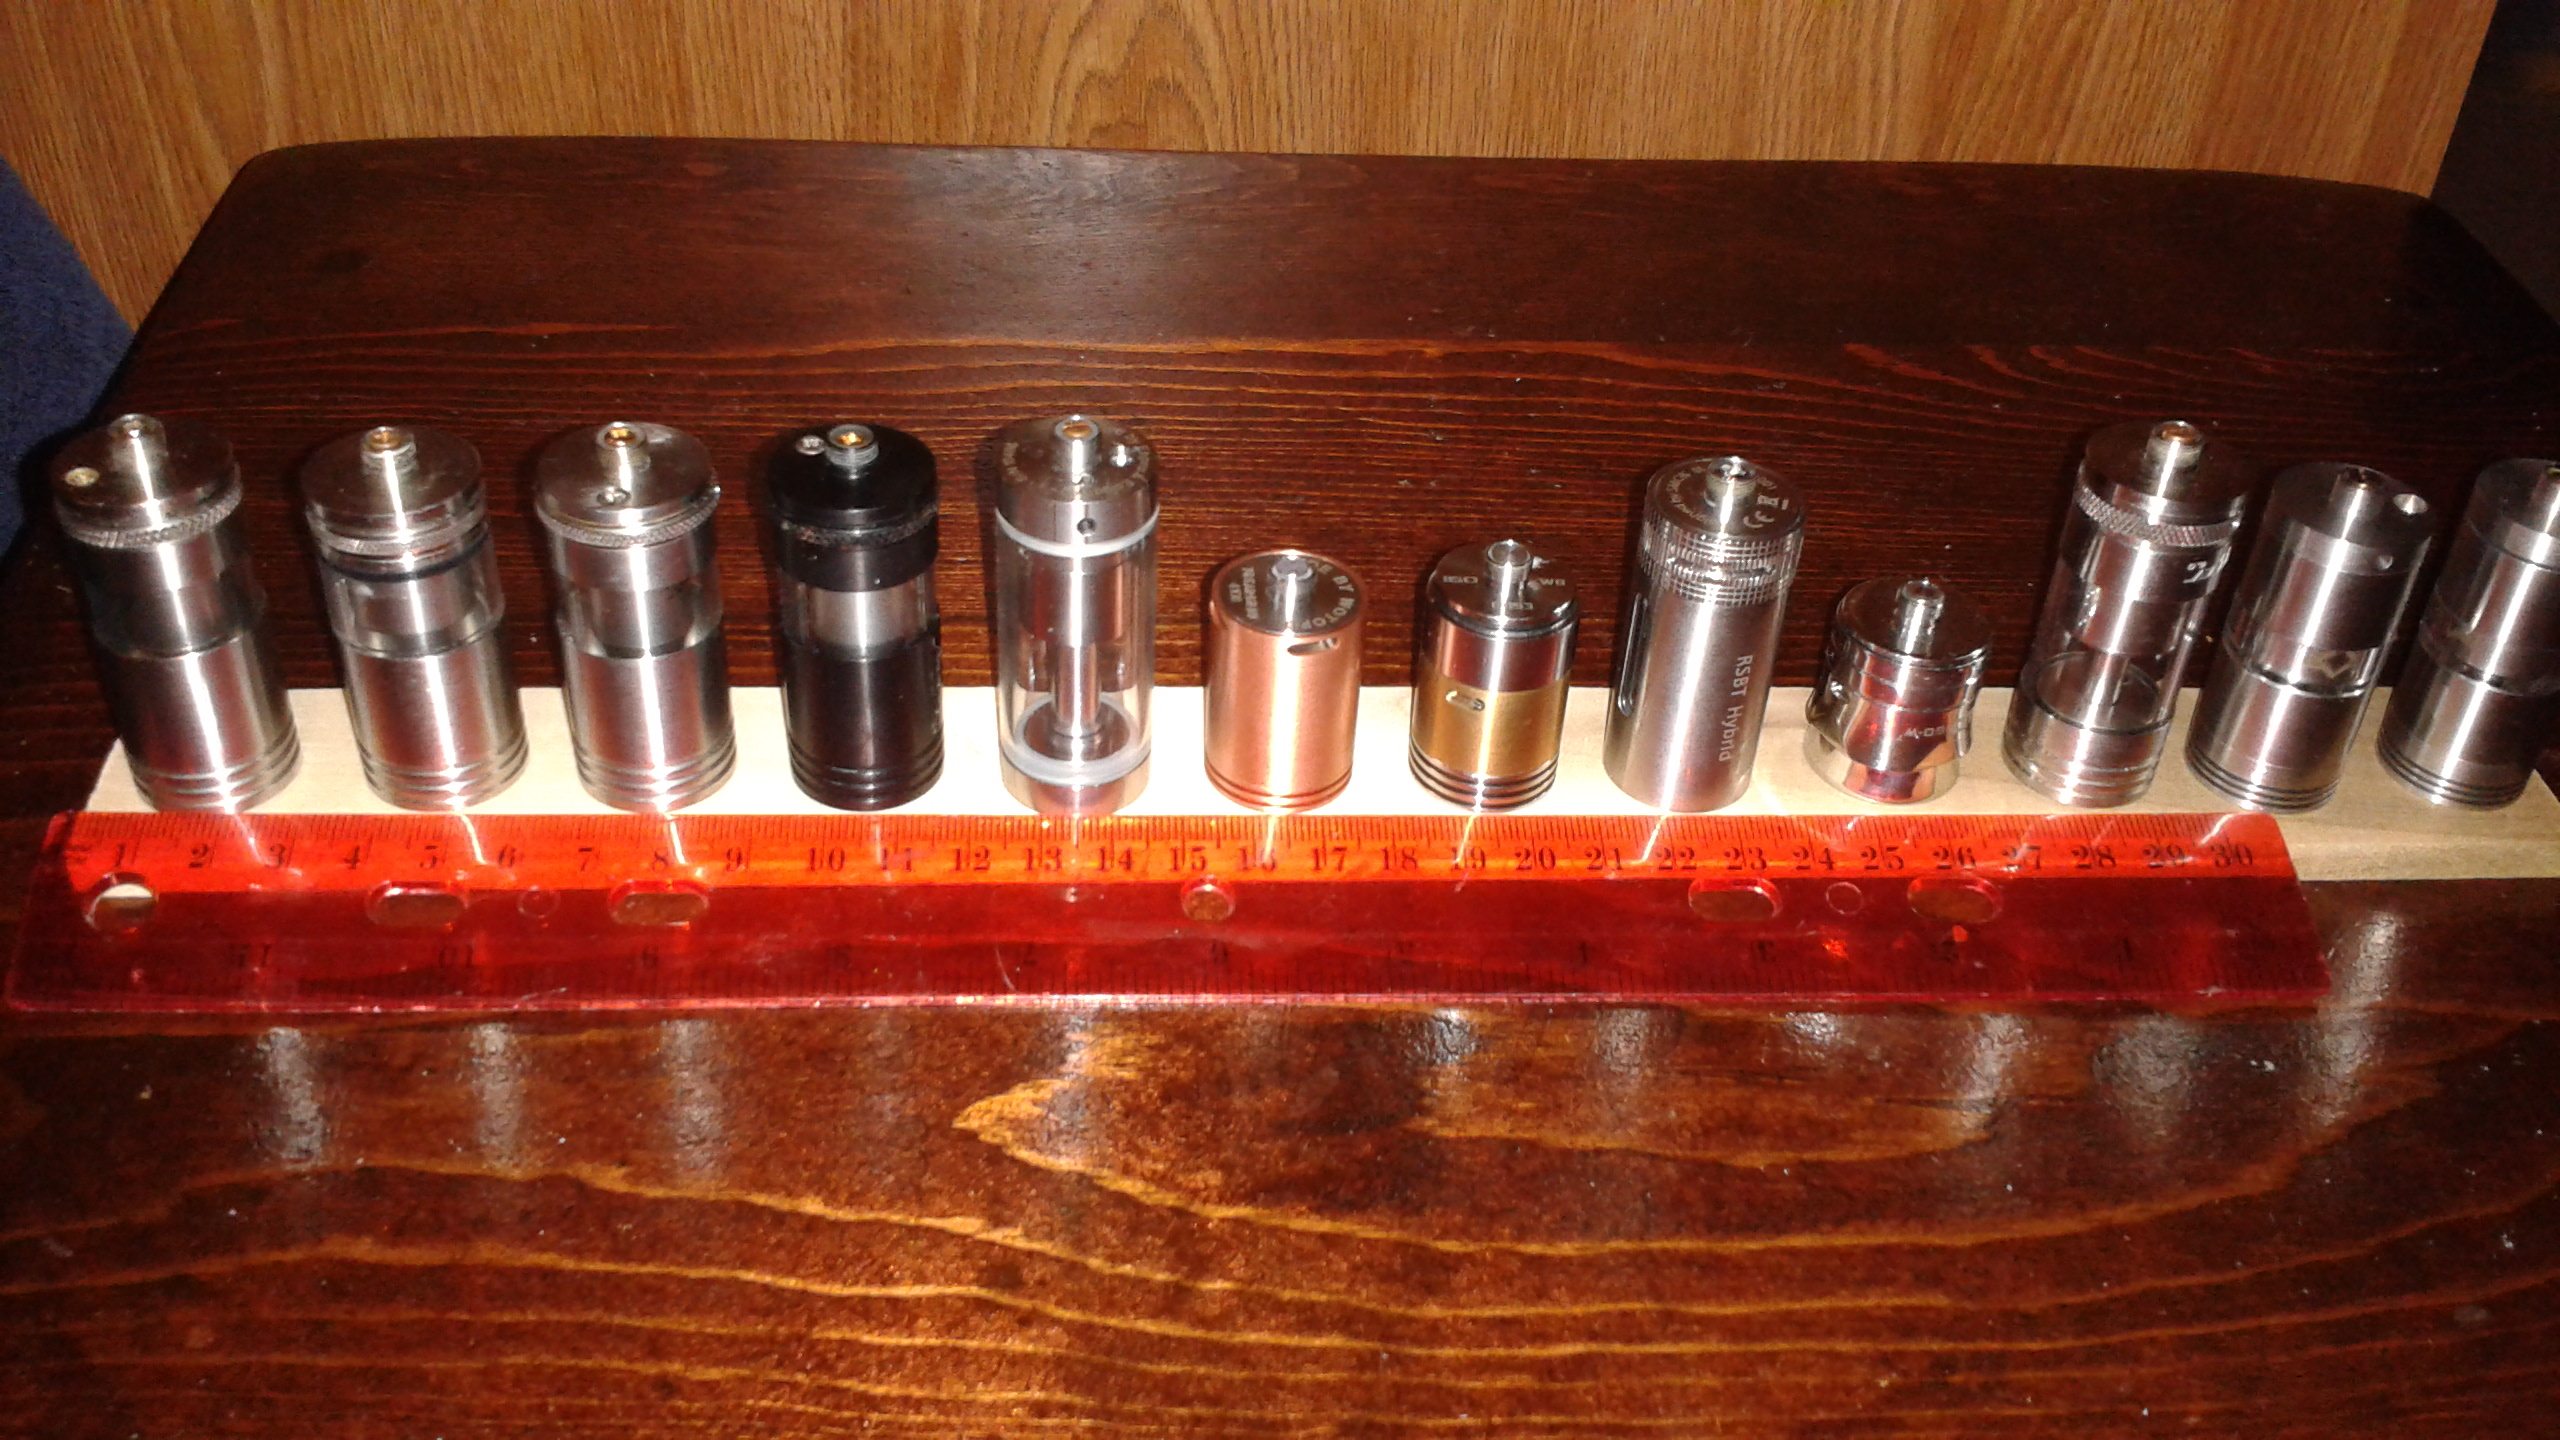
This will help you get a feel for how many will fit on your shelf and what spacing is needed between them. Then make 3/4 of an inch mark on both edges of shelf and using another shelf as straight edge draw a line down the center. Now transfer your spacing marks to that line.
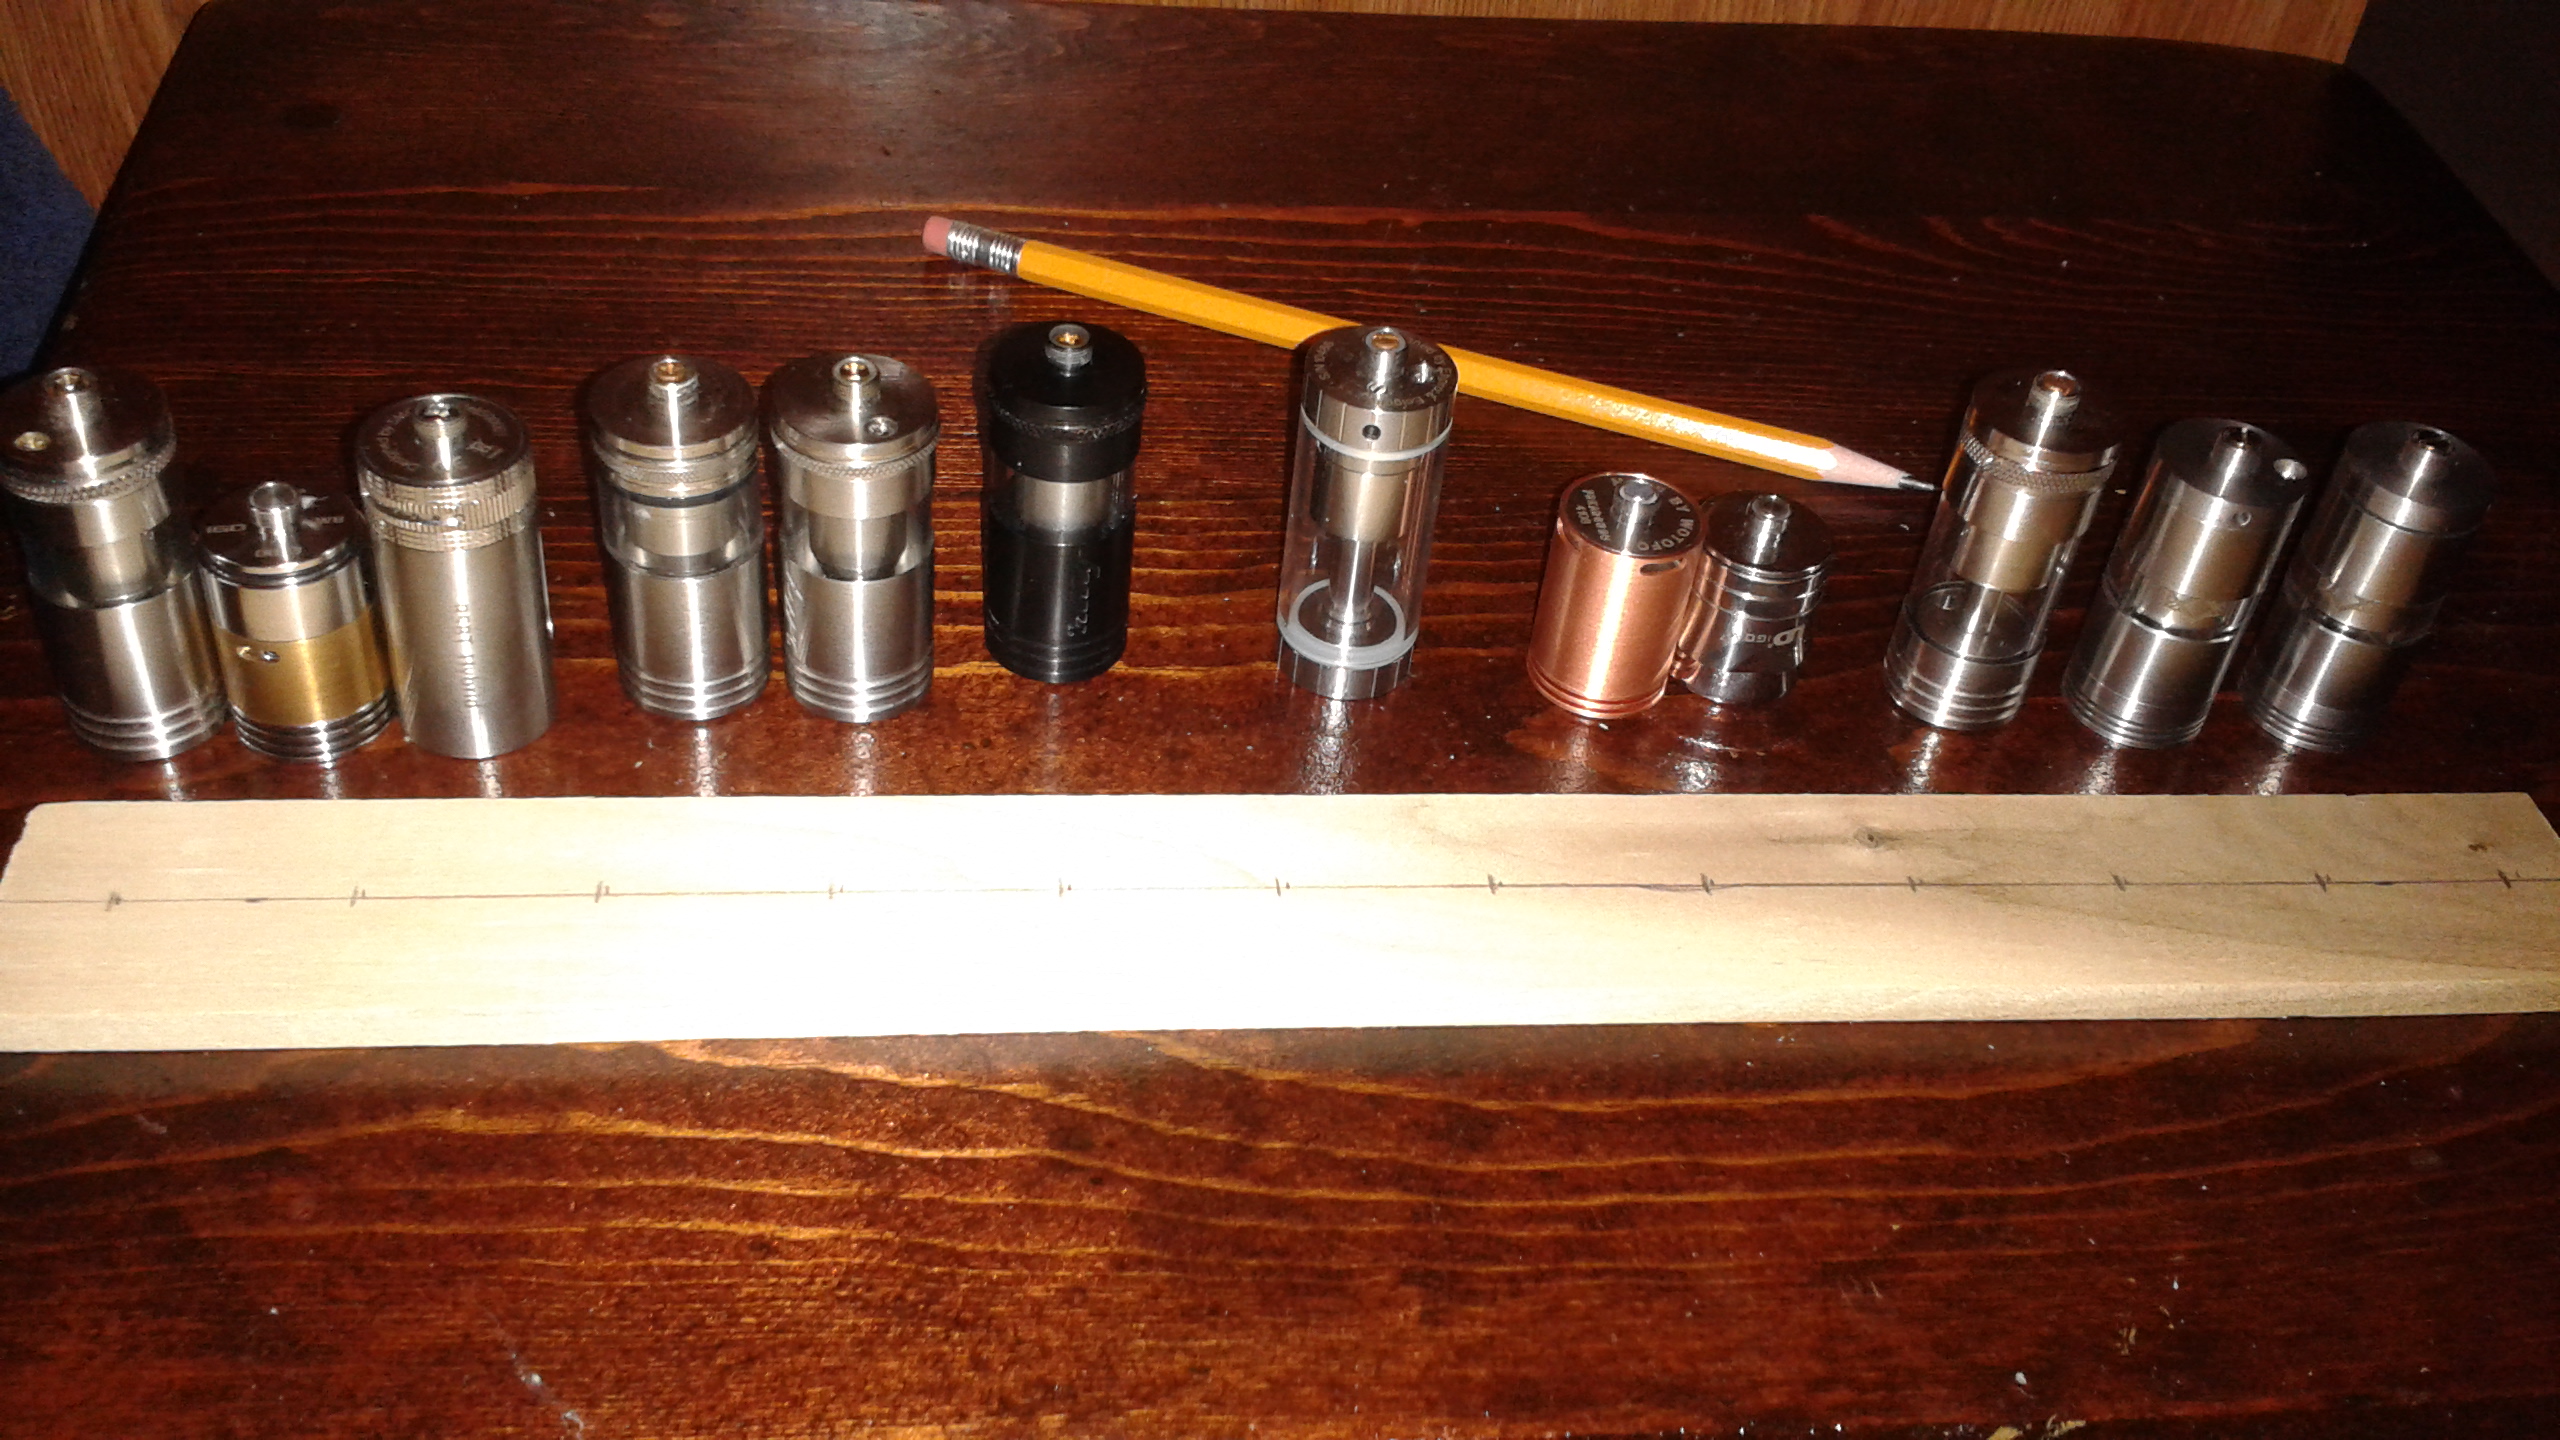
Now grab a drill and a bit that is slightly larger than your 510 connector on the bottom of the Atomizer (I used 9/32) and drill at your marks you can either drill all the way through or stop right before test with an atomizer to make sure base lays flat against shelf.
Do the same for other shelves.
Once you are done with that I recommend you glue shelves to bases.
And were done! As I said at first no frills but very useful.
Now you get to decide what else you could use this shelf for or maybe sand and stain or paint them.
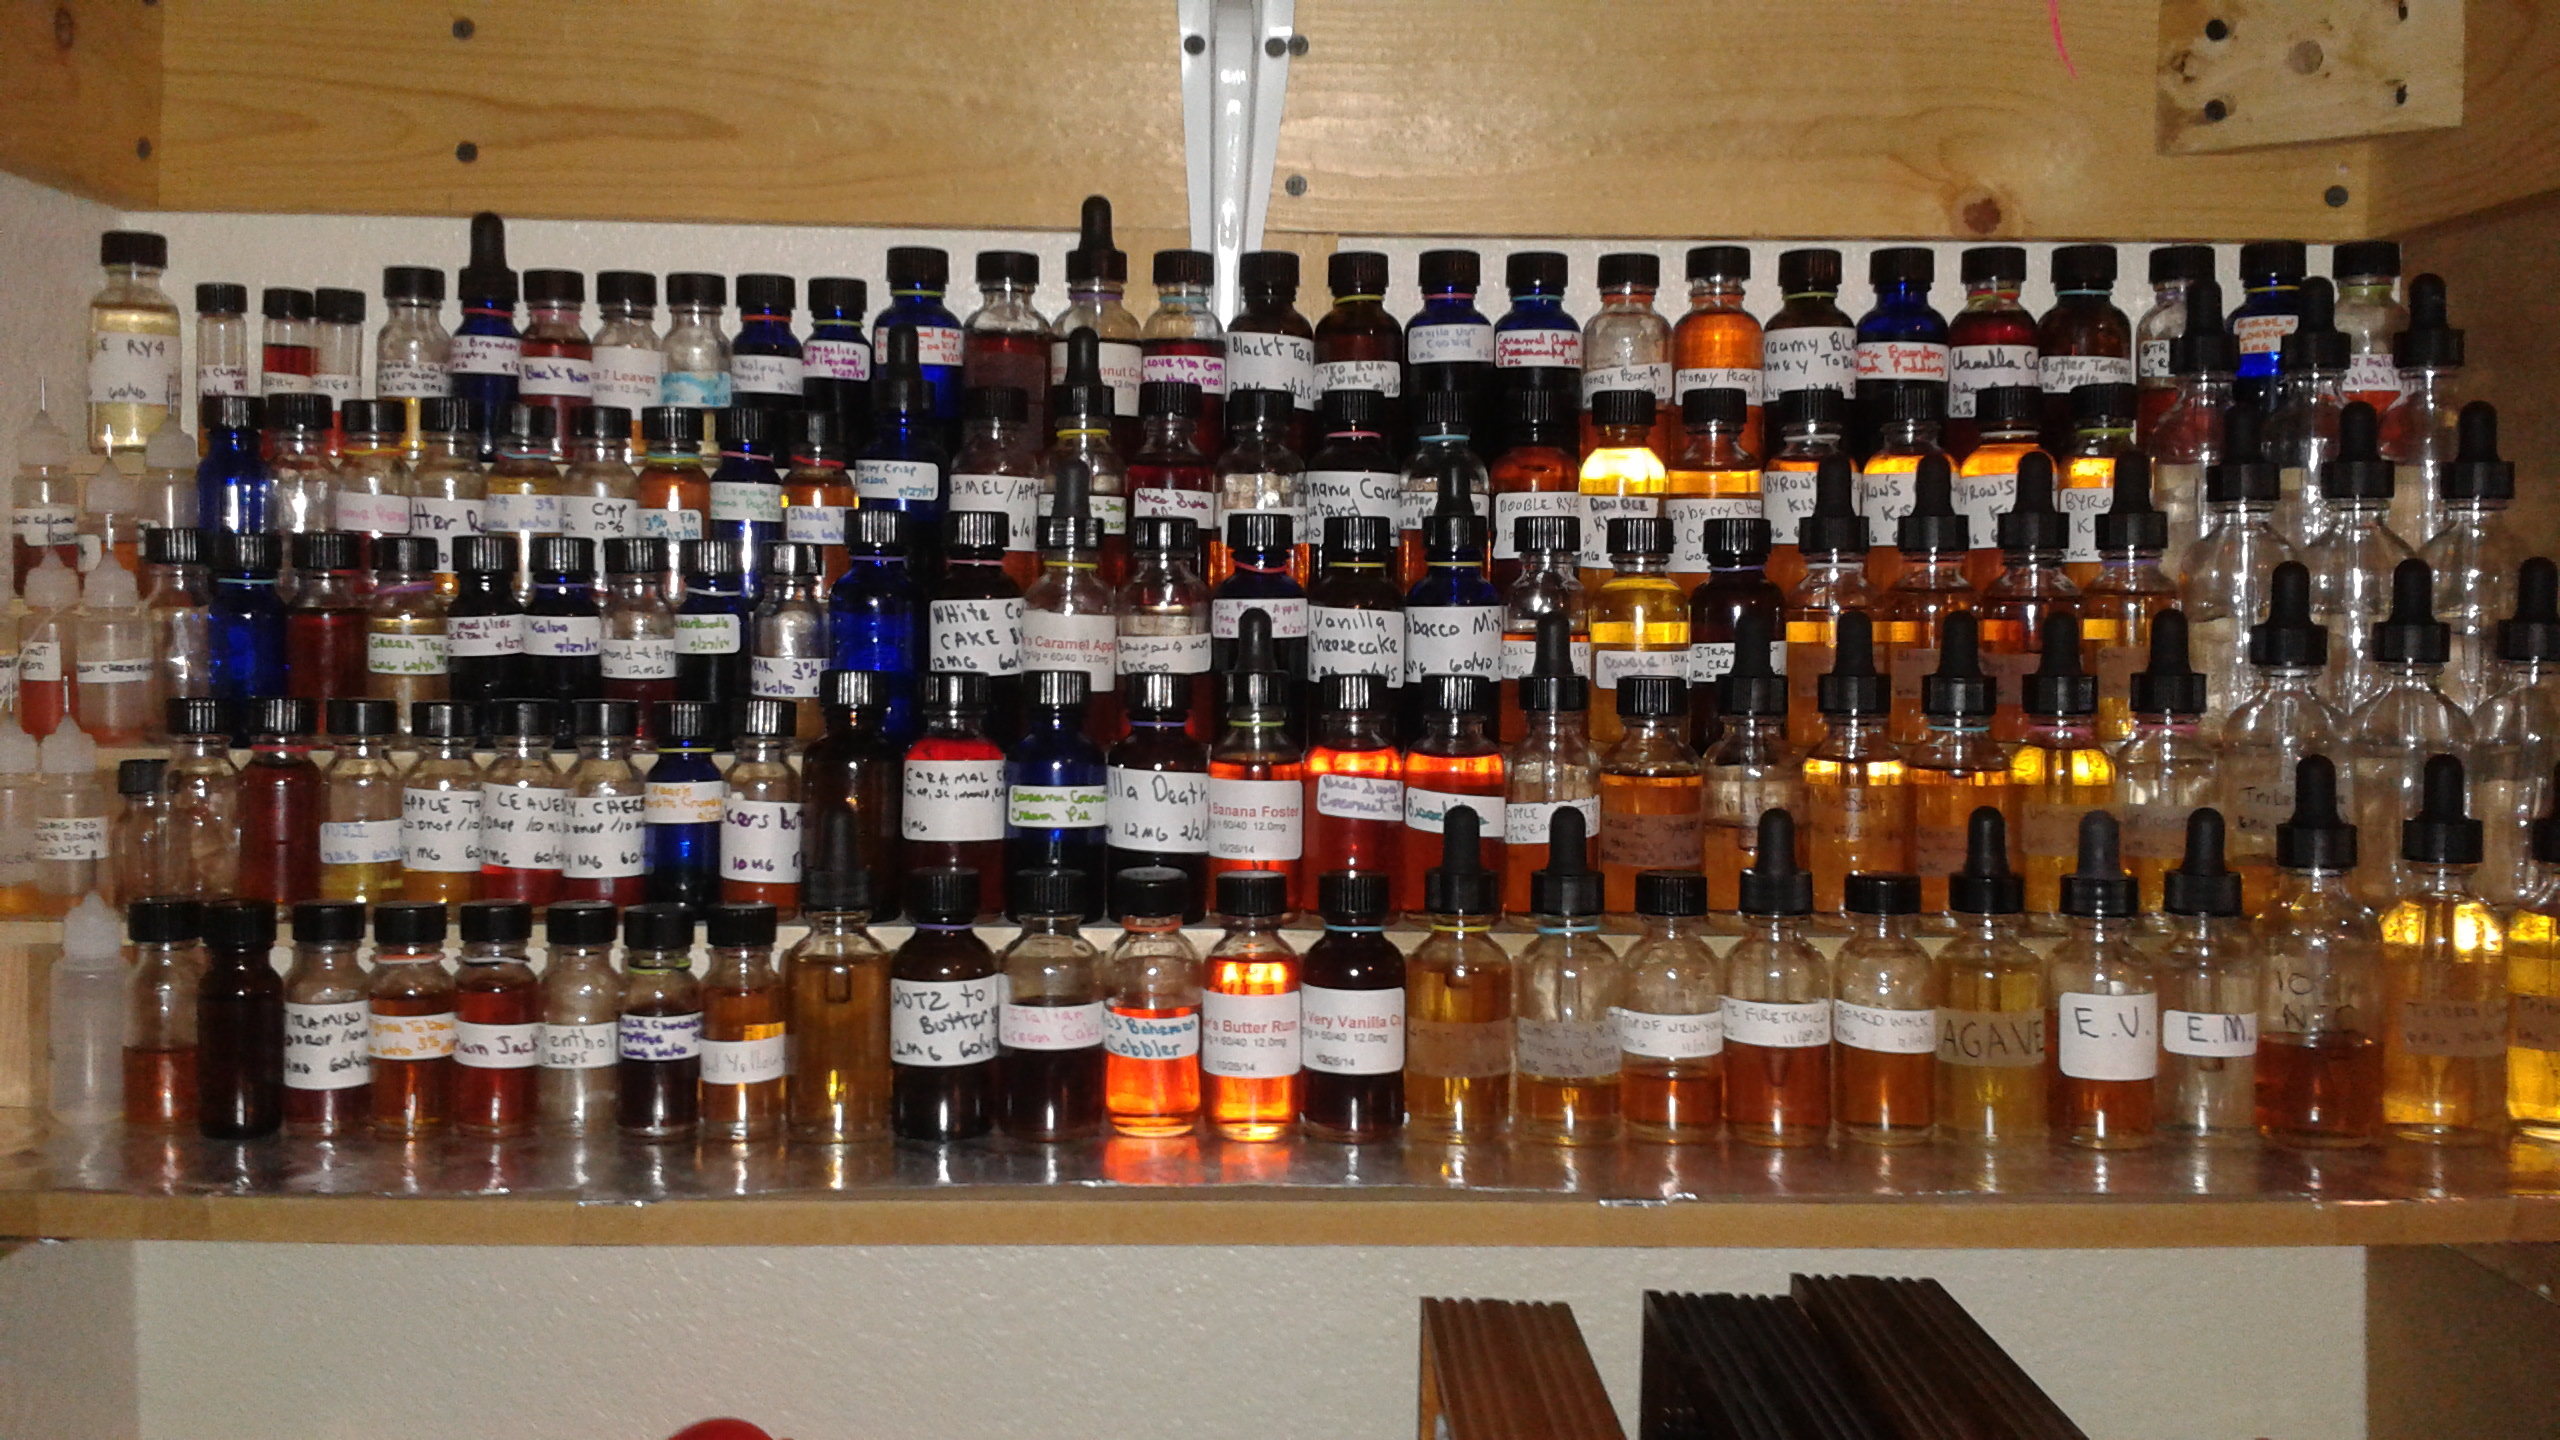
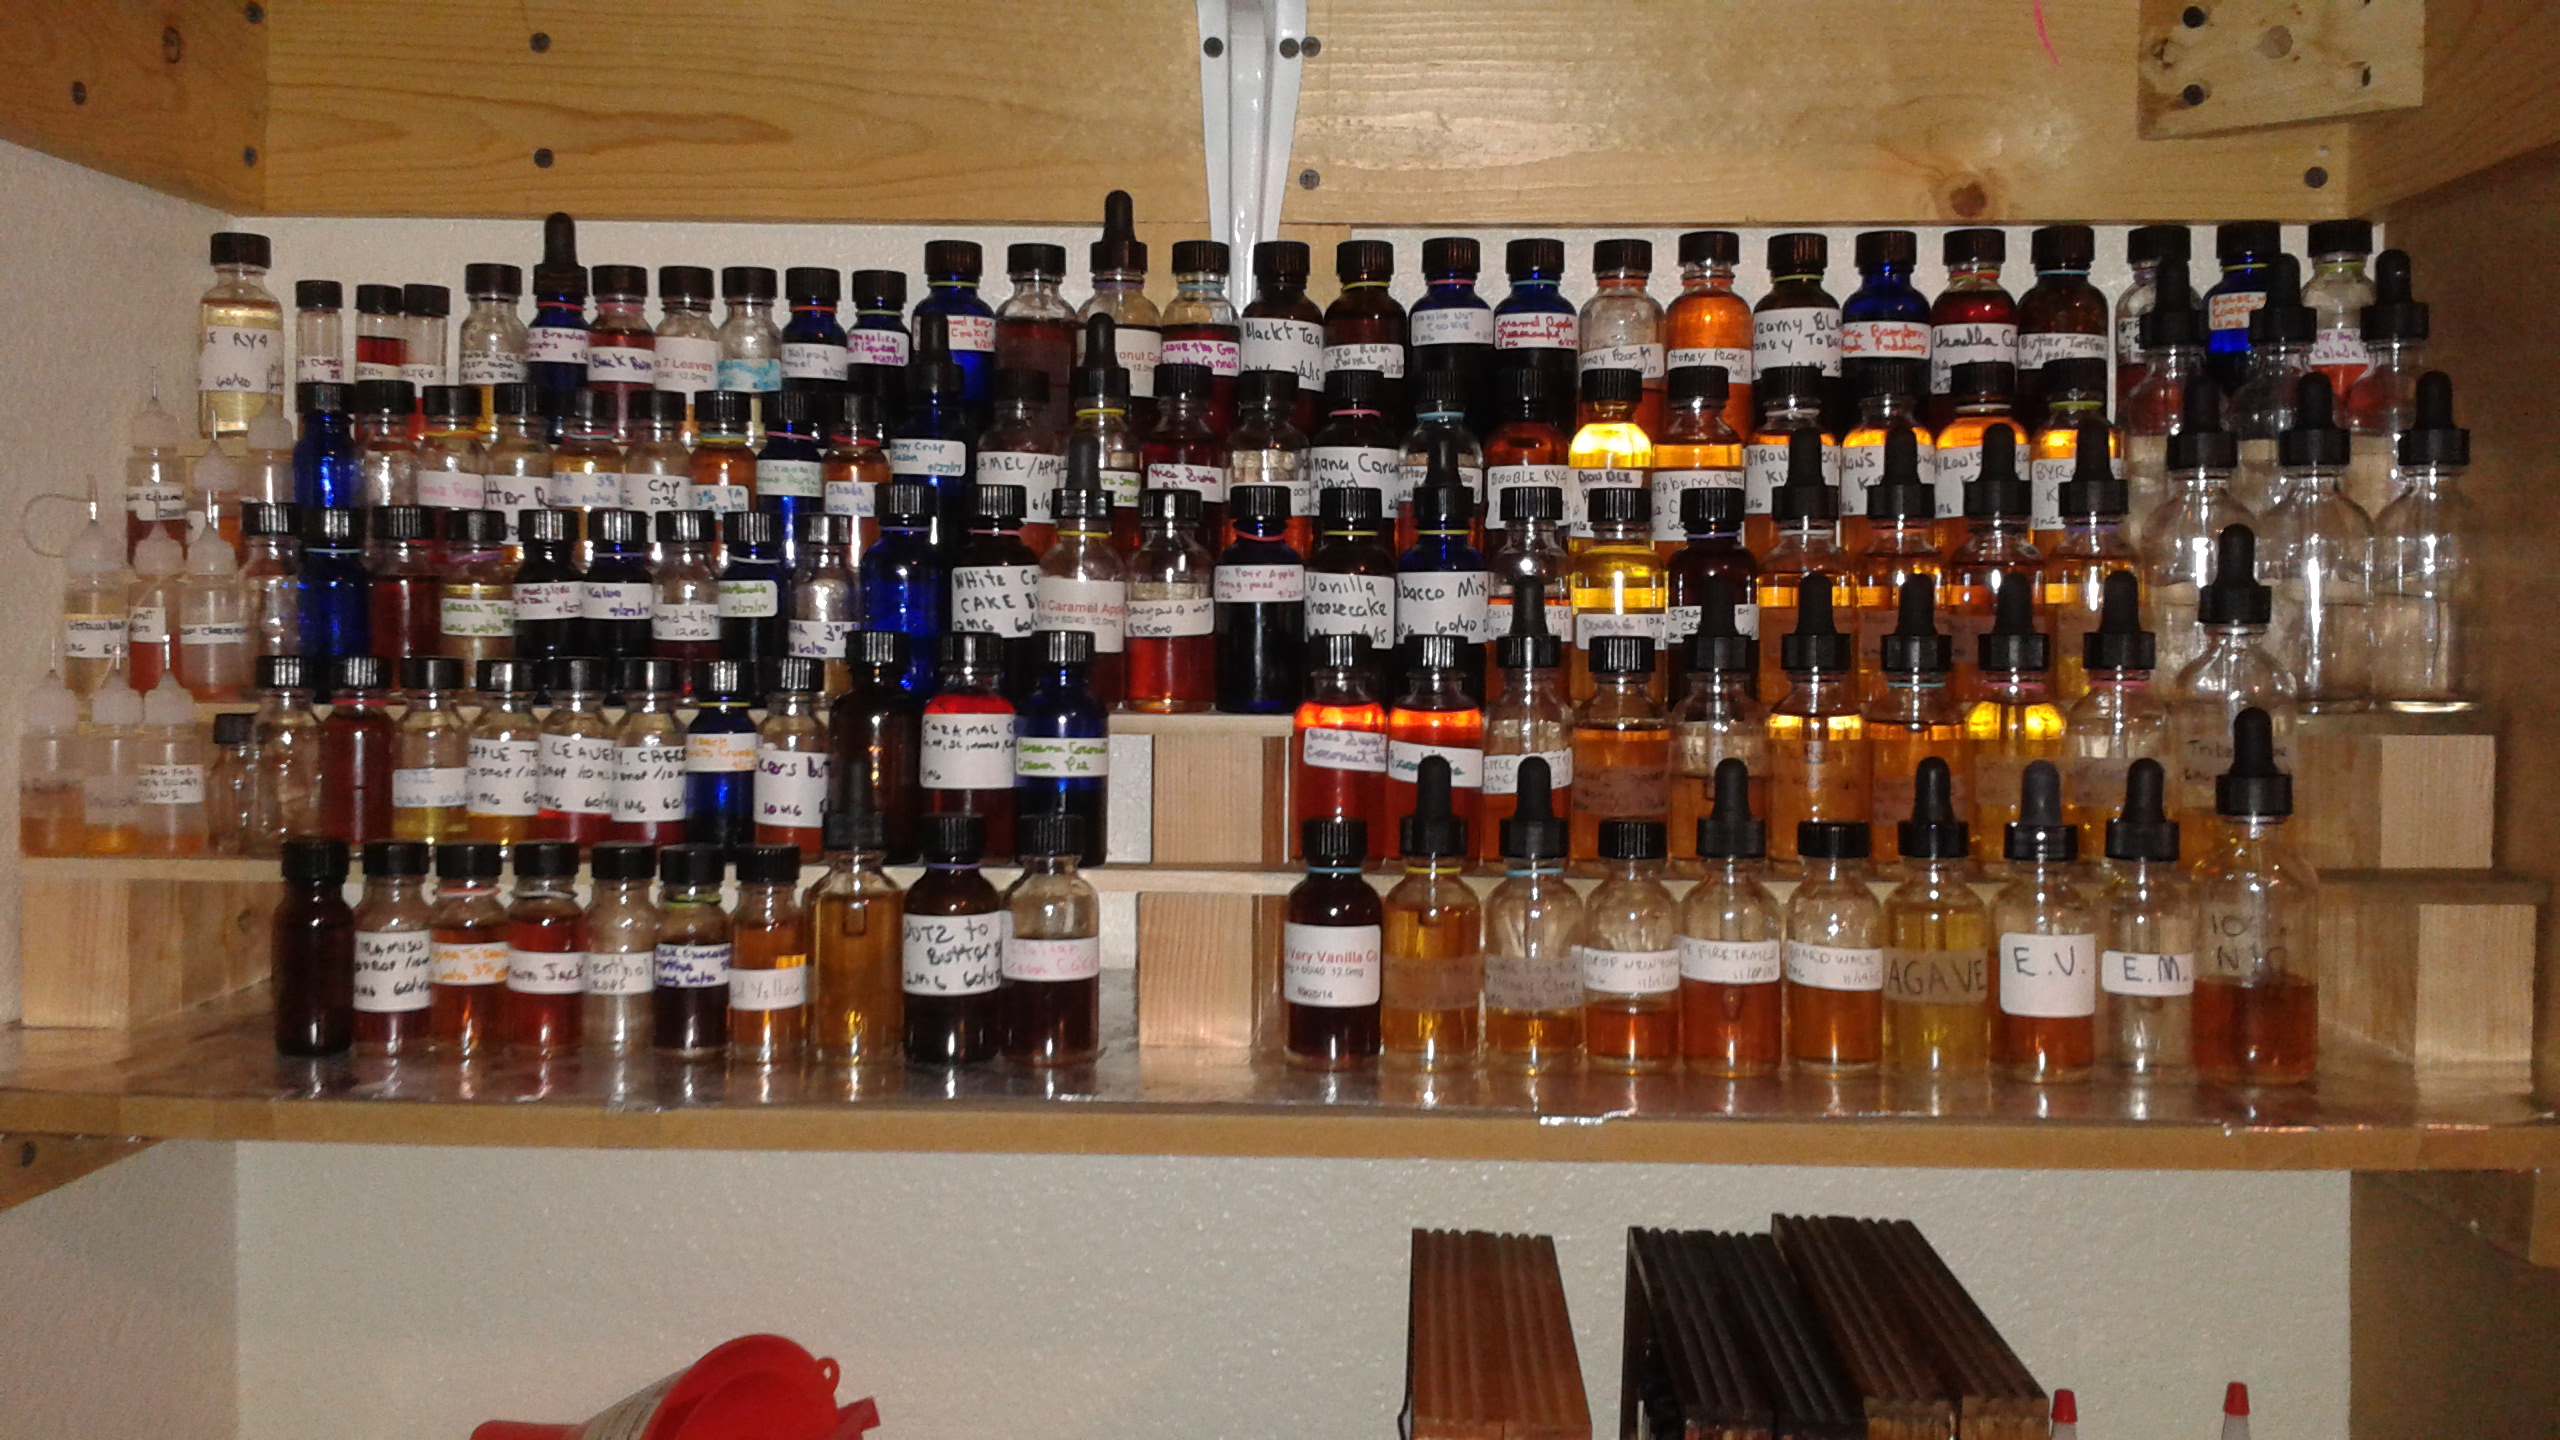
As for me after looking at the first picture I really need to get my bottle labels under control and now I know exactly where to place them on the bottle for optimum viewing.
Thanks for reading. As always all comments, critiques, and or questions are much appreciated.
Here Is what we are making. One for Juice bottles and One for Atomizers.
First step is deciding where you are going to place it. Whether in a cabinet, cubbie hole, a desk or table top then measure and write down height,width, and length. Now we drive to Home Depot for the 2 types of wood needed. I already had the materials at home left over from other projects so I just made both. You can do the same or just one or the other.
First the juice bottle one.
You need a 2"x2"x8 foot board (although they actually measure 1 1/2" wide not sure why?) Cost is around $2
Now you decide if you want Home Depot to cut your wood to size which they will they just won't guarantee precision cuts.
Based off of the measurements you took before, If your shelves are going to be less than 36" long then you need 3 of each size if more than 36" then you need 4 of each
2"
4"
6"
8"
If more than 4 shelves high than go up on each piece by 2"
This will form your bases.
Next look for this cart somewhere in the lumber section.
Look at the 1 1/2" size pieces (poplar is the cheapest) and grab the amount for the number of shelves you plan to make in either the precut sizes or have them cut down to the size needed by Home Depot.
For my 2 units I used (1) 2x2x8 and (4) 1/4x1 1/2x48 hobby boards. The bottle space was 34" long so I needed 3 bases up to 8" high and 4 shelf's 34" long. I used (3) of the remaining 14" hobby boards on the atomizer shelf and cut (2) 6" high bases leaving me with a 10" piece of 2x2x8.
Once back home find a flat place to work and grab any type of glue and start assembling the bases. Starting with the largest 2x2 piece lay it on it's side add glue to one side of next smaller size and stack it on top like so.
While glue is still wet adjust the pieces so cut edge and sides line up as even as possible. Continue on until all bases are glued. Allow glue to dry for a few minutes.
Place bases with cut edge down where you planned for with 3rd one in the middle or 3rd & 4th evenly spaced for longer shelf's. Then place hobby boards on other cut edge like so
For the atomizer one there is an extra step. Grab a pencil, ruler, and some atomizers. Lay them like so.
This will help you get a feel for how many will fit on your shelf and what spacing is needed between them. Then make 3/4 of an inch mark on both edges of shelf and using another shelf as straight edge draw a line down the center. Now transfer your spacing marks to that line.
Now grab a drill and a bit that is slightly larger than your 510 connector on the bottom of the Atomizer (I used 9/32) and drill at your marks you can either drill all the way through or stop right before test with an atomizer to make sure base lays flat against shelf.
Do the same for other shelves.
Once you are done with that I recommend you glue shelves to bases.
And were done! As I said at first no frills but very useful.
Now you get to decide what else you could use this shelf for or maybe sand and stain or paint them.
As for me after looking at the first picture I really need to get my bottle labels under control and now I know exactly where to place them on the bottle for optimum viewing.
Thanks for reading. As always all comments, critiques, and or questions are much appreciated.
")