what is LexdyciaI'm developing Lexdycia. The Mint distro is Unbuntu, KALI is Debian.
Become a Patron!
You are using an out of date browser. It may not display this or other websites correctly.
You should upgrade or use an alternative browser.
You should upgrade or use an alternative browser.
New custom firmware for the RX200S!!!!!!! (and RX2/3 now)
- Thread starter OneBadWolf
- Start date
what is Lexdycia
Very similar to dyslexia. Identical if you are dyslexic.
haha I thought it was another LINUX Distro hahaVery similar to dyslexia. Identical if you are dyslexic.
What up #vapefamily !
I just finally picked up the RX 200S (Latest upgraded firmware to 250W) and I wanted to throw this up because the logo option is a sick option to pimp out your mod. Check it! #VAPELIFE
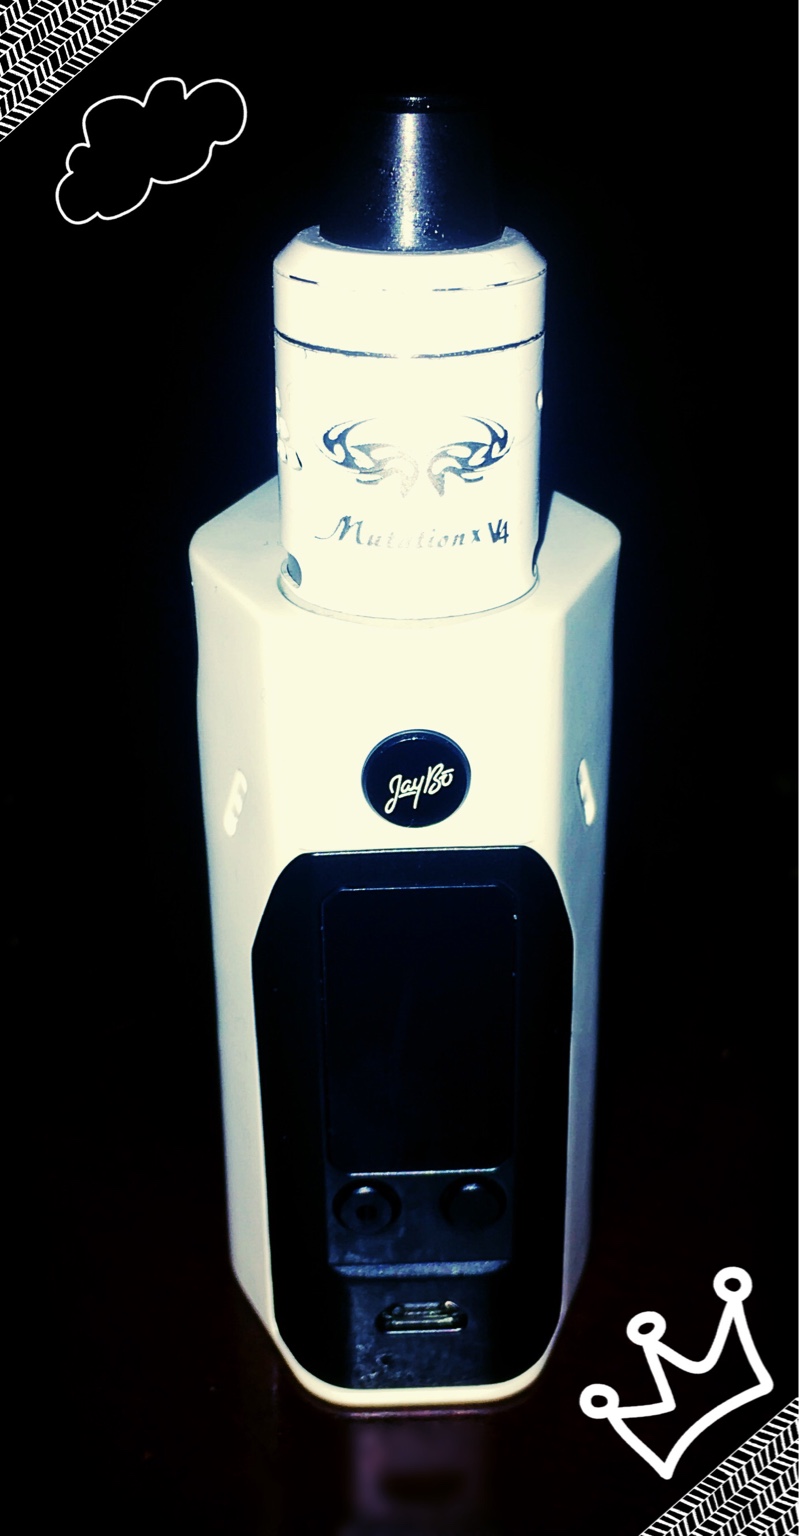
Sent from my iPhone using Tapatalk
I just finally picked up the RX 200S (Latest upgraded firmware to 250W) and I wanted to throw this up because the logo option is a sick option to pimp out your mod. Check it! #VAPELIFE
Sent from my iPhone using Tapatalk
just put this on my cuboid, really good so far, loving it
Welcome to VU!
What up #vapefamily !
I just finally picked up the RX 200S (Latest upgraded firmware to 250W) and I wanted to throw this up because the logo option is a sick option to pimp out your mod. Check it! #VAPELIFE
Wow! You photo shopped that right??
If that is real, could you explain to us how you did that? Did you have to pay extra?
Or do you send it to that place Rip Tripper has do all his custom stuff?
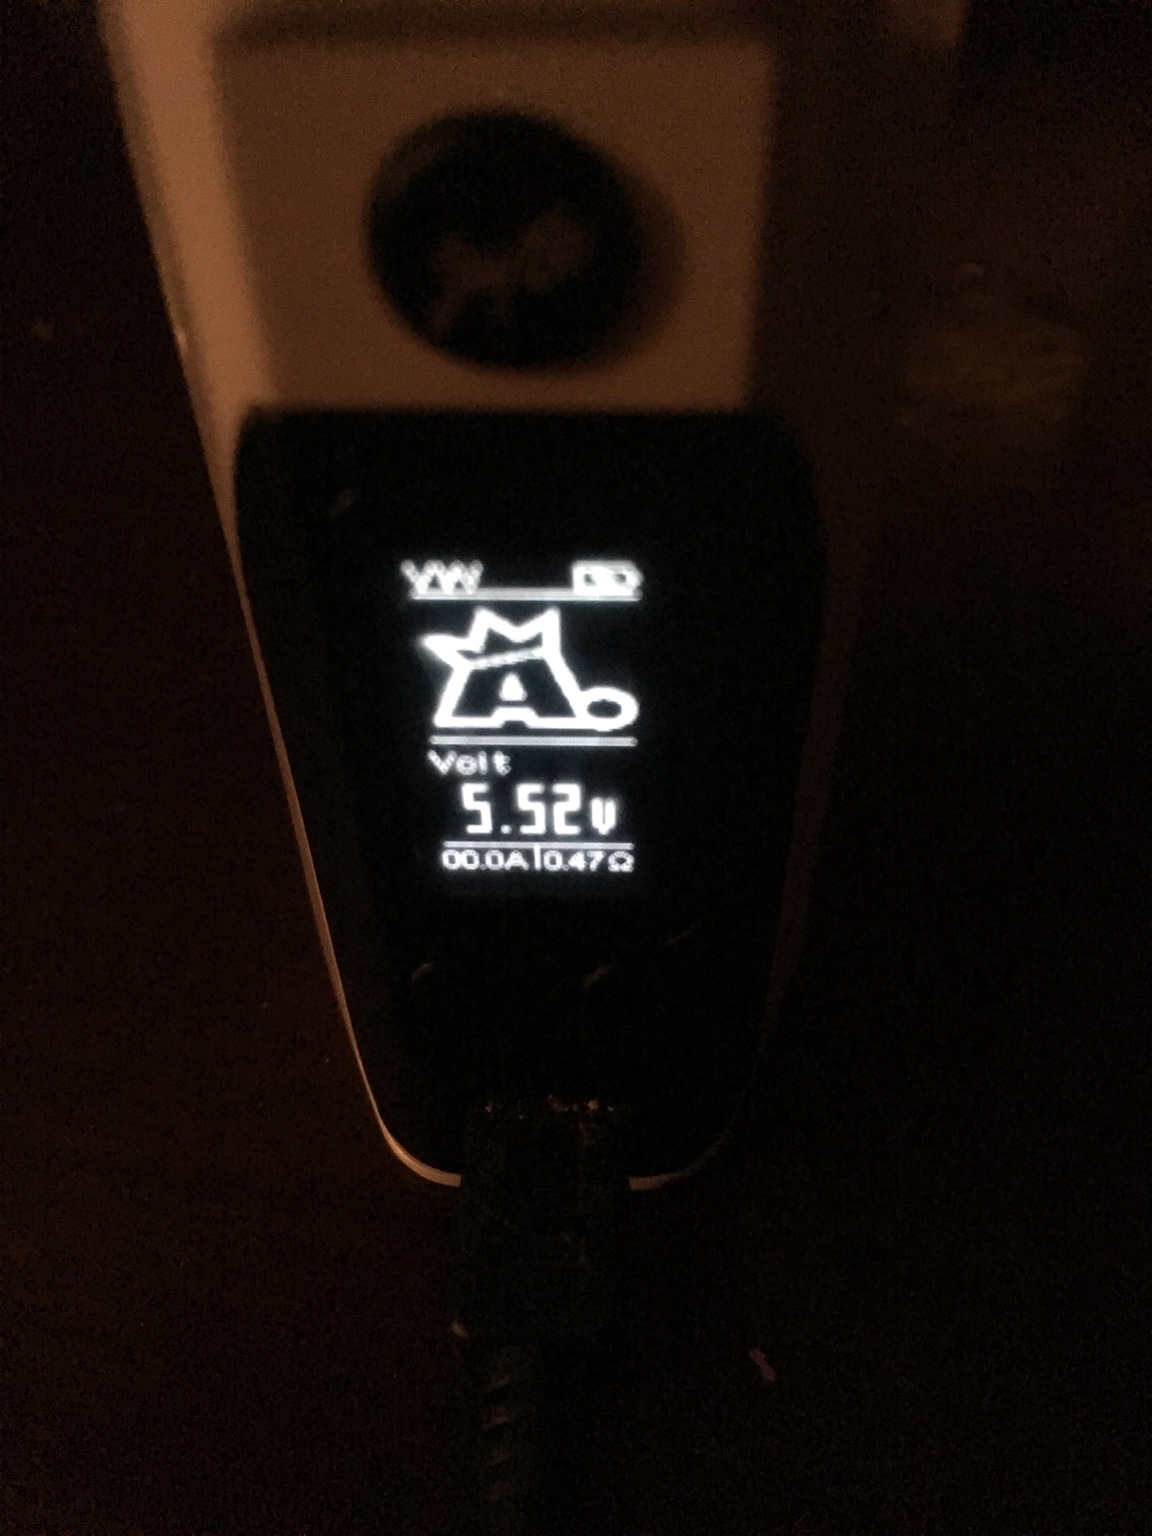
My bad I didn't see your reply! Haha it's real! I'd be more than happy to help; if you visit Wismec.com and go to the latest firmware update. Download that (Mac/Windows), open and extract the files from the RX200s into that same folder (so they're easily accessible) - next, once unzipped run the .exe file and a screen shout pop-up with "WISMEC" At the top; in the middle is a button labeled "Logo". When you press that, it will open a new window and the only file that should appear, the logo file. Double click that and hit update. Now, once you safely disconnect your mod blow a cloud  and now, after about 15 seconds you will notice how the wattage display is replaced by a sleek wismec logo. Once you get here, let me know (Just make sure your firmware is updated - newest edition). Check back with you tomorrow. #RX200s
Sent from my iPhone using Tapatalk
and now, after about 15 seconds you will notice how the wattage display is replaced by a sleek wismec logo. Once you get here, let me know (Just make sure your firmware is updated - newest edition). Check back with you tomorrow. #RX200sSent from my iPhone using Tapatalk
My bad I didn't see your reply! Haha it's real! I'd be more than happy to help; if you visit Wismec.com and go to the latest firmware update. Download that (Mac/Windows), open and extract the files from the RX200s into that same folder (so they're easily accessible) - next, once unzipped run the .exe file and a screen shout pop-up with "WISMEC" At the top; in the middle is a button labeled "Logo". When you press that, it will open a new window and the only file that should appear, the logo file. Double click that and hit update. Now, once you safely disconnect your mod blow a cloud
If I did that, I'd lose:
Main Screen
- Double-click:
A double fire click switches between standard view and clock screen.
The clock screen is close to the one viewed on the VTwo box; just better, imo.
See below the Clock menu to know how to configure clock.
- Third info line:
The third info line of the main screen, used to display amps, puffs or time counters now have a few more options:
- Atomizer voltage
- Battery voltage
- Board temperature
- Real-time clock
- Real-time atomizer resistance
- Estimate of vape velocity in ml or ml/day (experimental)
Holding Fire and Right (+) buttons 1/5th of a second enters menus.
- At any time, you may press simultaneously Fire and Right buttons to get out of the menus and return to the main screen.
- When navigating in sub-menus, you may press simultaneously Left and Right buttons to return to the parent (upper level) menu.
Main menu screen
- Screen
Screen management menu:
- Contrast:
Default VTC contrast is around 17%. This screen gives you access to the full contrast range of the display.
- Protection:
Configure main screen dim timeout and screen saver timing. After the time setup with the "Main" option, (default 30 seconds) of inactivity, the main screen switches to the screen saver animation (see below) for the duration configured with the "Saver" option, after what the box shuts down.
If the "Saver" item is set to "Off", the box will dim after "Main" second, then switch to a black screen for 3 minutes before being shut down.
- Saver:
Select the screen saver animation. You may choose between None (blank screen), the clock (analog or digital depending on the Clock menu setting), 3D spinning objects, the logo, a Qix-like animation, or the snow screen. More to come. Content of this menu will vary from time to time; this document may not always be up to date. Have a look.
When the 3D screen saver is active, the + and - buttons change the animated object.
About the snow screen saver: choose this screen saver if your box experiment burnt pixels; it's a common issue on boxes a few months to a year old, and this screen may help restore the pixels. Se also the Invert option that may serve the same purpose.
- Logo
The Logo submenu is used to toggle display of the custom logo On of Off, and to choose where to display it. Logo may be displayed on the top of the screen (in place of the power/temp setting zone) or in the middle of the screen in place of the two first information lines.
- Invert
Toggle display mode between white on black and black on white.
Beyond the fact you may find this option fancy and cool-looking, it may have its usefulness if your box experiment burnt pixels on the always-white zones. You may use this option in combination with the snow screen saver to restore the quality of your display (see the snow screen saver above in the Screen>Saver submenu section).
- Miscs
Sub-menu
- Game
Flappy bird. Guenuine menu.
- Led
eGrip II / eVic AIO LED Color setting.
- 3D
Cool 3D spinning shapes.
Come back to this menu and set it to "None" to cancel animation.
Or reset the box.
- Game
- Contrast:
- Coils
- Management:
- On each line of the four TC modes:
Click fire to toggle edit mode on the resistance.
While the resistance value is highlighted, click (+) and (-) to edit its value.
If you click fire again without editing the resistance value, this will toggle its locked/unlocked status.
Editing the resistance to any non-zero value automaticaly locks it.
Setting the resistance to zero with (-) will unlock and reset it.
You may also fire two seconds on one of the four resistances to reset its value; if the selected resistance corresponds to the current vaping mode, this will force an immediate reading of the atomizer, setting and lock of the new value.
When entering the Coils Management menu, the resistance corresponfing to the current vaping mode (if applicable) will be pre-selected.
- Zero All:
Zeroes all resistances; also zeroes all "SMART" and "POWER" modes saved resistance settings.
- Check: Yes/No
If you feel you need to use this feature in any other situation than a really heavy build with low TCR value (SS and such), you surely have an issue with your coil. Using this feature may be risky and therefore is not recommended. Check your build first.
In TC modes, the box checks for suitability of the resistance the first time it is fired (i.e. each time the atomizer in screwed on or after box reset). The test is done in a way that can make heavy builds with low TCR value fail the test (really heavy, like dual twisted clapton or such; more than around 1.7 grams of metal). If a coil fails the first fire test, the box will enforce the power mode.
If you know your heavy build is well done and suitable for temp control, you may set this option to "No". The box will bypass the first fire test and let you vape in the selected temp control mode.
Keeping the coil test disabled may get you into unpleasant situations. Use wisely.
- On each line of the four TC modes:
- TCR Set:
TCR Set menu.
This menu is also accessible by switching off the box and pressing both Fire and Right regulatory button (+) for 5 seconds.
In addition to the three usual TCR modes (M1, M2 & M3), the box standard presets for TEMP NI, TI and SS are editable. To edit one of the three preset modes:
- Select the mode you want to edit,
- Long fire to unlock the default (DEF) behavior; a reasonable value is proposed as a default starting value for edition,
- Edit the TCR value.
- Long fire to restore the default (DEF) behavior if needed.
- Management:
- Vaping
- Preheat:
Coil preheat function.
This function can only be active in "POWER" and "SMART" modes; it is ignored in all other modes.
Set at which power ( Pwr ) and how long ( Time ) you want the coil to be preheated when you fire; after this delay, the atomizer will be powered by your regular setting. Set the Time to zero to switch preheating off.
The Unit may be absolute Watts or percents of the main power setting.
The Delay allows to configure a dead time after fire, during which the preheating function will be disabled. This dead time goes from zero (Off) to 3 minutes. The delay runs from the end of fire. Use this feature if you use high inertia (heavy) builds to prevent over-heating when chain-vaping. The Delay also apply on power curves, preventing power to fire over 100% of the preset power within the given time.
A small P icon will appear on the main screen next to the the power setting to remind you the preheat function is enabled ("POWER" mode only). A blinking P indicates the dead time period.
If you configured a "PPwr" action in the multi-clicks configuration (see *Interface** menu), this action will pop-up this menu when in "POWER" or "SMART" mode.*
- Modes
Configure used/useless modes.
Click on each menu item to set 'Y' or 'N' if you want to see any given mode proposed while cycling between modes in menu mode.
Typically, you'll set "SMART" mode to 'N'. Typically.
- Algo
Temperature Control only
TC Algorithms submenu
- Algo
Choose betwen several algorithms for temperature control.
- Off: use the default standard agorithm from stock firmware.
- Sweet: much like the default, but smoothes out oscillations in regulation phase.
- Boost: speeds up temperature ramp-up and reduces oscillations, but with the risk of overshooting the target temperature if not configured properly. See the Boost option below.
- PID: A standard PID algorithm
More algorithms may be implemented with time. Stay tuned.
- Off: use the default standard agorithm from stock firmware.
- Boost
A parameter controling the Boost algorithm (see above).
Set the limit, in percentage of the target temperature, at wich the Boost algorithm will stop speeding up the temperature ramp-up phase. The more the value, the faster the ramp-up time, but with a higher risk of overshooting the target temperature. High values are best with heavy resistances such as clapton builds, lower are prefered with light resistances such as single high gauge wire. Also, choosing the right power/wattage setup (not too high nor too low) will help prevent overshooting while keeping a fast ramp-up. You'll have to experiment to see what fits the best for your setup and personal taste.
A long fire resets the parameter to its default value.
- P, I, D
The 3 parameters controlling the Proportional, Integral and Derivative part of the PID algorithm. You should familiarize yourself with the PID algorithm before playing with those parameters. Many papers exist over the internet on the subject.
A long fire resets the parameter to its default value.
Default values are (600,850,0). They are general-purpose values that should work in most cases, but may not be perfect and need to be tuned for any particular setup.
Algorithm is implemented in its independant form.
Sample time (50Hz) is scaled to one for parameters uniformity.
Units: P is expressed in mW/°C, I in mW/°C/s, D in mW.s/°C.
- Algo
- Curve
POWER/SMART mode only.
Enable, Reset and/or Edit the atomizer power curve.
When power curve is enabled, it take precedence over preheating; a little "C" next to the power setting on main screen indicates the power curve is enabled.
The values of the power curve are percentages (from 0 to 200%) of the main power setting. The whole power curve will thus scale with the main power setting. The default power curve (after reset) is a flat 100% curve, so will have no sensible effect.
The Delay setting prevents the power curve to apply a power above 100% during some time after the end of the last puff. See the Vaping>Preheat menu documentation for more informations.
You may have one different power curve per configuration profile.
- Prot.
Set the long fire protection time. Default is 10.0s.
Admissible values are 2.0s to 15.0s.
- Vaped
Choose the unit in wich the liquid consumption (on the 3rd info line of the main screen) is dislayed. You can choose between raw total ml, or consumption speed in ml/day. You must have setup the date and time of the RTC for the ml/d to behave correctly.
- ml/kJ
The speed at wich the liquid is vaporized in function of the energy dissipated by the coil. The value is in milliliters per KiloJoules. The proposed value of 360 is rtaher accurate for a standard 30W factory coil. It may need to be adjusted depending on your setup.
- Preheat:
- Clock
- Set Date/Time
Setup date and time. Fire change edited field, + and - set value, and long click on fire saves the setting. Since you need to click 2 seconds on the fire button to save, setup the time 2 seconds in advance if you want to achieve best accuracy. I know...
There is some other ways to setup time:
- use the evic-usb time command, if you installed the python-evic command-line utility;
- use the Time synchronization function of the NToolbox of the NFirmwareEditor 6.0+; (check the time synch feature in the system tray).
- MicroSur's FWUpdater also as a "Set current time" function.
- Joyetech's official firmware updater also sets date & time when uploading a firmware.
- Fmt (date format)
Toggle date display format between day.month.year (Western civilized world), month/day/year (US), day/month/year (Eastern civilized world), and year-month-day (Universe) format.
- Size
Toggle time display format of the digital dial between a small hh:mm:ss and a big HH:MM.
- Dial
Change the format of the clock display between a hand dial clock (A) and a digital clock with date and time (D). This will change the clock display on the main screen as well as on the screen saver, if the clock is chosen as screen saver.
- Clk Adjust
Adjust clock: for small adjustments to clock time + and - adjust clock by seconds. Fire to save. For VTwo owners, this option also adjusts the X32 frequency accordingly if done properly.
- Clk Speed
This setting is useless on RTC-enabled boxes (VTwo/Dual, AIO, Basic, eGrip II)
This setting is only usefull if you have set the Light Sleep mode "OFF" in the Expert menu. See below the "LSL" setting in the Expert menu description. As long as the Light Sleep mode is "ON" (default setting), there is no real need to adjust the Clock Speed Ratio.
Some boxes (VTC-Mini, Cuboid/Mini, Presa 75W, RX75, RX200S, RX2/3) does not have the needed 32kHz crystal soldered on the pcb to regulate the clock speed; so, another time source is used to drive the clock. Since its frequency is quite different, a clock speed ratio is needed to regulate the clock. As long as the box is awake (you're using it), the clock is regulated by the external 12.000MHz crystal, which is an accurate time source. Problem arises when the box enters sleep mode, since the crystal is switched off and the only clock source is the somewhat unreliable 10kHz internal oscillator of the processor. Clock drift mostly occurs when the box is switched off or sleeping.
The procedure to adjust the clock speed ratio is as follow:
- First, setup time accurately via the date/time menu or the "evic-usb time" command line.
- Let the box enter sleep mode (leave it alone or switch it off) for several hours. I suggest you're doing this before sleeping yourself.
- Awake the box and go into the "Clk Speed" menu; do not let the box enter sleep mode again in between, or you'll have to redo the whole thing.
- Using + and - buttons, adjust the time shown on top of the screen to catch up the real time. The number shown in the center of the screen is the clock speed ratio; reasonable values should be around 32~34000.
- Once you have adjusted the time to the real time, click fire to save the new clock speed ratio. Your clock should now be as accurate as it can. If not, try to repeat the procedure. Accuracy of a few seconds per day can be achieved this way.
- Set Date/Time
- 1Watt On/Off
Enable increment of power setting by plus ±1.0 Watt instead of ±0.1 Watts.
- 1C5F On/Off
Enable increment of temperature setting by ±1°C and ±5°F instead of ±5°C and ±10°F
- Wake < > On/Off
Enable/Disable box wake up from sleep mode when pressing the + or - button.
- Font A/B
Change the display font. You have two fonts available; choose what pleases you more. Choice is purely aesthetic. One may find the bolder font B more readable on some displays.
- Temp °C/°F
Choose once and for all your temperature unit, between °C and °F. Nobody needs to switch back and forth between standards. Moreover, Farenheit is not even a standard. Maybe I'll replace it by Kelvins one day. Changing temperature unit by wrapping around the temperature has been disabled.
- PPwr On/Off
TEMP Mode Only
Toggle Priority Power mode On/Off. In temperature control modes, this switches the power and the temperature display; the power is displayed at top of screen and is directly editable by the + and - keys just like in Power mode, and the temperature is displayed on the first of the 3 informations lines in the center of the screen. Temperature remains editable in Edit mode.
The purpose of this function is near the preheat function in PWR mode; once you have set your correct vape temperature (not burning your dry cotton), your comfort come from the heat rise speed. This feature let you adjust this parameter more easily.
- Clicks
The Clicks submenu allows you to configure the action associated to a Fire button multi-clic. Configurable multi-clicks are double, triple and quadruple clicks.
Possible actions are:
- Nothing
- Enter edit mode
- Toggle display of info lines / clock on the main display
- Toggle the "Priority Power" mode (basically, switches temperature and power on the main screen display in TC mode, see above "PPwr On/Off" doc), OR enters the Preheat menu if box is in POWER mode.
- Switch to next vaping mode ( TC -> POWER -> BYPASS -> ... )
- Switch box On or Off
- Cycle through configuration profiles
As a security feature, if none of the action are configured to be the "Edit" mode, the firmware will redefine the triple click action to "Edit" at next reset.
- Expert
Some advanced options.
Normal users should barely have anything to do with those options, and can live perfectly well without ever knowing they exist. I do not recommend "testing" those options just to "see what it does". Deny responsability of everything etc. You're supposed to have 18+, after all^^
- USB:
Choose between several USB modes:
- HID: Normal operation mode - factory setting. Disables any other USB device than HID. HID is always active, even in the two others modes of operation. This feature permits communication between the box and firmware utilities.
- COM: A virtual COM interface; mainly used for debugging with a COM terminal such as putty. May be usefull if you are developping your own version of the firmware.
- DSK: A virtual drive to download the firmware file. Connect the box to a PC, and a disk device will appear with a "MYEVIC.BIN" file. This can be read and copied. This file is an encoded firmware file that can be uploaded to another device using evic-usb or the official Joyetech/Wismec firmware tool.
- HID: Normal operation mode - factory setting. Disables any other USB device than HID. HID is always active, even in the two others modes of operation. This feature permits communication between the box and firmware utilities.
- DBG
Enables or disables the debug informations mode. Once the DBG option is set to "ON", Debug informations can be shown/hidden by clicking fire button four times. This option is OFF by default to prevent users to inadvertendly mess up their screen. It's of no interest if you're not developping your own version of the firmware.
- X32
Enables or disables usage of the X32 crystal of the PCB.
If this setting is "OFF", the firmware won't try to drive the Real-Time Clock with the 32.768kHz crystal. This may solve freezing issues on some malfunctionning boxes. This setting will be active at next reset.
After reset, if the box cannot use the X32 to drive the RTC, this option will be set back to "OFF" and the Light Sleep feature will be enabled (see "LSL" below).
This option is useless and forced to "OFF" on boxes known not to have an X32 crystal. Those are all boxes for which the manufacturer did not enable the RTC feature, i.e: VTC-Mini, Cuboid/Mini, Presa 75W and RX series.
- LSL
Light Sleep mode.
This setting is useless and forced to "OFF" on boxes with a X32 crystal (VTwo/Dual, AIO, Basic, eGrip II), and defaults to "ON" on other boxes.
On boxes where the Real-Time Clock is emulated (like the VTC-Mini), by setting the Light Sleep mode "ON", the box continues to drive the Real-Time Clock with the external 12.000MHz Crystal instead of the internal LIRC oscillator when entering sleep mode. This makes the Clock far more accurate and eliminates the need for the Clock Speed ratio, at the cost of a greater battery consumption (estimated less than 50 mAh/day).
Using this setting, Clock accuracy is identical to those of real RTC boxes.
- NFE
Warning: You can't use Joyetech's firmware updater while this option is "ON". It may aloso cause issues with third-party firmware management systems.
Enables or disables partial compatibility with the NFirmwareEditor 5.x myEvic Configuration Editor.
This option is disabled by default; set it to "ON" if you plan to use developpement features of the NFE. You'll have access to Monitoring, Screenshot, COM terminal, and Custom Battery Profile editor.
Since compatibility is only partial at the moment, editing parameters other than Battery Profile will have no effect.
- SHR
Shunt Resistance (in mΩ).
Warning: This item is dangerous to your box. Messing with this parameter may cause overcurrent in the atomizer circuitry and lead to definitive box failure.
This item let you edit the value of the Atomizer's circuit shunt resistance. This resistance is involved in every resistance/current/power measures and computation in the whole firmware. This value should only be changed if you know exactly what you are doing.
To reset the shunt value, select the SHR menu item and press the fire button during 2 seconds. This will revert the value to the default hardware setting.
- UCH
USB Battery Charging.
Multi-cell boxes only. This option has no effect on single-cell boxes.
Enables or disables battery charging via the USB port. The USB port is still usable for all other purposes: firmware management, debugging, etc.
If you have an external battery charger and want to take care of your batteries, it is recommended to switch off the USB charging feature to avoid potentialy unbalanced charges, or unadapted charge currents at end of charge.
- BAT
Battery model.
You can specify your battery brand and model among several ones: 25R, 30Q, HG2, HE4, VTC4, VTC5 and VTC6. "GEN" is the generic battery used by default and should be used for any other model of battery or for built-in battery.
Custom Battery:
By pressing the Fire button during two seconds while editing this option, the battery model changes to "CUS" (Custom Battery). The box will use the user-defined battery discharge curve and settings. Those informations can be edited using NFirwareEditor discharge profile editor (see NFirwareEditor documentation for more information).
The NFE compatibility mode must be set to ON in the expert menu for NFE to recognize the box as compatible.
At the moment, battery model information is used by the firmware to compute a more accurate state-of-charge than the generic setting, and to avoid battery stress by limiting max Amp draw. Max Amps by battery model is based on Mooch's stress tests and are fairly reliable.
On boxes with built-in battery (AIO, Basic, eGrip II, Cuboid Mini), this option should be kept on the "GEN" setting unless you've taken your box apart and manualy replaced the internal battery pack by something else.
- BVO
Battery Voltage Offset submenu
Corrective offset value of the battery voltage. Depending on your box, the displayed battery voltage may be off by a few tens of millivolts. It's usually not a concern, but it may make the box locking the vape too early (wasting some battery capacity) or too late (box resets due to low voltage when firing).
Use an external accurate voltmeter (your battery charger may do the job) to compare the displayed voltages on the box to the actual battery voltages, then adjust the displayed voltages with this item.
Range is -1.00 to +1.00 Volts by step of 10mV.
- On a single-cell box, only the first setting (B1) is significant. B2 and B3 are ignored.
- On a fixed dual-cells box, the two first settings (B1 & B2) are used, respectively, for the first and the second battery (depending on the box, you'll have to determine wich one wich with your voltmeter). B3 is ignored.
- On a mixed single/dual-cells box, B1 is used for the lone battery in single-cell setting, and B2 & B3 for the two cells in a dual-cell setting.
- On a triple-cell box, B4 is ignored.
- On a quad-cell box, I let you guess.
- On a single-cell box, only the first setting (B1) is significant. B2 and B3 are ignored.
- USB:
Profiles
You can switch between five different configuration profiles.
A Profile stores all data relevant to vaping configuration; that is, vaping mode, coils resistance, preheat and algo settings, etc. Interface, display or others non vape-related settings are not reloaded when switching profiles.
To access the Profile selection screen, press and hold the Fire and (+) buttons for two seconds. On the Profile selection screen, select the profile and click Fire to activate it.

Each line display the Profile number, the selected mode and last used resistance.
Empty lines correspond to empty profiles.
By selecting an empty profile, the current profile will be duplicated.
To duplicate current profile onto an existing profile (thus erasing it), select the target profile and press fire during two seconds. The target profile will be selected with a copy of the current profile.
You can switch between five different configuration profiles.
A Profile stores all data relevant to vaping configuration; that is, vaping mode, coils resistance, preheat and algo settings, etc. Interface, display or others non vape-related settings are not reloaded when switching profiles.
To access the Profile selection screen, press and hold the Fire and (+) buttons for two seconds. On the Profile selection screen, select the profile and click Fire to activate it.
Each line display the Profile number, the selected mode and last used resistance.
Empty lines correspond to empty profiles.
By selecting an empty profile, the current profile will be duplicated.
To duplicate current profile onto an existing profile (thus erasing it), select the target profile and press fire during two seconds. The target profile will be selected with a copy of the current profile.
@AJBclouds
In case you are still clueless, here is a Top Tip!
Actually read a thread before posting.
Here is another.
Don't try to teach your Grandfather to chew cheese.
I'm going to go out on a limb here. Your Latin is perhaps a bit rusty?
Let me help.
Insictus oportet nocere
Translated,
Stupid should hurt.
In case you are still clueless, here is a Top Tip!
Actually read a thread before posting.
Here is another.
Don't try to teach your Grandfather to chew cheese.
I'm going to go out on a limb here. Your Latin is perhaps a bit rusty?
Let me help.
Insictus oportet nocere
Translated,
Stupid should hurt.
Last edited:
Let me rephrase that, I did the custom update the Badwolf posted, not that little logo thingy. Lovin the custom update @OneBadWolf !I just did this custom update on my Rx200s and so far I love it!
Apparently the VaporShark Hedron is using this chip. Evolv must be pissed. lol
Let me rephrase that, I did the custom update the Badwolf posted, not that little logo thingy. Lovin the custom update
I cannot even consider buying a mod that won't support this firmware..
The curve feature looks interesting. Need to read up and see if anyone is having good results with it.
On the Smok XCube II, you could modify the curve through the Bluetooth interface, but it was clunky compared to this.
Its great being able to truly adjust your vape other than adjusting watts and temp. I see all mods eventually going this route with their firmware. Well, maybe not lol but, should.I cannot even consider buying a mod that won't support this firmware..
Its great being able to truly adjust your vape other than adjusting watts and temp. I see all mods eventually going this route with their firmware. Well, maybe not lol but, should.
Amen.
On Dec. 30, 2015 in the original RX200 thread I wrote:
At these prices, its only a matter of time before some hardcore bad ass uber geeks from hell, reverse engineer the firmware, and write a command interpreter to integrate the RX with Lightscribe.
I'm talking about men who will never experience female companionship, or sunlight, or emerge from their parents basements for any extended periods of time. The mad monks of microchip mayhem. They dream in binary, and could solder surface mount components before they could ride bicycles. OK, they will never ride bicycles, but Evolv, take heed...... Your pricing model really needs to...... um...... Evolve.
They did one better.
One of the reasons I find vaping so involving, is that the tech was driven by the amateurs, not the professionals. Then it seemed to stall for a while.
The word amateur has lost it's meaning. It has a negative connotation now. What the word actually means, is "one who does what they love" A professional? One who does something for a living.
This custom firmware VS Joyetec. The perfect example.
Give me amateur firmware any day.
@AJBclouds
In case you are still clueless, here is a Top Tip!
Actually read a thread before posting.
Here is another.
Don't try to teach your Grandfather to chew cheese.
I'm going to go out on a limb here. Your Latin is perhaps a bit rusty?
Let me help.
Insictus oportet nocere
Translated,
Stupid should hurt.
@OneBadWolf
WOW. Did you enjoy that? Was that necessary? I was replying a simple question (with no prior knowledge of the custom firmware you are running) and trying to let people know how I used http://www.customvapefirmware.com for a number of logos. Yes I knew you would lose all that you jackass, it changes the custom firmware you already have installed. BUT, if you just want a more simplistic, different look (like MYSELF from time to time), you just download the .bip logo from the website above, insert that file into the unzipped RX200s file. Then just plug back in, hit LOGO and select the file you downloaded. Now, @OneBadWolf - Who the fck do you think your talking to? Obviously your a more seasoned and a respected member of this forum but if I could reach through the computer I'd write arrogant asshole with a sharpie on your forehead. Who shits on someone that is just sharing some information? A Prick. There's two types of people who vape... those who vape because they love it, and it helped me (them) quick smoking completely - and then there's those who stick their nose up because they're more experienced. I think we all know your "type". ANYWAY, to end of a positive note, thanks for copying and pasting that guide above. There's a ton of really useful information. And before I forget, there is also another facebook group dedicated to all types of styles & logos.
"Mean People Suck" - some guys car
Last edited:
Who the fck do you think your talking to? If I could reach through the computer I'd write arrogant asshole with a sharpie on your forehead.
Politeness prevents me from answering your question fully, but it might be worthwhile to mention, before you try reaching through any screens, that I once used my RX200 to kinetically re-educate a pickup driver who thought it would be a good idea to give me the finger after nearly running me, and my dog over in a crosswalk. The mod worked just fine after he went to sleep beside his truck. There is a lesson here.
Vaping saves lives. I have dedicated more time and money in educating people, donating hardware, and supplying free juice than you can possibly imagine. And no, I don't own a vape shop.
To post on a thread, about something you know nothing about, without even reading it, deserved a spanking.
What is this "Facebook" you speak of?
Last edited:
I am noticing something. My batts are definitely draining quicker with this installed. I thought it was last night. Just put 3 fresh ones in. 100% charge. In five min its down to 88%. Also, its not gradually going down a % at a time like it used to. It jumped from 100% to 93% then straight to 88%. After leaving it sit for 5 min, I turned it back on and now its at 93%? Definitely never did that before.
It has me thinking that its just the battery voltage dropping while using it and pulling the charge down then coming back up after it sits for a bit. If thats the case, why has it not done that with the Wismec firmware? My Snowwolf does not do that either.
It has me thinking that its just the battery voltage dropping while using it and pulling the charge down then coming back up after it sits for a bit. If thats the case, why has it not done that with the Wismec firmware? My Snowwolf does not do that either.
I am noticing something. My batts are definitely draining quicker with this installed. I thought it was last night. Just put 3 fresh ones in. 100% charge. In five min its down to 88%. Also, its not gradually going down a % at a time like it used to. It jumped from 100% to 93% then straight to 88%. After leaving it sit for 5 min, I turned it back on and now its at 93%? Definitely never did that before.
It has me thinking that its just the battery voltage dropping while using it and pulling the charge down then coming back up after it sits for a bit. If thats the case, why has it not done that with the Wismec firmware? My Snowwolf does not do that either.
Which device? What type of batts? The battery profiles are configurable. I use HG2s, and the option is built into the firmware for those, but you can adjust the batt readout to the type of batts you are using.
You can also tell it to display the voltage instead of just the meter.
Which device? What type of batts? The battery profiles are configurable. I use HG2s, and the option is built into the firmware for those, but you can adjust the batt readout to the type of batts you are using.
You can also tell it to display the voltage instead of just the meter.
VTC 4, RX200S. I will piss with it when I get home. I have not touched it since I got my Snowwolf. I did see those setting in the menu.
There is still some funky stuff going on with the firmware I have noticed it mostly on the RX 300 one thing you can do is go into expert mode and if any of the batteries are off a few points just make them even. I have a theory but have not posted another issue as of yet that the balance charger is doing some wacked out stuffI am noticing something. My batts are definitely draining quicker with this installed. I thought it was last night. Just put 3 fresh ones in. 100% charge. In five min its down to 88%. Also, its not gradually going down a % at a time like it used to. It jumped from 100% to 93% then straight to 88%. After leaving it sit for 5 min, I turned it back on and now its at 93%? Definitely never did that before.
It has me thinking that its just the battery voltage dropping while using it and pulling the charge down then coming back up after it sits for a bit. If thats the case, why has it not done that with the Wismec firmware? My Snowwolf does not do that either.
There is still some funky stuff going on with the firmware I have noticed it mostly on the RX 300 one thing you can do is go into expert mode and if any of the batteries are off a few points just make them even. I have a theory but have not posted another issue as of yet that the balance charger is doing some wacked out stuff
No problems here on the 200S, I don't have the 300.
In any series configuration, the batts are not going to be even, not like if you are running multiple batts in series. It is because of this, that balnce charging is used for multiple cell series batt configs.
yep I have no probs with the Rx 2/3 or the 200s its just the RX 300 seems like with 3 in series the balance charger is doing ok 4 its wHacking no big deal really ;0 i may create another issue or not.. It only happens after the batteries are about half but until I get the numbers of when it is occurring no reason to spam the issues on their ;0No problems here on the 200S, I don't have the 300.
In any series configuration, the batts are not going to be even, not like if you are running multiple batts in series. It is because of this, that balnce charging is used for multiple cell series batt configs.
Hey @OneBadWolf I did the upgrade on the top of the first page, but I also saw your later link post and went to that page and downloaded the file posted three days ago, do I also do that one?The curve feature looks interesting. Need to read up and see if anyone is having good results with it.
Thanks,
b
how exactly those this "smart" thingy work?
any advantages over lets say "watt mod"
try´d to read about it ... but it dose not say anything
about it in the "manual"
"The Smart Mode will aromatically save ten groups of output settings. Each resistance contains an output power setting. It can be adjusted and will be saved once you changed the output wattage.
When ten groups of profiles are saved, the first profile will be deleted if a new resistance is added. And it is the same to continue."
It should be "automatically," but from the quoting, the poster might have been making a pun or a vaping slip.
Hey! Im new to this site and was wondering if you guys could help answer a few questions for me?
1) Im currently charging my RX2/3 through USB as i can not afford a nitecore till next week should i be rotating my 3 batteries inside the mod to different positions to get a better charge as they are unbalanced?
2) I see theres an expert setting on this new update which i have downloaded if i change to voltage so they all match up will this cause some damage to either the batteries or the mod? Seems to good to be true that i can rebalance my batteries like this?
Help!
Thank you.
You are not actually balancing them at all in fact their is not reason to do it if you batteries are charged properly and somewhat matchedHey! Im new to this site and was wondering if you guys could help answer a few questions for me?
1) Im currently charging my RX2/3 through USB as i can not afford a nitecore till next week should i be rotating my 3 batteries inside the mod to different positions to get a better charge as they are unbalanced?
2) I see theres an expert setting on this new update which i have downloaded if i change to voltage so they all match up will this cause some damage to either the batteries or the mod? Seems to good to be true that i can rebalance my batteries like this?
Help!
Thank you.
should i be rotating my 3 batteries inside the mod to different positions to get a better charge as they are unbalanced?
Yes.
I have a question... I have been using the RX200 but now I have the RX200s, I was just wondering if I can use the batteries that I used in my RX200 in my new RX200s?
I know that I should keep the same 3 batteries the same (married) but will something bad happen if I put the 3 married batteries into my RX200s?
I do not rotate the batteries inside (I use an external charger) my RX200's. I have the batteries labeled as #1 Left, #2 Right and #3 Back. I always put them back in just like that. Will that cause a problem? I've read 2 different answers so far.
Sent from my Nexus 5 using Tapatalk
you are good to go.. the marrying idea is kinda a myth the reason this is pushed by some is they do not use a analyzing charger as long as the mah hours of the batteries is similar you can use any and match any of them look in the future into getting a analyzing charger opus 3100 v 2.2 is an exampleI have a question... I have been using the RX200 but now I have the RX200s, I was just wondering if I can use the batteries that I used in my RX200 in my new RX200s?
I know that I should keep the same 3 batteries the same (married) but will something bad happen if I put the 3 married batteries into my RX200s?
I do not rotate the batteries inside (I use an external charger) my RX200's. I have the batteries labeled as #1 Left, #2 Right and #3 Back. I always put them back in just like that. Will that cause a problem? I've read 2 different answers so far.
Sent from my Nexus 5 using Tapatalk
So I am a bit confused with all the different fw versions out for the rx200s. I ended up with the arctic fox version and it appears mostly similar to everything you outlined above, however some of the menus appear different?Yes.
Just wanted to make sure I had installed the correct version.
Thanks for the heads up
download the whole release then open the folder and go to the .binI can not get the .bin file...
Can someone host it on Google Cloud or something else?
Sent from my Nexus 5 using Tapatalk
https://github.com/ClockSelect/myevic
then click on clone or download grab the zip open it and go to the bin directory
I have a pretty good charger. It's this one... http://www.rtdvapor.com/efest-luc-blu6-oled-charger/you are good to go.. the marrying idea is kinda a myth the reason this is pushed by some is they do not use a analyzing charger as long as the mah hours of the batteries is similar you can use any and match any of them look in the future into getting a analyzing charger opus 3100 v 2.2 is an example
Sent from my Nexus 5 using Tapatalk

that is the correct sizeThe bin file that I downloaded is only 96.63 kb in file size. That doesn't seem right for a whole new custom FW?? Does it?
Sent from my Nexus 5 using Tapatalk
Thanks man, I got it then. I finally downloaded the "myevic-master.zip" and I got the .bin out of that.download the whole release then open the folder and go to the .bin
https://github.com/ClockSelect/myevic
then click on clone or download grab the zip open it and go to the bin directory

Sent from my Nexus 5 using Tapatalk
welcomeThanks man, I got it then. I finally downloaded the "myevic-master.zip" and I got the .bin out of that.
Sent from my Nexus 5 using Tapatalk
So I am a bit confused with all the different fw versions out for the rx200s. I ended up with the arctic fox version
Never heard of it before, ap[pears to be related to NFE, which is a branch of this firmware. How is it
? I'll check it out.