Wicking guide or principles for any RTA
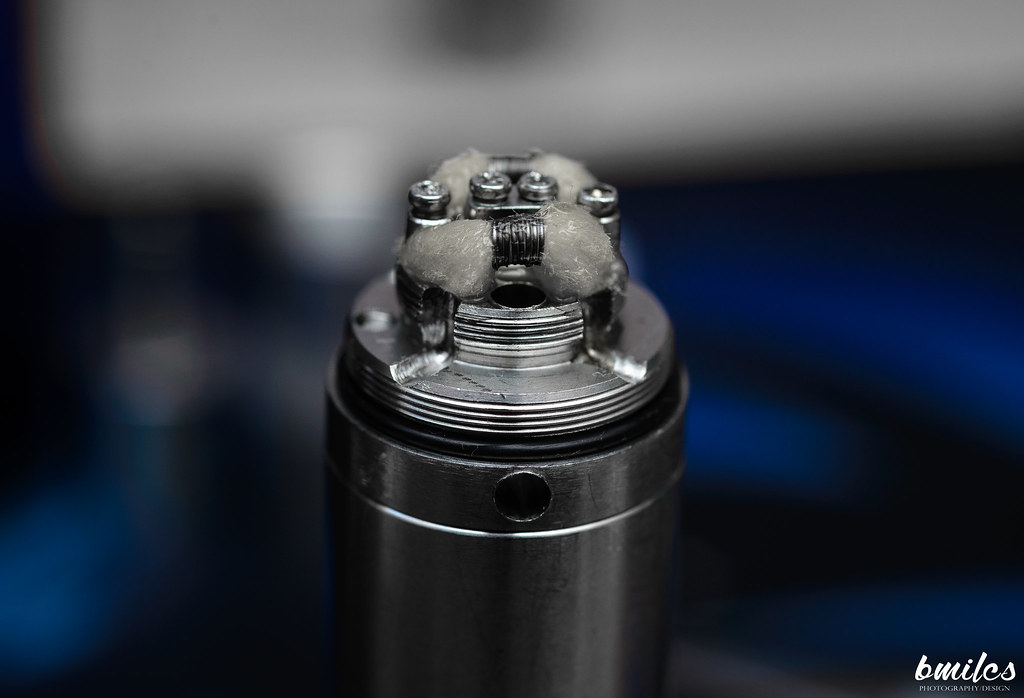
Pictured: Modified Orchid v4 with 3mm airholes and widened channels
DISCLAIMER: I've suffered, as most do, with dry hits, leaking and all sorts of wicking issues with RTA's. They're touchy and require consistency! With my guide below, I've developed an easily repeatable and effective way to wick your RTA for HIGH VG juices. I am a DIY'er at heart and regularly vape 85-90% VG blends. After watching SEVERAL videos, reading several guides and posting countless times for help with issues, this is what I've come up with over the past few weeks in my transition to RTA's from RDA's. My coils, modifications or style is NOT perfect... and that's what's GREAT about this technique. It doesn't require perfection in order to work beautifully. I'm not claiming this is original but this is what I've taken from others and adapted to work for my needs. I wanted to give back to the community that has helped me out immensely with getting off the stinkies and here it is --- a guide that took 3 hours lol. Feedback welcome!
- - - - - - - - - - - - - - - - - - - - - - - - - - - - - - - - - - - - - - - - - - - - - - - -
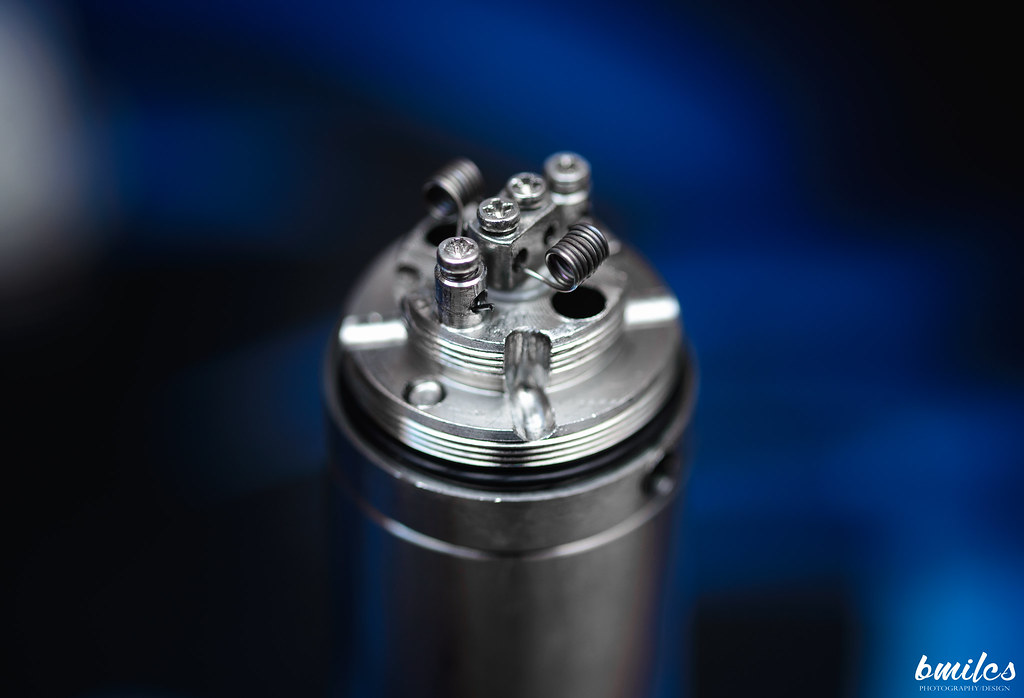
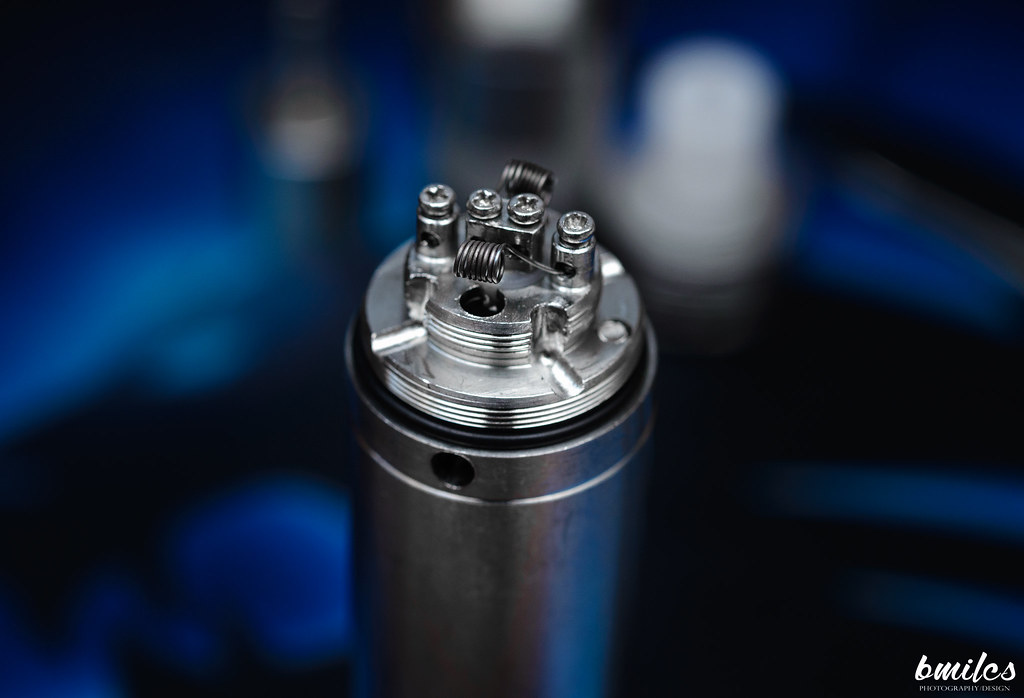
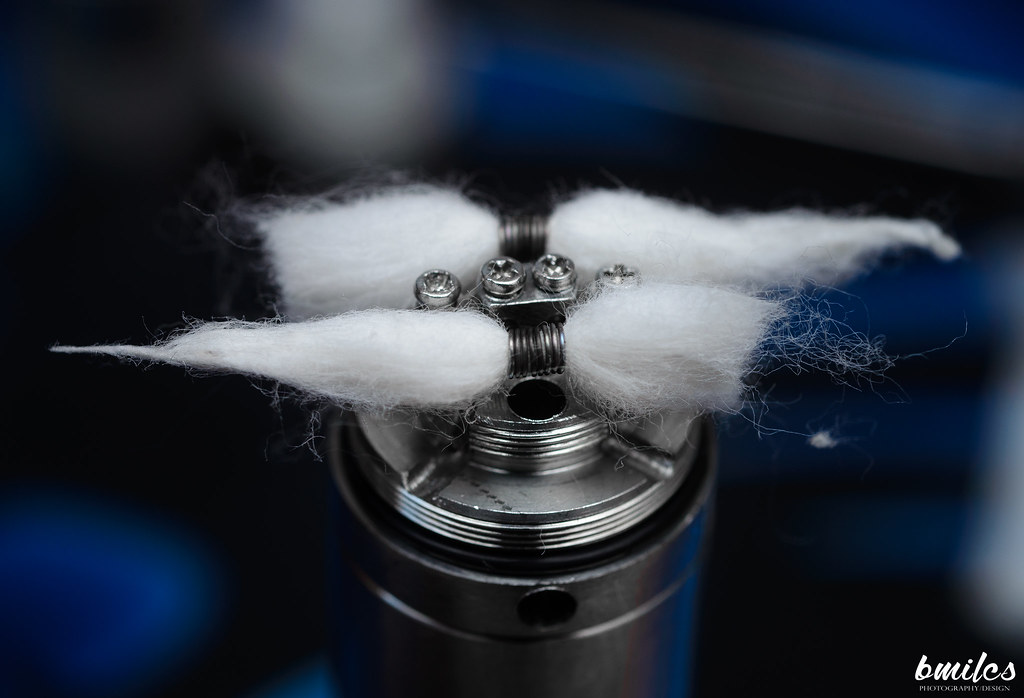
First off, I start with a basic coil. 7-8 wrap 2mm ID 28g dual coil. I love airflow and circulation as I feel it intensifies flavor and vapor production. Position the coils over the airhole with a good amount of space underneath, outside and inside of the coil so air can flow everywhere freely.
- - - - - - - - - - - - - - - - - - - - - - - - - - - - - - - - - - - - - - - - - - - - - - - -
- - - - - - - - - - - - - - - - - - - - - - - - - - - - - - - - - - - - - - - - - - - - - - - -
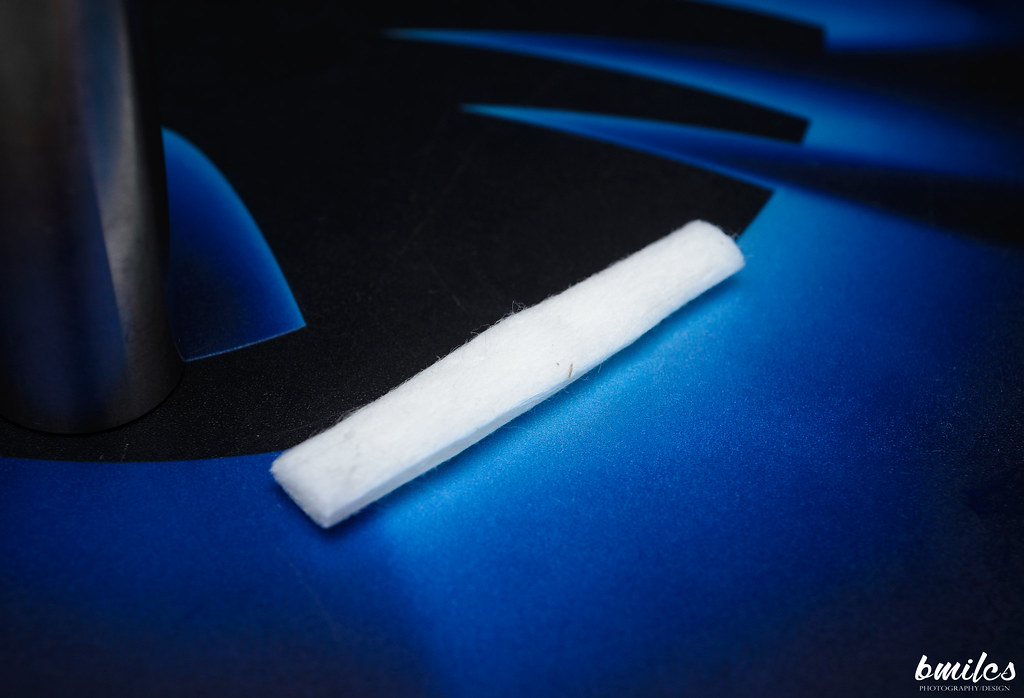
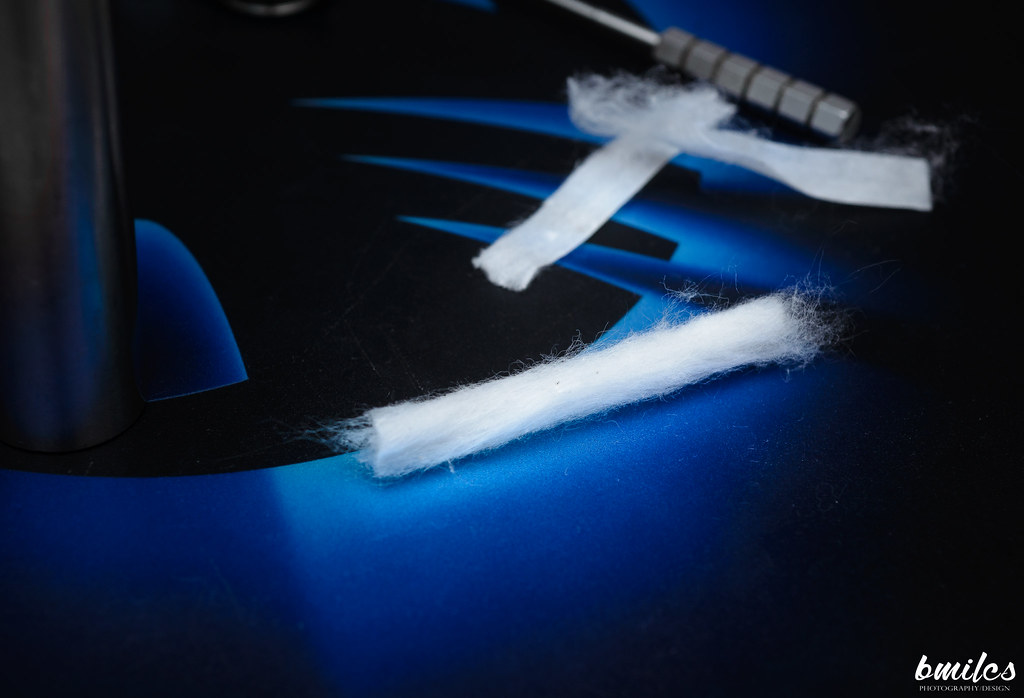
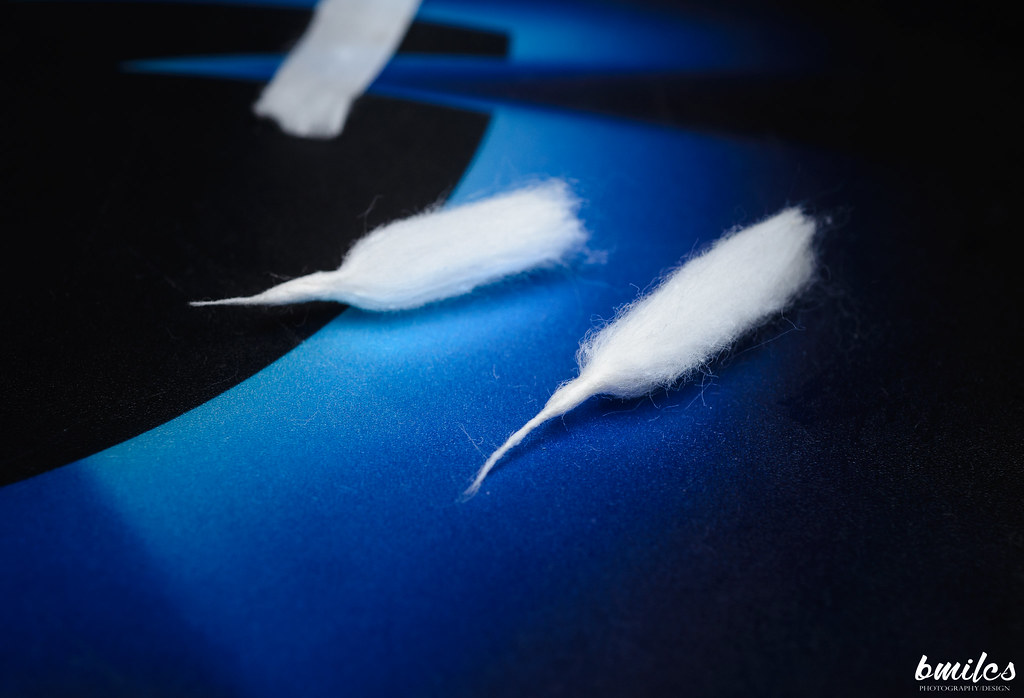
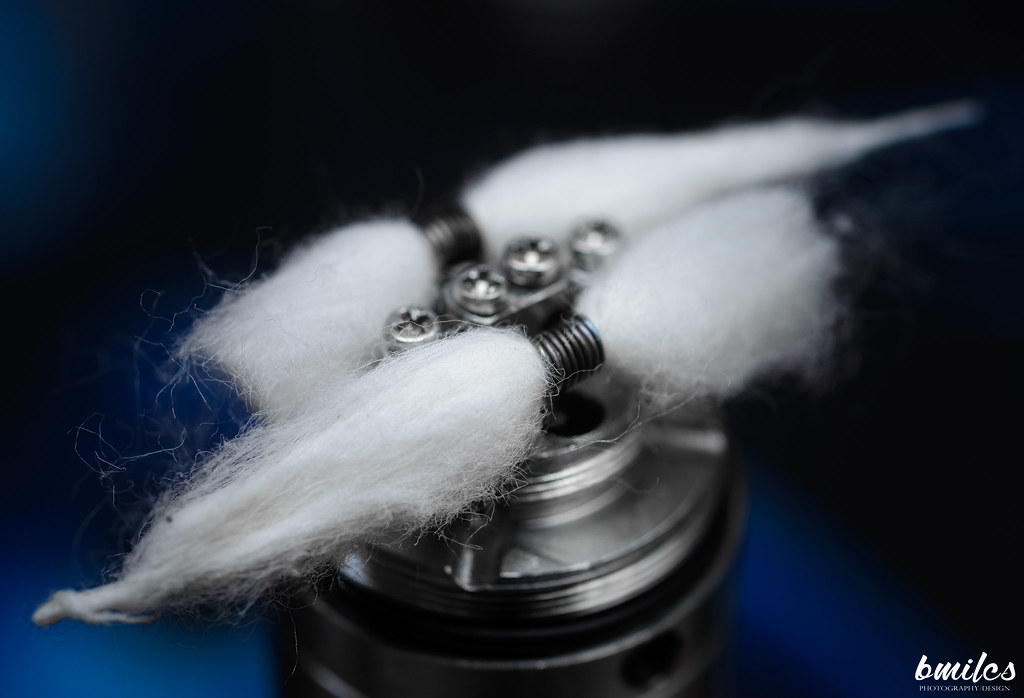
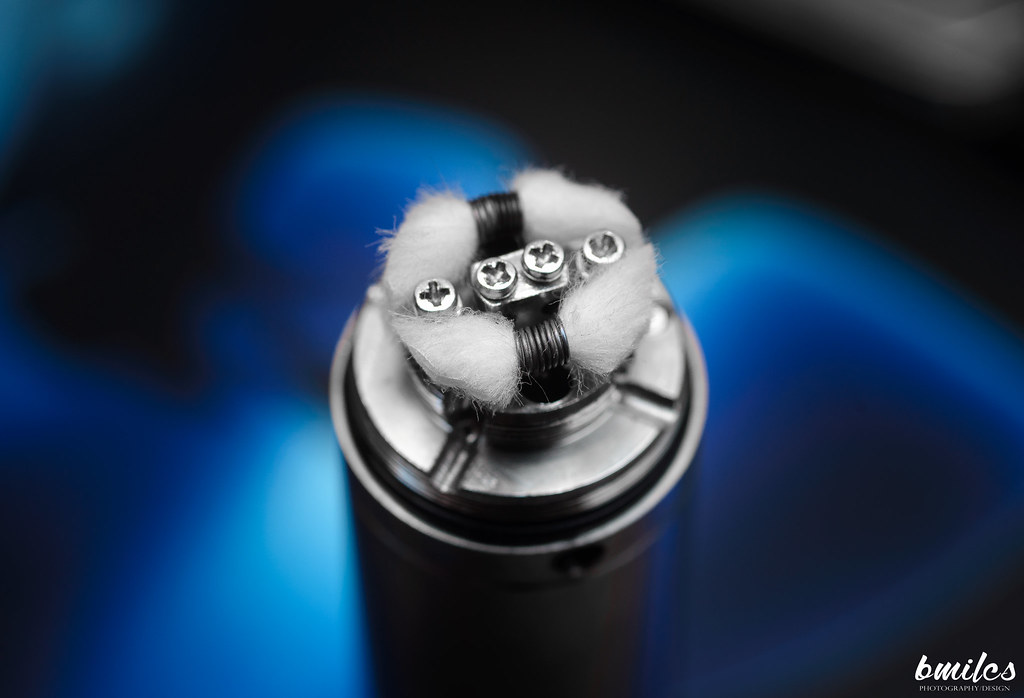
I use organic Japanese cotton pads from A*****.com. They're very popular, inexpensive and work great. I generally cut off an even piece, just enough to make sure it fits snug inside the coil but not too tight. You'll figure this out over time. I remove both exterior "sheets" of the pad, revealing only the stringy fresh stuff inside. I use my fingers, place them in the middle of the cotton strip and lightly press/massage outwards. This will slightly condense and shape it properly as pictured above. I do not roll or twist it whatsoever, but use my fingers to slightly straighten out the fibers like a comb would. A little goes a long way; keep it fluffy and nicey nice.
Using your thumb and index finger, Twist the outer ends of the wick so they're easy to insert into the coil. Snip the cotton evenly in half and you're ready to go!
- - - - - - - - - - - - - - - - - - - - - - - - - - - - - - - - - - - - - - - - - - - - - - - -

- - - - - - - - - - - - - - - - - - - - - - - - - - - - - - - - - - - - - - - - - - - - - - - -
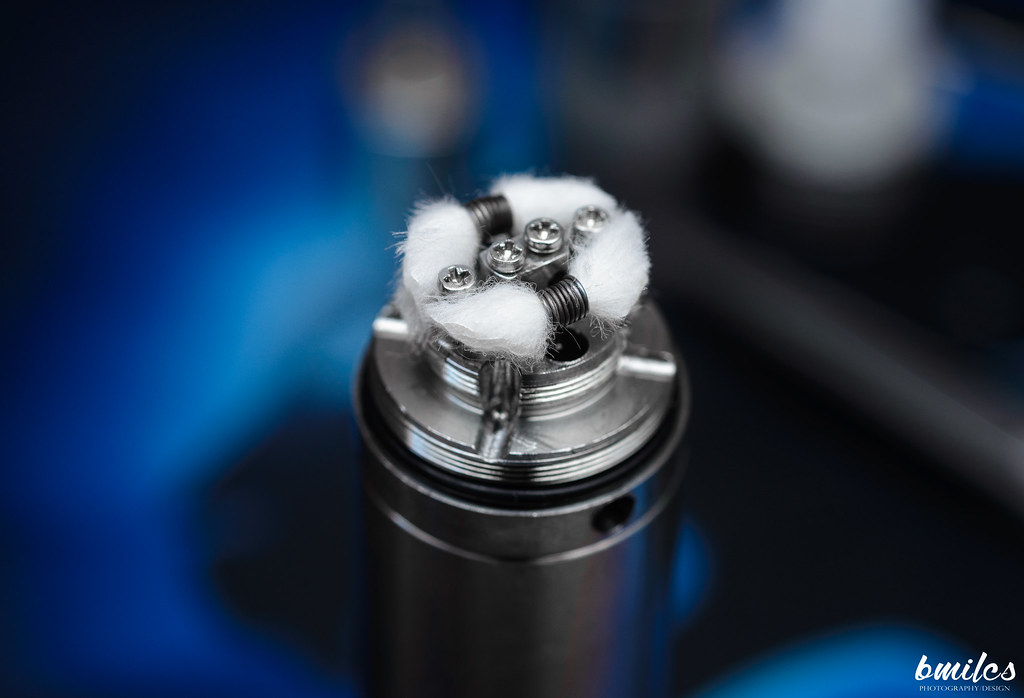
Ok here is where the magic happens. Remember those bowl hair cuts back in the day? Use your the upper most deck as your guide. Place your scissors underneath the cotton and move them into the corner below deck so that it's touching ( _| ). Snip the cotton flush with edge. Start with a nice straight cut, perpendicular with the posts (picture #1). Then go around the entire deck and snip any extra cotton that protrudes past the top deck in any way. In other words, keep the scissors touching metal and rotate the atty as you cut it into shape.
The key here is not compressing the cotton. You left it nice and fluffy in the first few steps, and you want to leave it that way. Shape it with your scissors and then you have minimal tucking and pushing to do later.
- - - - - - - - - - - - - - - - - - - - - - - - - - - - - - - - - - - - - - - - - - - - - - - -
- - - - - - - - - - - - - - - - - - - - - - - - - - - - - - - - - - - - - - - - - - - - - - - -
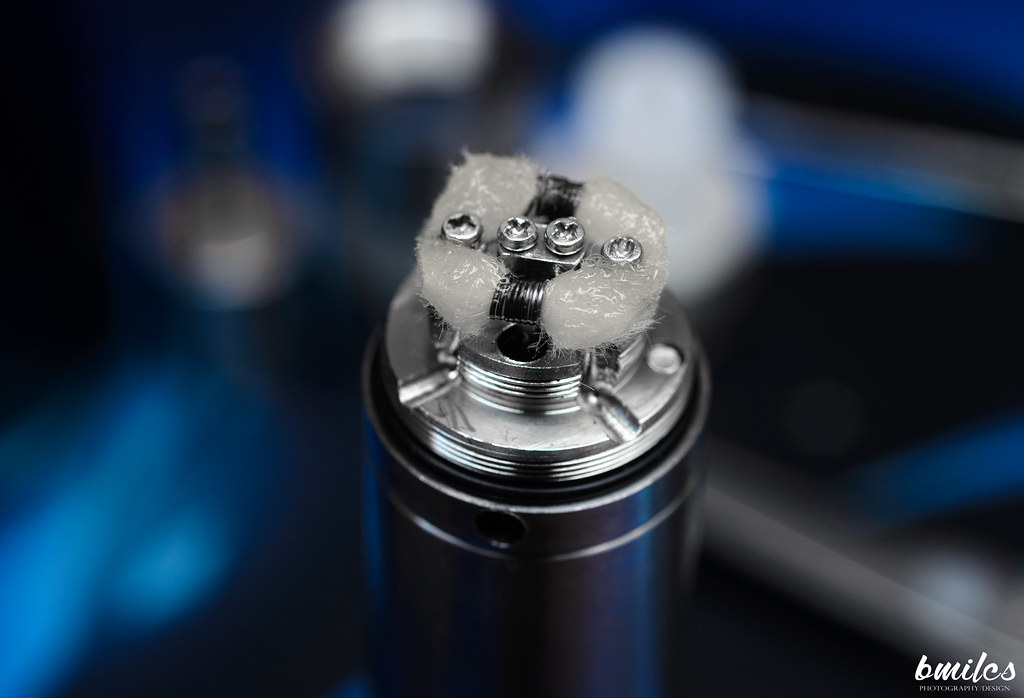
The final and very important step!! Apply juice like a paint brush to your wick so it's nice and wet. Here are my key tips:
1) Keep cotton OUT of the juice channels, leaving some on top of it like a bottle cap.
2) Keep cotton AWAY from the airhole. Don't let it sag over into it.
3) Keep ALL cotton WITHIN the deck, allowing none to extend out beyond the posts. This will leave your wick perfectly in tact when you screw on the chamber.
*AVOID COMPRESSION* Because you gave it that stylish hair cut, it won't require much cramming to fit all the cotton in there.
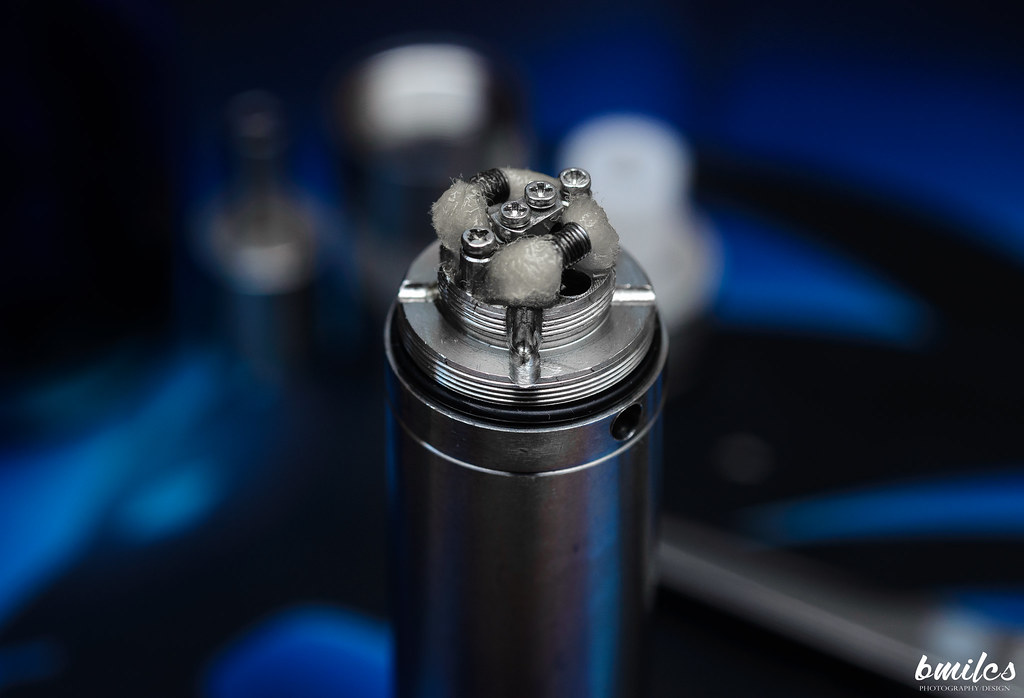
Take your screwdriver. Use the edge of the coil and the outer posts as a guide to slightly push the cotton back in place (*I literally make contact with the side of the post and coil edge with my screwdriver, and lightly press downward*). You want the cotton to sits over the channels, and none left in the channel itself. If any is falling into them, push it back upwards.
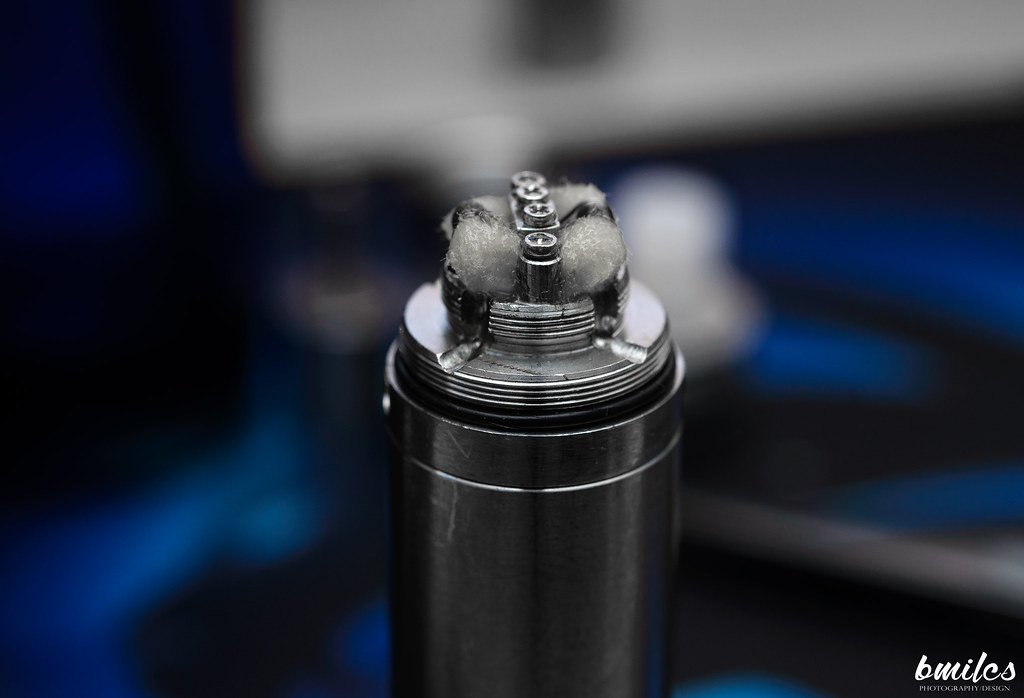
Check the airhole and move any cotton tipping over into it.
Lastly --- Take a birdseye view and make sure the cotton is inside the deck and won't be affected whatsoever once the chamber is screwed into place.
Screw the chamber, tank, and top cap on, fill it up and boom. You're good to go. =]
I hope this guide was clear enough to understand and helps anyone in need of guidance such as I was.
- - - - - - - - - - - - - - - - - - - - - - - - - - - - - - - - - - - - - - - - - - - - - - - -
EDITED: Typos and grammar suckage.
Pictured: Modified Orchid v4 with 3mm airholes and widened channels
DISCLAIMER: I've suffered, as most do, with dry hits, leaking and all sorts of wicking issues with RTA's. They're touchy and require consistency! With my guide below, I've developed an easily repeatable and effective way to wick your RTA for HIGH VG juices. I am a DIY'er at heart and regularly vape 85-90% VG blends. After watching SEVERAL videos, reading several guides and posting countless times for help with issues, this is what I've come up with over the past few weeks in my transition to RTA's from RDA's. My coils, modifications or style is NOT perfect... and that's what's GREAT about this technique. It doesn't require perfection in order to work beautifully. I'm not claiming this is original but this is what I've taken from others and adapted to work for my needs. I wanted to give back to the community that has helped me out immensely with getting off the stinkies and here it is --- a guide that took 3 hours lol. Feedback welcome!
- - - - - - - - - - - - - - - - - - - - - - - - - - - - - - - - - - - - - - - - - - - - - - - -
First off, I start with a basic coil. 7-8 wrap 2mm ID 28g dual coil. I love airflow and circulation as I feel it intensifies flavor and vapor production. Position the coils over the airhole with a good amount of space underneath, outside and inside of the coil so air can flow everywhere freely.
- - - - - - - - - - - - - - - - - - - - - - - - - - - - - - - - - - - - - - - - - - - - - - - -
- - - - - - - - - - - - - - - - - - - - - - - - - - - - - - - - - - - - - - - - - - - - - - - -
I use organic Japanese cotton pads from A*****.com. They're very popular, inexpensive and work great. I generally cut off an even piece, just enough to make sure it fits snug inside the coil but not too tight. You'll figure this out over time. I remove both exterior "sheets" of the pad, revealing only the stringy fresh stuff inside. I use my fingers, place them in the middle of the cotton strip and lightly press/massage outwards. This will slightly condense and shape it properly as pictured above. I do not roll or twist it whatsoever, but use my fingers to slightly straighten out the fibers like a comb would. A little goes a long way; keep it fluffy and nicey nice.
Using your thumb and index finger, Twist the outer ends of the wick so they're easy to insert into the coil. Snip the cotton evenly in half and you're ready to go!
- - - - - - - - - - - - - - - - - - - - - - - - - - - - - - - - - - - - - - - - - - - - - - - -
- - - - - - - - - - - - - - - - - - - - - - - - - - - - - - - - - - - - - - - - - - - - - - - -
Ok here is where the magic happens. Remember those bowl hair cuts back in the day? Use your the upper most deck as your guide. Place your scissors underneath the cotton and move them into the corner below deck so that it's touching ( _| ). Snip the cotton flush with edge. Start with a nice straight cut, perpendicular with the posts (picture #1). Then go around the entire deck and snip any extra cotton that protrudes past the top deck in any way. In other words, keep the scissors touching metal and rotate the atty as you cut it into shape.
The key here is not compressing the cotton. You left it nice and fluffy in the first few steps, and you want to leave it that way. Shape it with your scissors and then you have minimal tucking and pushing to do later.
- - - - - - - - - - - - - - - - - - - - - - - - - - - - - - - - - - - - - - - - - - - - - - - -
- - - - - - - - - - - - - - - - - - - - - - - - - - - - - - - - - - - - - - - - - - - - - - - -
The final and very important step!! Apply juice like a paint brush to your wick so it's nice and wet. Here are my key tips:
1) Keep cotton OUT of the juice channels, leaving some on top of it like a bottle cap.
2) Keep cotton AWAY from the airhole. Don't let it sag over into it.
3) Keep ALL cotton WITHIN the deck, allowing none to extend out beyond the posts. This will leave your wick perfectly in tact when you screw on the chamber.
*AVOID COMPRESSION* Because you gave it that stylish hair cut, it won't require much cramming to fit all the cotton in there.
Take your screwdriver. Use the edge of the coil and the outer posts as a guide to slightly push the cotton back in place (*I literally make contact with the side of the post and coil edge with my screwdriver, and lightly press downward*). You want the cotton to sits over the channels, and none left in the channel itself. If any is falling into them, push it back upwards.
Check the airhole and move any cotton tipping over into it.
Lastly --- Take a birdseye view and make sure the cotton is inside the deck and won't be affected whatsoever once the chamber is screwed into place.
Screw the chamber, tank, and top cap on, fill it up and boom. You're good to go. =]
I hope this guide was clear enough to understand and helps anyone in need of guidance such as I was.
- - - - - - - - - - - - - - - - - - - - - - - - - - - - - - - - - - - - - - - - - - - - - - - -
EDITED: Typos and grammar suckage.
Last edited:
")