Become a Patron!

Vaptio N1 Pro a 240W 2/3 Battery Mod Review by KingPin!

KingPin!

In my defence, I was left unsupervised ^^
VU Donator
Platinum Contributor
Member For 4 Years
VU Challenge Team
Reviewer
Hi Folks,
I received the N1 Pro from Vaptio. I will convey my thoughts and do my very best to provide you with enough information so you can reach your own conclusion on the product, so no recommendations from me, just a final conclusion on my personal experience with it. Please ask questions in the below if I've missed anything you want to know.

IMG_2006.JPG
Vaptio N1 Pro 240W

  • Height: 92.2mm
  • Width: 55mm
  • Depth: 40mm (2 x 18650 batteries), 45mm (3 x 18650 batteries)
  • Weight: 322g (2 x 18650 batteries), 402g (3 x 18650 batteries)
  • 0.96inch Colour TFT (LCD) display
  • Micro USB charging port (5V 1A charging)
  • Spring loaded 510 connection
  • Modes include: Wattage, Voltage, Bypass, Temp Control, Custom Profile Settings
  • Wattage Range 1-200W (2 batteries), 1-240W (3 Batteries) Output
  • Functional Resistance Range: 0.1 – 3.5 ohms
  • Continuous Fire time: (adjustable) 5s -10s
  • Dual/Triple 18650 batteries Series mod
  • Temperature Control Range: 200 – 600F / 100 – 315C
  • Low Battery Protection
  • Short Circuit Protection
  • Overheat Board Protection
  • Overcharge Protection
  • Reverse Polarity Protection
  • Passthrough Vaping
N1 Product Page ($74.40) : https://vaptio.com/catalogue/n1-pro-240w-mod_100/

Available Colours;
Kit options: Black & Gold, White & Gold, Black & Red, White & Red

What's included in the Box?
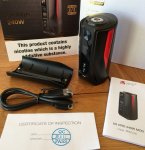
  • N1 Pro mod
  • 2 & 3 battery doors
  • USB cable
  • User Manual
  • Inspection card
IMG_2008.JPG

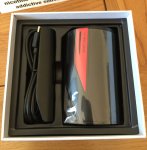
Presentation wise the graphics on the sleeve are ok, Vaptio could have been a little bit more creative in my opinion. The scratch and sniff is on the bottom along with content details. Upon opening the box the mod is presented in the same plastic tray Vaptio seem to be using on everything lately which I just don’t like especially for its price point.
IMG_2007.JPG

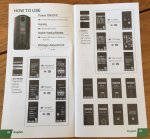
One other thing which needs a special mention is the instruction manual, if you can call it that, is below par. I read it and was none the wiser about how to use the mod. So I guess they think it’s really intuitive to use. I do wish some of these companies put a bit more effort into their presentation and manuals after all it’s all part of the initial user experience. Vaptio aren’t the only culprit in this area either.
IMG_2027.JPG

Looks, Build Quality & Impressions

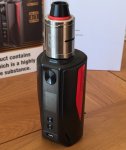
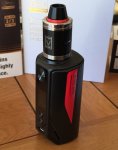
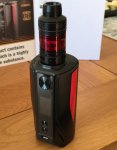
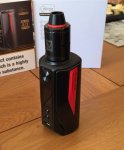
Ok box aside it’s a great looking mod, originally Vaptio were going to pair this with the Turbo RDTA for the kit version, but they have since changed their mind. It’s now been paired with the Frogman tank https://vaptio.com/catalogue/n1-pro-240w-kit_119/. I’ve reviewed both of these Atomisers before and liked them both, here are a few pics with the mod.
IMG_2028.JPG
IMG_2034.JPG
IMG_2036.JPG
IMG_2041.JPG
 
Last edited:

KingPin!

In my defence, I was left unsupervised ^^
VU Donator
Platinum Contributor
Member For 4 Years
VU Challenge Team
Reviewer
The mod itself is substantial both in weight and size 322g/402g (and that’s without an atomiser attached) it’s a brick. The Lost Vapes Drone BF is 381g if that helps put it into perspective as that is also a lump. I don’t own the Wisemec Reuleaux 2/3, but a mate at work has it and with the 3 battery combo they feel roughly the same in weight in the hand. So you know you are holding this especially in the 3 battery configuration.

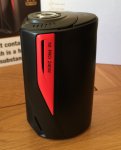
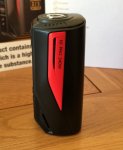
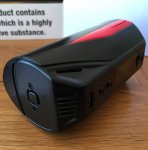
From what I can see there are very few plastic parts used in the mods construction. The battery tray, clips on top of the battery doors, the venting panels on the sides and obviously the screen and it’s panel, everything else is metal even the buttons. I don’t worry that this mod is going to break easily, in fact it’s probably the most solid regulated mod I’ve used to date.

IMG_2014.JPG

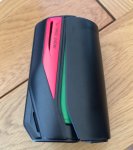
Styling wise it has clean bold lines, although I would say because of their angles they give me the impression that any atomiser I put on top sits pissed, but it’s an illusion, it does actually sit straight or at least I’m pretty sure it does!. The colour options are great, love the red and black it’s my favourite combo and my colour combo of choice for most mods. I’ve not had any scratches or chips since I’ve been using this mod, although I’ve treated it well for the most part.

Ergonomically both in the 2 and 3 battery configuration it’s comfortable to hold and use no matter whether you prefer a thumb or finger firing position, both work well. If you have smaller hands you aren’t going to like the 3 battery option as it’s chunky in the hand and rounded as opposed to a sharper V shape that sits better in the fleshy bit between your thumb and index finger. I personally didn’t have a problem with it however using two batteries is much easier to use and hold.

IMG_2019.JPG
IMG_2020.JPG

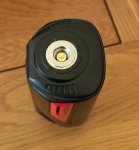
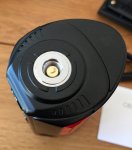
The 510 has good threading with a decent throw on the gold plated pin. Some atomisers I’ve had to push down slightly to engage the threads, with others it seems fine. It seats my atomisers “almost” flush. I say “almost” since the plate design means there is always a 2mm gap for any atty over 22mm which is a real shame. Don’t get me wrong the atomiser is stable on top but if you are OCD about this sort of thing, then you are going to have a problem with this mod.

IMG_2021.JPG

IMG_2010.JPG

I’ve both yanked on my attached atomiser and shook the mod holding the atomiser or just often picked the tank up first and the 510 hasn’t budged in a month.

The button layout is great, there’s been no accidental changing of wattages or any other function, no misfiring or sticky buttons. There is no rattling when I shake the mod. So all in all pleased here, except for the down button on mine, which is slightly off centre and has a little bit of play side to side. However it’s still perfectly functional.

I like to test controls before I read the manual because a mod should be intuitive to use. There were some parts that took a little bit of figuring out but nothing major worth mentioning. As I said before it would have been helpful if Vaptio put some more effort into the instruction manual.

The screen is nice and bright when indoors or at night, but not bright enough in daylight. I cannot see a thing without cupping my hands over the screen which is a shame. Also I noticed there is 1 dead pixel on the screen after turning it on for the first time, however it hasn’t interfered with anything, but it shouldn’t have slipped past QC.

IMG_2025.JPG
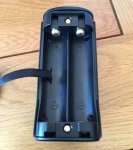
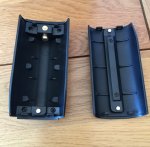
The battery door is one of the best I’ve seen on a mod. I just can’t see it going anywhere once it’s locked into place and both options have great alignment to the mod itself. I much prefer this design to a magnet style. When the mod is brand new it will take some time to break in, in terms of clicking into place so do be a little patient with it to start with. The door release button is located under the mod and pushing it essentially ejects the bottom of the door which you can then remove. The button itself is recessed ensuring it sits flush so it doesn’t cause the mod to wobble when standing it upon a flat surface.

IMG_2012.JPG

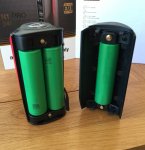
There are two things to note about this door design. First make sure the ribbon, used to pull the batteries out, doesn’t get in the way when clicking the door into place as it will stop it engaging properly. Second you need to ensure you engage the clips at the top of either door first when offering it up to the mod. Whilst I’m on this subject, the mod will not turn on with the doors detached. Both the 2 and 3 option have contacts on them which need to complete the circuit first.

IMG_2018.JPG

IMG_2015.JPG
When using the 3 battery configuration you have to place the battery inside the door before you connect it to the mod. It can be a little tricky to get it in and out, so be careful as snagging the wrap and damaging it will be easy to do. The battery contacts on the main battery sled are excellent, it’s a very snug fit though so do take care inserting and removing the batteries to ensure you don’t damage the wraps in here either. Finally battery orientation is clearly marked on everything.

IMG_2016.JPG

The USB charge cable seems ok probably a bit thin truth be told, being this mod is supposedly capable of 1A charging but it does do the job. The mod does support (pass through) vaping while charging, happy days!

The mod is grippy enough only if there is no juice on it! I’m useless when it comes to over dripping and it does lose its grip and become slick if you get any on the mod or have any on your hands. Even when wiping away said juice. I did find myself wiping it down fairly frequently.

Whilst on the subject of messy dripping or leaking atomiser, the side venting does bother me. If you get juice in there you’re going to end up damaging the board. I’d prefer it if the vents were facing downwards

For low battery cut off I recorded a low point of 2.99v during my time testing, most of the time it’s between 3 – 3.4V. The batteries seems to last a fair amount of time on here (roughly the same as the Aspire Speeder which has a chip efficiency of 95%) in the 2 battery configuration, obviously with 3 in they last a lot longer

Finally drawing this section to a close I haven’t found any links to update the firmware. Vaptio need to sort this on their website and I’ve raised this with them directly. I’m currently using v1 as I write this review, no idea if there’s an update or not as of now.
 
Last edited:

KingPin!

In my defence, I was left unsupervised ^^
VU Donator
Platinum Contributor
Member For 4 Years
VU Challenge Team
Reviewer
Functions

The N1 Pro has most of the modes available to regulated mods; Temperature Control, Bypass, Wattage, Power Curve.

IMG_2104.jpg

IMG_2104.jpg

There is a no delay when firing which I like a lot. I have noticed in both 2 and 3 battery configurations the mod seems to favour drawing on the battery furthest to the right first, but does balance after time.

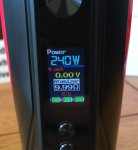
There are always details of the voltage output, coil resistance and each batteries life on the screen. Otherwise each mode differs slightly. When using 2 batteries the 3rd battery slot remains red, perhaps they could have left it unlit altogether?

There is a part on the screen under the resistance which states “00s” I have absolutely no idea what its purpose is as it never changes or doesn’t anything? I’m assuming this was meant to tell me how many seconds into a draw I am. Also to note there is no information recorded regarding a puff counter, I know some people like this. I personally never look at it or care about that detail on any of my other mods so I’m not going to list it as a con for me but I wanted to point it out anyway.

The menu system is a little bit clunky, I haven’t found many short cuts using the N1. I always feel like it takes ages drilling into things to sort settings out. Holding the fire button in menu takes me back to where I only have to press exit once.
  • Fire Button = used to Fire, Confirm or to Select
  • Click Fire Button 5 Times = Lock/Unlock Device
  • Click Fire Button 3 Times = Access the menu
  • Pressing “+” or “-“ = Increase or decrease settings
  • Holding Fire Button for 3s when locked = Turn off device
  • Click Fire Button 5 times when mod is off = Turn system on

Menu

Out Mode
  • Regulated = Wattage Mode
  • Bypass
  • Temper = Temperature Control
  • Custom = Wattage Curves
  • ScreenOFF = Stealth mode (if selected click fire button 3 times to undo)
System
  • T unitze = set .F or .C for the screen (you cannot cycle round in TC mode)
  • TCR Data = that symbol means “parts per mille” (divide the TCR value by 1000 so 0.88 is = 0.00088)
  • Set Custom = (option to set 3 different curves. Once inside press fire button to make line go blue, then set wattage using + / -, press fire button again to turn line red. Then you can move the line to the next point using + / -. Each line movement after 0 (1-20) represents half a second.
  • Smoke Time = how much time before its cut out for you 5 – 10 seconds
  • Sleep Time = I’m not entirely sure. My guess is it’s supposed to represent how long before screen goes off? But it doesn’t seem to work.

Wattage Mode

The screen cycles in 1w increments there is no fine tuning with decimal selection on this mode. It cycled through the wattages quickly enough. When you reach max or min settings it will not cycle back around by clicking up or down again which is a pain.

Wattage mode feels pretty accurate compared with my DNA mod possibly a few watts under displayed amount but certainly packs a punch. Most of my vaping occurs between the 45-120w mark and at these ranges it was pretty spot on to me. Going above 120w using my VTC5a batteries it really did feel like is was getting up there on the 2 battery configuration though they get drained pretty quickly. I was using my 30q’s for 3 battery mode so didn’t push it above 180w. I’d recommend 0.15 down to 0.1ohm for the full wattage range based on my experience with this device.

Once batteries get to about half charge I do start to notice output falling off a little not so much as the Aspire Speeder though. Once batteries get to third life I felt the need to change them as output power becomes noticeably more restricted.

Bypass Mode

Same as a Voltage mode except it hits with whatever voltage it can based on available battery level left, there is no control here. When I was trying to use a 0.16 ohm coil on my 2 battery set up it quickly wimped out and refused to fire shortly after full charge. Before that point though it hits like a truck. I did try the 3 battery configuration on this with a low ohm coil very briefly and holy crap way too much for me, it was like an instant lung BBQ time!

Bypass mode is supposed to represent a mechanical device. All safety features are still active in the background and it works exactly the same as regulated device with max current drain at low battery cut off. It’s just simulating a mechanical mod vape like experience which to me is a bit gimmicky so haven’t really used it.

Temp Control & Manual TCR

In standard Temp Control mode you have the options of Stainless Steel 316L (SS), Nickel (NI200), Titanium (Ti) and Nichrome (Ni80) as standard. When in the system menu you cannot adjust TCR only the wattage it uses to heat. I’m actually quite excited here. Notice I listed Nichrome available as a standard option which I used in my builds a lot!

I tried Kanthal coils to see if it would kick me out of temp control – it did not which is a con.

The mod doesn’t ask you if a new atomiser is attached when selecting the temp mode. Be sure to unscrew and re-attach the atomiser at room temperature before using TC.

The resistance remains at its original value on the screen as you heat the coil, which is a shame I like seeing live resistance changes like on my DNA mod.

You have to access the menu to change between the coil materials, or to change memory mode, there is no quick way to change anything, which was the clunky part of the menu I mentioned earlier. It’s bloody irritating to be honest especially when I’m trying to test out different atomisers with different builds in.

When you go into “System”, then “Manual TCR Data” within the menu; along with the standard settings there are 3 memory modes to customise. Once inside you can adjust the TCR and Wattage. The TCR value isn’t a percentage symbol it means “parts per mille” (or divide by 1000), ShowerHead on Vaping Underground corrected my ignorance after my speeder review where I was thinking at the time it was a percentage. The N1 Pro allows a value between 0.10 through to 9.99.

Once you have finished setting the wattage and TCR, going back to the main screen will allow you to adjust temperature. It does not cycle round, and if you want to change between Centigrade and Fahrenheit, yep you guessed back in the menu you go! As I said bloody infuriating.

Right down to business how does it do in TC. First I’ll go over the standard settings, I don’t really use Titanium or Ni200 so my experience is from SS316L and NI80. The standard settings for both of these materials works well, more so SS which is very smooth along the lines of the Aspire Speeder. NI80 was a little choppy at temp, but it’s not Smok TC terrible by any measure it’s still a decent TC vape.

Using the custom TCR settings in memory mode my standard settings seemed very lackluster and disappointing, and I struggled to hone them in. So I reached out to Vaptio to see if they could advise.

The best TCR settings on here are 0.98 - SS316, 5.4 – TI, 3.4 – NI200, 0.15 – NI80. Using this guidance I got a really decent vape and surprisingly NI80 wasn’t noticeably choppy either, very impressed. Perhaps in future Vaptio could provide some actual guidance in their user manual though.

I’d say the temperature setting is off by a fair amount compared to my DNA device. I had to raise it a good 20.F to match the temp id set on that on my Drone BF.

I never got a burnt hit on either material, the mod would reduce wattage output significantly when it detected the cotton was dry and resistance increased.

I took 5 second pulls to test TC and it was a consistent satisfying vape throughout. It’s a shame it didn’t have a pre heat on top of the standard heating to give me a sense of more customisation but for its price point it can do TC as well as well as the Aspire Speeder which I was equally impressed with.
 
Last edited:

KingPin!

In my defence, I was left unsupervised ^^
VU Donator
Platinum Contributor
Member For 4 Years
VU Challenge Team
Reviewer
Custom Profile Settings (wattage power curve manual adjustments)

After having great success with custom power curves on the Aspire Speeder I wanted to see how the N1 Pro stacked up. Again the menu system is cumbersome and I dislike the graphic of the curve on the main screen, I can’t even see the line with the grey background, a strange choice to be sure.

You have 3 memory settings to utilise if you run different atomisers on top or use different builds. When you are in the main screen you can select which custom curve you want by pressing + / - . As I mentioned earlier to set a customer curve press the fire button three times, select “System”, select “Set Custom”;

Once inside you can adjust two things in here “time” and “wattage” but that’s really all you need. Press the fire button to make the line on the graph go blue, then set wattage using + / -. Press the fire button again to turn line red. Once it’s red you can move the line to the next point using + / -. Each line movement represents half a second (after the initial zero point)

Once I got of my soap box about the menu system and endured the time it took to set it all up I actually really enjoyed it. Ok it’s not as easy to set up as the speeder nor is it going to be any good for someone who’s colour blind. But the actual vape experience is very good in that it follows the profile lines well.

Recharging and Battery

So the N1 Pro is supposed to be capable of 1A charging.

This wasn’t my experience though 8 hours 18 minutes. Two batteries from 3V, took the mod off charge at this point as I was losing the will a little. Both batteries were at 4.16V not even in the final stages!

Three Batteries from 3V was even worse 9 hours and 47 minutes. Again lost the will so took it off charge. The batteries were at 4.14V (+/- 0.01V variance)

That’s is an insane amount of time to charge batteries! Definitely not a time I’d expect to see for 1A charging. Having said that it did balance the charge, after putting them on my external charger to finish them up.

The mod remained cool throughout the charge process.

There is very little detail on the screen as to what’s going on so I couldn’t take any notes other than time it took. In all honesty after the length two batteries took I would say stick to external charging unless they can sort something with a firmware update in the future.

Things I Feel Could Be Improved
  1. Package presentation was lacking substance and the manual content was poor.
  2. The menu system is annoying due to lack of shortcuts.
  3. Small 2mm gap between atomiser base and the mod.
  4. Surface does get slippery if you get juice on it, requires a wipe regularly.
  5. Low battery cut off could be a little bit higher than 2.99v (firmware update could fix this).
  6. 1 dead pixel on the screen and the down button was a little off centre.
  7. What’s the purpose of that “00s” on the front screen it doesn’t change?
  8. Charging seemed to take forever, it’s not charging at 1A.
  9. Discharge seems to favour one battery over the other at least to start with.
  10. Temp control didn’t kick me out when using Kanthal coils.
  11. Vaptio need to give advice with regards to manual TCR settings (thankfully I’ve got hold of the info for you)
  12. No idea where to update firmware.
  13. Would have preferred downward facing venting, watch out for major juice leaks!

Things I Feel It Does Well
  1. Great styling and paintwork is excellent.
  2. Comfortable to use and hold, button layout is very good.
  3. Solid it’s going to weather some beatings.
  4. 510 is quality stable readings throughout my testing.
  5. All modes work really well so it’s a good all-rounder.
  6. It offers Nichrome (NI80) TC as standard, something not often seen as standard.
  7. Intuitive menu system (I managed to figure it out quickly anyway).
  8. Good price point for what’s on offer.
  9. Tactile buttons and no rattling.
  10. Battery doors are excellent and are very secure once attached, for both 2/3 configurations.
  11. 3 Batteries seem to last for ages (more than others ive tried) especially on temp control.
  12. Excellent venting

Final Conclusion

Most of my user experience annoyances evolve around the lack of short cuts and navigation to change settings with the N1 Pro. There’s a couple of QC issues that should have been picked up though, theres no excuse for that. Finally some of my suggested improvements might well be sorted with firmware updates in the future (V1.0 this review was based on).

Despite my annoyances though this is still a solid mod, literally and figuratively speaking, It has the versatility to offer dual and tri battery options without either being an afterthought. All the modes work well and I can’t complain about this aspect at all. No dodgy resistance jumping, the 510 stood fast after a month. Buttons are as good as the day I got it out of the box and the battery door has begun to break in properly now.

Once I went through and set everything up after my rounds of testing on different atomisers it was a pleasure to use, just a shame it’s so damn heavy for out and about.

IMG_1999.JPG

Thank you for taking the time to read this review! I hope this information serves you well until next time KingPin!
 
Last edited:

VU Sponsors

Top