KingPin!
In my defence, I was left unsupervised ^^
VU Donator
Platinum Contributor
Member For 4 Years
VU Challenge Team
Reviewer
Hi Folks,
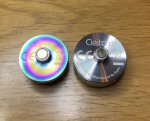
According to Greek mythology “Cleito” was the mother of Atlas, the first king of “Atlantis” (which also happens to be a former tank in the Aspire family line). Whilst it’s no secret Aspire have achieved success with the Cleitos, I have wanted to put these through their paces for some time, to see if they do indeed live up to their reputation. Aspire sent the tanks through and I purchased the aftermarket items in this review.
As usual I don’t like to make recommendations so consider this a collection of my thoughts and findings to bolster your research should you be interested in either of these. I know they’ve been out for a while now but reviews don’t always have to be about the new shiny stuff.
So what stock items do you get with the Cleito Exo?
Whilst neither of these are particularly forthcoming with spares, ill focus instead on the other aspect which is compatibility. Whilst these two are not compatible with each other in any way, be it coils, glass sections or drip tips, the Exo is compatible with the original Clietio tank, in that it can use the same coils which are readily available as well as utilise its same RBA deck. You can also purchase resin top caps for the Exo directly from Aspire or from a whole host of aftermarket vendors.
When it comes to the 120 it uses its own coils and RBA deck which won’t fit the Exo or the Original Cleito. You can purchase a “Fat Boy” 5ml glass tank as well as a host of aftermarket resin top caps.
Build Quality and impressions
Exo Dimensions
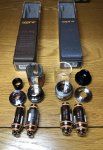
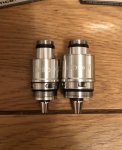
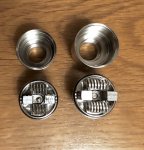
Simplicity is as the heart of the design for these tanks. Most sub ohm tanks comprise of a coil then a separate chamber/chimney section which then attaches to the coil, however on the Cleitos the coil itself combines these features which means fewer parts when dissembled (4 parts or 5 including coil) translating to fewer stress points and O-rings perishing to worry about compared to some other tanks.
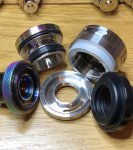
The finish is better on the Exo over the 120 at least on mine. I had small machine scratches on the base of the 120, although I will say the top of my Exo tank section had a couple of stress points on the plastic perhaps where the top cap was really tight on its arrival.
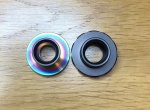
I would say threading is better on the Exo, for a start its top cap is metal rather than the Delrin on the 120. Being these are both unscrewing top fill designs I’m concerned about early wear and ability to cross thread on the 120. Having said that the metal top cap on the Exo will conduct heat when vaping much more so than the Delrin especially since it’s connected to the coil itself. I would like to have seen a hybrid between the two with metal threads inside the Delrin top cap to have a clear decider on this point. Since there isn’t this option and the fact you don’t get a spare top cap with the 120 ill have to give it to the Exo.
"Assembly" in terms of parts fitting together with no gaps between pieces I’d give both the thumbs up here no issues with either. The O-rings are nice and chunky holding everything in place, and should they perish you get spares in the kits as well.
I won’t talk about looks you can be the judge of that, but in terms of durability the Exo will take more of a beating than the 120 will especially with it being mainly a metal construction throughout. I would say the downside on the Exo is it’s easier to miss when it’s time to refill leading to a potential unexpected dry hit (as I found). This is because of the writing on the window, combine that with writing on the coil and it’s really easy to miss where the level is at unless using dark liquid or vaping in a well-lit area.
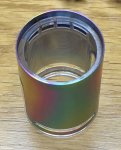
There is no glass on the Exo (unlike the 120) rather it utilises PCTG plastic inside the chamber and for the airflow channels. PTCG is resistant to chemicals while being durable with a pretty decent heat resistance; however over a longer period of time I’d still rather have glass especially if I’m running through any citric juices and cooking the coils at higher temperatures on and off. Being it’s solely reliant on hard plastic I found it to make the airflow somewhat turbulent compared to other materials I’ve tried with top airflow.
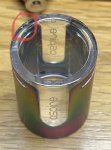
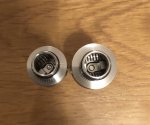
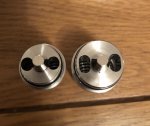
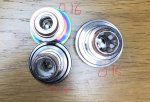
The Exo is designed to be leak-proof so the airflow holes are located at the top of the tank. As you inhale air travels between a gaps between inner plastic linings down to a smaller set of outlet holes under the coil, from there it travels round and back up through the centre of the coil. Whilst the design here is great you have to let Aspire take control as you cannot adjust the airflow. I’m pretty pleased with it for the most part (think of it as a slightly restricted draw roughly half way on the AFC of the Cleito 120) although I would say Aspire should look into swappable items to restrict draw if they were to keep using non-adjustable top airflow. Happy to report I’ve had no leaking from either the 0.16 or 0.4 ohm coil provided.
The 120 is in stark contrast, it runs with the traditional airflow ring at the bottom which you can adjust between very airy to very restricted putting you in control. I have found the 120 to suffer from “occasional” condensation leaking using the premade coils. Also perhaps a minor point but the airflow control ring is free turning which does make it difficult to remove the top refill section when disassembling.
Both have Top fill designs although with the Exo there is no refill ring so you do need to watch not to overfill or you’ll suffer gurgling and spitting issues later on. The 120 does have a refill ring with a well to catch slight overfill. I found the 120’s refill port to be a little on the tight side, they could have definitely made this a few mm wider.
Finally Drip tip designs are very similar with the 120 offering a wider bore, but they are both comfortable to use. I would have liked the Exo’s drip tip be a tad taller with its metal top cap. It’s worth noting here the 120’s drip tip differs to the exo as an all in one design with the top cap.
How’s the pre made coil vape experience
Using the 0.16 coils first side by side I’d say the Exo had the better flavour of the 2. Both tanks took the equivalent of 8ml of liquid to break their coils in.
I found the Exo to be a somewhat dry vape compared to the 120 although even the 120 is a little dry in comparison to other tanks I’ve used. I’m putting this down to the length of the coil and a lack of chamber containing condensation. Being I was able to adjust the 120’s airflow I felt like I could get a better hit from it without having to ramp up the wattage.
The 0.16 coil makes the Exo TPD complaint and you really notice having to refill its 2ml capacity often compared to using the 120’s 4ml stock size (or 5ml with the fatboy glass).
I was able to push the 120’s 0.16 coil to a much higher wattage than the Exo’s equivalent because the vape became too hot to handle. In fact I even settled for normal vaping 30 watts higher on the Cleito 120 at 110W over the Exo’s 80W.
I did experience vapour/juice lock at times on the 120 using 75% VG liquid leading to dry hits even with juice in the tank. I had poked holes in the cotton and undid the top cap slightly but it didn’t address the issue. What worked for me was replacing the 4ml tank with the separate 5ml “Fat Boy” glass. I’m assuming here that’s because there is more juice pressure around the cotton keeping it nicely saturated as I wasn’t noticing air bubbles being trapped. Since I changed it over, the issue never re-occurred, and I noticed it also kept the tank cooler under chain vaping conditions.
I never experienced any vapour/juice lock issues on the Exo’s stock coils.
The Exo also comes with a 0.4 coil. I switched over to that and again vaped against the 120’s 0.16 coil. I had high hopes for the 0.4 because of the capacity increase from 2ml to 3.5ml and at the same time expected a further restriction to the draw (being it’s thinner inside), but it didn’t seem to adjust airflow at all, in fact I found it more airy than the 0.16! I have no idea whether I had a janky coil in the pack but it I was getting some Spitback and I could only get an “ok” flavoured vape once I wacked it up to 60W or above at which point I could start to detect a dry hit when chain vaping so actually turned out to be a disappointment.
I found both tanks to be thirsty expect to refill often. Finally in this section I found the coil life to be significantly less using the Exo’s 0.4 coil compared to the 0.16 at just over a week of solid use. Using the 0.16 coil both went on for much longer into 3 weeks solid use.
According to Greek mythology “Cleito” was the mother of Atlas, the first king of “Atlantis” (which also happens to be a former tank in the Aspire family line). Whilst it’s no secret Aspire have achieved success with the Cleitos, I have wanted to put these through their paces for some time, to see if they do indeed live up to their reputation. Aspire sent the tanks through and I purchased the aftermarket items in this review.
As usual I don’t like to make recommendations so consider this a collection of my thoughts and findings to bolster your research should you be interested in either of these. I know they’ve been out for a while now but reviews don’t always have to be about the new shiny stuff.
So what stock items do you get with the Cleito Exo?
- x1 Cleito EXO tank (0.16 TPD compliant coil pre-installed, Kanthal 60-100W)
- x1 Spare Cleito EXO Coil (0.4 40-60w, Kanthal)
- x1 Spare Drip Tip.
- x2 Additional 0-rings.
- x1 Warranty Card.
- x1 User Manual.
- x1 Aspire Cleito 120w Tank.
- X2 Cleito Coils (0.16ohm Kanthal, 60-120W).
- x1 User Manual.
- x1 Warranty Card
- x1 Aspire Vape Band
Whilst neither of these are particularly forthcoming with spares, ill focus instead on the other aspect which is compatibility. Whilst these two are not compatible with each other in any way, be it coils, glass sections or drip tips, the Exo is compatible with the original Clietio tank, in that it can use the same coils which are readily available as well as utilise its same RBA deck. You can also purchase resin top caps for the Exo directly from Aspire or from a whole host of aftermarket vendors.
When it comes to the 120 it uses its own coils and RBA deck which won’t fit the Exo or the Original Cleito. You can purchase a “Fat Boy” 5ml glass tank as well as a host of aftermarket resin top caps.
Build Quality and impressions
Exo Dimensions
- Height 57mm
- Diameter 23.5mm
- Capacity 2ml (with the 0.16 coil) or 3.5ml with the 0.4 coil
- Materials in construction: plastic (PCTG) and SS 304 (tank section)
- Drip Tip: Delrin
- Top cap and base: Stainless Steel (SS)304
- Positive Pin: Gold plated SS 304
- Airflow: 2 slotted
- Height: 58mm
- Diameter: 25mm
- Capacity: 4ml
- Glass type: Pyrex
- Base: Stainless Steel (SS)304
- Top Cap: Delrin
- Positive Pin: Gold plated SS 304
- Airflow: 3 slotted

Simplicity is as the heart of the design for these tanks. Most sub ohm tanks comprise of a coil then a separate chamber/chimney section which then attaches to the coil, however on the Cleitos the coil itself combines these features which means fewer parts when dissembled (4 parts or 5 including coil) translating to fewer stress points and O-rings perishing to worry about compared to some other tanks.

The finish is better on the Exo over the 120 at least on mine. I had small machine scratches on the base of the 120, although I will say the top of my Exo tank section had a couple of stress points on the plastic perhaps where the top cap was really tight on its arrival.
I would say threading is better on the Exo, for a start its top cap is metal rather than the Delrin on the 120. Being these are both unscrewing top fill designs I’m concerned about early wear and ability to cross thread on the 120. Having said that the metal top cap on the Exo will conduct heat when vaping much more so than the Delrin especially since it’s connected to the coil itself. I would like to have seen a hybrid between the two with metal threads inside the Delrin top cap to have a clear decider on this point. Since there isn’t this option and the fact you don’t get a spare top cap with the 120 ill have to give it to the Exo.
"Assembly" in terms of parts fitting together with no gaps between pieces I’d give both the thumbs up here no issues with either. The O-rings are nice and chunky holding everything in place, and should they perish you get spares in the kits as well.
I won’t talk about looks you can be the judge of that, but in terms of durability the Exo will take more of a beating than the 120 will especially with it being mainly a metal construction throughout. I would say the downside on the Exo is it’s easier to miss when it’s time to refill leading to a potential unexpected dry hit (as I found). This is because of the writing on the window, combine that with writing on the coil and it’s really easy to miss where the level is at unless using dark liquid or vaping in a well-lit area.
There is no glass on the Exo (unlike the 120) rather it utilises PCTG plastic inside the chamber and for the airflow channels. PTCG is resistant to chemicals while being durable with a pretty decent heat resistance; however over a longer period of time I’d still rather have glass especially if I’m running through any citric juices and cooking the coils at higher temperatures on and off. Being it’s solely reliant on hard plastic I found it to make the airflow somewhat turbulent compared to other materials I’ve tried with top airflow.

The Exo is designed to be leak-proof so the airflow holes are located at the top of the tank. As you inhale air travels between a gaps between inner plastic linings down to a smaller set of outlet holes under the coil, from there it travels round and back up through the centre of the coil. Whilst the design here is great you have to let Aspire take control as you cannot adjust the airflow. I’m pretty pleased with it for the most part (think of it as a slightly restricted draw roughly half way on the AFC of the Cleito 120) although I would say Aspire should look into swappable items to restrict draw if they were to keep using non-adjustable top airflow. Happy to report I’ve had no leaking from either the 0.16 or 0.4 ohm coil provided.
The 120 is in stark contrast, it runs with the traditional airflow ring at the bottom which you can adjust between very airy to very restricted putting you in control. I have found the 120 to suffer from “occasional” condensation leaking using the premade coils. Also perhaps a minor point but the airflow control ring is free turning which does make it difficult to remove the top refill section when disassembling.
Both have Top fill designs although with the Exo there is no refill ring so you do need to watch not to overfill or you’ll suffer gurgling and spitting issues later on. The 120 does have a refill ring with a well to catch slight overfill. I found the 120’s refill port to be a little on the tight side, they could have definitely made this a few mm wider.
Finally Drip tip designs are very similar with the 120 offering a wider bore, but they are both comfortable to use. I would have liked the Exo’s drip tip be a tad taller with its metal top cap. It’s worth noting here the 120’s drip tip differs to the exo as an all in one design with the top cap.

How’s the pre made coil vape experience
Using the 0.16 coils first side by side I’d say the Exo had the better flavour of the 2. Both tanks took the equivalent of 8ml of liquid to break their coils in.
I found the Exo to be a somewhat dry vape compared to the 120 although even the 120 is a little dry in comparison to other tanks I’ve used. I’m putting this down to the length of the coil and a lack of chamber containing condensation. Being I was able to adjust the 120’s airflow I felt like I could get a better hit from it without having to ramp up the wattage.
The 0.16 coil makes the Exo TPD complaint and you really notice having to refill its 2ml capacity often compared to using the 120’s 4ml stock size (or 5ml with the fatboy glass).
I was able to push the 120’s 0.16 coil to a much higher wattage than the Exo’s equivalent because the vape became too hot to handle. In fact I even settled for normal vaping 30 watts higher on the Cleito 120 at 110W over the Exo’s 80W.
I did experience vapour/juice lock at times on the 120 using 75% VG liquid leading to dry hits even with juice in the tank. I had poked holes in the cotton and undid the top cap slightly but it didn’t address the issue. What worked for me was replacing the 4ml tank with the separate 5ml “Fat Boy” glass. I’m assuming here that’s because there is more juice pressure around the cotton keeping it nicely saturated as I wasn’t noticing air bubbles being trapped. Since I changed it over, the issue never re-occurred, and I noticed it also kept the tank cooler under chain vaping conditions.
I never experienced any vapour/juice lock issues on the Exo’s stock coils.
The Exo also comes with a 0.4 coil. I switched over to that and again vaped against the 120’s 0.16 coil. I had high hopes for the 0.4 because of the capacity increase from 2ml to 3.5ml and at the same time expected a further restriction to the draw (being it’s thinner inside), but it didn’t seem to adjust airflow at all, in fact I found it more airy than the 0.16! I have no idea whether I had a janky coil in the pack but it I was getting some Spitback and I could only get an “ok” flavoured vape once I wacked it up to 60W or above at which point I could start to detect a dry hit when chain vaping so actually turned out to be a disappointment.
I found both tanks to be thirsty expect to refill often. Finally in this section I found the coil life to be significantly less using the Exo’s 0.4 coil compared to the 0.16 at just over a week of solid use. Using the 0.16 coil both went on for much longer into 3 weeks solid use.
Last edited:

