KingPin!
In my defence, I was left unsupervised ^^
VU Donator
Platinum Contributor
Member For 4 Years
VU Challenge Team
Reviewer
Hi Folks,
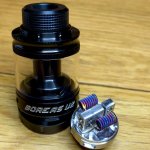
I received the Boreas V2 directly from Augvape. I will convey my thoughts and do my very best to provide you with enough information so you can reach your own conclusion on the product based on my experience. Please ask questions in the below if I've missed anything you want to know.
Being this RTA bears the legendary Boreas name its only right I draw comparisons to the original from time to time being I have both.
Product Overview
Stainless, Black
What's included in the Box?
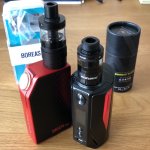
1 x Boreas V2 fully assembled
1 x Spare 5 ml glass
1x Spare 2.5ml glass
1x Spare bits pack (O-rings, 4 x spare screws, 510 drip tip adaptor)
1 x Allen key
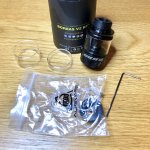
Presentation wise Augvape have stuck with their trusty tube pot. Dig down and try to pull out the pieces is the name of game here. Thankfully the Boreas V2 wasn’t stuck in there like the merlin RDTA was when I bought that. The scratch and sniff sticker is on that back.
Build Quality, Looks & Initial Impressions
The original Boreas was one of the best affordable RTA’s on the market when it launched and remained there for a long time. It’s safe to say even now there’s a deep fan base for it, which I associate myself with.
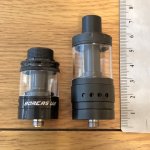
When I heard Augvape were releasing the Boreas V2 it’s fair to say I was a little excited. How were they were going to improve on the original, what were they going to change, will they sort out the Boreas burp, were a few questions that crossed my mind. Unlike some of the Chinese Companies who release a new tank every other week, Augvape tend to take their time to bring out new gear, and when they do its normally pretty damn decent, at least in my experience.
Differences I can see - The original had;
The Drip tip is something Goodyear would have been proud of. Anyone who vapes knows you get a crust forming on your drip tip after a while. Whilst disgusting and not often stated in reviews it’s vaping’s “unfortunate truth” and this thing is going to be a magnet for it. Whilst I feel they got the 8mm bore spot on, and it’s even fairly comfortable to use, I would have preferred two things 1) it needed to be slightly taller 2) lose the tyre treads.
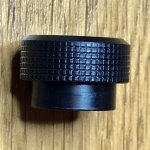
I don’t mind they went with a Delrin 810. It actually suits this tank because of its lower profile and the vapour production its kicks out. However should you prefer to use the trusty old 510, the good news is you can, except hopefully you have your own as they only provide you with an adaptor to use one.
The original Boreas Drip works really well with the tank. It will also accommodates aftermarket drip Goon/Kennedy tips as long as they have a short base. I tried my Half Moon - Goon Tallboy drip tip in here and it didn’t sit flush so watch out for that.
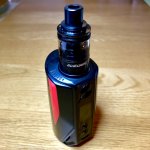
The top cap has very good knurling. This is something the original suffered with especially when it got hot, in that it would sometimes stick if you overtightened it. At least on here you have a fighting chance to get the bugger undone when that happens.
The threading left a little to be desired. It’s an area I felt they had let slip since the original. The top cap is difficult to engage. Additionally the bottom cap (quick access to the deck) doesn’t have the beefy threading the original had either.
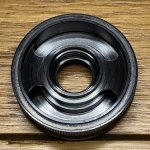
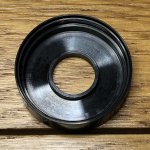
The Juice fill holes are very large. I was able to fit my big twist nozzle bottle at the top and refill it easily. The payoff with the large size is the refill ring is very thin, it feels almost delicate when you strip the tank down.
The glass is thick enough for the 5 ml, however the 2.5 ml is thinner. I managed to crack my small glass soon after I installed it (user error over tightening) so I never really got to give the V2 a proper test run with it. You do get a spare 5ml glass in the box just no spare extra spare 2ml.
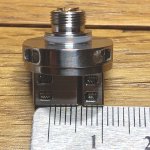
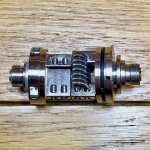
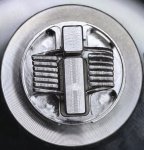
The airflow design on the V2 is the most significant overhaul I can see. You now have dual upward angled slots (8.5mm x 2mm). These airflow inlets are used in conjunction with the Wotofo “Troll” style post system, think of it like a wall on the post block. This creates two chambers within a single chamber, removing central turbulence enhancing the flavour (at least that’s the theory) but coil positioning within those chambers are going to be critical for it to work effectively.
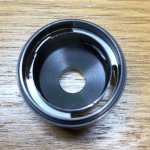
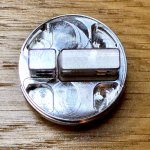
You have the same quick access to the deck employed by the original. Seating the deck on the notches is a lot more difficult than before. I find I have to fiddle about for ages to engage it properly.
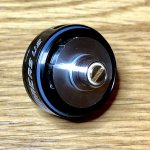
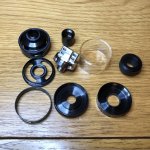
Finally the Tank breaks down in 9 pieces. The paintwork stood up to an ultrasonic cleaning without issue.
I received the Boreas V2 directly from Augvape. I will convey my thoughts and do my very best to provide you with enough information so you can reach your own conclusion on the product based on my experience. Please ask questions in the below if I've missed anything you want to know.
Being this RTA bears the legendary Boreas name its only right I draw comparisons to the original from time to time being I have both.
Product Overview
- 304 stainless Steel
- Diameter: 24mm
- Capacity: 5ml and 2.5ml options
- Height: 41.8mm or 33.1mm (depending on tank option)
- Two Post velocity style build deck (with side mounted hex screws)
- Compatible With 510 & 810 Drip Tips (stock is 9mm wide bore Delrin)
- Glass type: Pyrex
- Support Dual Coil only
- Airflow Slots: 2 adjustable (8mm x 2mm)
- Gold plated 510 positive pin
Stainless, Black
What's included in the Box?
1 x Boreas V2 fully assembled
1 x Spare 5 ml glass
1x Spare 2.5ml glass
1x Spare bits pack (O-rings, 4 x spare screws, 510 drip tip adaptor)
1 x Allen key

Presentation wise Augvape have stuck with their trusty tube pot. Dig down and try to pull out the pieces is the name of game here. Thankfully the Boreas V2 wasn’t stuck in there like the merlin RDTA was when I bought that. The scratch and sniff sticker is on that back.
Build Quality, Looks & Initial Impressions
The original Boreas was one of the best affordable RTA’s on the market when it launched and remained there for a long time. It’s safe to say even now there’s a deep fan base for it, which I associate myself with.

When I heard Augvape were releasing the Boreas V2 it’s fair to say I was a little excited. How were they were going to improve on the original, what were they going to change, will they sort out the Boreas burp, were a few questions that crossed my mind. Unlike some of the Chinese Companies who release a new tank every other week, Augvape tend to take their time to bring out new gear, and when they do its normally pretty damn decent, at least in my experience.
Differences I can see - The original had;
- Juice flow control
- Side airflow direct onto coils
- Big 7ml tank size
- 510 drip tip only and in my opinion the best drip tip ever released still to this day
- The famous refilling technique “the Boreas burp”
- An RDA type wicking approach where you lay the cotton on the deck
- True Velocity style deck
- Industrial styling
- Parts were thicker
- Matt finish on the black
- Airflow ring was hole based so you could maintain air over length of the coil
The Drip tip is something Goodyear would have been proud of. Anyone who vapes knows you get a crust forming on your drip tip after a while. Whilst disgusting and not often stated in reviews it’s vaping’s “unfortunate truth” and this thing is going to be a magnet for it. Whilst I feel they got the 8mm bore spot on, and it’s even fairly comfortable to use, I would have preferred two things 1) it needed to be slightly taller 2) lose the tyre treads.

I don’t mind they went with a Delrin 810. It actually suits this tank because of its lower profile and the vapour production its kicks out. However should you prefer to use the trusty old 510, the good news is you can, except hopefully you have your own as they only provide you with an adaptor to use one.
The original Boreas Drip works really well with the tank. It will also accommodates aftermarket drip Goon/Kennedy tips as long as they have a short base. I tried my Half Moon - Goon Tallboy drip tip in here and it didn’t sit flush so watch out for that.

The top cap has very good knurling. This is something the original suffered with especially when it got hot, in that it would sometimes stick if you overtightened it. At least on here you have a fighting chance to get the bugger undone when that happens.
The threading left a little to be desired. It’s an area I felt they had let slip since the original. The top cap is difficult to engage. Additionally the bottom cap (quick access to the deck) doesn’t have the beefy threading the original had either.


The Juice fill holes are very large. I was able to fit my big twist nozzle bottle at the top and refill it easily. The payoff with the large size is the refill ring is very thin, it feels almost delicate when you strip the tank down.
The glass is thick enough for the 5 ml, however the 2.5 ml is thinner. I managed to crack my small glass soon after I installed it (user error over tightening) so I never really got to give the V2 a proper test run with it. You do get a spare 5ml glass in the box just no spare extra spare 2ml.
The airflow design on the V2 is the most significant overhaul I can see. You now have dual upward angled slots (8.5mm x 2mm). These airflow inlets are used in conjunction with the Wotofo “Troll” style post system, think of it like a wall on the post block. This creates two chambers within a single chamber, removing central turbulence enhancing the flavour (at least that’s the theory) but coil positioning within those chambers are going to be critical for it to work effectively.


You have the same quick access to the deck employed by the original. Seating the deck on the notches is a lot more difficult than before. I find I have to fiddle about for ages to engage it properly.

Finally the Tank breaks down in 9 pieces. The paintwork stood up to an ultrasonic cleaning without issue.

Last edited:

