Become a Patron!

Augvape Merlin mini - Product Review and Wicking Technique by PhantomOp

PhantomOp

VU Donator
Gold Contributor
Member For 3 Years
Member For 2 Years
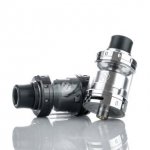
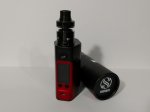
Augvape Merlin mini

Product Review and Wicking Technique
by PhantomOp

merlin_mini (Mobile).jpg

This product was provided to me, free of charge, by Augvape in a request to provide my personal opinion of this product and to provide a fair, honest and unbiased review of their product.

The following review is based on my personal options, and your choice and use of this product is your responsibility. I am not an expert, nor do I claim to be an expert in vaping hardware and technology. I would highly advise that you research everything before you make a decision to purchase this or any other product.

Hardware Specs
  • 24x42.3 mm
  • Capacity: 2 ML
  • 304 Stainless Steel
  • Comes with 2 pcs 18mm Decks (single coil and dual coil)
Single Coil Deck
  • 2x2 mm Squared Post Holes
  • Single 4.5 mm Internal Air-holes
  • Includes a 2mm & 1.5mm Airflow Restricting Inserts
  • 3x4 mm Juice Holes
Dual Coil Deck
  • 2-Post Velocity Style
  • 2x2.5 mm Post Holes
  • Dual 3x5 mm Squared Air-holes
  • 3 mm Diameter Juice Holes
  • Peek Insulator
  • Gold Plated Brass Contact

Unboxing

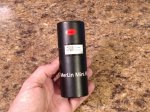
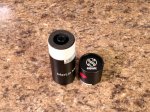
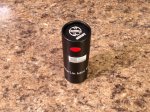
The Merlin Mini comes packaged in a nicely padded tube to protect the tanks and spare glass from damage during shipping.
IMG_20170121_202106202 (Medium).jpg IMG_20170121_202123278 (Medium).jpg

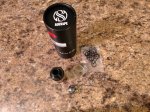
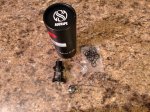
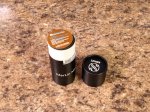
Upon opening the tube, you will find a sticker and the 1.3mm hex key. Once I removed the tank and the two other layers of padding you will find the remaining spare glass, additional deck and maintenance accessories.
IMG_20170121_202144678 (Medium).jpg IMG_20170121_202225147 (Medium).jpg IMG_20170121_202953209 (Medium).jpg IMG_20170121_203009196 (Medium).jpg

Tank Disassembly

Disassembling the tank is very easy to accomplish. Once everything is disassembled, you will have a total of ten (10) main parts of the atty (excluding o’rings and maintenance parts)

  • Base
  • Single Coil Deck
    • 2mm Airflow Restrictor
    • 1.5mm Airflow Restrictor
  • Dual Coil Deck
  • Chimney
  • Two (2) Glass Pieces
  • Chimney Cap (seals the glass to the base)
  • Top Cap w/510 Drip Tip
 

PhantomOp

VU Donator
Gold Contributor
Member For 3 Years
Member For 2 Years
Inspection

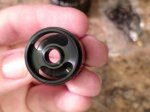
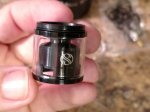
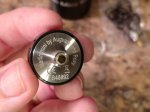
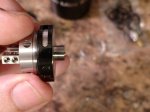
The machining of the stainless steel parts is very smooth and crisp. I appreciated the fact that they beveled the posts and all possibly sharp areas so that they did not have sharp edges as I have seen with other attys. There were very little machine oils (if any) on any of the parts. All of these detailed pictures are PRE-WASHED so that you could see exactly how it was when I took it out of the packaging.

IMG_20170121_203138669 (Medium).jpg IMG_20170121_203214668 (Medium).jpg IMG_20170121_203232578 (Medium).jpg IMG_20170121_203403670 (Medium).jpg IMG_20170121_203434662 (Medium).jpg

The threading on the 510 pin connector looks very clean with no burring or tweaked threads. While threading it into my Wismec RX200S MOD and my SMOK Alien MOD, I was not able to feel any catching.

The 510 pin is well protruded when the deck is fully secured into the base.

IMG_20170121_203307661 (Medium).jpg IMG_20170121_203320165 (Medium).jpg


It is always advised to wash all parts with soap and hot water, and to do an ultrasonic cleaning of these parts (removes and loosens misc. debris) before using.


PhantomOp

VU Donator
Gold Contributor
Member For 3 Years
Member For 2 Years
Deck Build Space

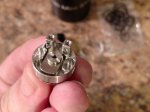
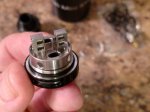
Both of the single coil and dual coil decks come with spacious build space. I was able to easily get a 3.5mm coil on either of these decks while working with this atty. During my testing of this atty, I went through many different variants of coil sizes (2mm, 2.5mm, 3mm, 3.5mm ID) and setups (Simple spaced coil, Twisted coils, Clapton coils, and fused Clapton coils), all of which performed very well in either deck.
My preference coil size is a 3mm or 3.5mm ID coil, simply because it provides more surface area on the cotton.

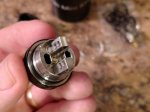
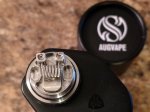
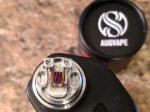
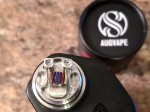
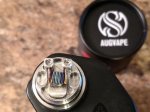
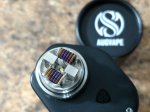
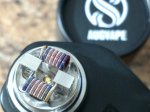
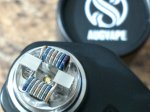
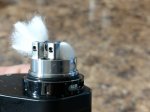
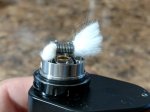
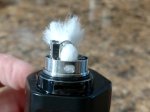
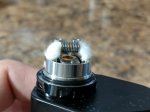
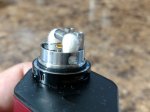
Below are some pictures with each build deck and 3mm Fused Clapton coils.

Single Coil Deck
The single coil deck came pre-installed with the 2mm airflow restriction insert. I used both inserts during my testing and found that I did not like either of them. I do still like some of my attys that are setup with MTL style airflow, however, I feel that Augvape made these extremely tight, even for MTL style vaping. I would have preferred the airflow restriction inserts to be between 3mm and 2mm. Keep in mind, this is simply my opinion. Some people will appreciate the tighter airflow, especially those that are still used to the analog cigarettes.

You can easily remove the airflow restriction inserts without issue. This is how I ended up running the single coil deck the remainder of my testing. If I wanted to work with a higher ohm coil (.6ohm to 1.0ohm) I would simply restrict the airflow at the AFC at the base of the tank.

Dual Coil Deck
The dual coil desk is a standard 2-Post Velocity Style deck with two kidney shaped airflow channels directly below the coils. The airflow on this deck is very nice!

IMG_20170121_210029606 (Medium).jpg IMG_20170121_210155564 (Medium).jpg IMG_20170121_210218061 (Medium).jpg IMG_20170121_210306254 (Medium).jpg
IMG_20170121_220245495 (Medium).jpg IMG_20170121_220544484 (Medium).jpg IMG_20170121_220548571 (Medium).jpg

On my MODs
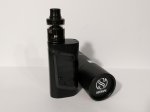
IMG_20170122_141407492 (Medium).jpg IMG_20170122_141614454 (Medium).jpg
 

PhantomOp

VU Donator
Gold Contributor
Member For 3 Years
Member For 2 Years
Final Impressions and Thoughts

The Merlin Mini by Augvape is very well made and feels really sturdy. I love how this single tank came with the option of a single coil setup and a dual coil setup. This one feature caters to many different styles of vaping, from new MTL (mouth-to-lung) style of vaping, all the way up to those who love massive clouds and hot vapes! This little tank can do it!

The AFC (airflow control) on this tank is very smooth and never “whistled” or hissed at me. This was very nice, as some of my tanks are very annoying and/or loud when you start to close down the AFC.

Flavor output is always very subjective and dependent on the coil build you use. With that said, at no time with the many different coils and builds that I used did I ever not enjoy using this tank (except with the airflow restriction inserts). I always got really good flavor and vapor production.

Getting the wicking correctly setup on this tank, on either of the build decks is important. If you do not use enough cotton in the juice channels, this little guy will leak all over you and your MOD. This tank does not come with any sort of JFC (juice flow control) like other tanks.

Some other reviewers have said that you can unscrew the tank from the base a quarter turn to block the juice channels and this will provide some level of JFC. While I agree with that, I personally do not like that method or want to say that that is the proper way of doing it. I can see someone attempting this and turning it too much and the juice will dump all over them and their MOD. Just not cool in my opinion. So, I would rather provide the wicking method that will allow you to fill up this tank and not have to worry about it leaking or dumping juice all over.

As I stated at the beginning of this review. Augvape provided this tank atty to me free of charge, explicitly for me to provide my opinion and thoughts on this product. So, is this tank worth purchasing?

Absolutely! This little tank is solid, caters to many style of vaping and carries a massive flavor punch!
I will be purchasing a couple more of these in SS and Black. I will also be getting the original Merlin RTA just so that I can have a larger juice capacity and to compare the two tanks.


I encourage you to look at other reviews so that you can make an educated decision before choosing to purchase this tank.

http://vapingunderground.com/threads/merlin-mini-review-by-deucesjack.297863/

http://vapingunderground.com/threads/augvape-merlin-mini-review.298017/

http://vapingunderground.com/threads/merlin-mini-rta-by-augvape.294125/
 

PhantomOp

VU Donator
Gold Contributor
Member For 3 Years
Member For 2 Years
Wicking Technique
(Single Coil & Dual Coil Base -- same technique for both)

I use Labo Cotton sheets, so this technique is based on this type of cotton.

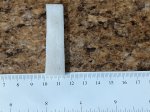
1) Cut a strip approximately 13-15mm wide. Then remove the two outer skin layers to expose the fluffy cotton pad.
IMG_20170123_225700510 (Medium).jpg IMG_20170123_225800482 (Medium).jpg

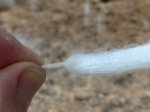
2) Tight roll one end of the cotton strip so that it will slide through the coil. Hold both ends firmly and it will slide through with ease. There will be some tension while pulling it through, this is OK.
IMG_20170123_225849551 (Medium).jpg IMG_20170123_230010974 (Medium).jpg

3) Now the most critical part. The reason this is the most critical part is because if you don't use enough cotton in the juice channels, this deck will leak all over the place when you fill it up and while vaping it.

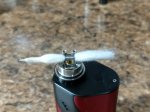
3.1) Pull down the cotton strip at an angle and cut it just at the length of the O'ring on the base on both sides.
IMG_20170123_230054971 (Medium).jpg IMG_20170123_230245568 (Medium).jpg

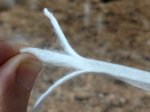
3.2) Fluff up both ends of the newly cut to length cotton strip. This will allow the juice to wick better in the juice flow channel.
IMG_20170123_230323463 (Medium).jpg IMG_20170123_230331265 (Medium).jpg IMG_20170123_230338661 (Medium).jpg
 

PhantomOp

VU Donator
Gold Contributor
Member For 3 Years
Member For 2 Years
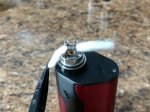
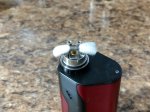
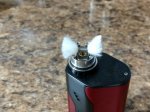
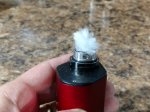
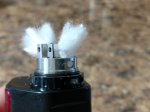
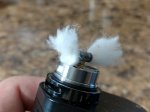
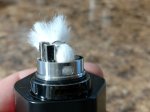
3.3) Now start tucking in the cotton from the bottom layer of the fluffed cotton. Once the bottom layer is tucked in, start folding down the top layer into the juice channel. Once done, clean it all up and make sure it is tucked down to the bottom of the juice flow channel. Now do the other side the same exact way.
Once done, make sure that the air flow is completely free of any cotton. You want the best airflow possible to cross the coils.
IMG_20170123_230422001 (Medium).jpg IMG_20170123_230430468 (Medium).jpg IMG_20170123_230547966 (Medium).jpg IMG_20170123_230552964 (Medium).jpg IMG_20170123_230558787 (Medium).jpg IMG_20170123_230610970 (Medium).jpg IMG_20170123_230747812 (Medium).jpg IMG_20170123_230738522 (Medium).jpg


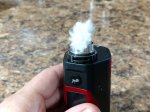
You are now ready to prime the cotton with your e-juice and place the tank back onto the base. Gently slide the tank top back onto the base making sure not to smoosh or compress the cotton, then gently screw the top to the base and make sure that all everything is tight.


Time to fill it up! Unscrew the top cap and add your favorite e-juice!
ejuice.jpg
 

Deucesjack

VU Donator
Platinum Contributor
Member For 4 Years
ECF Refugee
Nice job!

Variety's the very spice of life, that gives it all it's flavour.

-William Cowper
 

Fragility

Member For 3 Years
Member For 2 Years
Member For 1 Year
I really like the step-by-step pictures you include in your reviews, great job. I found the mini to be quite a bit more airy than the regular version, even though the chamber is shorter, the airflow hole is slightly bigger. Which simple builds did you find worked best in single coil? (you're probably sick of me asking this ;)).
 

PhantomOp

VU Donator
Gold Contributor
Member For 3 Years
Member For 2 Years
I really like the step-by-step pictures you include in your reviews, great job. I found the mini to be quite a bit more airy than the regular version, even though the chamber is shorter, the airflow hole is slightly bigger.

Thank you Fagility!

I will being doing a review on the Geek Vape Ammit soon. I haven't done one yet as it has been a steady use tank and I can't stop using it. ;)

Which simple builds did you find worked best in single coil? (you're probably sick of me asking this ;)).

Honestly, I haven't found it yet. Today was the first day that I actually took this little tank to work with me today just to see how quickly I would get annoyed with the small juice ML. It wasn't to bad, but that is because I'm currently using a very simple .9ohm coil and running it at 27w. Very juice efficient currently.

There is a thread going around today about "how often do you change coils" ... my response to that thread is going to be "daily" because I don't have a single "one" that is "perfect". I'm still in my beginning stages of vaping and am enjoying just "building" and learning new things. Every day I am doing something different and using something different. I don't have "one" juice that I use or one atty.

Something else you might consider. Purchase another Identical atty (Ammit, Merlin, etc) and do a build in it that is just a little different than the other atty. Then vape them side by side. Decide which one is the "better" of the two. Then do it again and again and again. You will eventually find "the one".

Vape On and Vape Strong! Every day is a new day and a new challenge. Every day is a day to learn something new!
 

KingPin!

In my defence, I was left unsupervised ^^
VU Donator
Platinum Contributor
Member For 4 Years
VU Challenge Team
Reviewer
Nice review phantom thanks very much may well have persuaded me to get this tank!
 

CDroverNL

Silver Contributor
Member For 4 Years
Member For 3 Years
Member For 2 Years
Has anyone had their cotton slide up in the wicking slots? It doesn't come right out but up out of view in the hole on the side
 

PhantomOp

VU Donator
Gold Contributor
Member For 3 Years
Member For 2 Years
Has anyone had their cotton slide up in the wicking slots? It doesn't come right out but up out of view in the hole on the side
Can't say that I've seen that one happen yet. Take off the deck cover, snap a clear picture, and then post it up here so that we can try to identify the cause.
 

VU Sponsors

Top