KingPin!
In my defence, I was left unsupervised ^^
VU Donator
Platinum Contributor
Member For 4 Years
VU Challenge Team
Reviewer
Hi Folks
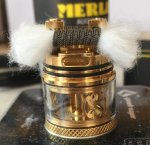
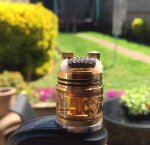
Snagged myself a bunch of goodies recently including the very slick looking Merlin RDTA. This review is based on my experiences so far, i should add I purchased this RDTA myself.
What do you get in the box?
I went and purchased the black and gold version. There is also stainless steel and rose gold on offer

Features
304 SS
Diameter:24mm
Capacity:3.5ml
Height:48.5mm
Derlin Top Cap And Drip Tip
Peek Insulator
Borosilicate Glass Tube
Elegant Hollowed-out Logo
Easy to wick and refill
You get a bag of spare o rings, a spare glass, a Phillips screwdriver, and two spare Phillips screws
The box it comes in is tiny! but the saying goes good things come in small packages! .. there is a scratch and sniff on the side and a small card about entering into a competition on instagram to win prizes
Initial impressions
Well the atty breaks into 6 pieces for easy cleaning


The piece in the upper left most part of the pictures screws into the plastic top cap and acts as a plug for the "juice well" as well as an anti spit back
Next to it is the proprietary drip tip which is plastic and does concern me over time regarding the threads lasting and the lack of a spare however does give your lips protection from the housing heating up
It's very clean out of the box although I did wash mine thoroughly and give it a good scrub as always...paint quality is excellent as is the machining except maybe the metal juice chamber (lower right in the above pic) but considering how intricate it is I'll give them a pass on this, I mean it's not awful but it's not super clean machining either
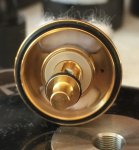
Also to note I thought I had lost my peek insulator whilst cleaning which normally sits at the bottom of the base between the positive pin and the threads, there is a peek insulator further up so it it's normal for it to look like this below (this was a beta version pic I pulled from google hence why it's not serialised ...mine is)
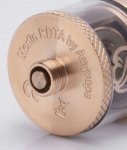
The pin doesn't sit far enough proud from the threads though so I would say no hybrid usage on this one
Also in both the stainless steel and rose gold versions the symbol on the housing is ethched in. This isnt the case with the black version it's like they applied the paint and later peeled away the symbol to give it a recessed feel...although it stood up to a good scrubbing no probs
Finally the O-ring resistences are all top notch as is the threading on everything
All in all though it looks and feels absolutely lovely very impressed with the gold and black version
What's she like the build on?
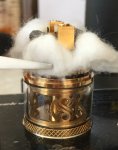
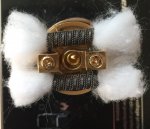
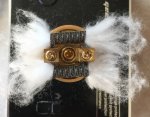
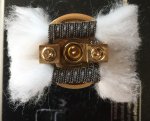
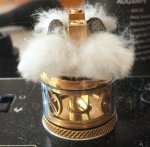
Here is where the fun really begins! The deck is massive I made some monster coils recently and had nothing to put them in...these are framed staple helixes 7 wrap 3mm diameter came out at just shy of 15mm in width! at the time of making them I thought to myself can anything handle these? Yep the Merlin RDTA can! Inside post to post is 20mm!
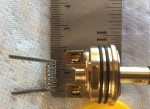
Mounting was easy although I didn't like the Phillips screws they felt quite shallow and like I'm gonna strip them in time...having said that the screw did bite the coils well without too much force
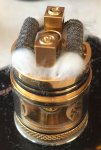
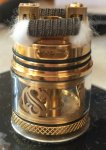
Here is the final shot of my coils mounted on here
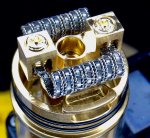

Now i wouldn't advise to get anything wider in here I managed to wick these fill up the holes without issue ...had no dry hits whatsoever, bloody marvellous ...on the subject of wicking I wouldn't advise putting anything less than 3mm in diameter in here since as you can see with the picture above there is rather a large space to fill either side.
I cut my wick to the length of the bottom black oring, fluffed them up and just poked them down, finally checked had no space anywhere and done very easy. Just ensure you don't lay them over the bottom fed airhole otherwise you will get leakage (but this is true of any bottom airhole atty)
To refill this RDTA you just place your juice bottle in that large hole in the middle of the deck and squeeze, that's it you're done! ...you can either remove the entire top housing or unscrew the top cap to refill whatever floats your boat
...the only negative about this whole refill experience is the vent hole. It's situatied in one of the air vent chambers (You can see this in the shot below underneath the bottom coil)...I couldn't see this when refilling and if you overfill your gonna have a bad day because that juice is gonna run straight out as I found out myself!
Having said that if you look at the juice level in the chamber as you refill and stop as soon as it hits the top of the glass you'll be fine as there is a little bit of a recess beyond that which gives you a safety refill buffer.
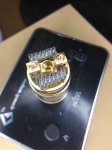
Build deck I would give almost top marks except for the Phillips screws which I'm not a fan of anyway... you're gonna be able to take some great pics of coils on this deck if you care for such things
How's she vape?
Flavour comes through really well very impressed I find it's flavour is better than the Boreas if I had to draw a comparison to another Augvape product, it's not a massive cloud chucker but it's no sloth either I found the vent half closed provided me with a good balance on flavour and cloud
The draw feels a little turbulent and airy ...I think this has to do with the proprietary drip tip and the anti spit back/juice hole plug I'm not a massive fan of these I have to say I would like to have had the option to choose my own drip tip and a different way to plug the juice well, but I understand why they went with it like this in the design process, in order to kills two birds with one stone ...I just feel having a goon or 510 drip tip on here would have made it an incredible vape fully worthy of top marks
Also I noticed a very slight amount of seeping between the housing and the plastic top cap when chain vaping maybe some sort of gasket here would have rectified this? ...I haven't found it to leak other than this, I even held it upside down for a minute to test it! (as long as you plug up those juice holes you are golden)
Final conclusion
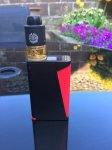
If you like building and experimenting with large coils this is the one for you! You have the ability to carry this about with you on the go with a decent 3.5ml juice capacity and flavour is very good, refilling is a breeze, and for the price it's just a stunning atty to have in your collection

Pros
Overall very good quality machining
Great flavour
Great price point
Refilling is super easy
Build deck is exceptional
Looks the absolute nuts!
Cons
Placement of the refill vent hole
Proprietary drip tip combined with a plastic top cap/ anti spit back/ juice plug
Phillips screws
Snagged myself a bunch of goodies recently including the very slick looking Merlin RDTA. This review is based on my experiences so far, i should add I purchased this RDTA myself.
What do you get in the box?
I went and purchased the black and gold version. There is also stainless steel and rose gold on offer

Features
304 SS
Diameter:24mm
Capacity:3.5ml
Height:48.5mm
Derlin Top Cap And Drip Tip
Peek Insulator
Borosilicate Glass Tube
Elegant Hollowed-out Logo
Easy to wick and refill
You get a bag of spare o rings, a spare glass, a Phillips screwdriver, and two spare Phillips screws
The box it comes in is tiny! but the saying goes good things come in small packages! .. there is a scratch and sniff on the side and a small card about entering into a competition on instagram to win prizes
Initial impressions
Well the atty breaks into 6 pieces for easy cleaning


The piece in the upper left most part of the pictures screws into the plastic top cap and acts as a plug for the "juice well" as well as an anti spit back
Next to it is the proprietary drip tip which is plastic and does concern me over time regarding the threads lasting and the lack of a spare however does give your lips protection from the housing heating up
It's very clean out of the box although I did wash mine thoroughly and give it a good scrub as always...paint quality is excellent as is the machining except maybe the metal juice chamber (lower right in the above pic) but considering how intricate it is I'll give them a pass on this, I mean it's not awful but it's not super clean machining either
Also to note I thought I had lost my peek insulator whilst cleaning which normally sits at the bottom of the base between the positive pin and the threads, there is a peek insulator further up so it it's normal for it to look like this below (this was a beta version pic I pulled from google hence why it's not serialised ...mine is)

The pin doesn't sit far enough proud from the threads though so I would say no hybrid usage on this one
Also in both the stainless steel and rose gold versions the symbol on the housing is ethched in. This isnt the case with the black version it's like they applied the paint and later peeled away the symbol to give it a recessed feel...although it stood up to a good scrubbing no probs
Finally the O-ring resistences are all top notch as is the threading on everything
All in all though it looks and feels absolutely lovely very impressed with the gold and black version
What's she like the build on?
Here is where the fun really begins! The deck is massive I made some monster coils recently and had nothing to put them in...these are framed staple helixes 7 wrap 3mm diameter came out at just shy of 15mm in width! at the time of making them I thought to myself can anything handle these? Yep the Merlin RDTA can! Inside post to post is 20mm!

Mounting was easy although I didn't like the Phillips screws they felt quite shallow and like I'm gonna strip them in time...having said that the screw did bite the coils well without too much force
Here is the final shot of my coils mounted on here


Now i wouldn't advise to get anything wider in here I managed to wick these fill up the holes without issue ...had no dry hits whatsoever, bloody marvellous ...on the subject of wicking I wouldn't advise putting anything less than 3mm in diameter in here since as you can see with the picture above there is rather a large space to fill either side.
I cut my wick to the length of the bottom black oring, fluffed them up and just poked them down, finally checked had no space anywhere and done very easy. Just ensure you don't lay them over the bottom fed airhole otherwise you will get leakage (but this is true of any bottom airhole atty)
To refill this RDTA you just place your juice bottle in that large hole in the middle of the deck and squeeze, that's it you're done! ...you can either remove the entire top housing or unscrew the top cap to refill whatever floats your boat
...the only negative about this whole refill experience is the vent hole. It's situatied in one of the air vent chambers (You can see this in the shot below underneath the bottom coil)...I couldn't see this when refilling and if you overfill your gonna have a bad day because that juice is gonna run straight out as I found out myself!
Having said that if you look at the juice level in the chamber as you refill and stop as soon as it hits the top of the glass you'll be fine as there is a little bit of a recess beyond that which gives you a safety refill buffer.

Build deck I would give almost top marks except for the Phillips screws which I'm not a fan of anyway... you're gonna be able to take some great pics of coils on this deck if you care for such things
How's she vape?
Flavour comes through really well very impressed I find it's flavour is better than the Boreas if I had to draw a comparison to another Augvape product, it's not a massive cloud chucker but it's no sloth either I found the vent half closed provided me with a good balance on flavour and cloud
The draw feels a little turbulent and airy ...I think this has to do with the proprietary drip tip and the anti spit back/juice hole plug I'm not a massive fan of these I have to say I would like to have had the option to choose my own drip tip and a different way to plug the juice well, but I understand why they went with it like this in the design process, in order to kills two birds with one stone ...I just feel having a goon or 510 drip tip on here would have made it an incredible vape fully worthy of top marks
Also I noticed a very slight amount of seeping between the housing and the plastic top cap when chain vaping maybe some sort of gasket here would have rectified this? ...I haven't found it to leak other than this, I even held it upside down for a minute to test it! (as long as you plug up those juice holes you are golden)
Final conclusion
If you like building and experimenting with large coils this is the one for you! You have the ability to carry this about with you on the go with a decent 3.5ml juice capacity and flavour is very good, refilling is a breeze, and for the price it's just a stunning atty to have in your collection


Pros
Overall very good quality machining
Great flavour
Great price point
Refilling is super easy
Build deck is exceptional
Looks the absolute nuts!
Cons
Placement of the refill vent hole
Proprietary drip tip combined with a plastic top cap/ anti spit back/ juice plug
Phillips screws
Last edited:

