KingPin!
In my defence, I was left unsupervised ^^
VU Donator
Platinum Contributor
Member For 4 Years
VU Challenge Team
Reviewer
Hi Folks,
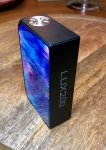
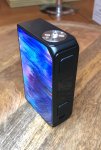
To my knowledge this is the second regulated mod to come from the CoilART camp. They switched things up a bit from the Mage 217 box mod by incorporating a new chipset named “Eagle”, which I’m told is proprietary. In addition they got a lending hand from an Italian fashion designer ‘Aligheri Petraca’ to give it some visual flair…..well, there you go fashion designers working in the vape industry is now a thing…..next it'll be: “Get your glitzy mod from Jimmy Choo”…. actually I bet this would go down well with some.
So without further ado …CoilArt kindly sent me the LUX200 Kit for the once over. As usual with any of my kit reviews I’ll go over the tank first, then the mod.
I don’t like to make recommendations in my reviews instead I’ll share my findings to bolster your research should you be interested in the product.
(Please note: photos appear normal size when logged in)
What’s in the box?
Available Colours: Black, Red, Blue, Green, and White available
Part 1 - The Lux Subohm Tank
Tank Specifications
Build Quality and Impressions
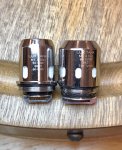
The kit I’m reviewing was meant for the American consumer base, meaning the spare glass included is an additional 5.5ml bubble instead of the TPD straight option you’ll get in Europe. It comes with everything to get you started including a couple of different mesh coil types. It’s worth noting both coil options are going to give you a lung full which some vapers might find a bit overwhelming.
The Lux tank is compatible with Smoks TFV12 coil range (according to CoilArt) so that makes it highly accessible when finding spares should you have trouble finding their own coils.
CoilArt markets the finish on the tank as “faux marble” …that’s exactly what I’d expect a fashion designer to say! ….no….it’s plastic, let’s not beat around the bush here. They also say its resin but I’m not sure on that, it feels soft on the surface and has that acrylic smell to it, so I believe it’s not really resin either. Either way to me there’s something about the presentation that’s amiss, personally I think it’s the top cap because other resin type tanks pull it off ok.
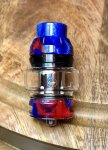
There’s definitely a trade-off with form over function because the top cap makes the tank look unnecessarily large, especially with the squished bubble tank. On the flip side it does provide a larger area for grip, combined with the short threads under the cap just makes for a hassle free quick refill experience. Plus it provides very good heat protection using higher wattages…regardless I just think they could have paid more attention to this eye catching area blacken it out, colour match better….lower it …something.
The fit and finish is good, except the drip tip which was really tight to get out to begin with, although it loosens up fine after use...actually I found I had to wipe excess juice pooling underneath it every now and then. There’s O-rings on the tip itself and inside the cap where it fits, meaning unfortunately this tank it not compatible with standard 810 drip tips, although you may find Smok tips work ok. Fortunately the stock tip suits the tank really well especially using the larger M4 coil although some might find its overall diameter a little wide at 17mm.
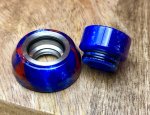

Removing the cap reveals two smaller kidney shaped refill ports (each 12mm x 2.9mm in size). I did need to be a little careful getting juice in the tank using twist top nozzles by tilting it, otherwise it was fine. I didn’t worry about closing the AFC during refilling and it didn’t seem to care about that with any leaking issues…in fact this tank was bone dry during my month of testing, I didn’t even get any sort of condensation seeping around the AFC which is a big pro in my book.
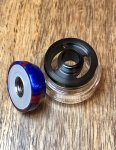
The chimney section screws on top of the coil directly leaving it more akin to the type of chimney you’ll find on the Aspire Clieto tank (where there’s no chamber dome above the coil), it’s quite handy on this tank because you can check your cotton and make the call when it’s time to swap them out as you go.
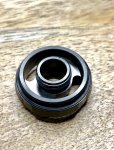
The tank is 25mm at its base, however the bubble glass takes it out to a hefty 30mm, and with the mod being narrow the tank overhangs. Careful knocking it over as it will take the full force of the impact….it’s well worth putting a vape band around it, actually CoilART this is something I’d like to have seen you include in the pack for this.
The tank breaks down into 6 pieces, you get two massive 14mm x 3.5mm airflow slots with an adjustable Airflow Control (AFC) ring. It’s not a press fit design so you cannot remove it which helps with a non-leaky base (one of my pet hates). I’m not a huge fan of the amount of airflow this tank has though, even at 120W. I only have to set the AFC slightly open, I’m guessing they added it just in case someone grabs hold of one of the 150 Watt+ Smok coils.
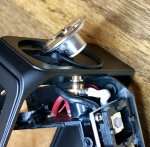
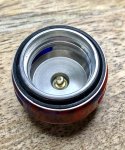
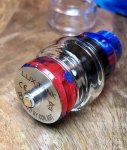
The coil, when screwed in, will sit on top of a gold plated positive pin. It’s possible to pull the pin out from the bottom even after the coil is screwed in which is a bit pants, I don’t like this floating pin design approach, as they rely on the user securing the coil in tight, can create problems with readings on the mod, and only contact a tiny part of the coils base.
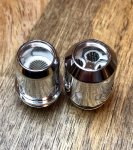
There’s a black gasket acting as both an insulator and seal at the end of the coils, I expect this part to be sitting flat with no wires poking out, and in this regard these coils were spot on, as to whether this is the case for aftermarket purchases I can’t say, but these were good and the coils were perfectly packed with cotton..
To my knowledge this is the second regulated mod to come from the CoilART camp. They switched things up a bit from the Mage 217 box mod by incorporating a new chipset named “Eagle”, which I’m told is proprietary. In addition they got a lending hand from an Italian fashion designer ‘Aligheri Petraca’ to give it some visual flair…..well, there you go fashion designers working in the vape industry is now a thing…..next it'll be: “Get your glitzy mod from Jimmy Choo”…. actually I bet this would go down well with some.
So without further ado …CoilArt kindly sent me the LUX200 Kit for the once over. As usual with any of my kit reviews I’ll go over the tank first, then the mod.

I don’t like to make recommendations in my reviews instead I’ll share my findings to bolster your research should you be interested in the product.
(Please note: photos appear normal size when logged in)
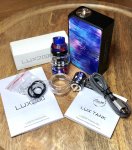
What’s in the box?
- 1 x CoilART LUX200 Mod
- 1 x LUX mesh subohm tank
- 1 x Spare bubble glass
- 1 x M1 0.15 (mesh coil 50-90W)
- 1 x M4 0.15 (mesh coil 80-150w)
- 1 x spare O-rings
- 1 x USB Firmware/Charging Cable
- 1 x User Manual
Available Colours: Black, Red, Blue, Green, and White available
Part 1 - The Lux Subohm Tank
Tank Specifications
- Height 49.4mm (with drip tip)
- Diameter 24mm (25mm from the Airflow, and 30mm at the widest point on the glass)
- Thread Length: 5.3mm
- Airflow: Two adjustable (each 14mm x 3.2mm)
- Filling: Top fill – 2 kidney ports (12mm x 2.9mm)
- Capacity 5.5ml bubble glass
- Weight: 58g (with juice and coil)
- Materials in construction: Stainless Steel (SS)304, Pyrex Glass, Resin
- Drip Tip: Resin (Visible Height: 7.2mm, diameter at the tip : 17mm, Tapered Bore 8mm up to 12.5mm)
- Positive Pin: Gold plated SS304
Build Quality and Impressions
The kit I’m reviewing was meant for the American consumer base, meaning the spare glass included is an additional 5.5ml bubble instead of the TPD straight option you’ll get in Europe. It comes with everything to get you started including a couple of different mesh coil types. It’s worth noting both coil options are going to give you a lung full which some vapers might find a bit overwhelming.
The Lux tank is compatible with Smoks TFV12 coil range (according to CoilArt) so that makes it highly accessible when finding spares should you have trouble finding their own coils.
CoilArt markets the finish on the tank as “faux marble” …that’s exactly what I’d expect a fashion designer to say! ….no….it’s plastic, let’s not beat around the bush here. They also say its resin but I’m not sure on that, it feels soft on the surface and has that acrylic smell to it, so I believe it’s not really resin either. Either way to me there’s something about the presentation that’s amiss, personally I think it’s the top cap because other resin type tanks pull it off ok.

There’s definitely a trade-off with form over function because the top cap makes the tank look unnecessarily large, especially with the squished bubble tank. On the flip side it does provide a larger area for grip, combined with the short threads under the cap just makes for a hassle free quick refill experience. Plus it provides very good heat protection using higher wattages…regardless I just think they could have paid more attention to this eye catching area blacken it out, colour match better….lower it …something.
The fit and finish is good, except the drip tip which was really tight to get out to begin with, although it loosens up fine after use...actually I found I had to wipe excess juice pooling underneath it every now and then. There’s O-rings on the tip itself and inside the cap where it fits, meaning unfortunately this tank it not compatible with standard 810 drip tips, although you may find Smok tips work ok. Fortunately the stock tip suits the tank really well especially using the larger M4 coil although some might find its overall diameter a little wide at 17mm.


Removing the cap reveals two smaller kidney shaped refill ports (each 12mm x 2.9mm in size). I did need to be a little careful getting juice in the tank using twist top nozzles by tilting it, otherwise it was fine. I didn’t worry about closing the AFC during refilling and it didn’t seem to care about that with any leaking issues…in fact this tank was bone dry during my month of testing, I didn’t even get any sort of condensation seeping around the AFC which is a big pro in my book.

The chimney section screws on top of the coil directly leaving it more akin to the type of chimney you’ll find on the Aspire Clieto tank (where there’s no chamber dome above the coil), it’s quite handy on this tank because you can check your cotton and make the call when it’s time to swap them out as you go.

The tank is 25mm at its base, however the bubble glass takes it out to a hefty 30mm, and with the mod being narrow the tank overhangs. Careful knocking it over as it will take the full force of the impact….it’s well worth putting a vape band around it, actually CoilART this is something I’d like to have seen you include in the pack for this.
The tank breaks down into 6 pieces, you get two massive 14mm x 3.5mm airflow slots with an adjustable Airflow Control (AFC) ring. It’s not a press fit design so you cannot remove it which helps with a non-leaky base (one of my pet hates). I’m not a huge fan of the amount of airflow this tank has though, even at 120W. I only have to set the AFC slightly open, I’m guessing they added it just in case someone grabs hold of one of the 150 Watt+ Smok coils.
The coil, when screwed in, will sit on top of a gold plated positive pin. It’s possible to pull the pin out from the bottom even after the coil is screwed in which is a bit pants, I don’t like this floating pin design approach, as they rely on the user securing the coil in tight, can create problems with readings on the mod, and only contact a tiny part of the coils base.


There’s a black gasket acting as both an insulator and seal at the end of the coils, I expect this part to be sitting flat with no wires poking out, and in this regard these coils were spot on, as to whether this is the case for aftermarket purchases I can’t say, but these were good and the coils were perfectly packed with cotton..

Last edited:

