Tim Vatic
Bronze Contributor
Member For 4 Years
Member For 3 Years
Member For 2 Years
Member For 1 Year
Member For 5 Years
This is a very interesting RBTA. It works sort of like an upside down Genesis. I've been checking them out for a while but I've never seen anyone build a parallel coil on one so that's what I tried for my first build on the Flash V3. It turned out better than expected and its easy to build. It's got RDA flavor and vapor with the convenience of a tank! There are different size screws to change your air flow options. Here's a step by step tutorial on how I built mine. I hope you enjoy it.
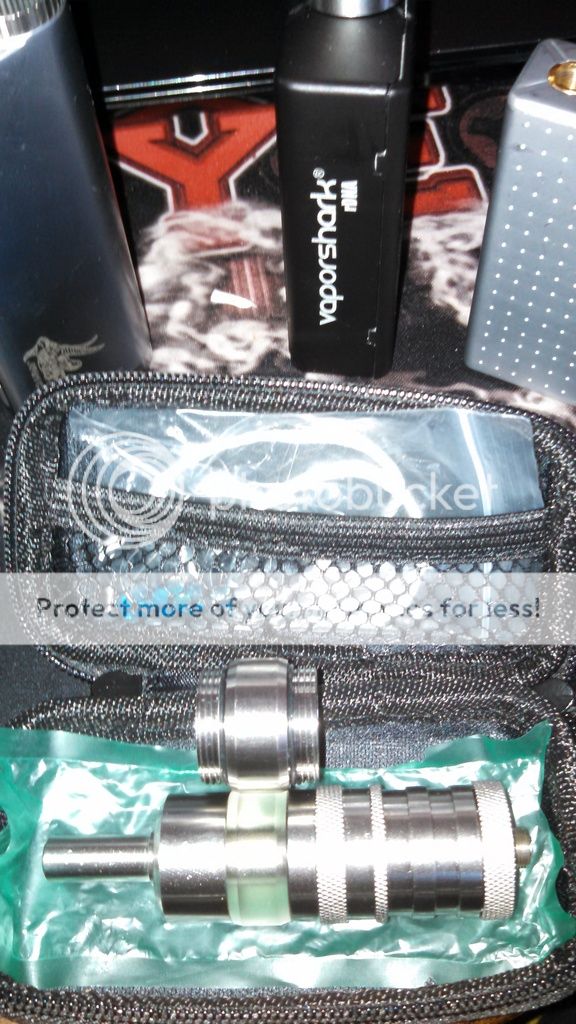
This is how it comes, in a cloth, zippered, carrying case with extra O rings, screwdriver, different sized air hole screws, clear tube, a long length of silica and kanthal. I use the clear tube when available because I like to see my liquid levels but you can have the complete stainless look if you like and you can also use your own drip tip if you prefer, like a wide bore.
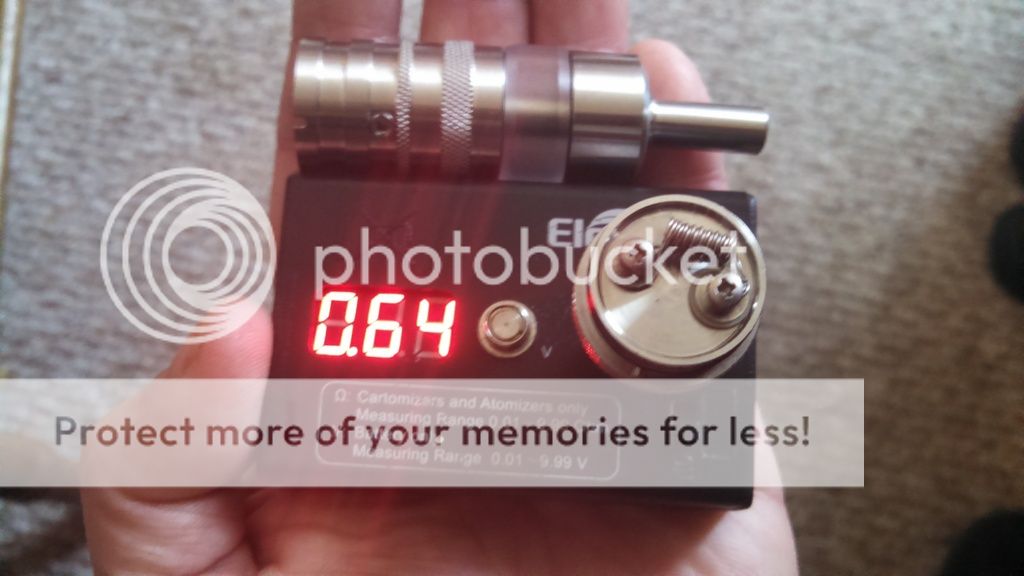
1st. Build your coil on the deck. I decided to try a 26g parallel.
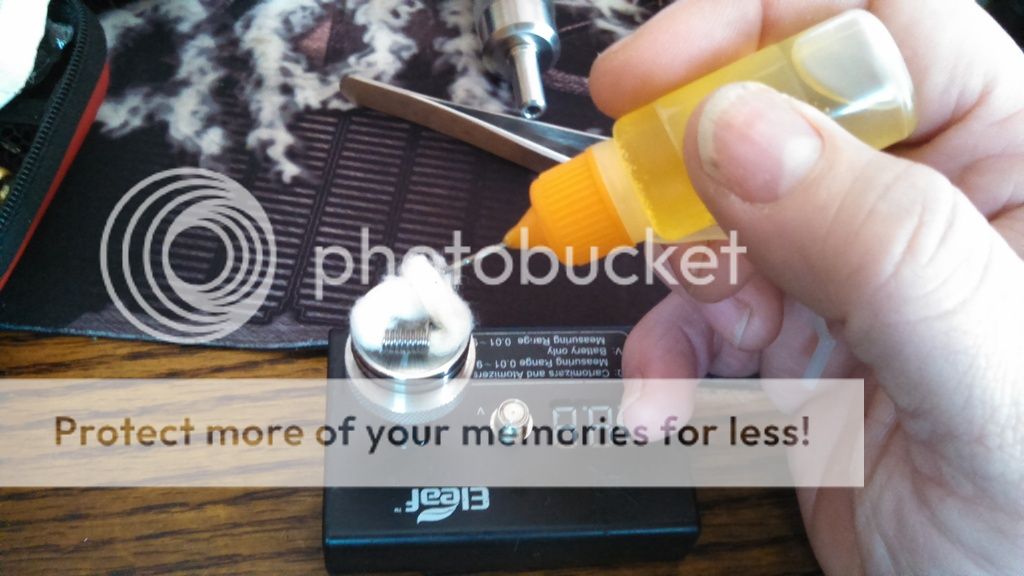
2nd. Wick it and wet the wick. Whoops!! I put this coil on backwards! I had to take it off an turn it around. You'll see why in the next pic.
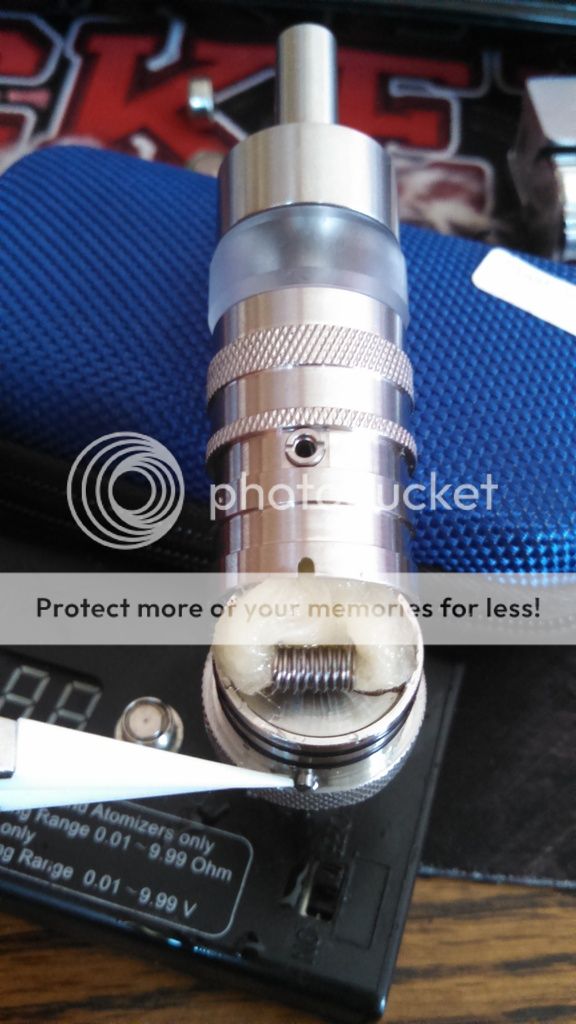
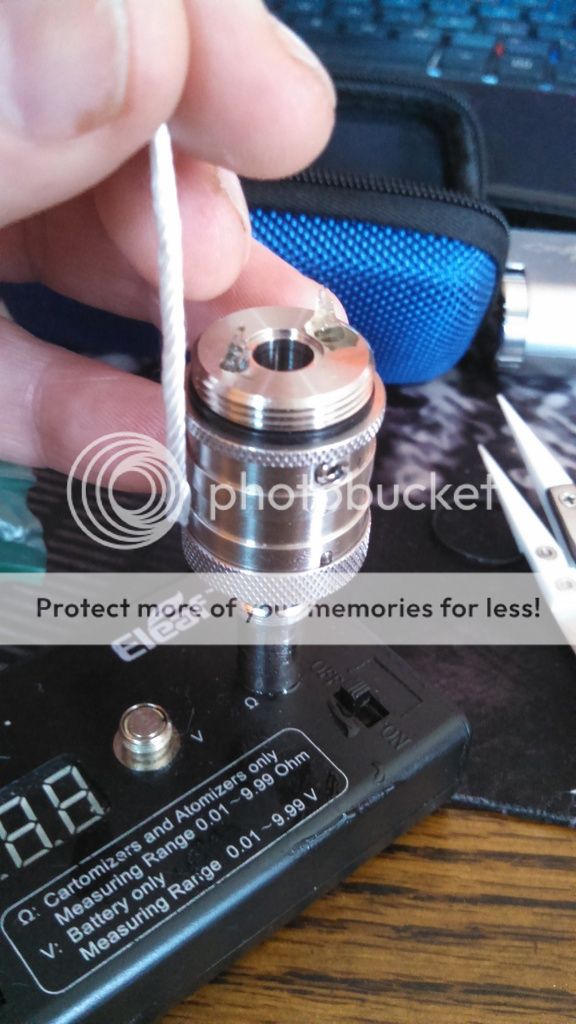
3rd. Make sure that you wrap your coil facing the little nub I'm pointing to with my ceramic tweezers because the single air hole is on that side and you want your air to flow directly over the coil. This is how it goes together. Very easy and simple. Note the notch in the cap that corresponds with the nub. This is so the top cap and tank don't spin freely on the deck because it just pops on like an RDA top cap.
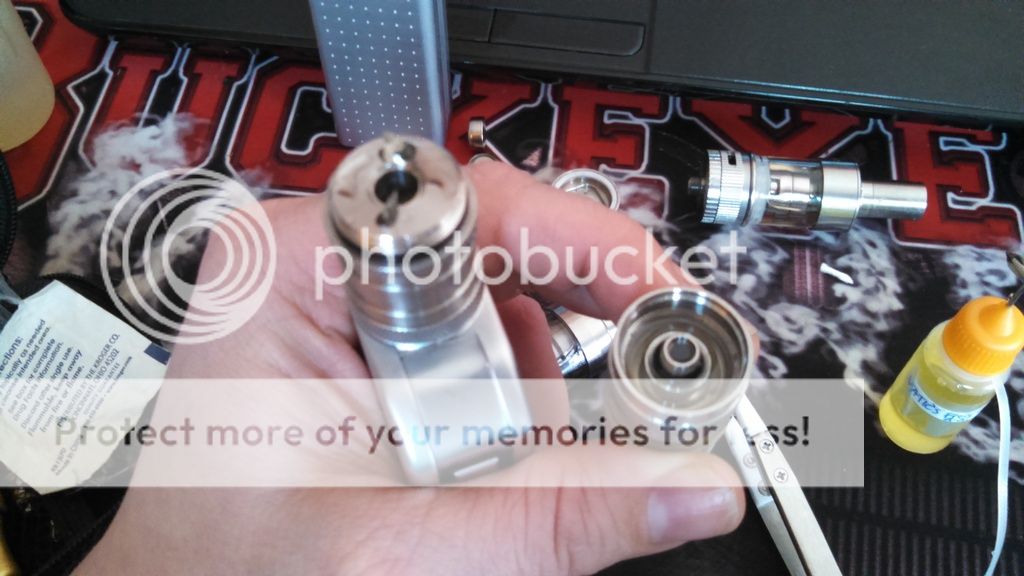
4th. Pop the cap/next segment on and insert wicks. This is how the tank feeds the coil. I'm using silica because it came with but you can probably use cotton. Snip them off flush with the top of the cap. and wet them with e-liquid. As you can see, there are already wicks in mine. The wick holes are directly over the screws and the wicks are meant to touch on either side of your coil.
5th. Now your ready to Fill up the tank, do this just like any other bottom coil tank and fill it up to the ring on the chimney with juice. I'm using 80%Vg
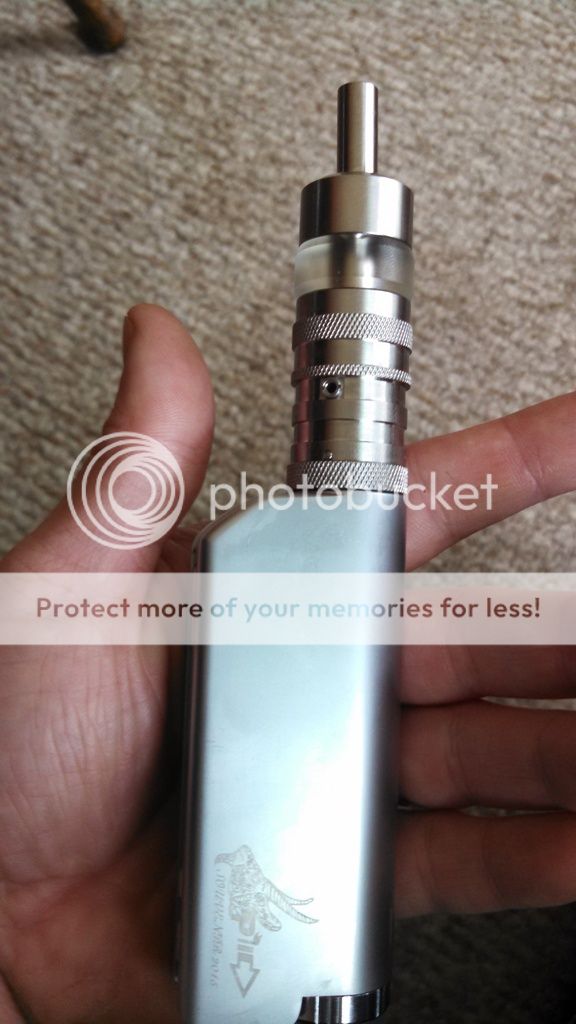
6th and lastly. Screw it on to the cap and your ready to put it on a device and use it! Here I have it on my IPV mini II.
Hope you enjoyed this tutorial and learned from my backwards coil mistake.")
since making this tutorial, I replaced the silica wicks with little ss mesh straw tubes, they seem to wick much better with my high VG juice and if I never feel like its getting dry, I just cover the air hole and take a few pulls and watch the bubbles. It works great especially for driving. Friends don't let friends drip and drive.
If your interested in this clone, here is the link...KEEP ON VAPING!!!
Rebuildable Flash E Vapor V3 Stainless Steel E - Cigarette - 510 Thread-17.99 and Free Shipping| GearBest.com
http://www.gearbest.com/electronic-cigarettes/pp_137306.html
This is how it comes, in a cloth, zippered, carrying case with extra O rings, screwdriver, different sized air hole screws, clear tube, a long length of silica and kanthal. I use the clear tube when available because I like to see my liquid levels but you can have the complete stainless look if you like and you can also use your own drip tip if you prefer, like a wide bore.
1st. Build your coil on the deck. I decided to try a 26g parallel.
2nd. Wick it and wet the wick. Whoops!! I put this coil on backwards! I had to take it off an turn it around. You'll see why in the next pic.
3rd. Make sure that you wrap your coil facing the little nub I'm pointing to with my ceramic tweezers because the single air hole is on that side and you want your air to flow directly over the coil. This is how it goes together. Very easy and simple. Note the notch in the cap that corresponds with the nub. This is so the top cap and tank don't spin freely on the deck because it just pops on like an RDA top cap.
4th. Pop the cap/next segment on and insert wicks. This is how the tank feeds the coil. I'm using silica because it came with but you can probably use cotton. Snip them off flush with the top of the cap. and wet them with e-liquid. As you can see, there are already wicks in mine. The wick holes are directly over the screws and the wicks are meant to touch on either side of your coil.
5th. Now your ready to Fill up the tank, do this just like any other bottom coil tank and fill it up to the ring on the chimney with juice. I'm using 80%Vg
6th and lastly. Screw it on to the cap and your ready to put it on a device and use it! Here I have it on my IPV mini II.
Hope you enjoyed this tutorial and learned from my backwards coil mistake.
since making this tutorial, I replaced the silica wicks with little ss mesh straw tubes, they seem to wick much better with my high VG juice and if I never feel like its getting dry, I just cover the air hole and take a few pulls and watch the bubbles. It works great especially for driving. Friends don't let friends drip and drive.
If your interested in this clone, here is the link...KEEP ON VAPING!!!
Rebuildable Flash E Vapor V3 Stainless Steel E - Cigarette - 510 Thread-17.99 and Free Shipping| GearBest.com
http://www.gearbest.com/electronic-cigarettes/pp_137306.html