Become a Patron!

Modmaker Silvered out kit - My squonk upgrade

KingPin!

In my defence, I was left unsupervised ^^
VU Donator
Platinum Contributor
Member For 4 Years
VU Challenge Team
Reviewer
Hi Folks,

Decided to have a go upgrading my squonk box, this is my first such project and I can honestly say this was the most fun I’ve had in ages.

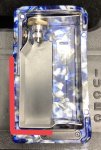
So why did I choose this box, I bought this prototype earlier in the year and to my knowledge it was never released by Ephro but it’s a lovely design and very comfortable to use.

7F89D563-FC34-4E7F-8274-BBB80575A27D.jpeg

But it had issues ...the fire button would get hot quickly and let’s just say it performence was underwhelming at best, which further compounded the fire button issue ... I was a little pissed about it at first cause I paid a fair bit for it (it came with an RDA as well which had nice flavour but was ultimately junk with posts bending out of position so that can stay in the box)

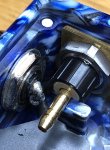
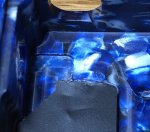
Any way it’s the box I was really after. First was understanding why it was performing poorly ...it had this plastic/rubber insulation over the contact...at first I thought it was a cap
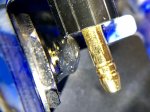
E023E218-A029-4B92-9010-651110C42BB5.jpeg

taking it away revealed the wire
424A60FC-BA0F-40F0-A88C-90C9064A62AA.jpeg

I forgot to take a pic at this point but there wire connecting the 510 to the switch was hidden behind and it was entirely too thin to carry the loads required of it ....hence why it was getting hot

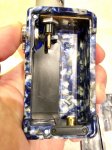
The wire soldered on to the end of the switch ran down to the positive spring loaded pin and was hidden by a panel
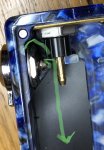
05E7A125-CB08-471C-8CAC-860C78CCFAFE.jpeg

Which you can see a little better here
FE33E5BD-1258-46CE-99AF-096C24182EEB.jpeg
EFC4D449-2A97-4F1C-B4BA-4437BE92B94B.jpeg

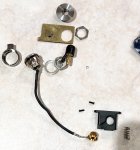
So after stripping it down you can see why this was performing so bad ...state of those wires was shocking and to be honest I’m glad this was never put into production as it was dangerous in all honesty 120C4F02-3273-4F0C-8BD9-3BEDC8C71732.jpeg
 

KingPin!

In my defence, I was left unsupervised ^^
VU Donator
Platinum Contributor
Member For 4 Years
VU Challenge Team
Reviewer
I should mention at this point it’s worth researching a little bit before gutting your mod ...I decided to wing it because the mod was junk as it was anyway

So researching and measuring the internal space, I figured out I’d need the below - and being I wanted it silvered out, got a few extra bits with it.

AF257252-C3A1-4344-9912-9372A20CFDC3.jpeg

It’s worth noting the MM510 V1 silvered out kit does not include the squonk assembly, in addition it only works with the original MM510 V1 squonk connector

There are two things in the list I could have avoided buying;

MM510 micro spring loaded squonker connector....thier latest connector apparently with a slight improvement in voltage drop, and it’s smaller than the V1 in terms of threading inside the box, I bought this as a standby in case my plan wasnt going to fit.

The other thing was the MM510 large silver plated nut...I wasn’t sure how much room I’d need for contact travel so again was a stanbye part, which as it turned out I didn’t need in the end, but being postage is expensive on this lot I didn’t want to have to spend more. ...Total cost £47.84 after I get spanked with tax ...I could have saved a tenner had I not bought the sparsies so not a really cheap upgrade but should vastly improve the box.
 
Last edited:

KingPin!

In my defence, I was left unsupervised ^^
VU Donator
Platinum Contributor
Member For 4 Years
VU Challenge Team
Reviewer
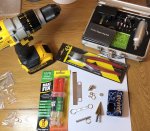
Ok project time game on - here are the bits ...it’s worth noting I had a vice and workbench outside of this picture - the vice comes in handy cause I can bend the contacts and drill holes without parts moving

Otherwise I have

a dremmel set ...handy for getting in and filing metal parts, and cutting out extra bits in the box itself

A drill ...gonna need it to use the step drill bit

A step drill bit to cut holes large enough to support the fixings

A spanner set 13mm and 14mm needed for this project

Wire cutters ...these will cut the silver sheets to length

A dimple tool as you’ll want to punch in dimples for battery contact

Epoxy resin so you can stick the contact in the box

Some clothes pegs to hold the contact in place after gluing

Some rubbing alcohol (isopropyl) to clean the contacts areas and surfaces for gluing

A toothpick and kitchel towel so I can get in a wipe away excess glue if needed

26638EEF-1A12-4EFD-B07E-E20191B74F1E.jpeg
2260ED75-3524-4695-AA59-24F170A3CAC5.jpeg

Disassembling the MM510 here is what it’s like as standard when broken down

E0E50F46-5CF2-4F32-977B-98CD13A14A6C.jpeg

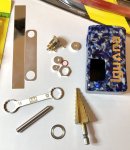
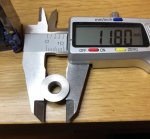
Here is what I’m going to use replacing parts with the silvered out kit ...note I have a 22mm washer (second in from the right) ...the MM510’s are 16mm so depending on the size of the hole you have you will need a washer to go with it)

Also note I crossed out that large nut in the pic ...this is the part I was describing in my first post and is what your contact touches to make it go ...was too big for my squonker)
6BB3480B-25A5-4987-B159-D2BF951EC395.jpeg

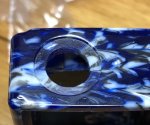
First thing to address is getting the 510 in the box ...bollocks doesn’t fit 838A01E4-057A-45AD-A3DF-8EDC3E8A6C79.jpeg

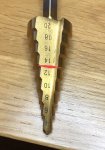
Ok measuring the threads I’ll need to use the 12mm step on the drill bit
65BDC3D7-2219-4B93-A7DD-5EC7E699B8D2.jpeg

0EF6D671-649E-4E3F-A10C-2FDBCFB82B49.jpeg

Go easy on here and make sure drill is going full speed before committing you don’t wanna snag and knacker your lovely box

EB3DE701-9274-4F00-B6F4-4A7FB3C7EFD3.jpeg

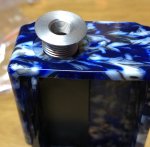
Job done

62C5EF82-F010-42C9-93B8-878F305CC1D0.jpeg

Now I’ve got that little ledge bit in the way time to get the dremmel out and remove it as flush as I can so it doesn’t interfere with the nut or squonk tubing

7E88536A-A43F-4949-89C4-CB3BEC1D2FE9.jpeg
 
Last edited:

KingPin!

In my defence, I was left unsupervised ^^
VU Donator
Platinum Contributor
Member For 4 Years
VU Challenge Team
Reviewer
in terms of the stock MM510 as you can see it’s 16mm and my box had an 18mm sink (I had pre measured this before ordering the right washer)

8A499960-4A26-45D8-8D6C-A7B0DD5A59C1.jpeg

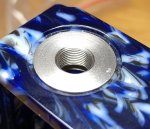
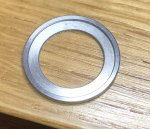
Here is the 18mm washer
8C45C681-344C-4591-BF81-13DB182DB29F.jpeg

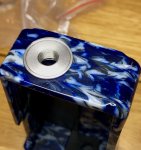
Fits flush ....liiiiiiiiike a glove

103CB71A-E78D-4F44-AF09-F716DBCCEEB2.jpeg

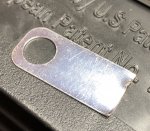
The other thing to note is the silver contact strip (the one with two holes) doesn’t actually fit over the threads of the MM510 ....another “oh bollocks” moment.

B7B298E4-0935-4325-8FB1-87D78D24807A.jpeg

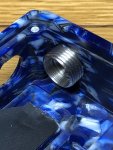
Next up was using the dremmel to cut a small ledge the 510 contact would be able to sit on. This made sure the contact sits flat when the nut is secured on and avoids the need to epoxy this bit.

19116669-5B4A-48C5-A2F5-C59864339863.jpeg

I measured inside the box (many times to make sure I got the cut point right) and figured I’d cut it about here ...I later flattened the end with a hammer on the side that wouldn’t be used to contact the battery
14311227-F02A-4A26-840B-28ADC55615FD.jpeg

Ok I was stupid and decided I would rush this bit and drill the hole bigger (12mm again) holding the contact myself ...yeah bad Darwinian idea on my part ...use the sodding vice doughnut...damn thing snagged on the step bit and started spinning at 1500rpm like a lawnmower ....don’t be stupid like me, do it right ....still blood sacrifice to the modding gods made I proceed to the next part

01C8B402-4A0E-4395-8663-6E40C4E74DFB.jpeg

I used a hammer and the dimple tool so add a dimple at this stage to the contact which you can see in the picture further up

I also used the dremmel with a fine file to sand down and rough edges along the cut line


Next up is bending and cutting the other contact strip....each box is different but I figured doing these bends would be best to fit this box. I had to step it out at the top on mine as I wanted to re-use the existing fire button as a mechanical actuator (it was nice and suited the look, plus it has an in inbuilt lock mechanism so why buy new when I can re-use)

But the first thing I did was measure the corner bend so I didn’t have to muck about cutting the contact part at the top of the strip

D013EFF8-4A02-460D-A597-A273D7A67F37.jpeg

I also snipped and filed the edges around the squonk door so the strip doesn’t get in the way

Finally I had to raise the battery part of the contact being I now removed the spring loaded contact ...the box wasn’t big enough to house a 21700 cell (I tried that first) but it is big enough to house a 20700 ....this bit took ages but it’s worth checking and re-checking before committing to any bending or cutting

Finally add a dimple to the bottom battery contact same as the top contact

Dry run ...loosely assembled the parts to make sure everything fits as it should

6388D06E-6779-4F9C-98D1-778E919CCBE6.jpeg

Also a dry run to test how it’s firing ...I made a small clip so you can hear the ramp up (I have a staple coil in this atty so ramp up is pretty damn good a massive improvement over the stock build!!)

https://imgur.com/a/YS9HHQ2

Ok getting excited now ...onto the final stages
 
Last edited:

KingPin!

In my defence, I was left unsupervised ^^
VU Donator
Platinum Contributor
Member For 4 Years
VU Challenge Team
Reviewer
So with all the parts assembled so far so good
145F221E-6438-42EB-AE78-9832B0FD00ED.jpeg

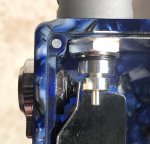
Next step was to sort out that fire button. The contact is metal and I didn’t want it becoming part of the circuit, so I needed to isolate it

What I did was find some plastic screw covers on amazon and snipped the very top off with scissors...then I stuck it over the contact and sanded it down flat as far as I could take it....this took loads of sodding about disassembling/assembling to get it right.

Admittedly this modification made the throw very short but there’s still enough of a gap to make it safe to use ...Happy days I can use my stock fire button now!!

1FAE144C-6894-4097-9CCC-003D75B227F6.jpeg

Now onto the epoxy part...holding the contact in places I decided to apply it thinly to the areas in red below

F3C4C3D5-0B70-49A7-8601-B3D491589DC3.jpeg

After mixing the glue (using a old plastic bank card on a peice of cardboard) - I let the glue set for a little while so it didn’t run everywhere when I applied it to the box...

Also I ruffed up the other side of the contact and box areas so they would adhere better...

Before gluing the peice in I made sure to use isopropyl (rubbing alcohol) to the glue area to make sure all surfaces were grease free

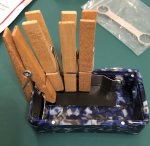
Don’t go made on glue application as it will squeeze out when you put the pegs on...Worthing having a toothpick and kitchen towel at the ready to wipe away excess glue from the edges

I left sitting like this for 24 hours
BEA7997A-284D-4170-9839-204AA40897E7.jpeg


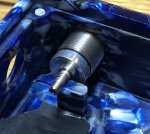
Now re-assemble...I didn’t buy the 510 tightening jig from modmaker and managed without it, but it does make life easier at the end.

E7FF15F8-68B4-4170-B6BD-A3351B6B72C3.jpeg

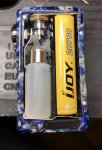
Now all I need is the Sanyo 20700C cell and I’m away, in the meantime I’m using a Sony VTC5A 18650 and very happy with my project :) a massive boost to performance so was well worth the time, effort and fun learning this
 
Last edited:

MrMeowgi

The Vapin' Drummer
VU Donator
Diamond Contributor
Member For 4 Years
So with all the parts assembled so far so good
View attachment 126744

Next step was to sort out that fire button. The contact is metal and I didn’t want it becoming part of the circuit, so I needed to isolate it

What I did was find some plastic screw covers on amazon and snipped the very top off with scissors...then I stuck it over the contact and sanded it down flat as far as I could take it....this took loads of sodding about disassembling/assembling to get it right.

Admittedly this modification made the throw very short but there’s still enough of a gap to make it safe to use ...Happy days I can use my stock fire button now!!

View attachment 126747

Now onto the expoxy part...holding the contact in places I decided to apply it thinly to the areas in red below

View attachment 126745

After mixing the glue (using a old plastic bank card on a price of cardboard) - I let the glue set for a little while so it didn’t run everywhere when I applied it to the box...

Also I ruffed up the other side of the contact and box areas so they would adhere better...

Before gluing the peice in I made sure to use isopropyl (rubbing alcohol) to the glue area to make sure all surfaces were grease free

Don’t go made on glue application as it will squeeze out when you put the pegs on...Worthing having a toothpick and kitchen towel at the ready to wipe away excess glue from the edges

I left sitting like this for 24 hours
View attachment 126748


Now re-assemble...I didn’t buy the 510 tightening jig from modmaker and managed without it, but it does make life easier at the end.

View attachment 126746

Now all I need is the Sanyo 20700C cell and I’m away, in the meantime I’m using a Sony VTC5A 18650 and very happy with my project :) a massive boost to performance so was well worth the time, effort and fun learning this
F'n amazing write up and modifications. I built a wooden squonk last year. Tons of accomplishment to be had when you finish.:)
 

KingPin!

In my defence, I was left unsupervised ^^
VU Donator
Platinum Contributor
Member For 4 Years
VU Challenge Team
Reviewer
F'n amazing write up and modifications. I built a wooden squonk last year. Tons of accomplishment to be had when you finish.:)

Thanks mate :cheers: Agree it was a really rewarding project, well happy with it. knowing you did something like this yourself makes it all the better.

now to think about what to do next haha
 

PoppaVic

Gold Contributor
Member For 4 Years
No. I've built a half-dozen or so mods into plastic/abs boxes over the years, but no: I just don't like single-cell mechanical.

Right now, my only mechanical is a ds-style - and I just love the 2P design.. I'm hoping a buddy eventually comes thru with a PWM board and 3d-print for programming, but I can live with the SX mini-M, pair of Vt133's and the ds-style. [edit: correction, I've also 2x NC v1's for the Apocalypse packed away, which I had forgotten ;-]

I do have about 6x 510's I ordered from Varitube, though - pretty much one of each version, squonk and regular: I wanted to see how they vary since the pictures were fairly crappola. These were supposed to hook up to a programmable PWM, (but the buddy is slacking - the first design just died at testing with his own code).

Anyway, nice post - it really should convince many they CAN improve their chinee-boxes ;-)
 

r055co

VU Donator
Platinum Contributor
Member For 4 Years
So with all the parts assembled so far so good
View attachment 126744

Next step was to sort out that fire button. The contact is metal and I didn’t want it becoming part of the circuit, so I needed to isolate it

What I did was find some plastic screw covers on amazon and snipped the very top off with scissors...then I stuck it over the contact and sanded it down flat as far as I could take it....this took loads of sodding about disassembling/assembling to get it right.

Admittedly this modification made the throw very short but there’s still enough of a gap to make it safe to use ...Happy days I can use my stock fire button now!!

View attachment 126747

Now onto the epoxy part...holding the contact in places I decided to apply it thinly to the areas in red below

View attachment 126745

After mixing the glue (using a old plastic bank card on a peice of cardboard) - I let the glue set for a little while so it didn’t run everywhere when I applied it to the box...

Also I ruffed up the other side of the contact and box areas so they would adhere better...

Before gluing the peice in I made sure to use isopropyl (rubbing alcohol) to the glue area to make sure all surfaces were grease free

Don’t go made on glue application as it will squeeze out when you put the pegs on...Worthing having a toothpick and kitchen towel at the ready to wipe away excess glue from the edges

I left sitting like this for 24 hours
View attachment 126748


Now re-assemble...I didn’t buy the 510 tightening jig from modmaker and managed without it, but it does make life easier at the end.

View attachment 126746

Now all I need is the Sanyo 20700C cell and I’m away, in the meantime I’m using a Sony VTC5A 18650 and very happy with my project :) a massive boost to performance so was well worth the time, effort and fun learning this
https://www.18650batterystore.com/20700-p/sanyo-ncr20700a.htm

The A hits very well

Sent from my HTC 10 using Tapatalk
 

KingPin!

In my defence, I was left unsupervised ^^
VU Donator
Platinum Contributor
Member For 4 Years
VU Challenge Team
Reviewer
https://www.18650batterystore.com/20700-p/sanyo-ncr20700a.htm

The A hits very well

Sent from my HTC 10 using Tapatalk

Thanks I’ve heard that the A’s are good and would have snapped some up, we seem to have a 20700 dry spell over here at the moment, can’t find any in the usual haunts as they stopped production on them I beleive (could be wrong about that)

The C is going to be replacing the A and outperforms it according to fogstar, they have them coming in soon so I’ll wait until Ben gets his delivery and order some then
 

springer

Just like Jerry
VU Donator
Bronze Contributor
Member For 4 Years
Reddit Exile
So with all the parts assembled so far so good
View attachment 126744

Next step was to sort out that fire button. The contact is metal and I didn’t want it becoming part of the circuit, so I needed to isolate it

What I did was find some plastic screw covers on amazon and snipped the very top off with scissors...then I stuck it over the contact and sanded it down flat as far as I could take it....this took loads of sodding about disassembling/assembling to get it right.

Admittedly this modification made the throw very short but there’s still enough of a gap to make it safe to use ...Happy days I can use my stock fire button now!!

View attachment 126747

Now onto the epoxy part...holding the contact in places I decided to apply it thinly to the areas in red below

View attachment 126745

After mixing the glue (using a old plastic bank card on a peice of cardboard) - I let the glue set for a little while so it didn’t run everywhere when I applied it to the box...

Also I ruffed up the other side of the contact and box areas so they would adhere better...

Before gluing the peice in I made sure to use isopropyl (rubbing alcohol) to the glue area to make sure all surfaces were grease free

Don’t go made on glue application as it will squeeze out when you put the pegs on...Worthing having a toothpick and kitchen towel at the ready to wipe away excess glue from the edges

I left sitting like this for 24 hours
View attachment 126748


Now re-assemble...I didn’t buy the 510 tightening jig from modmaker and managed without it, but it does make life easier at the end.

View attachment 126746

Now all I need is the Sanyo 20700C cell and I’m away, in the meantime I’m using a Sony VTC5A 18650 and very happy with my project :) a massive boost to performance so was well worth the time, effort and fun learning this
That is some amazing work! And a beautiful mod! Well done sir.
 

jwill

The Great King of Nothing
VU Donator
Platinum Contributor
Member For 2 Years
VU Challenge Team
Reddit Exile
VU SWAT
Very fine job KP. Nice to see how it all played out.
 

f1r3b1rd

https://cookingwithlegs.com/
Staff member
Senior Moderator
VU Donator
Diamond Contributor
VU Challenge Team
Member For 5 Years
VU Patreon
It came out Awesome bro!
Congrats on the build!!!!!
 

VU Sponsors

Top