OXVA Origin AIO & Unicoil RBA
Introduction
The OXVA Origin is an AIO from OXVA, a relatively new company in the vaping world. OXVA was founded by Justin Lai, who designed the Aegis series of mods and Zeus tanks at Geekvape, so there’s a lot of pedigree behind the company despite them being new kids on the block.
The OXVA Origin is an AIO which features a refillable pod and has a power output range between 5-40W. It uses an external 18650 battery and is, according to OXVA, the smallest 18650 AIO.
Let’s take a look at the Origin AIO.
Disclaimer: I was sent the Origin AIO for review by OXVA.
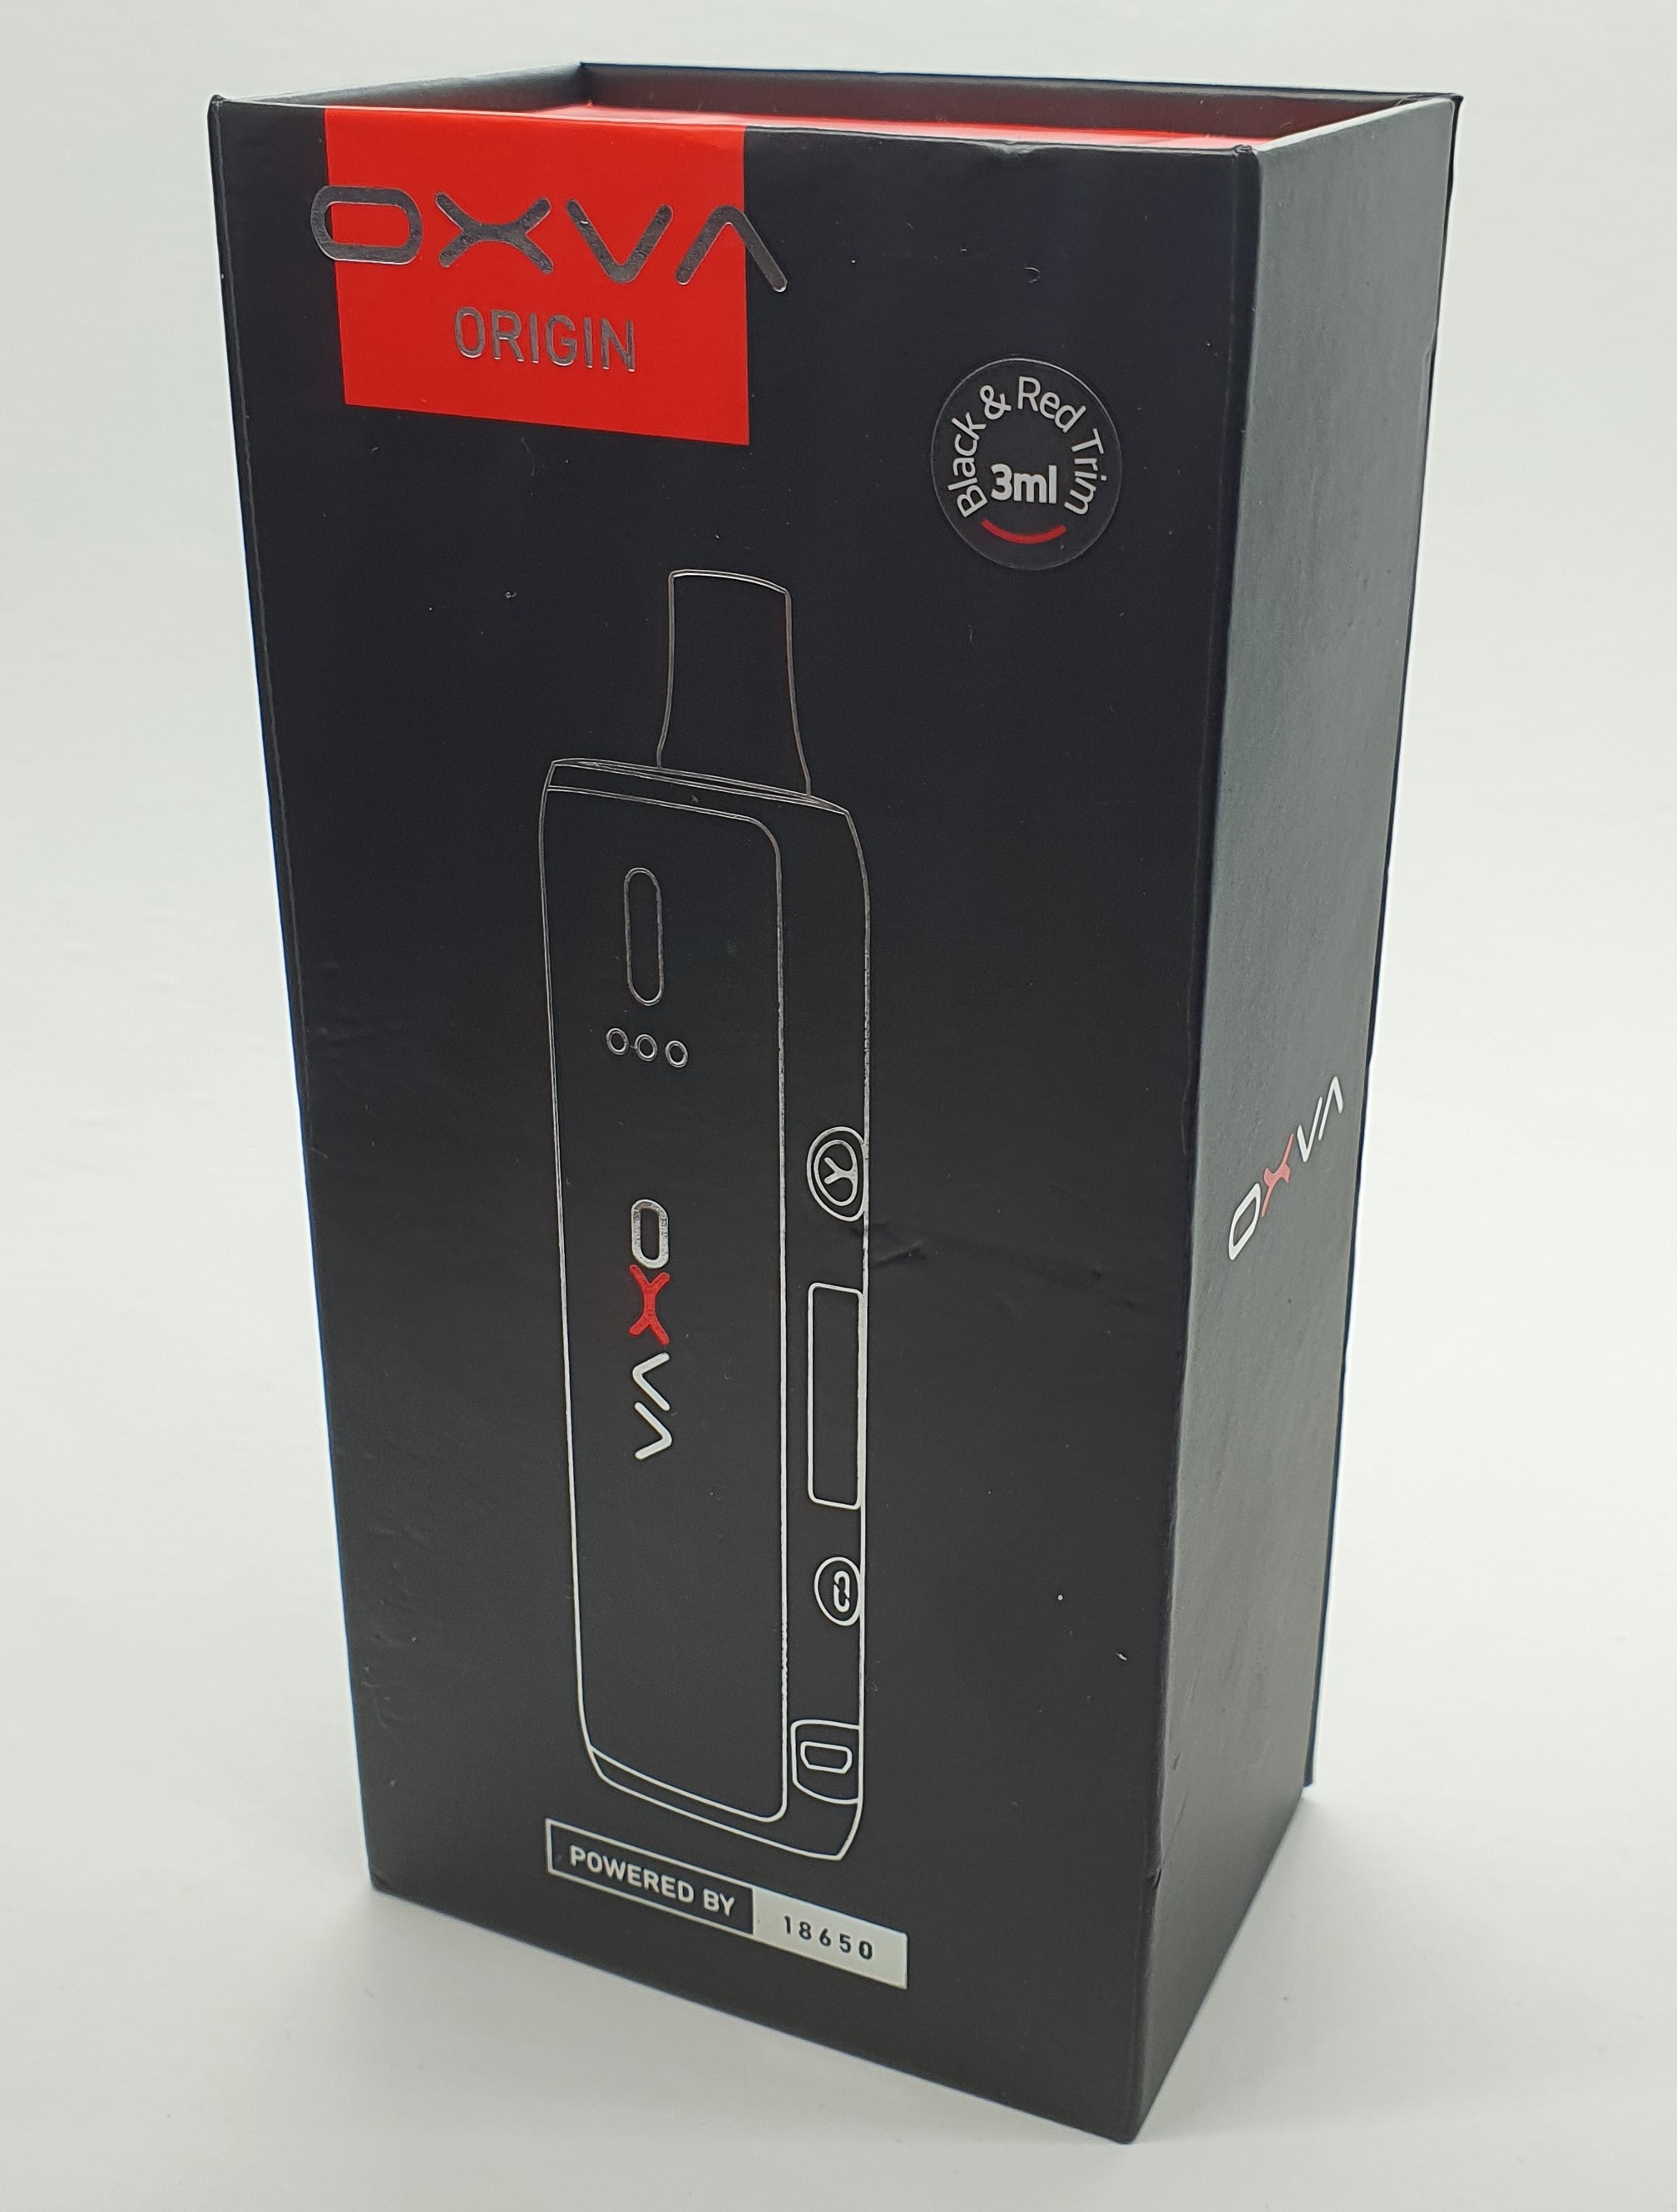
Box Contents

Design & Build Quality
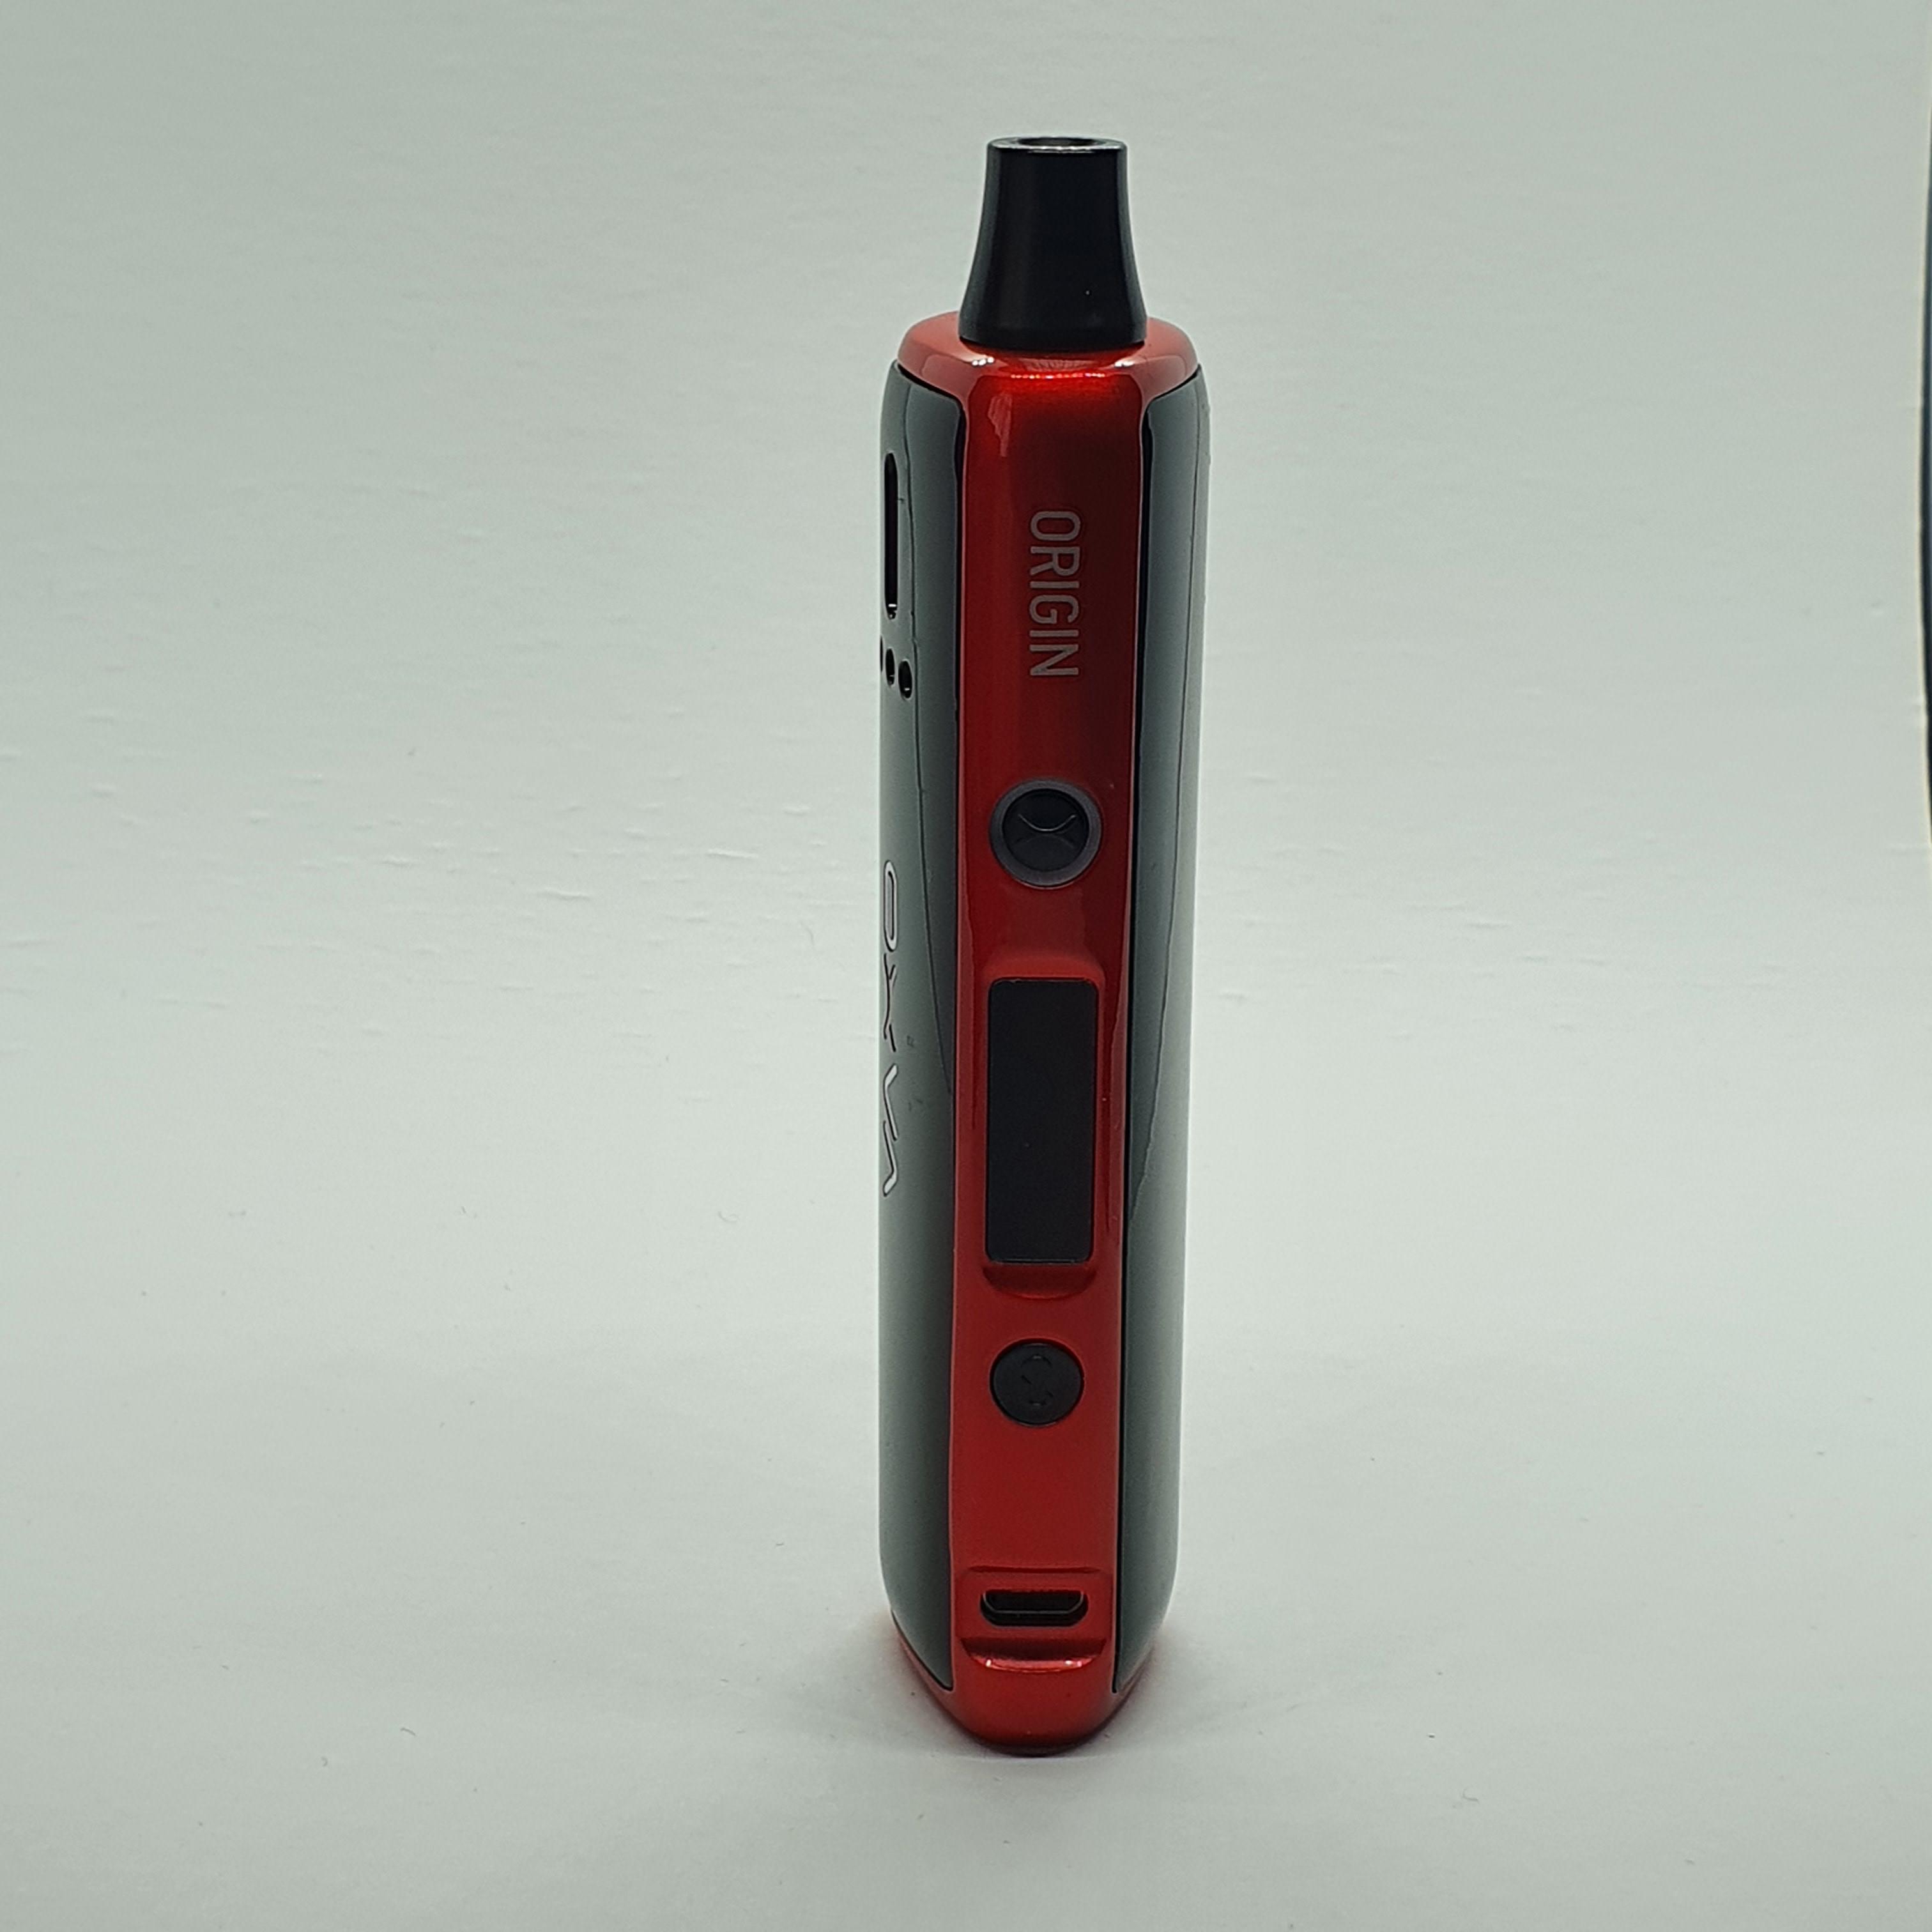
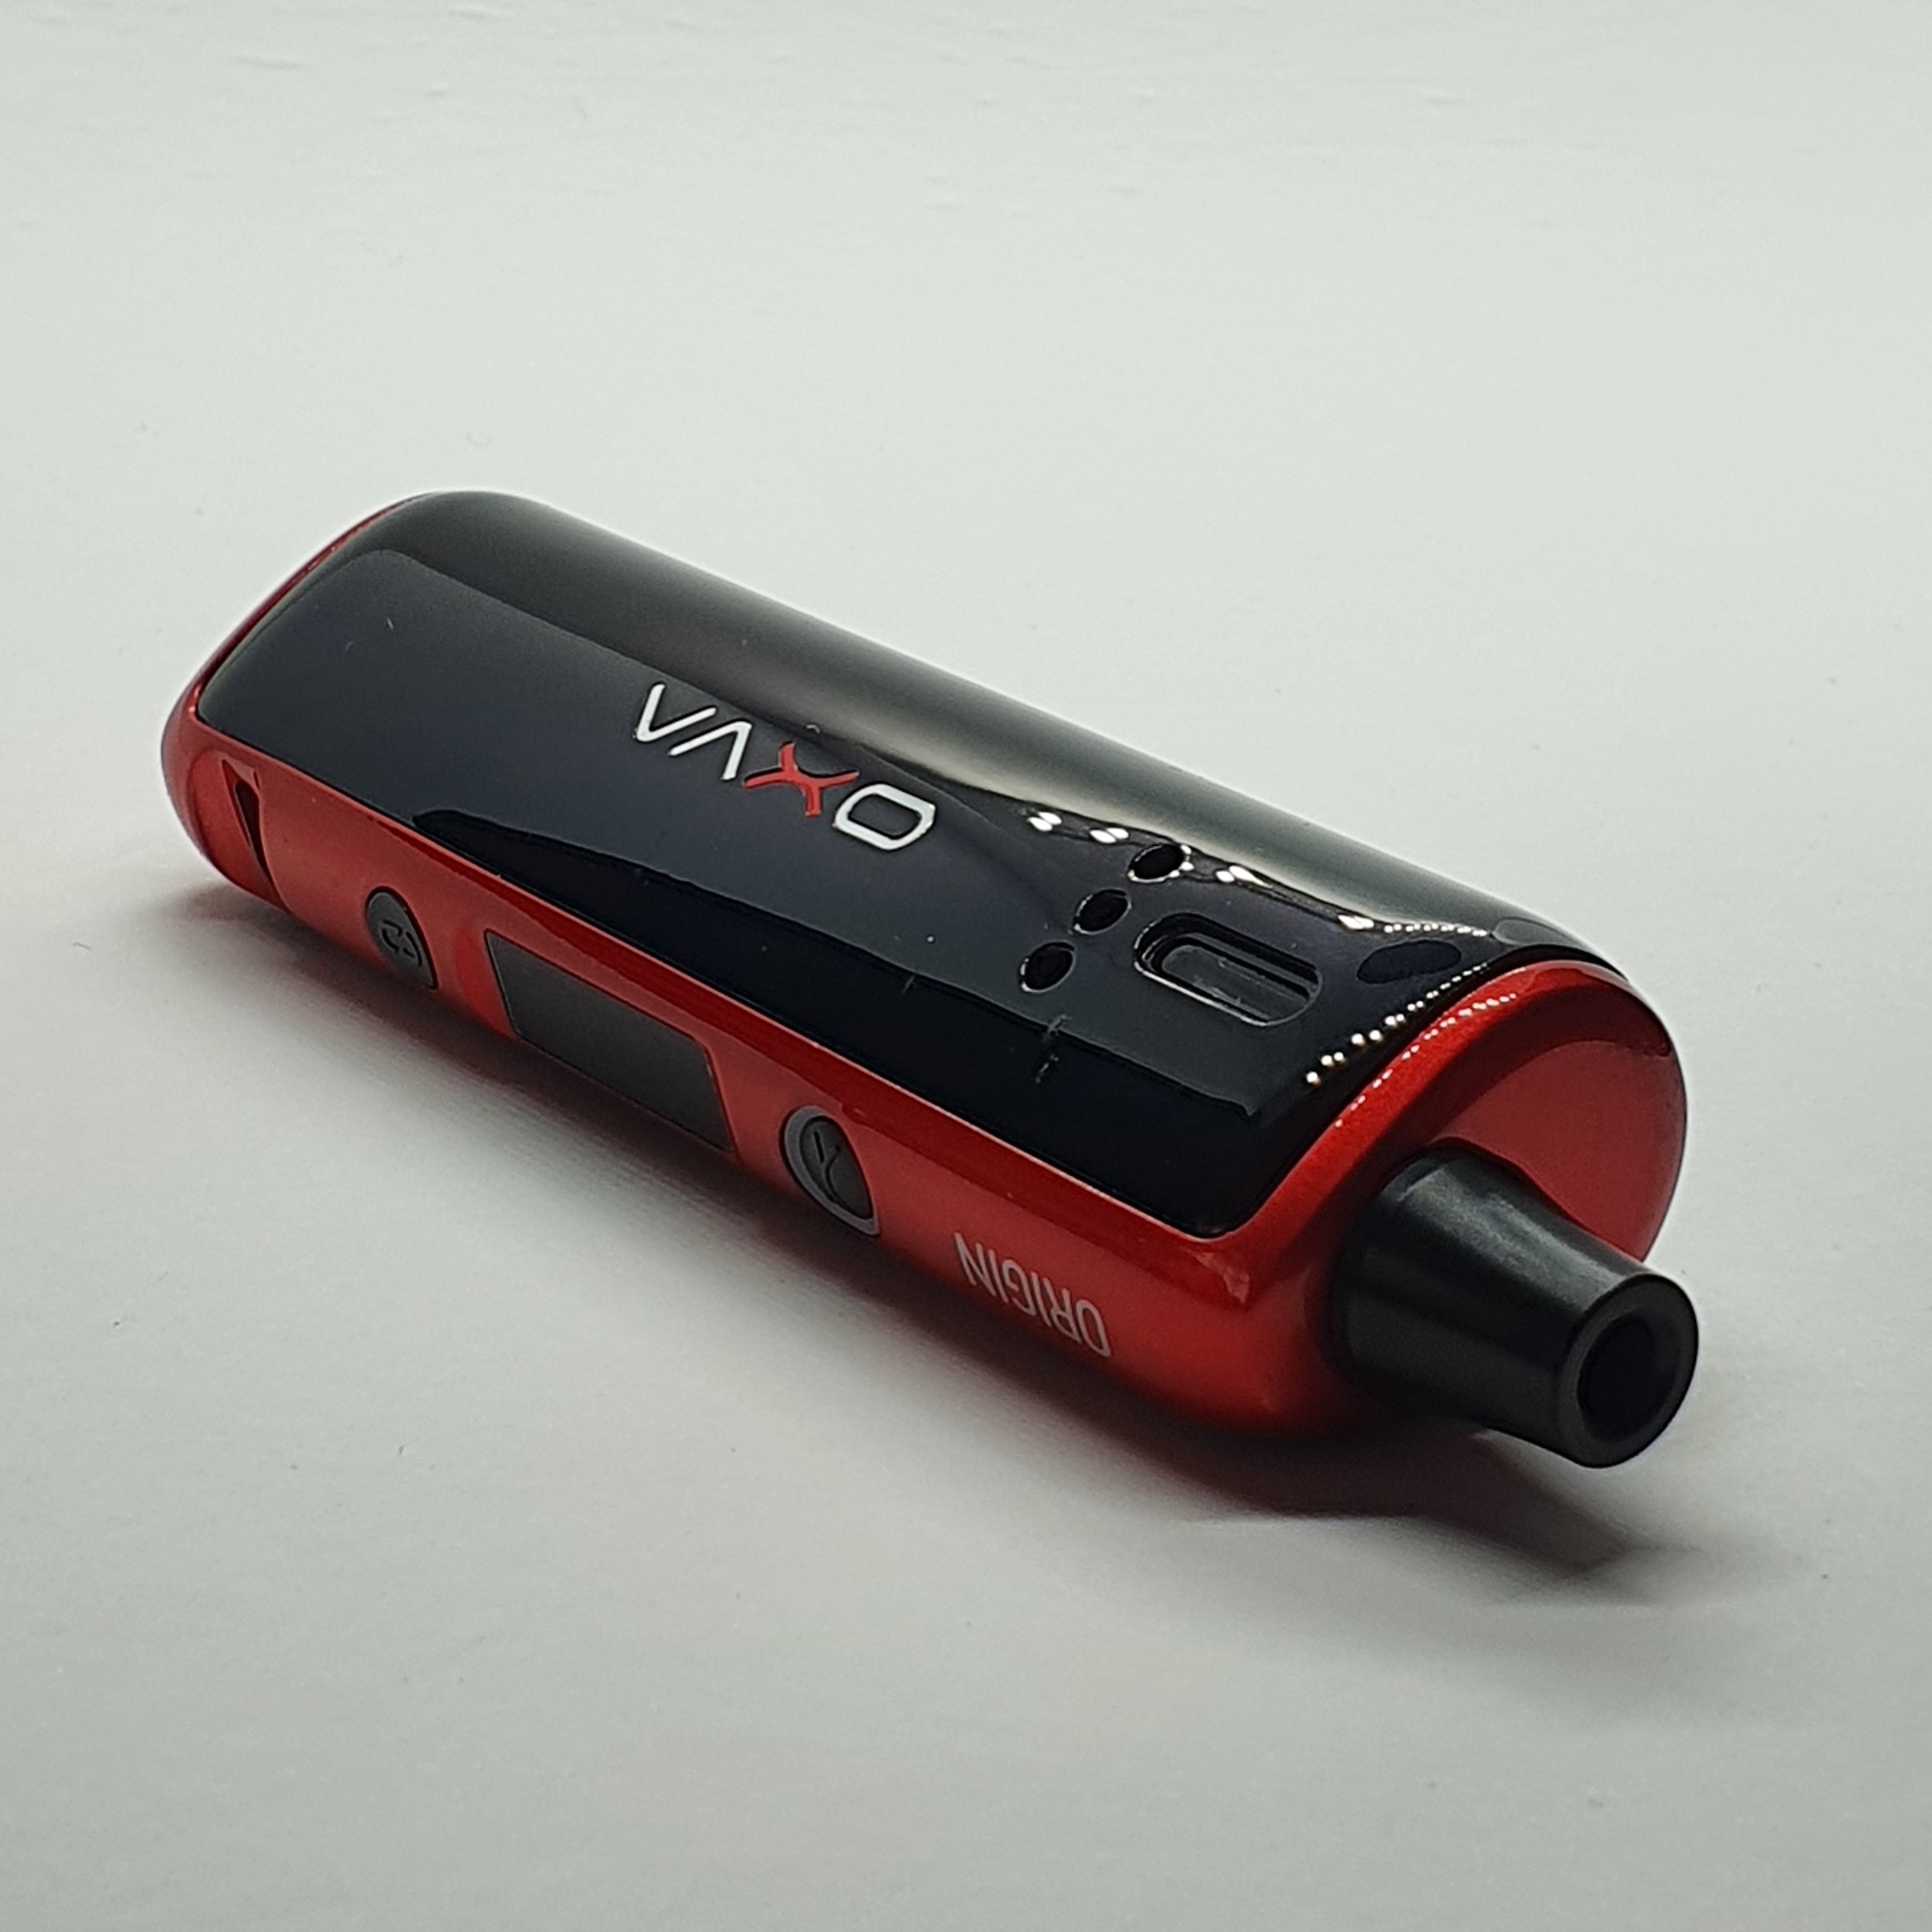
The Origin has a drip tip on the top of the device, however it is not a standard 510 drip tip. It is tapered in shape, being slightly thinner at the top than the bottom. It’s a comfortable drip tip to use, but being non standard, if you lose it or break it you cannot just pop another one on. I would have either preferred it to be non removable or a standard 510 fit, personally.
The body of the device is tall and slim, fitting in your hand comfortably. It is wider on one side, creating a very nice overall shape to hold onto. The frame of the body is metal and it has two plastic panels on either side.
One of these panels is removed to reveal the battery compartment and the pod. The removable panel is held on by two magnets, which are plenty strong enough. You can hold the panel about 1cm away and let go; it snaps right into place. It’s not coming off unless you want it to, so no worries about it falling off accidentally.
The battery compartment has a ribbon to help you remove your battery for charging and there is no wiggle of the battery when installed.
The panel on the other side of the device has a little window to allow you to see your liquid level. I have found the window to be absolutely fine for viewing the liquid level, it’s not difficult to see like with some other AIO devices. Below the window are 3 airflow holes and below these is the OXVA logo.
On the bottom of the device are some battery venting holes and the usual safety marks.
On the front of the device is the Origin name, the fire button, screen, wattage adjustment button and a micro USB port.
The fire button is circular and convex shaped. It is also surrounded by an LED indicator. It is clicky and responsive when pressed. It took a little time to get used to the button, due to its size, but it works absolutely fine and you get used to it.
The screen of the Origin displays your wattage, voltage, coil resistance and battery life. It’s black and white and is perfectly legible even when outside in bright daylight. There are no menus to navigate, everything is displayed on one screen.
The adjustment button is a single button, which scrolls up through your wattage selection. Once you reach 40W you press it again to round robin. Single clicks adjust in one watt increments and you can hold the button to scroll up through wattages faster. The single button configuration works absolutely fine and the button is nice and accurate when letting go.
Overall, the build quality of the device is high. It feels nice and sturdy and well put together. My only niggle from an aesthetic point of view is that the plastic panels have a glossy finish, so they attract fingerprints and smudges. I would have preferred them to have a matt finish like the metal frame of the device.
Features & Functions
The Origin is powered by the Photon chip, which allows it to fire between 5-40W. It also features an intelligent-match system where it generates the adjustment range of the coil installed, based on its resistance. This should ensure that you don't burn your coil by using too high of a wattage.
The Origin is a really simple device to use. The only thing you are going to be adjusting is your wattage, and you can't really go wrong with this due to the limiting of the wattage range based on the coil resistance.
Below are the button combinations for usage:
Pod
The pod is located by removing the side panel. It sits at the top of the inside of the device, above the battery. Removing the pod is done by placing a fingernail in the groove on the right side of the pod and pulling, it will swivel out of the device and can then be removed.
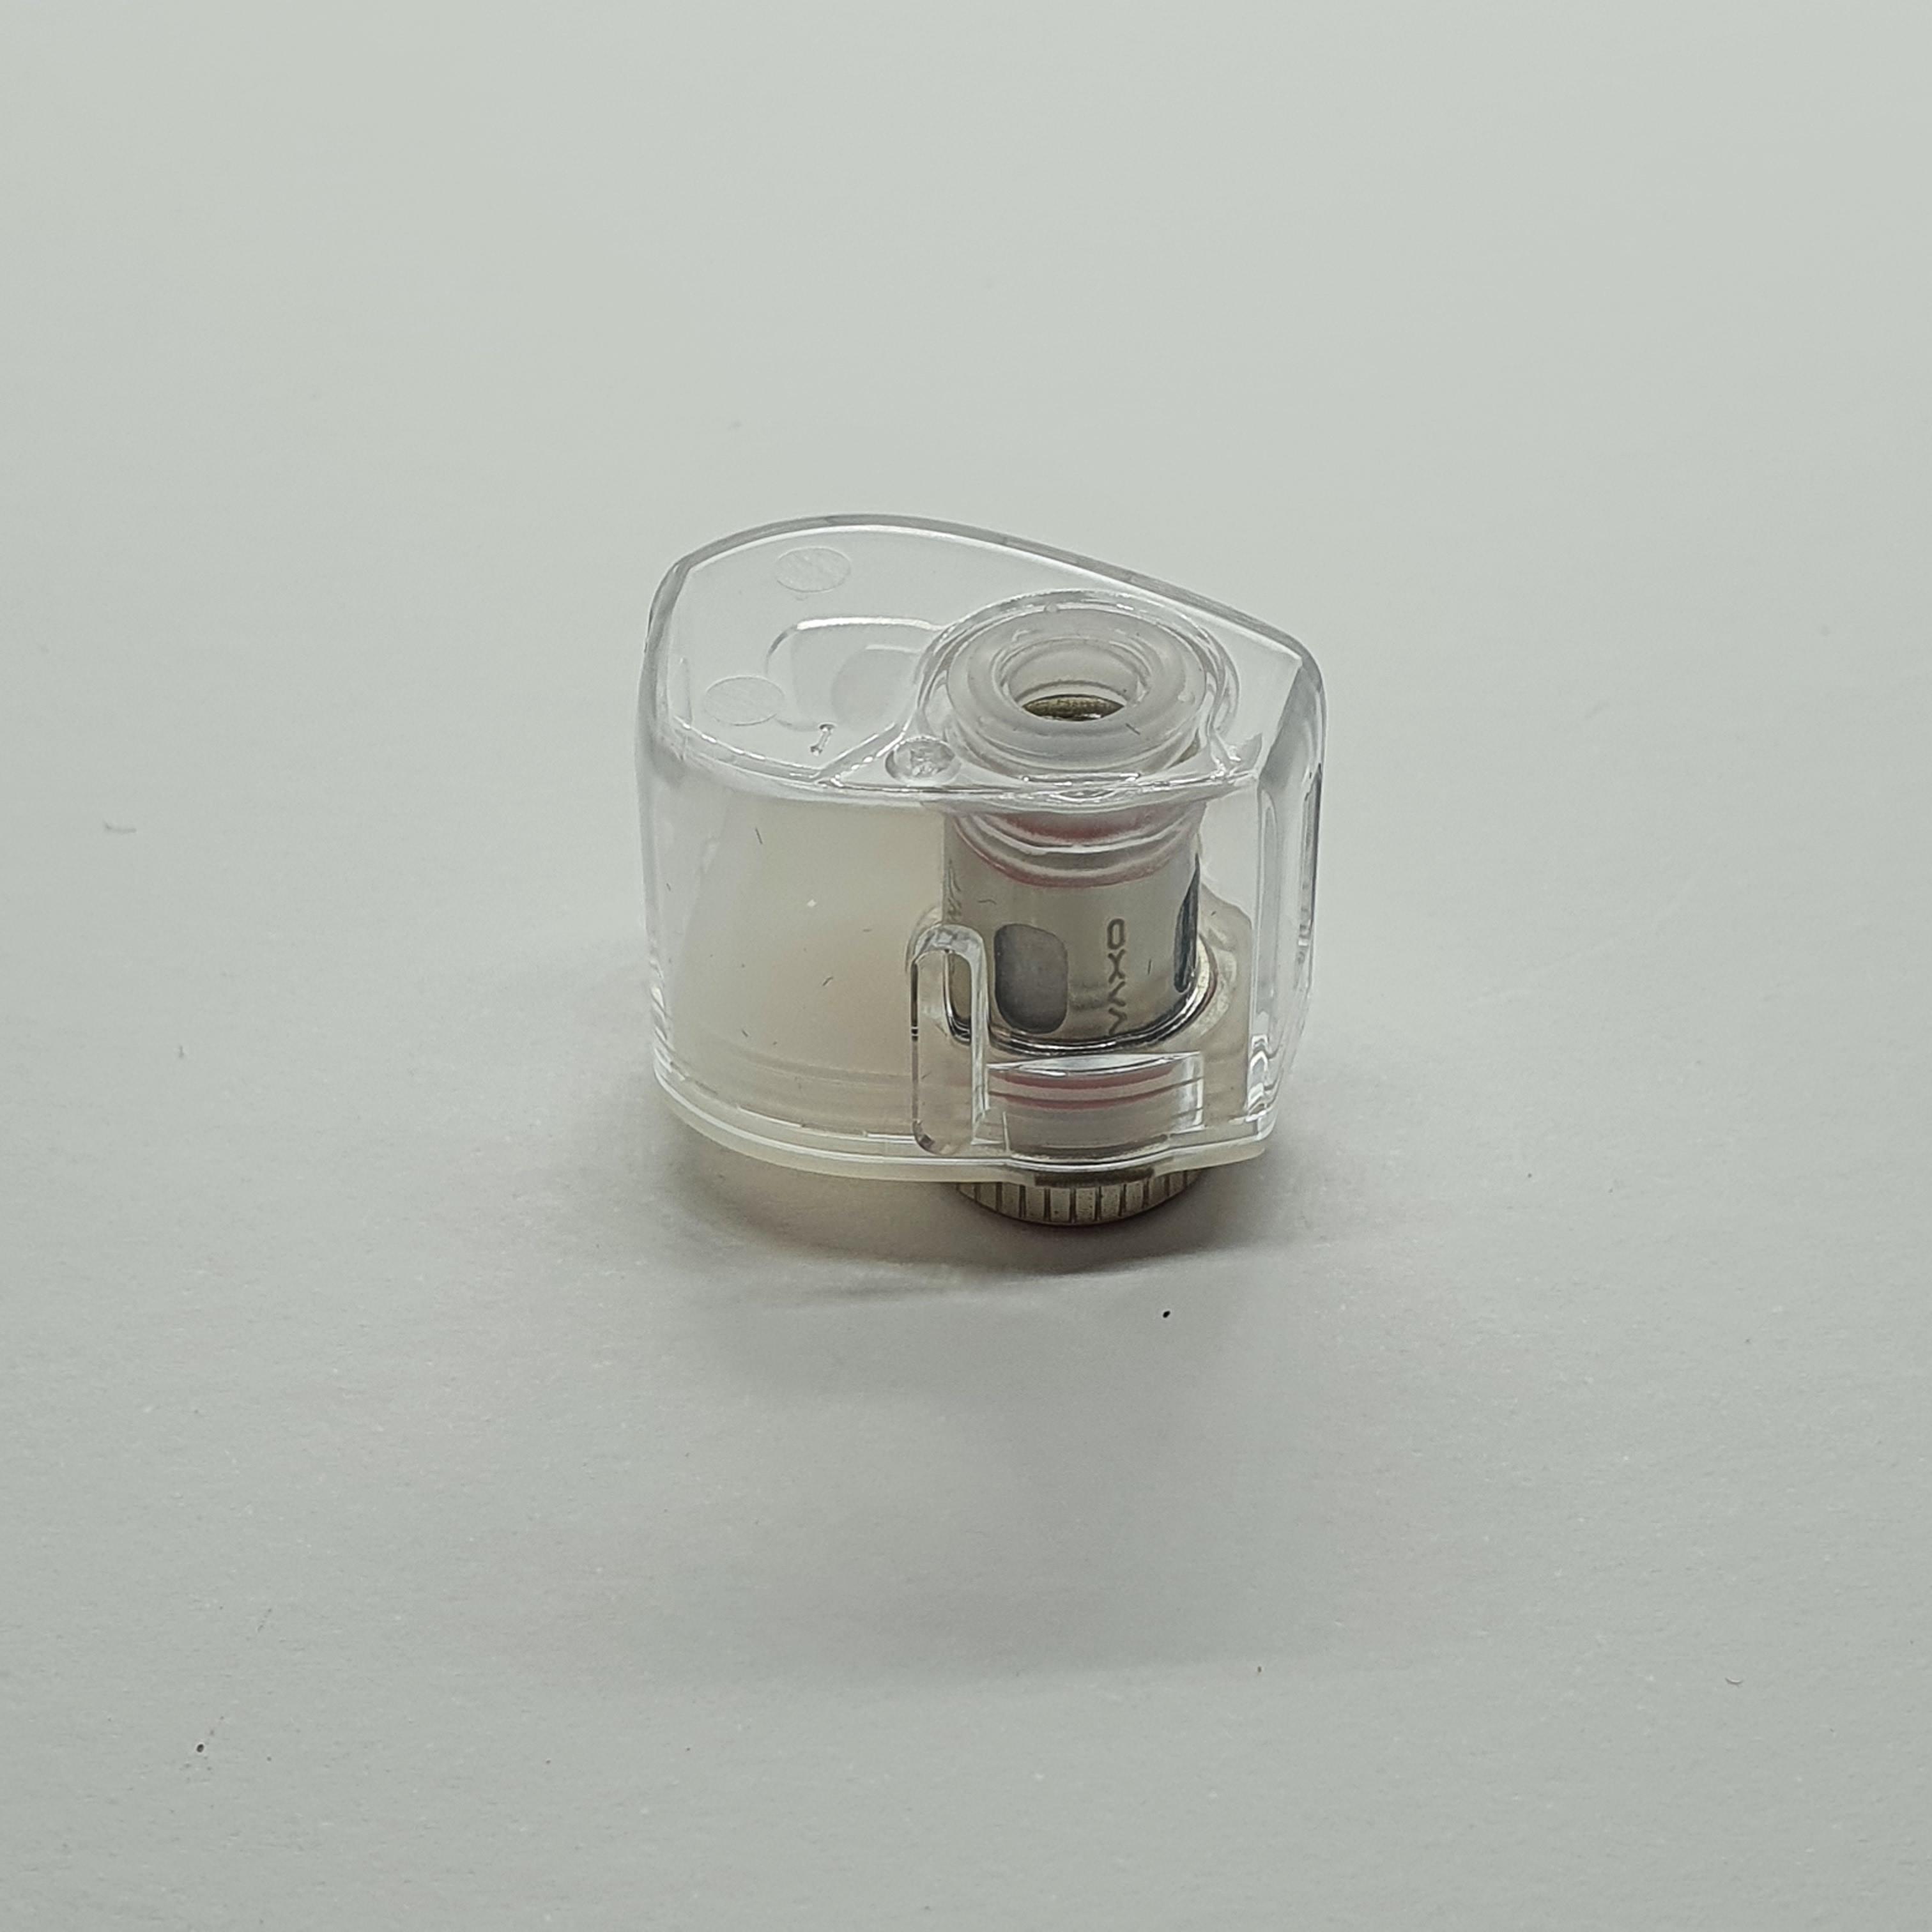
The pod can hold 3ml of liquid (2ml TPD) and is filled by removing the rubber stopper from the fill port. It is easy enough to fill and I have experienced no leaking from the fill port, despite it being located on the side of the pod. The rubber stopper fits firmly into place with a nice click and doesn't feel flimsy.
The airflow control ring is actually attached to the bottom of the coil you have installed. It’s important to note that the airflow control ring is reusable, so don’t throw it away when changing coils!
Adjusting the airflow has to be done with the pod out of the tank. I can’t reach it with a nail when the pod is installed. Once the pod is removed it turns nicely and is neither too stiff or too slack.
To remove a coil you just pull the airflow control ring and the pod will come out of the bottom of the pod. You will need to do this when the tank is empty otherwise you will have liquid leaking out of the pod. It is possible to do when you have roughly a half pod of liquid, but you will have to keep the pod on its side when doing this to avoid spilling the liquid remaining in the pod.
Installing a new coil is simple to do. Remove the airflow control ring from the old coil, screw a new coil to the airflow control ring and push the coil into the bottom of the pod, taking care to make sure you have lined up the airflow control ring correctly. You will know it’s in correctly as you will struggle to put the pod back into the device if it’s not pushed in properly.
I always fill the pod with liquid and leave it to sit for about 5 minutes to allow the coil to saturate with liquid.
The pod then pushes back into the device. I find it easier to push the left side first where the connection is, then push the right side of the pod into place.
Coils
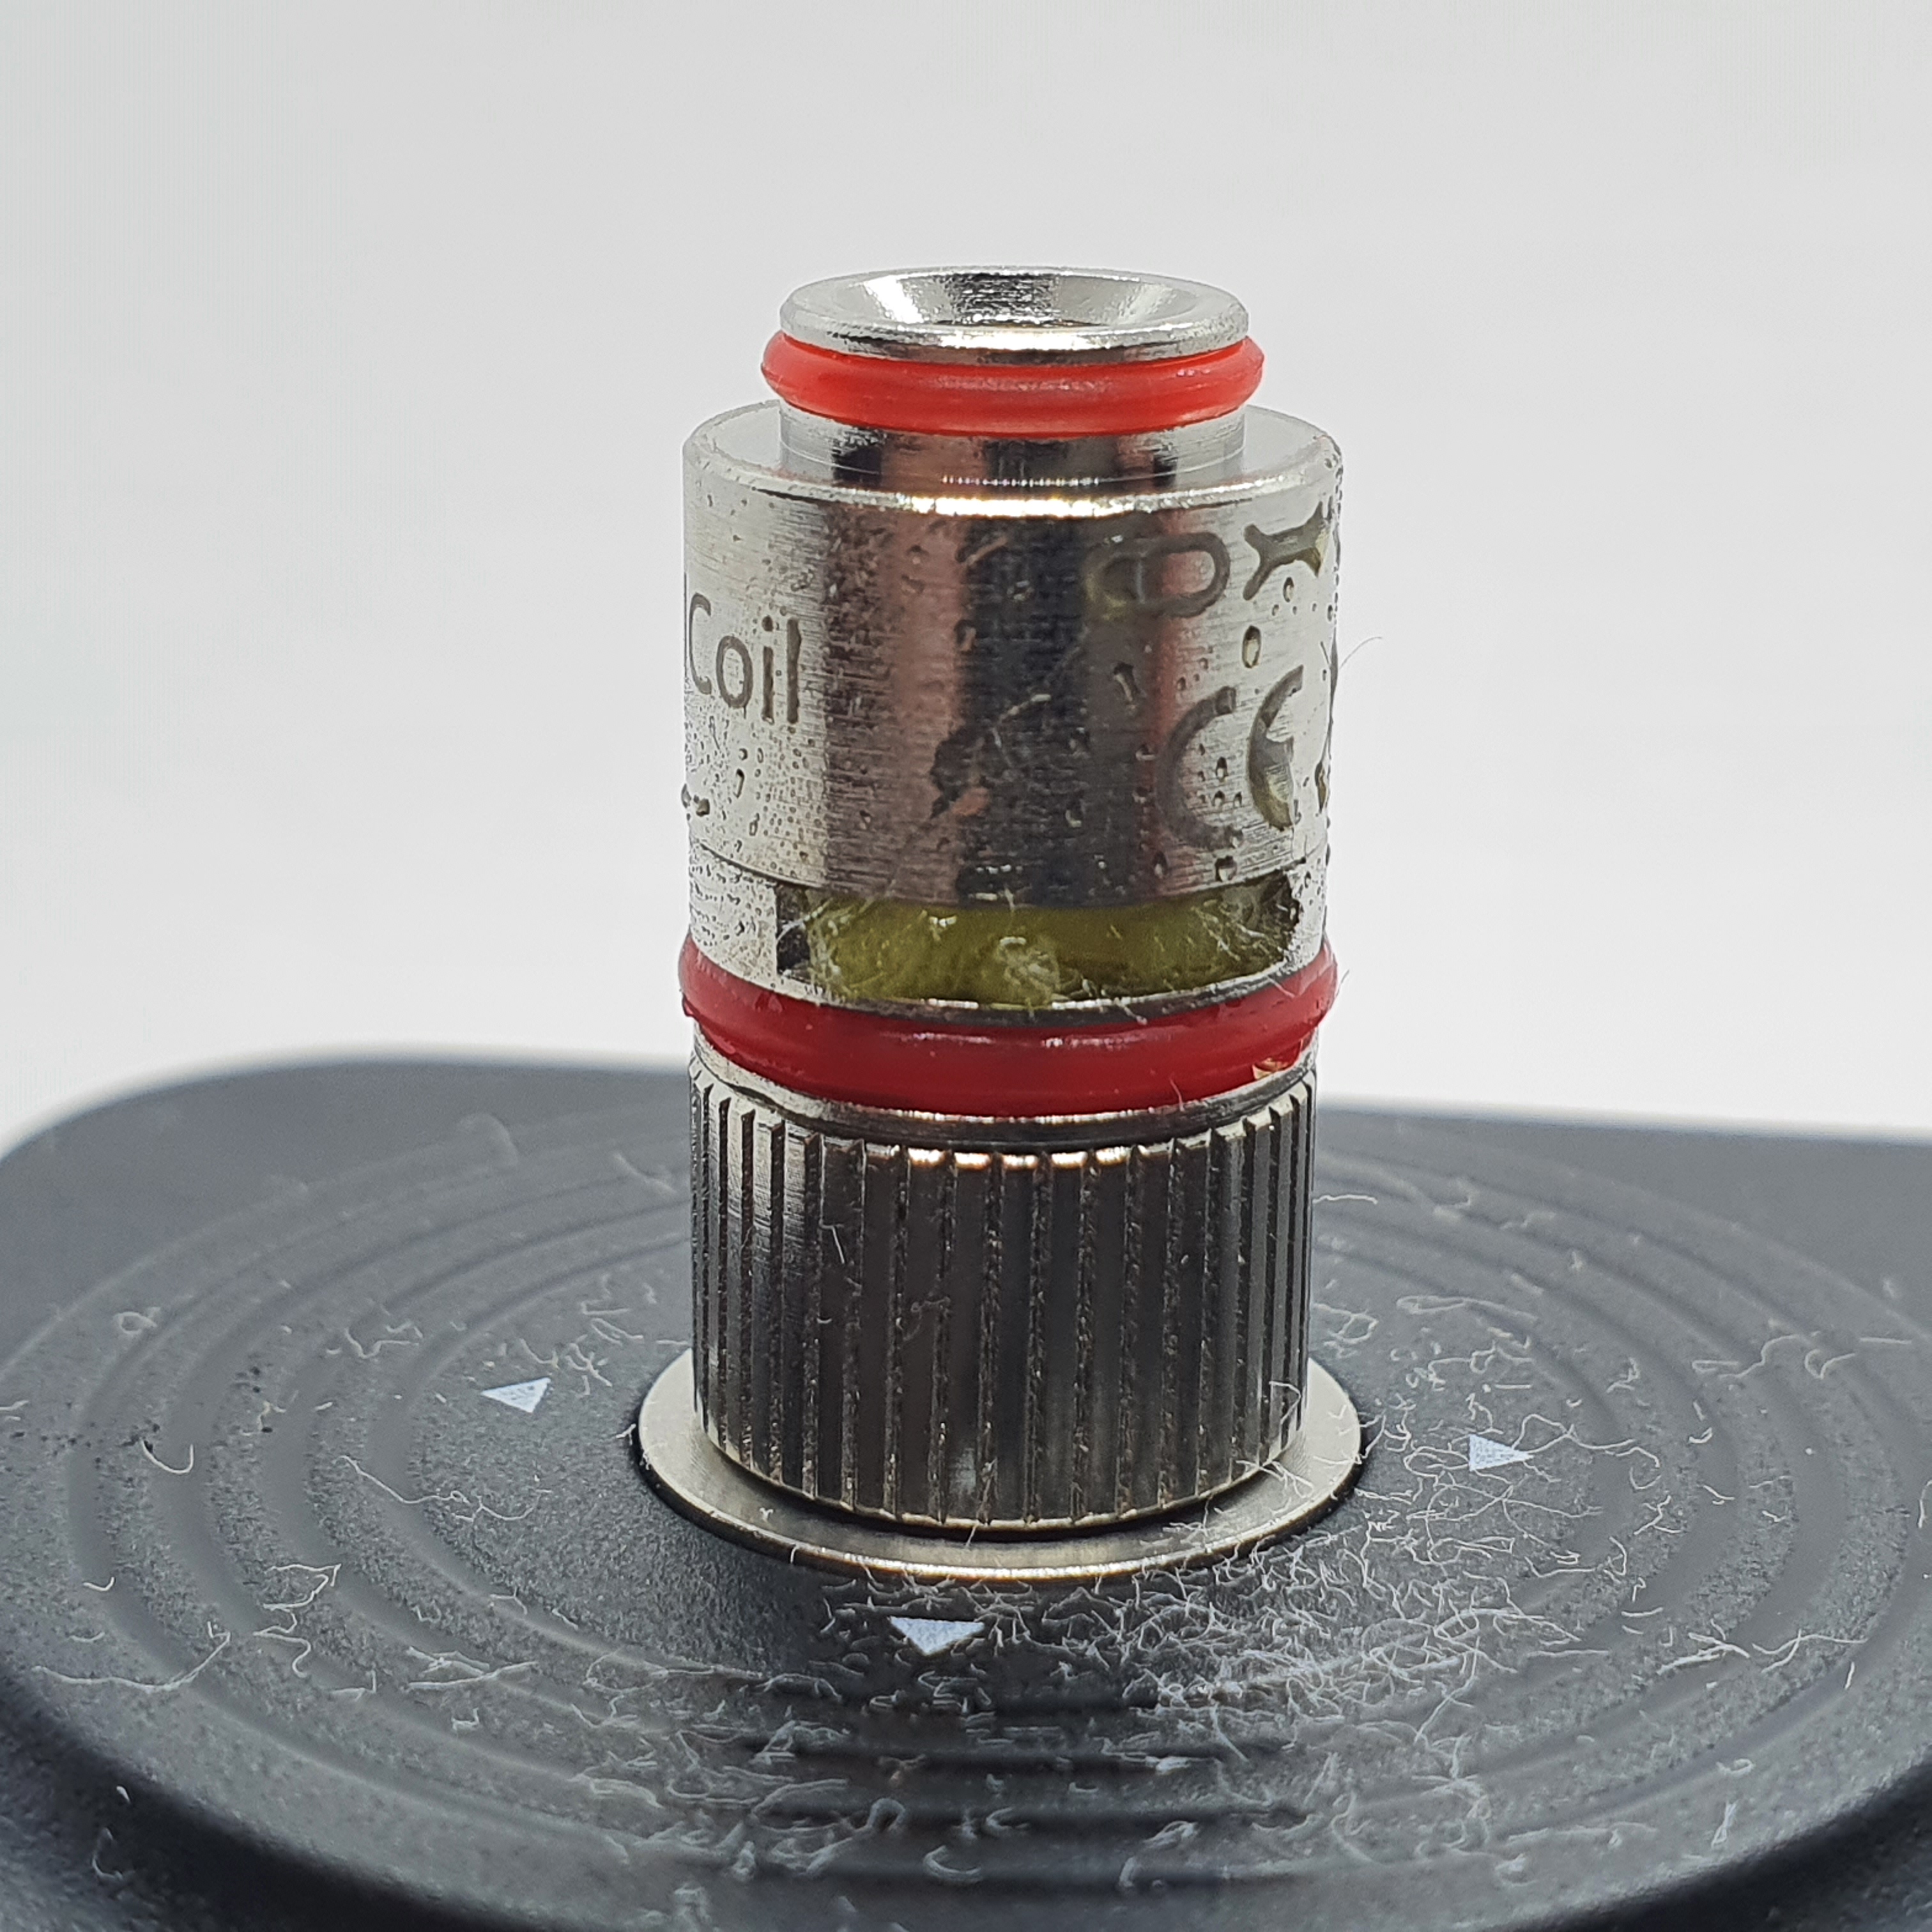
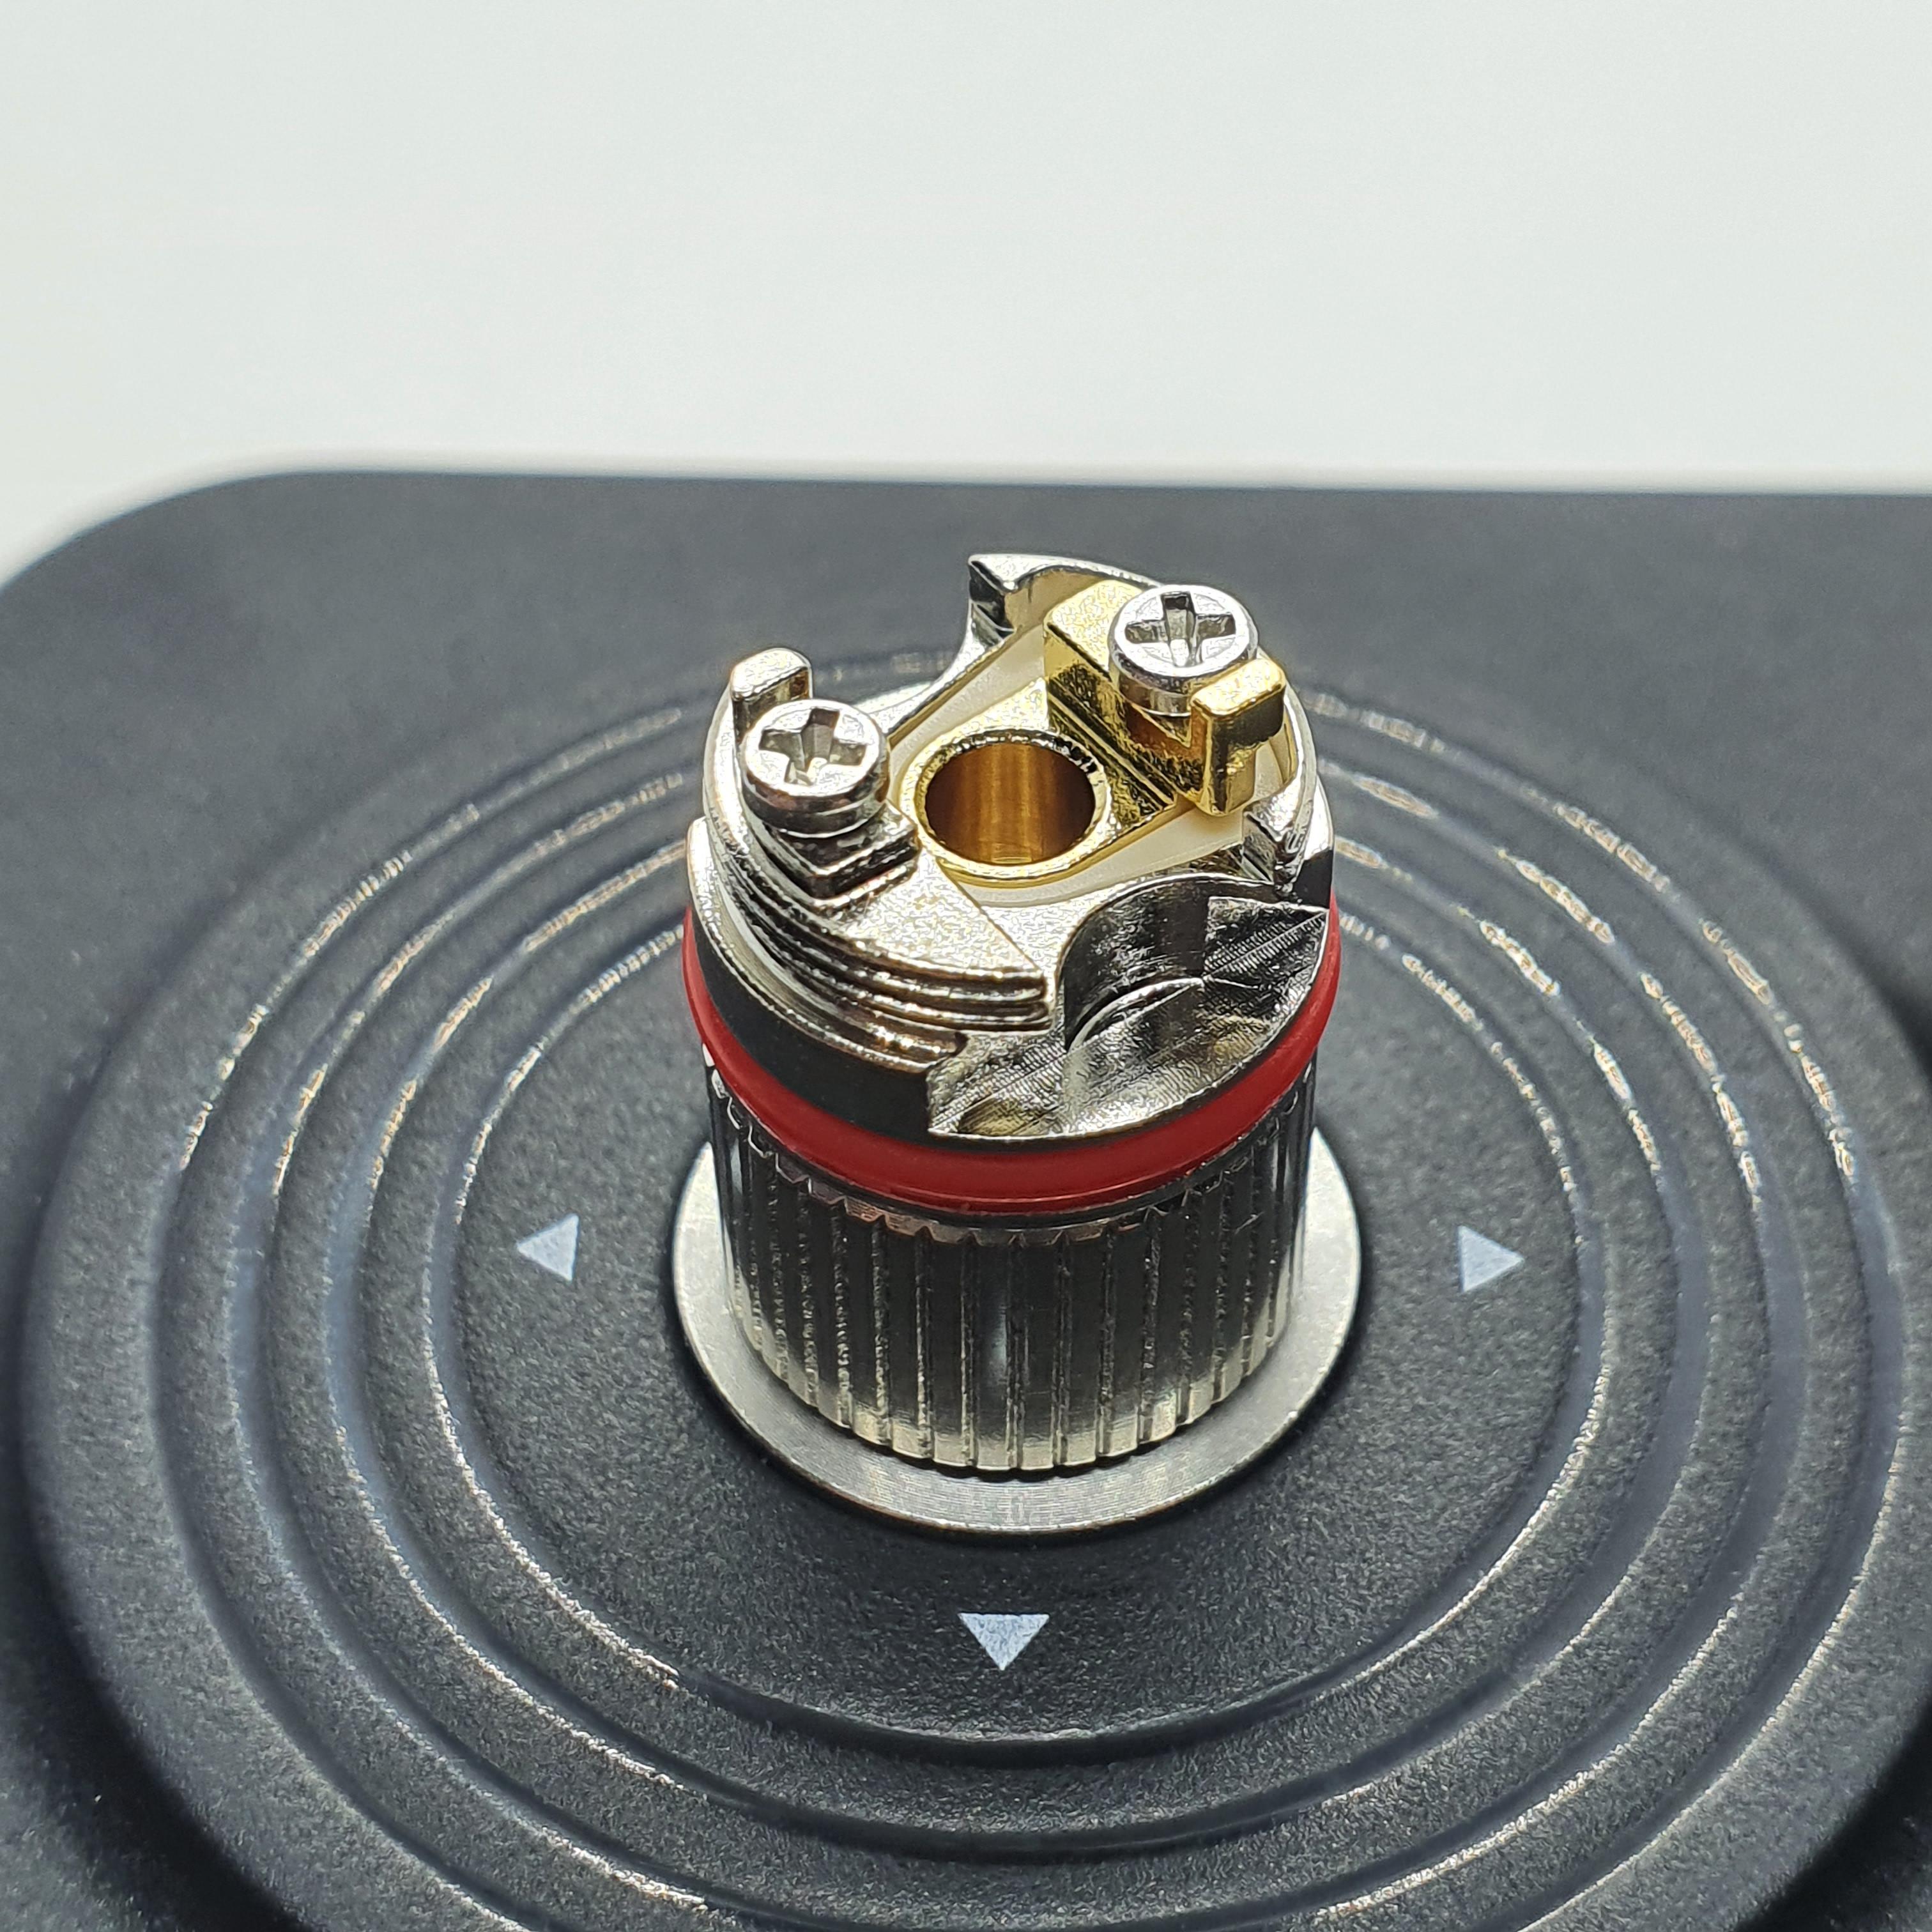
You get a 0.3ohm mesh coil already installed in the Origin and a 0.5ohm mesh coil in the box. You can also purchase a 1ohm coil and there is an RBA kit available too.
The 0.3ohm coil is rated between 30-40W and is meant for DTL vaping. The 0.5ohm coil is rated between 20-25W and is again a DTL coil, but you can get a loose MTL vape if you close the airflow down. The 1ohm coil is rated between 10-15W and is a MTL coil.
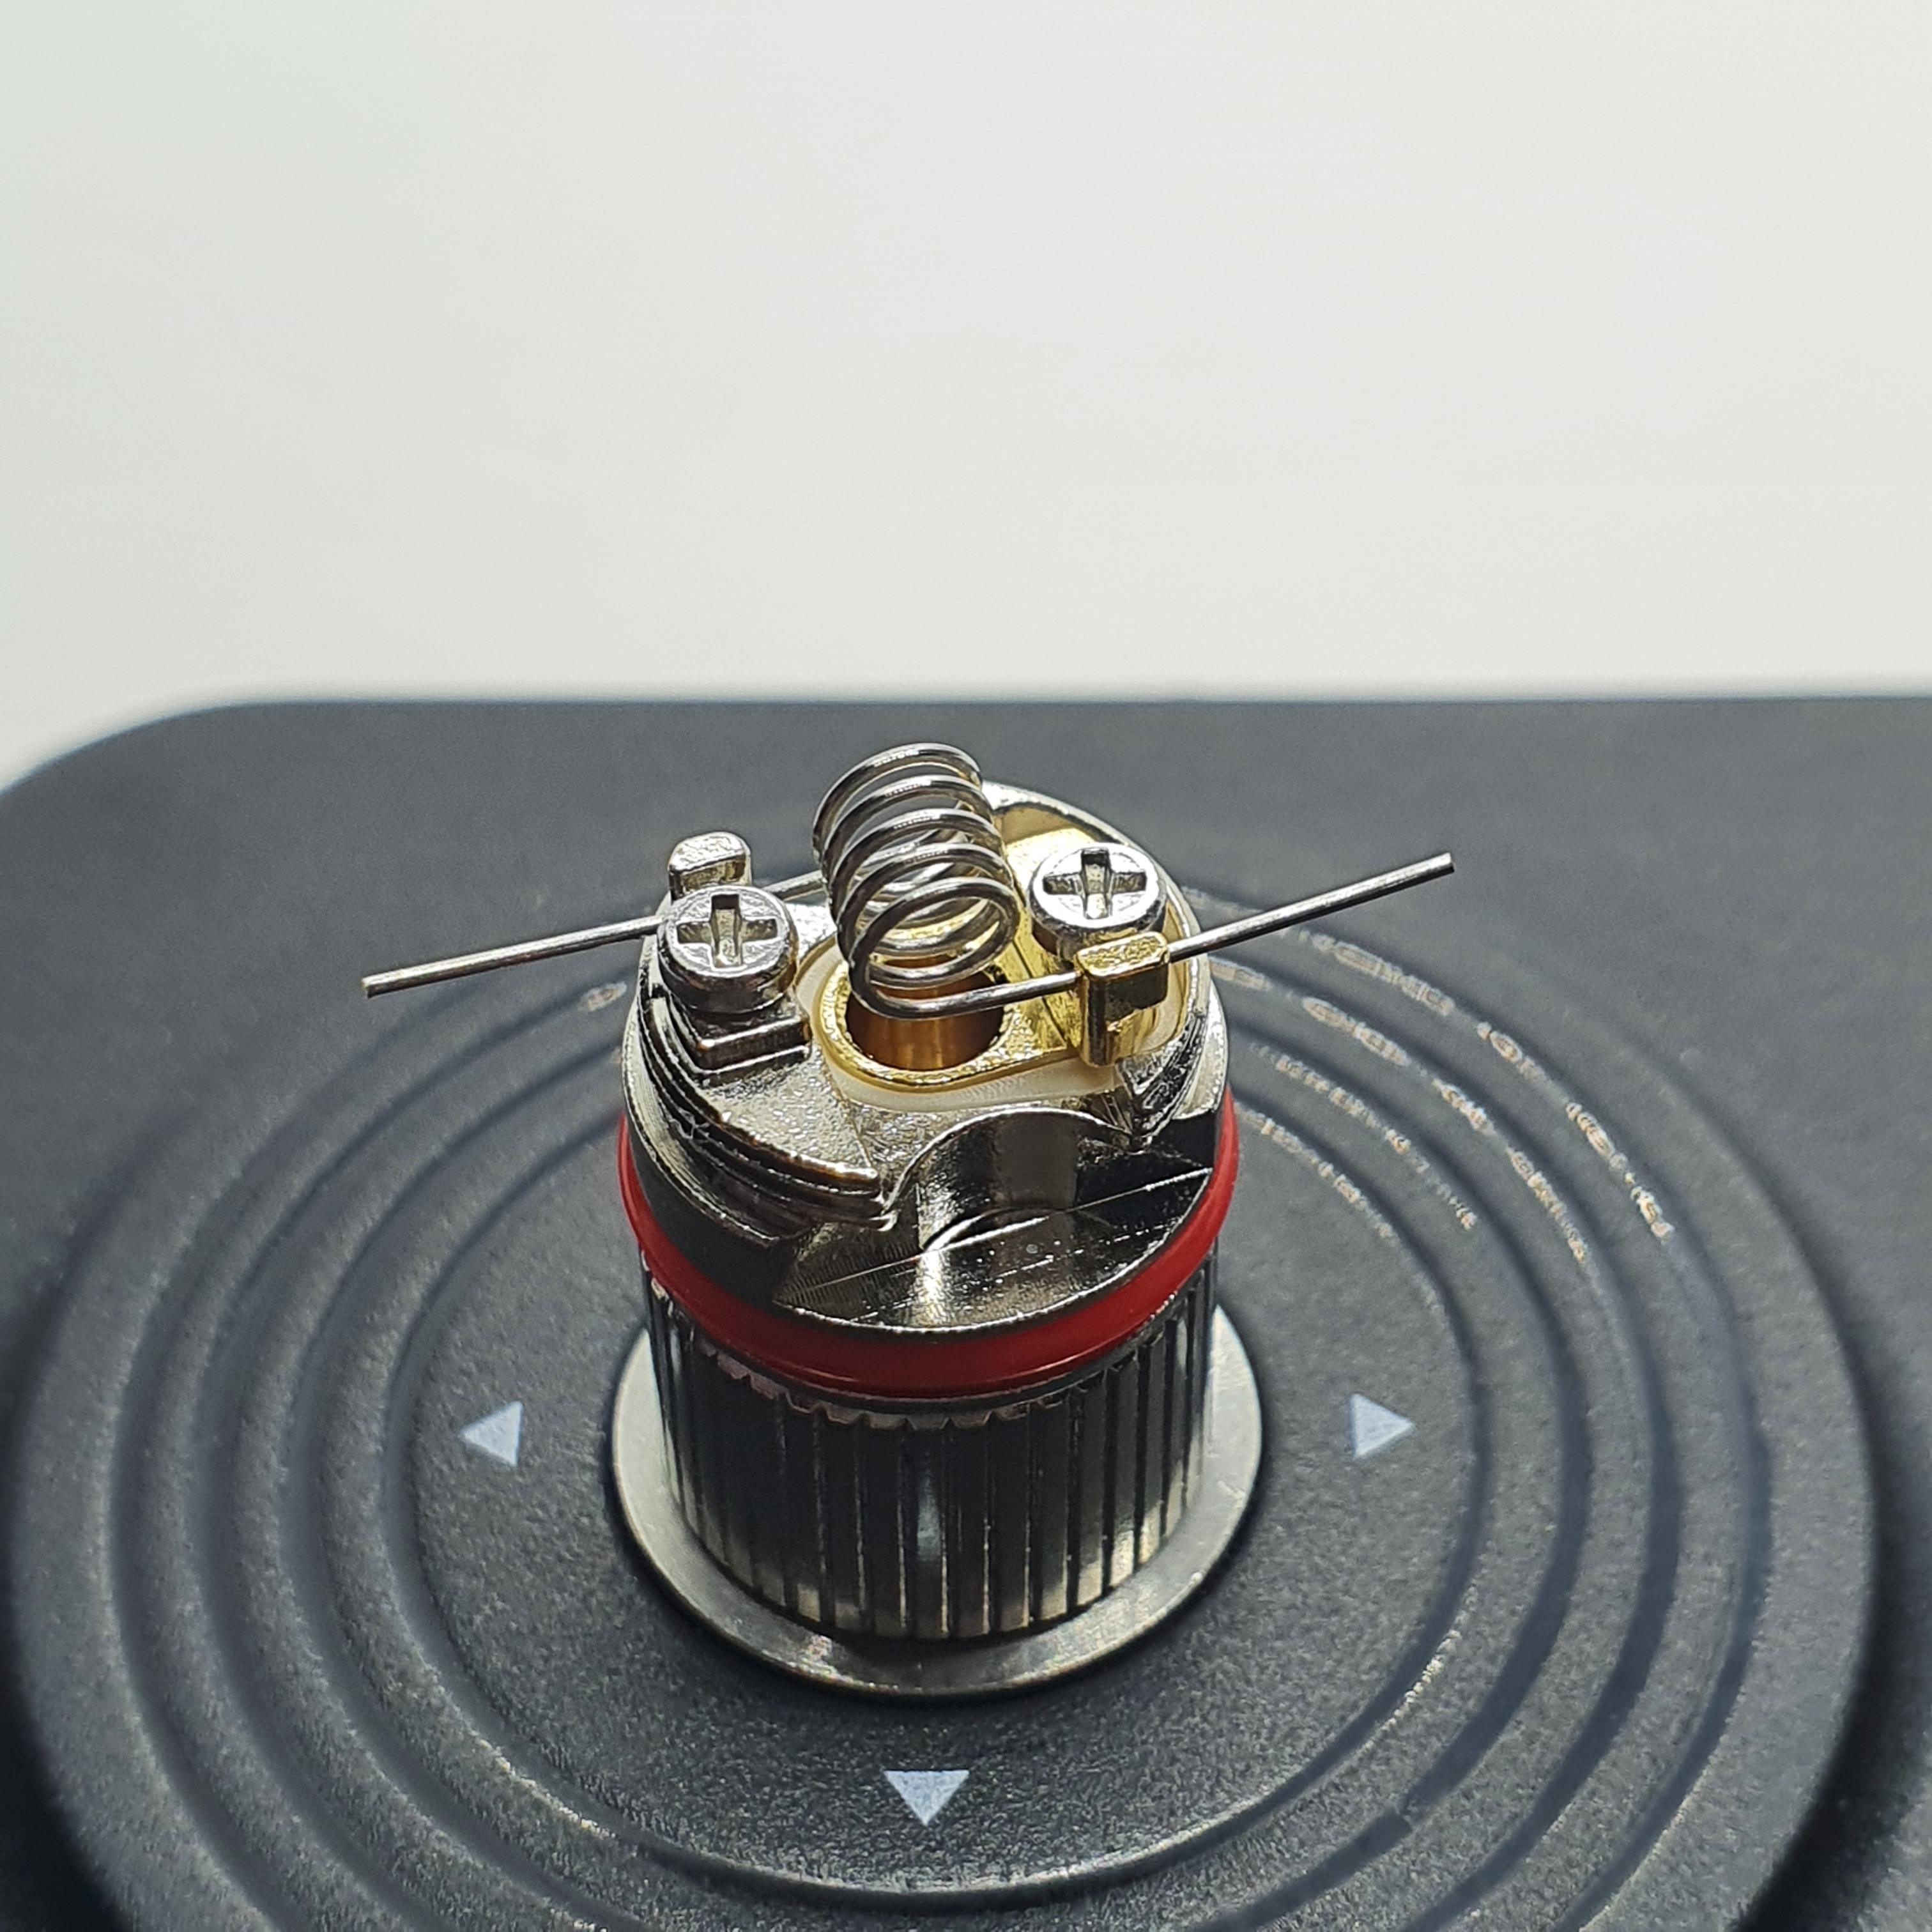
The RBA kit allows you to install your own single coil builds. I’m interested to see if the Origin suggests a wattage range when you install your own build.

Performance
I tried the 0.3ohm coil first as it was already installed. With the airflow fully open you get a lot of airflow with this coil. The amount of cloud production is very impressive from such a small coil. It is rated 30-40W and the flavour is also very impressive. I found the flavour to be excellent even as low as 25W.
The 0.5ohm coil was tried next. This coil is rated for use between 20-25W. With the airflow wide open it gives a slightly more restricted vape than the 0.3ohm coil. It still gives a DTL draw but closing down the airflow will allow you to get a loose MTL draw if you prefer. Cloud production is slightly less than with the 0.3ohm coil, which is to be expected at the lower wattage range. Flavour production seems the same as the 0.3ohm coil, but it is a cooler vape.
I next tried the 1ohm coil, which is a much more restricted draw. Being rated between 10-15W the cloud production is obviously going to be less than the previous coils. It has less flavour than the other two coils, but it is still a very nice flavour.
Overall I am very impressed with all of the coil options. You can choose which will suit your style of vaping and the flavour performance is great. I personally prefer MTL or very restrictive DTL vaping. The 1ohm coil, despite it’s lesser flavour, gives me a nice and satisfying MTL draw. It’s not the tightest MTL draw, but definitely tight enough for MTL vaping.
Another note on performance is battery life. Obviously this will depend on battery choice, but I was getting two days usage out of a battery, when on other AIO devices that use an 18650 I would need to swap batteries before the day is out.
I also experienced zero leaking when using the OXVA. This was true with all three pre-built coils and the RBA section.
Introduction
The OXVA Origin is an AIO from OXVA, a relatively new company in the vaping world. OXVA was founded by Justin Lai, who designed the Aegis series of mods and Zeus tanks at Geekvape, so there’s a lot of pedigree behind the company despite them being new kids on the block.
The OXVA Origin is an AIO which features a refillable pod and has a power output range between 5-40W. It uses an external 18650 battery and is, according to OXVA, the smallest 18650 AIO.
Let’s take a look at the Origin AIO.
Disclaimer: I was sent the Origin AIO for review by OXVA.
Box Contents
- 1 x Origin Device
- 1 x Origin Pod (pre-installed)
- 1 x 0.3ohm UNI mesh coil (pre-installed)
- 1 x 0.5ohm UNI mesh coil
- 1 x USB Cable
- 1 x User Manual
- 1 x Warranty Card
- 1 x Attention Card
- Size: 115.5mm x 32.8mm x 23.5mm
- Weight: 70g
- Output Power: 5-40W
- Battery: External 18650
Design & Build Quality
The Origin has a drip tip on the top of the device, however it is not a standard 510 drip tip. It is tapered in shape, being slightly thinner at the top than the bottom. It’s a comfortable drip tip to use, but being non standard, if you lose it or break it you cannot just pop another one on. I would have either preferred it to be non removable or a standard 510 fit, personally.
The body of the device is tall and slim, fitting in your hand comfortably. It is wider on one side, creating a very nice overall shape to hold onto. The frame of the body is metal and it has two plastic panels on either side.
One of these panels is removed to reveal the battery compartment and the pod. The removable panel is held on by two magnets, which are plenty strong enough. You can hold the panel about 1cm away and let go; it snaps right into place. It’s not coming off unless you want it to, so no worries about it falling off accidentally.
The battery compartment has a ribbon to help you remove your battery for charging and there is no wiggle of the battery when installed.
The panel on the other side of the device has a little window to allow you to see your liquid level. I have found the window to be absolutely fine for viewing the liquid level, it’s not difficult to see like with some other AIO devices. Below the window are 3 airflow holes and below these is the OXVA logo.
On the bottom of the device are some battery venting holes and the usual safety marks.
On the front of the device is the Origin name, the fire button, screen, wattage adjustment button and a micro USB port.
The fire button is circular and convex shaped. It is also surrounded by an LED indicator. It is clicky and responsive when pressed. It took a little time to get used to the button, due to its size, but it works absolutely fine and you get used to it.
The screen of the Origin displays your wattage, voltage, coil resistance and battery life. It’s black and white and is perfectly legible even when outside in bright daylight. There are no menus to navigate, everything is displayed on one screen.
The adjustment button is a single button, which scrolls up through your wattage selection. Once you reach 40W you press it again to round robin. Single clicks adjust in one watt increments and you can hold the button to scroll up through wattages faster. The single button configuration works absolutely fine and the button is nice and accurate when letting go.
Overall, the build quality of the device is high. It feels nice and sturdy and well put together. My only niggle from an aesthetic point of view is that the plastic panels have a glossy finish, so they attract fingerprints and smudges. I would have preferred them to have a matt finish like the metal frame of the device.
Features & Functions
The Origin is powered by the Photon chip, which allows it to fire between 5-40W. It also features an intelligent-match system where it generates the adjustment range of the coil installed, based on its resistance. This should ensure that you don't burn your coil by using too high of a wattage.
The Origin is a really simple device to use. The only thing you are going to be adjusting is your wattage, and you can't really go wrong with this due to the limiting of the wattage range based on the coil resistance.
Below are the button combinations for usage:
- To turn the device on you press the fire button five times within two seconds.
- The adjustment button can be pressed to increase wattage in one watt increments, held to cycle up through wattages. Once you reach the max wattage pressing again will cycle down to 5W.
- To turn the device off you press the fire button five times within two seconds.
- To lock or unlock the device hold the fire button and the adjustment button for three seconds.
Pod
The pod is located by removing the side panel. It sits at the top of the inside of the device, above the battery. Removing the pod is done by placing a fingernail in the groove on the right side of the pod and pulling, it will swivel out of the device and can then be removed.
The pod can hold 3ml of liquid (2ml TPD) and is filled by removing the rubber stopper from the fill port. It is easy enough to fill and I have experienced no leaking from the fill port, despite it being located on the side of the pod. The rubber stopper fits firmly into place with a nice click and doesn't feel flimsy.
The airflow control ring is actually attached to the bottom of the coil you have installed. It’s important to note that the airflow control ring is reusable, so don’t throw it away when changing coils!
Adjusting the airflow has to be done with the pod out of the tank. I can’t reach it with a nail when the pod is installed. Once the pod is removed it turns nicely and is neither too stiff or too slack.
To remove a coil you just pull the airflow control ring and the pod will come out of the bottom of the pod. You will need to do this when the tank is empty otherwise you will have liquid leaking out of the pod. It is possible to do when you have roughly a half pod of liquid, but you will have to keep the pod on its side when doing this to avoid spilling the liquid remaining in the pod.
Installing a new coil is simple to do. Remove the airflow control ring from the old coil, screw a new coil to the airflow control ring and push the coil into the bottom of the pod, taking care to make sure you have lined up the airflow control ring correctly. You will know it’s in correctly as you will struggle to put the pod back into the device if it’s not pushed in properly.
I always fill the pod with liquid and leave it to sit for about 5 minutes to allow the coil to saturate with liquid.
The pod then pushes back into the device. I find it easier to push the left side first where the connection is, then push the right side of the pod into place.
Coils
You get a 0.3ohm mesh coil already installed in the Origin and a 0.5ohm mesh coil in the box. You can also purchase a 1ohm coil and there is an RBA kit available too.
The 0.3ohm coil is rated between 30-40W and is meant for DTL vaping. The 0.5ohm coil is rated between 20-25W and is again a DTL coil, but you can get a loose MTL vape if you close the airflow down. The 1ohm coil is rated between 10-15W and is a MTL coil.
The RBA kit allows you to install your own single coil builds. I’m interested to see if the Origin suggests a wattage range when you install your own build.
Performance
I tried the 0.3ohm coil first as it was already installed. With the airflow fully open you get a lot of airflow with this coil. The amount of cloud production is very impressive from such a small coil. It is rated 30-40W and the flavour is also very impressive. I found the flavour to be excellent even as low as 25W.
The 0.5ohm coil was tried next. This coil is rated for use between 20-25W. With the airflow wide open it gives a slightly more restricted vape than the 0.3ohm coil. It still gives a DTL draw but closing down the airflow will allow you to get a loose MTL draw if you prefer. Cloud production is slightly less than with the 0.3ohm coil, which is to be expected at the lower wattage range. Flavour production seems the same as the 0.3ohm coil, but it is a cooler vape.
I next tried the 1ohm coil, which is a much more restricted draw. Being rated between 10-15W the cloud production is obviously going to be less than the previous coils. It has less flavour than the other two coils, but it is still a very nice flavour.
Overall I am very impressed with all of the coil options. You can choose which will suit your style of vaping and the flavour performance is great. I personally prefer MTL or very restrictive DTL vaping. The 1ohm coil, despite it’s lesser flavour, gives me a nice and satisfying MTL draw. It’s not the tightest MTL draw, but definitely tight enough for MTL vaping.
Another note on performance is battery life. Obviously this will depend on battery choice, but I was getting two days usage out of a battery, when on other AIO devices that use an 18650 I would need to swap batteries before the day is out.
I also experienced zero leaking when using the OXVA. This was true with all three pre-built coils and the RBA section.