INTRODUCTION
Hello everyone and thanks for stopping by to read another one of my reviews. Today I will be going over the Ragnar RTA by Steam Crave. The Ragnar is an absolute beast of an RTA. Measuring in at 35mm wide, and 58mm tall, with a capacity of 18ml, it is not your run of the mill atomizer. It’s also not another run of the mill RTA from Steam Crave, as for years they have had side airflow only. The Ragnar also introduces bottom airflow with the standard deck. Just to add more value to the thing, they also include a chamber reducer/adapter so all Aromamizer Plus (V1/V2) decks can also be used with this tank. Let’s stop hyping and start review, so I will get right to it eh?
DISCLAIMER: This was sent to by Steam Crave for review.
_____________________________________________________________________________________
WHAT YOU GET
Available in black, gunmetal, and stainless steel.
STOCK SHOT

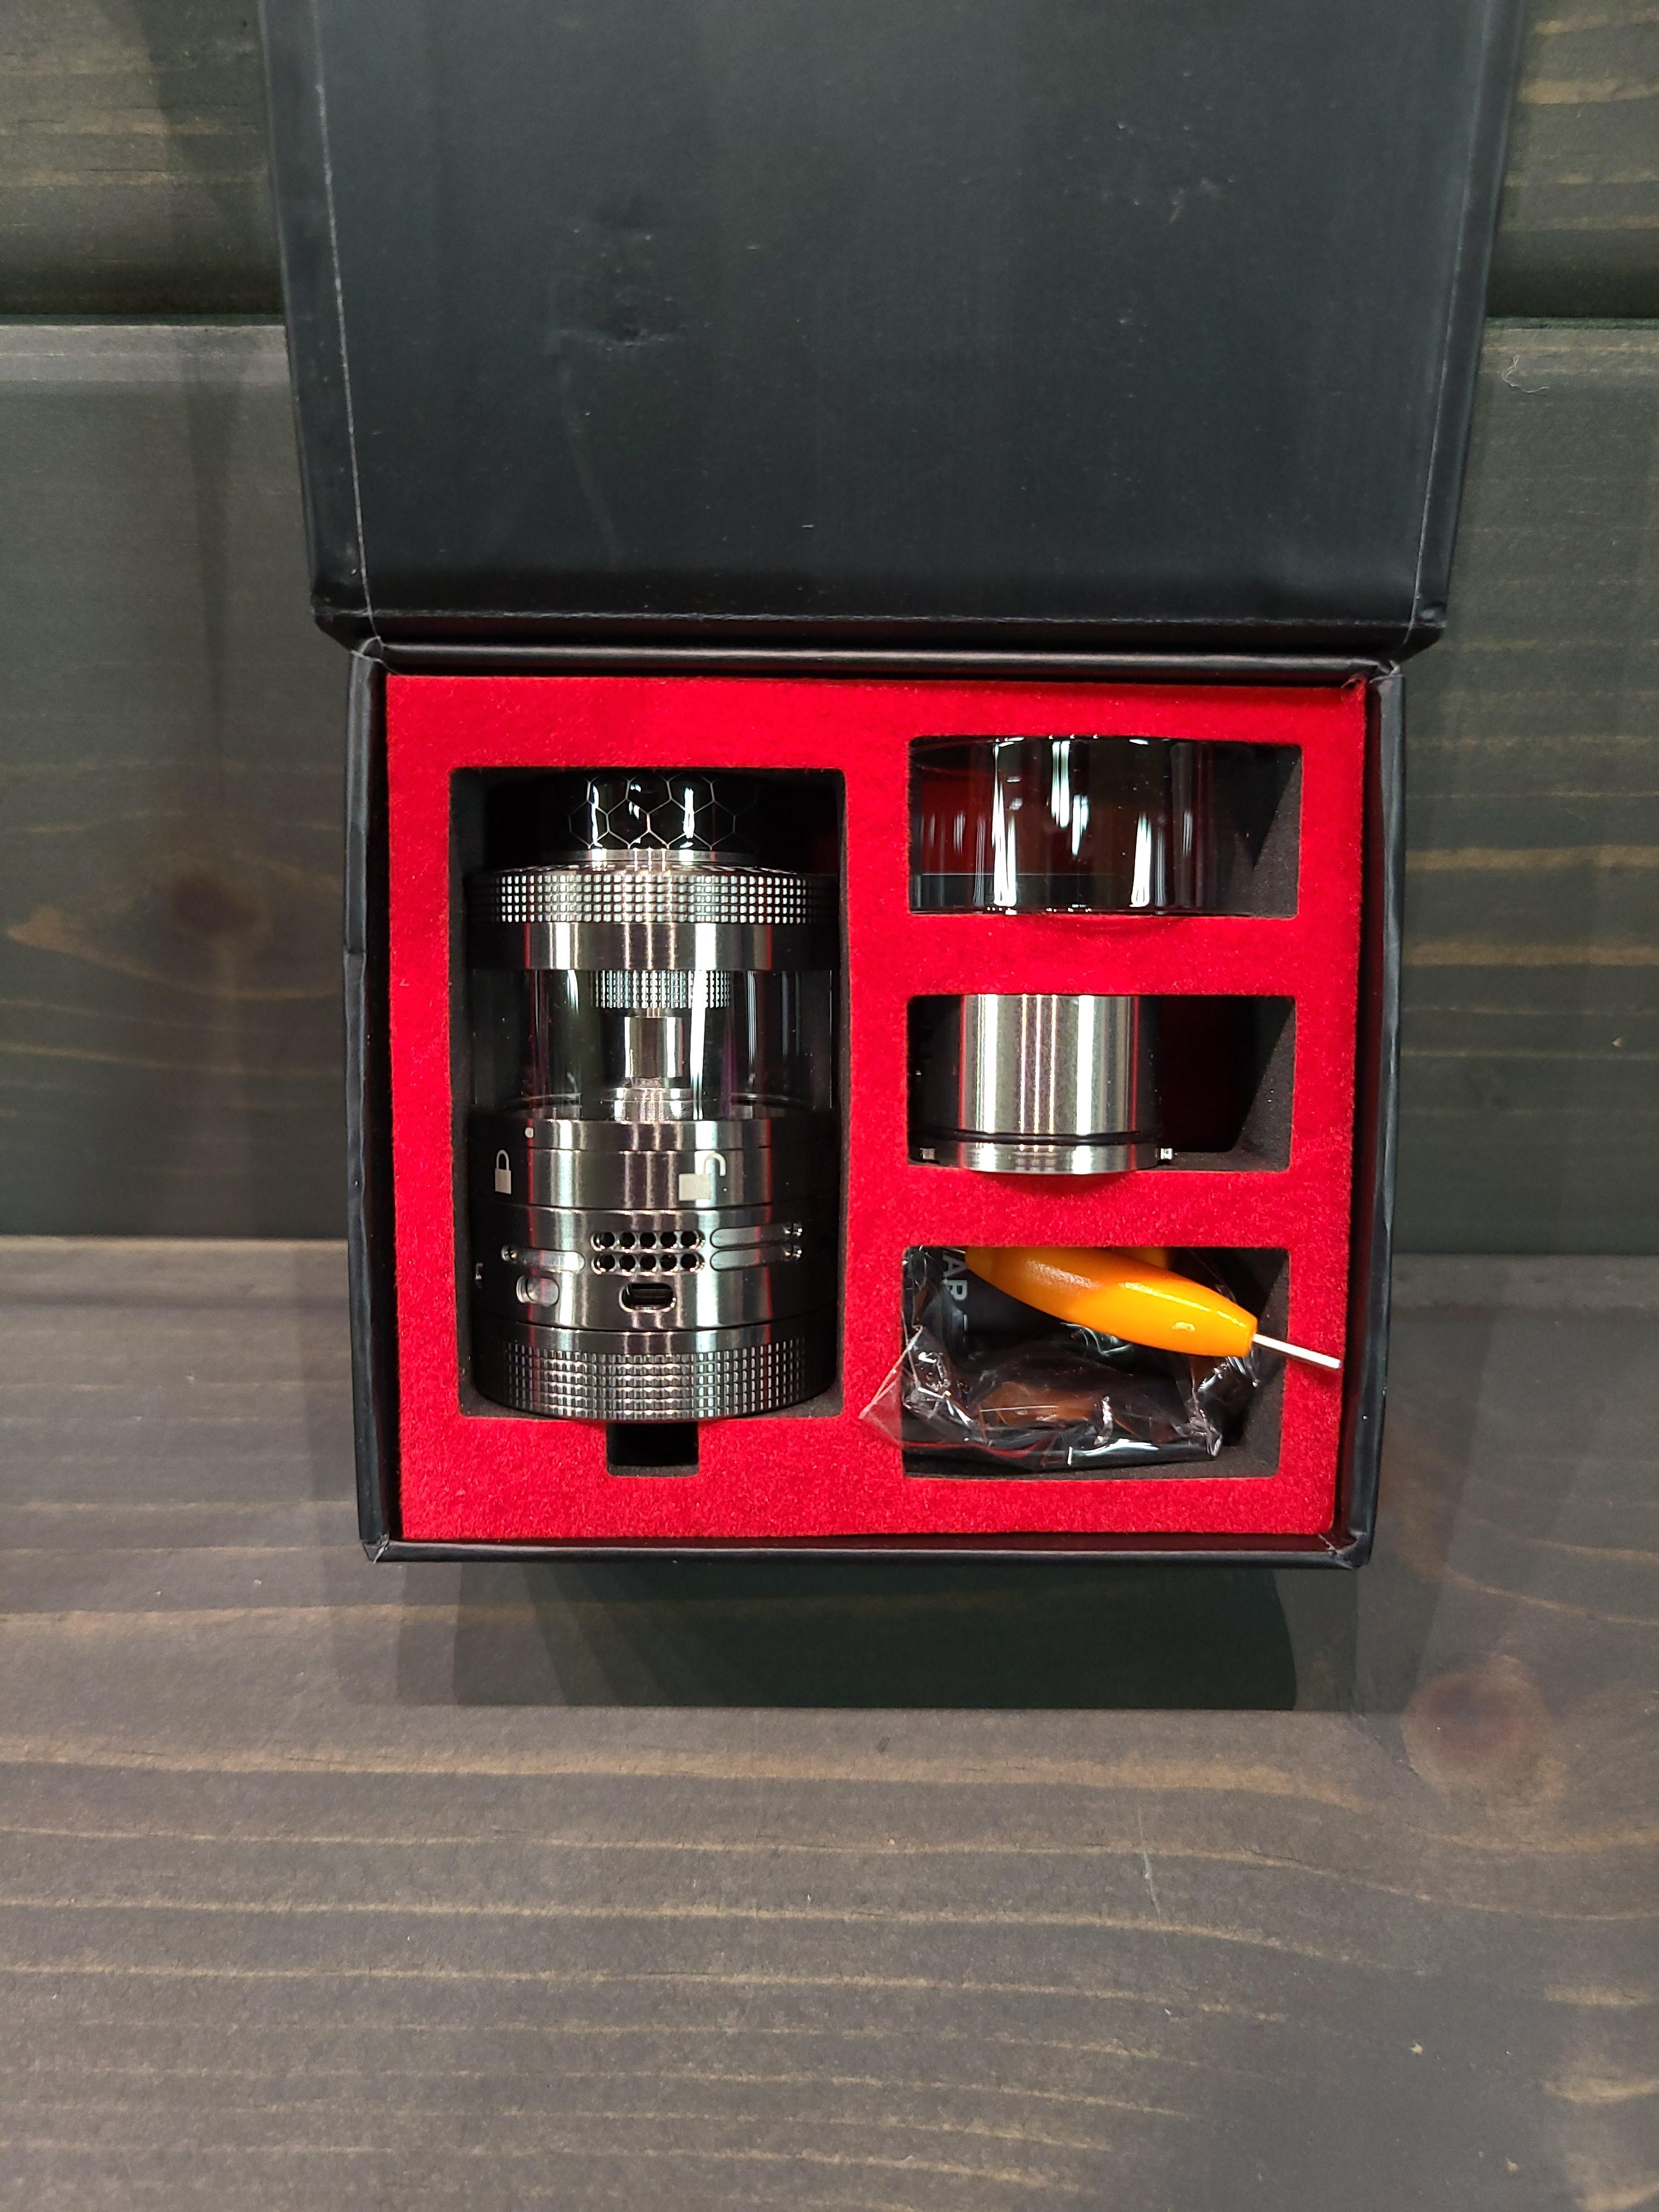
PACKAGING
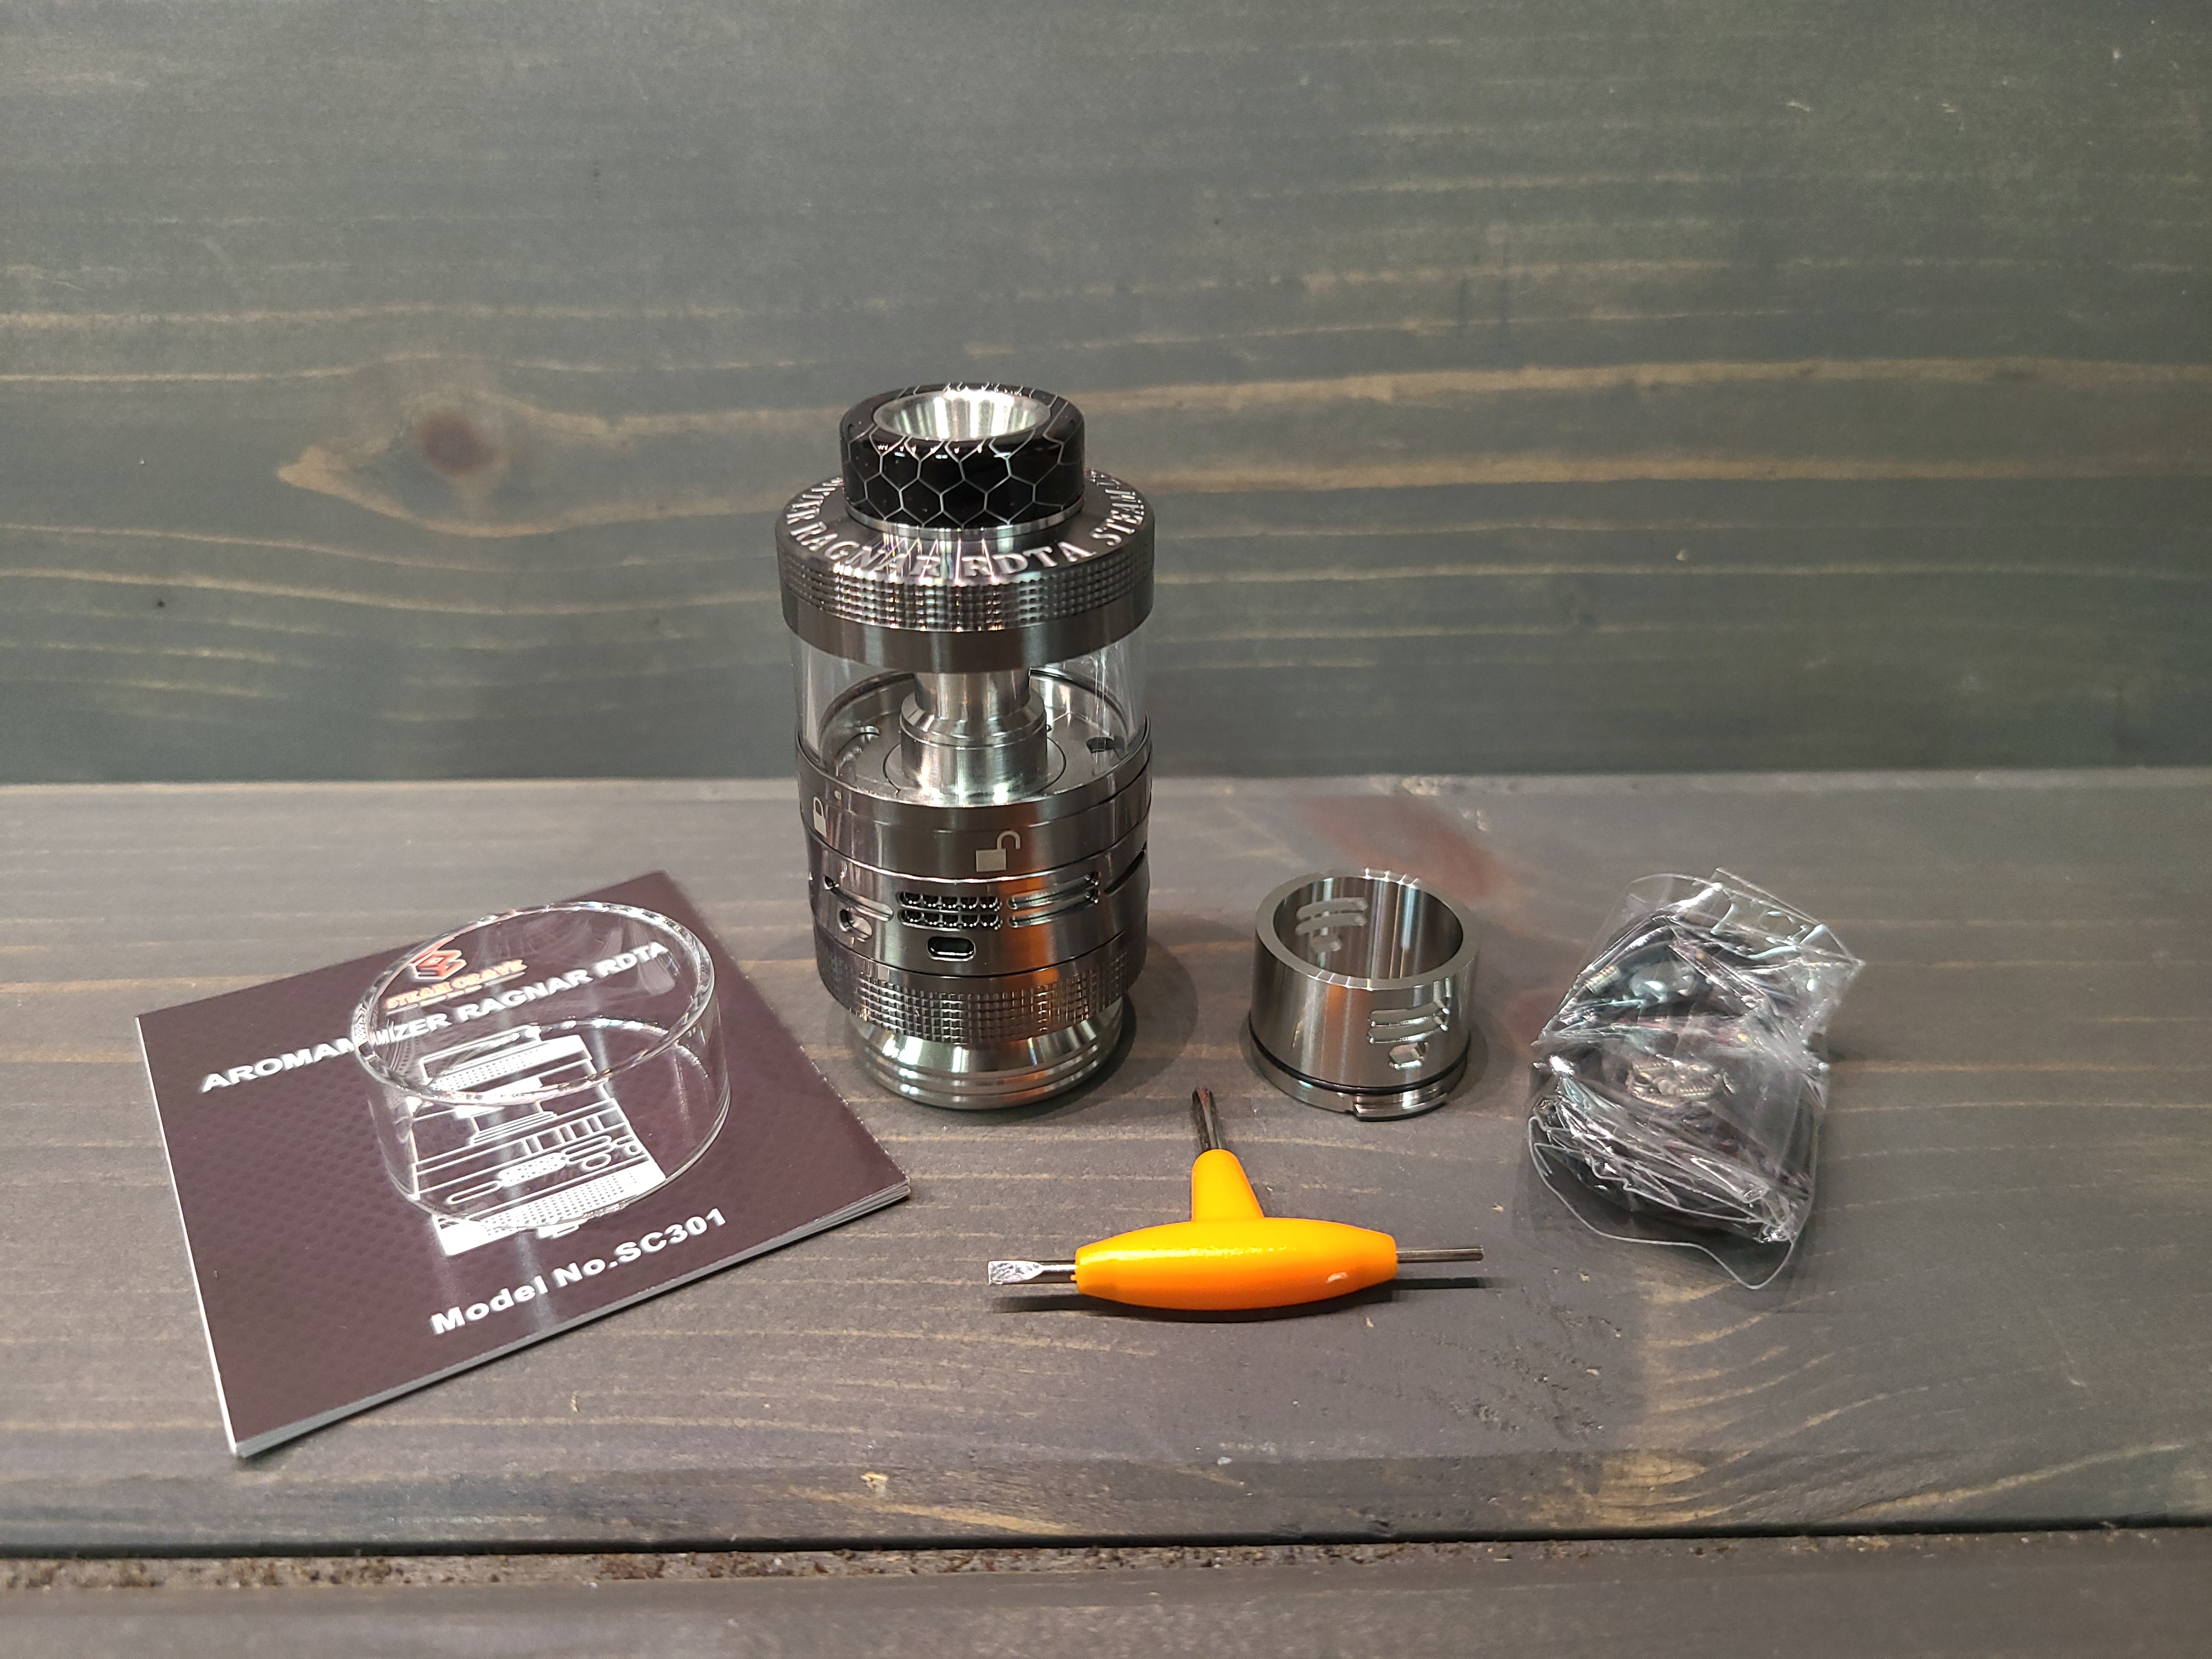
OUT OF BOX
_____________________________________________________________________________________
FIRST IMPRESSIONS
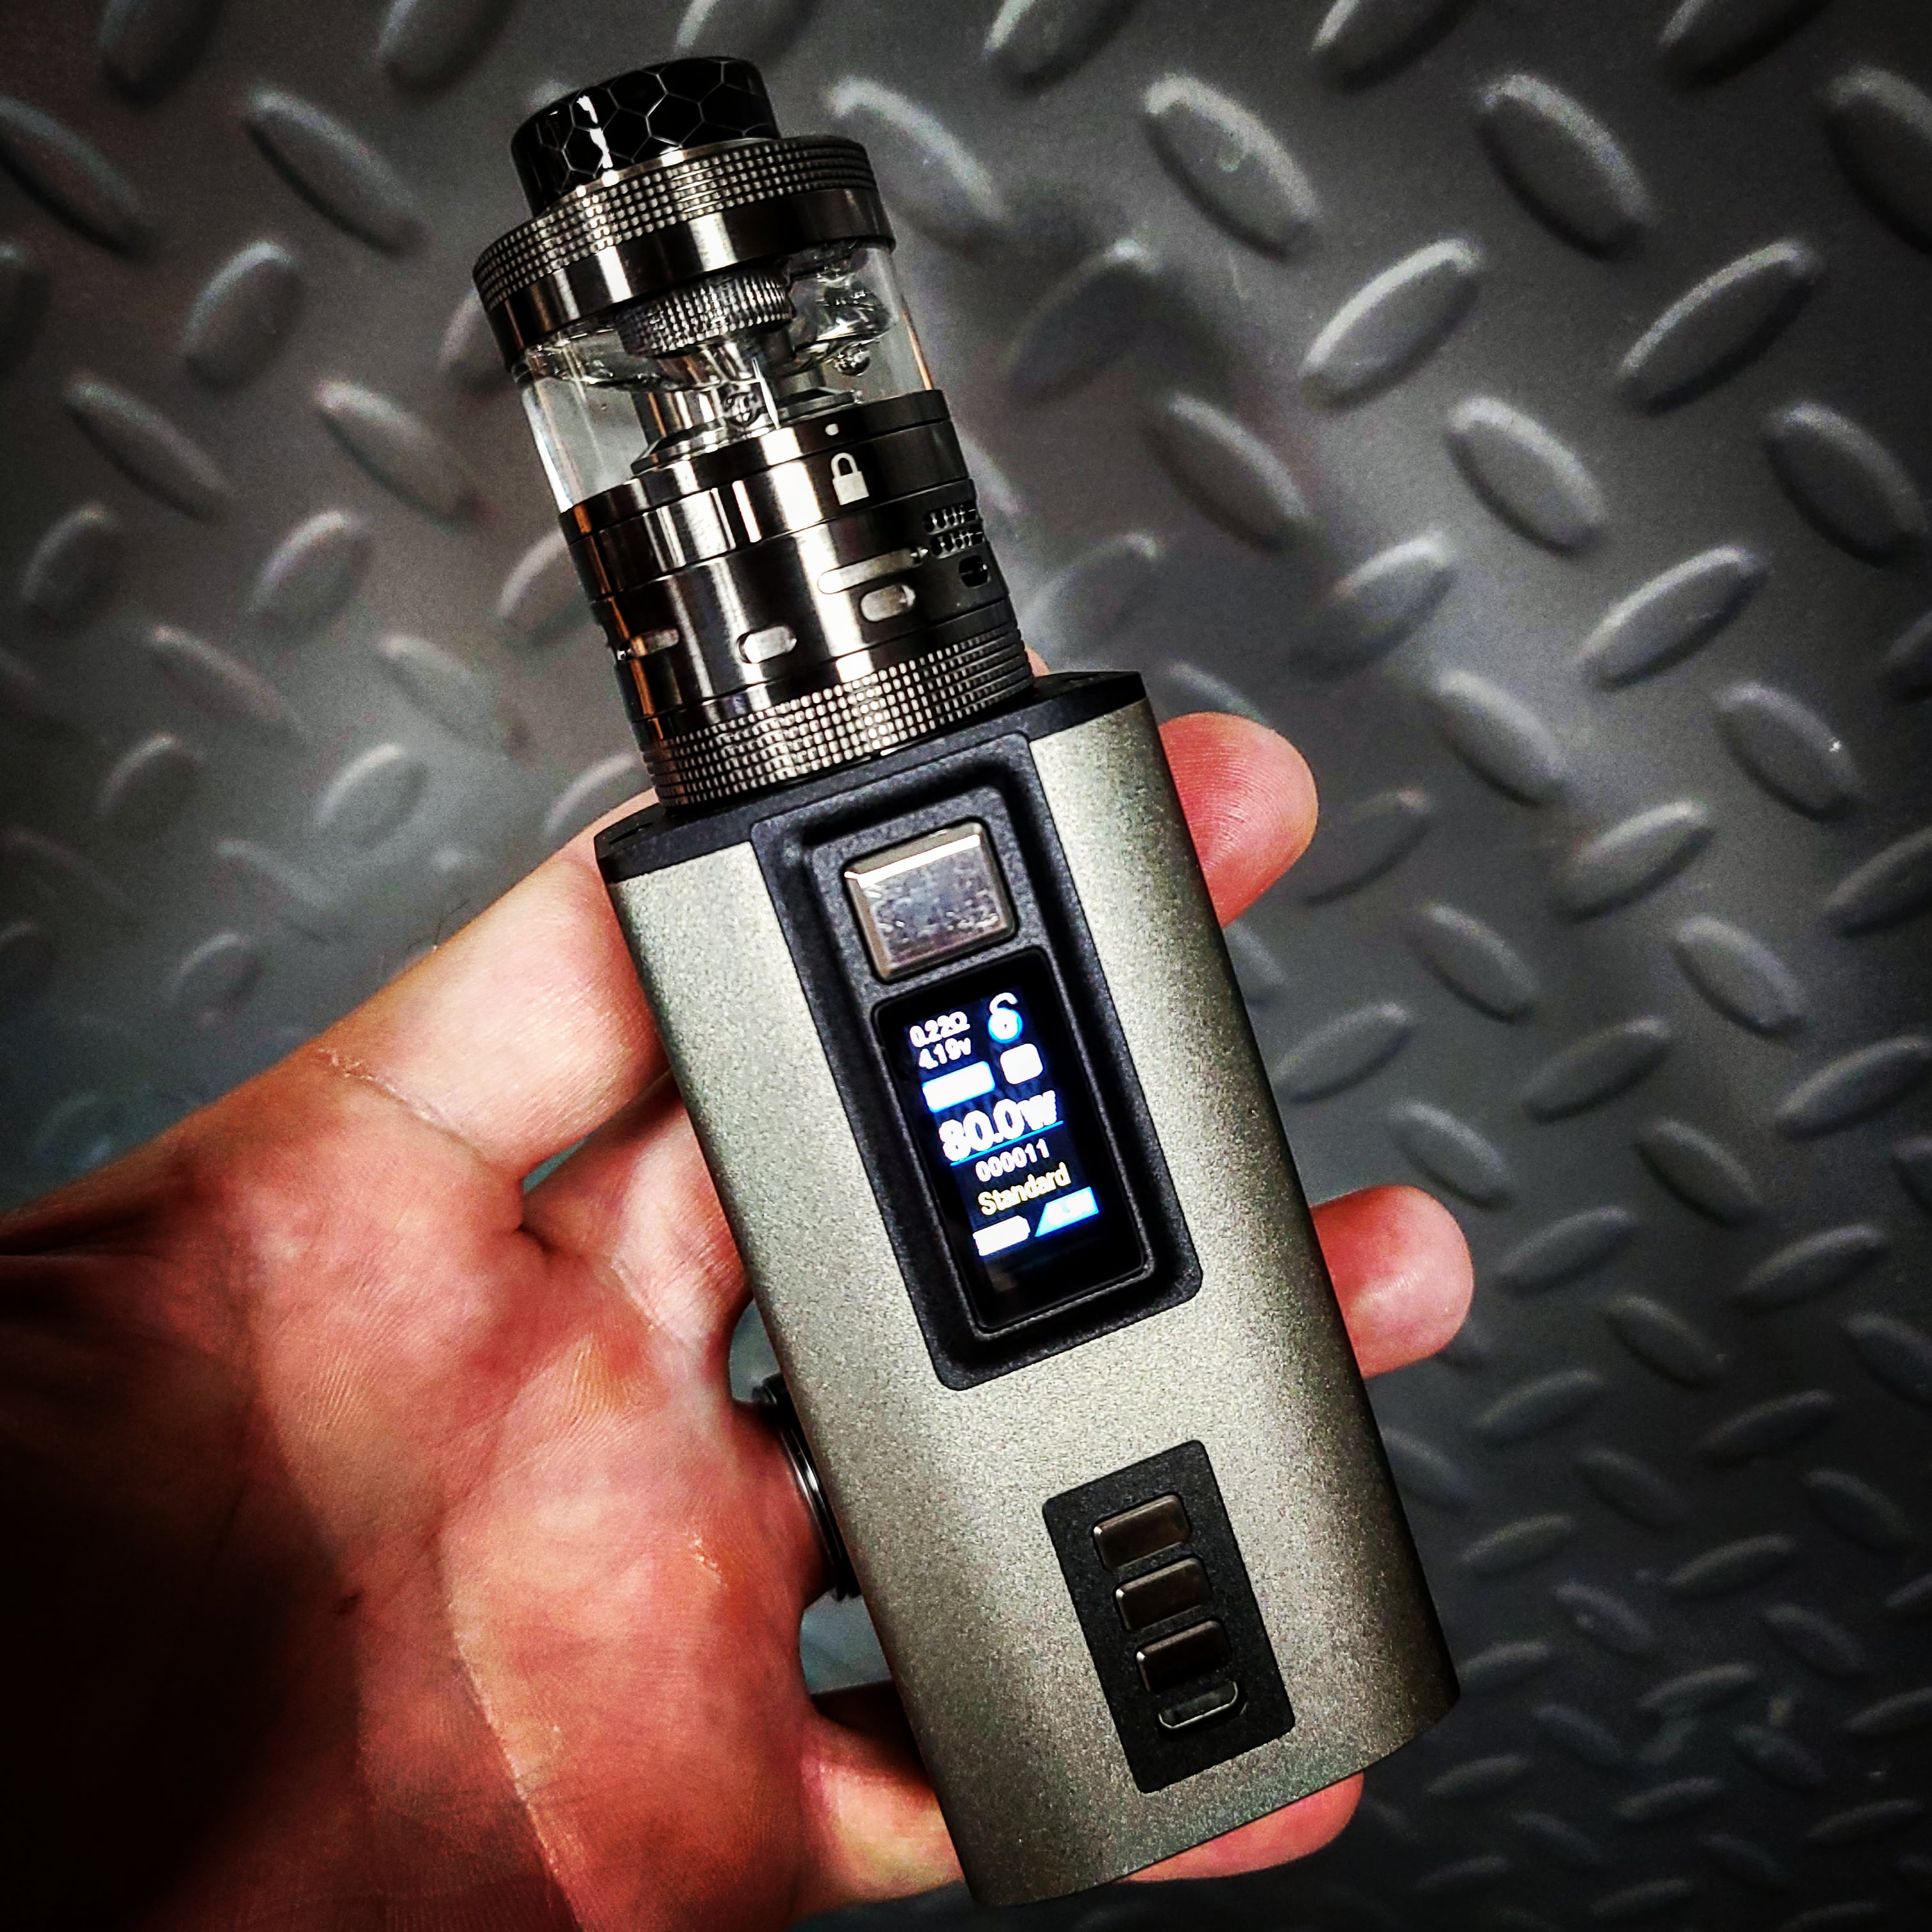
Ragnar - Noun - Definition - Masculine Germanic name. Totally accurate Steam Crave. When you open this, you feel like you are handling an atomizer that isn’t messing around. It looks just beefy and gorgeous all at once. Steam Crave machining is on par as well, with nothing to complain about in that department. Measuring in at 35mm wide and 58mm tall, it has a solid width to height ratio that makes it look even heftier. However, beyond the looks comes a lot of function. For starters, Steam Crave has a modified version of the airflow they did on the Aromamizer Plus V2. Like that atomizer, the AFC has multiple settings which cover varying levels of airflow, but also added control of side or bottom airflow. I will get more into that down below. One other thing that is seen in the box is an adapter / chamber reducer. This can be used in conjunction with any of the Aromamizer Plus V1/V2 build decks, so anybody with these has even more options. With how much I have been enjoying the Aroma Plus V2 lately, I couldn’t wait to toss a build in this and start chucking.
_____________________________________________________________________________________
BUILD DECK
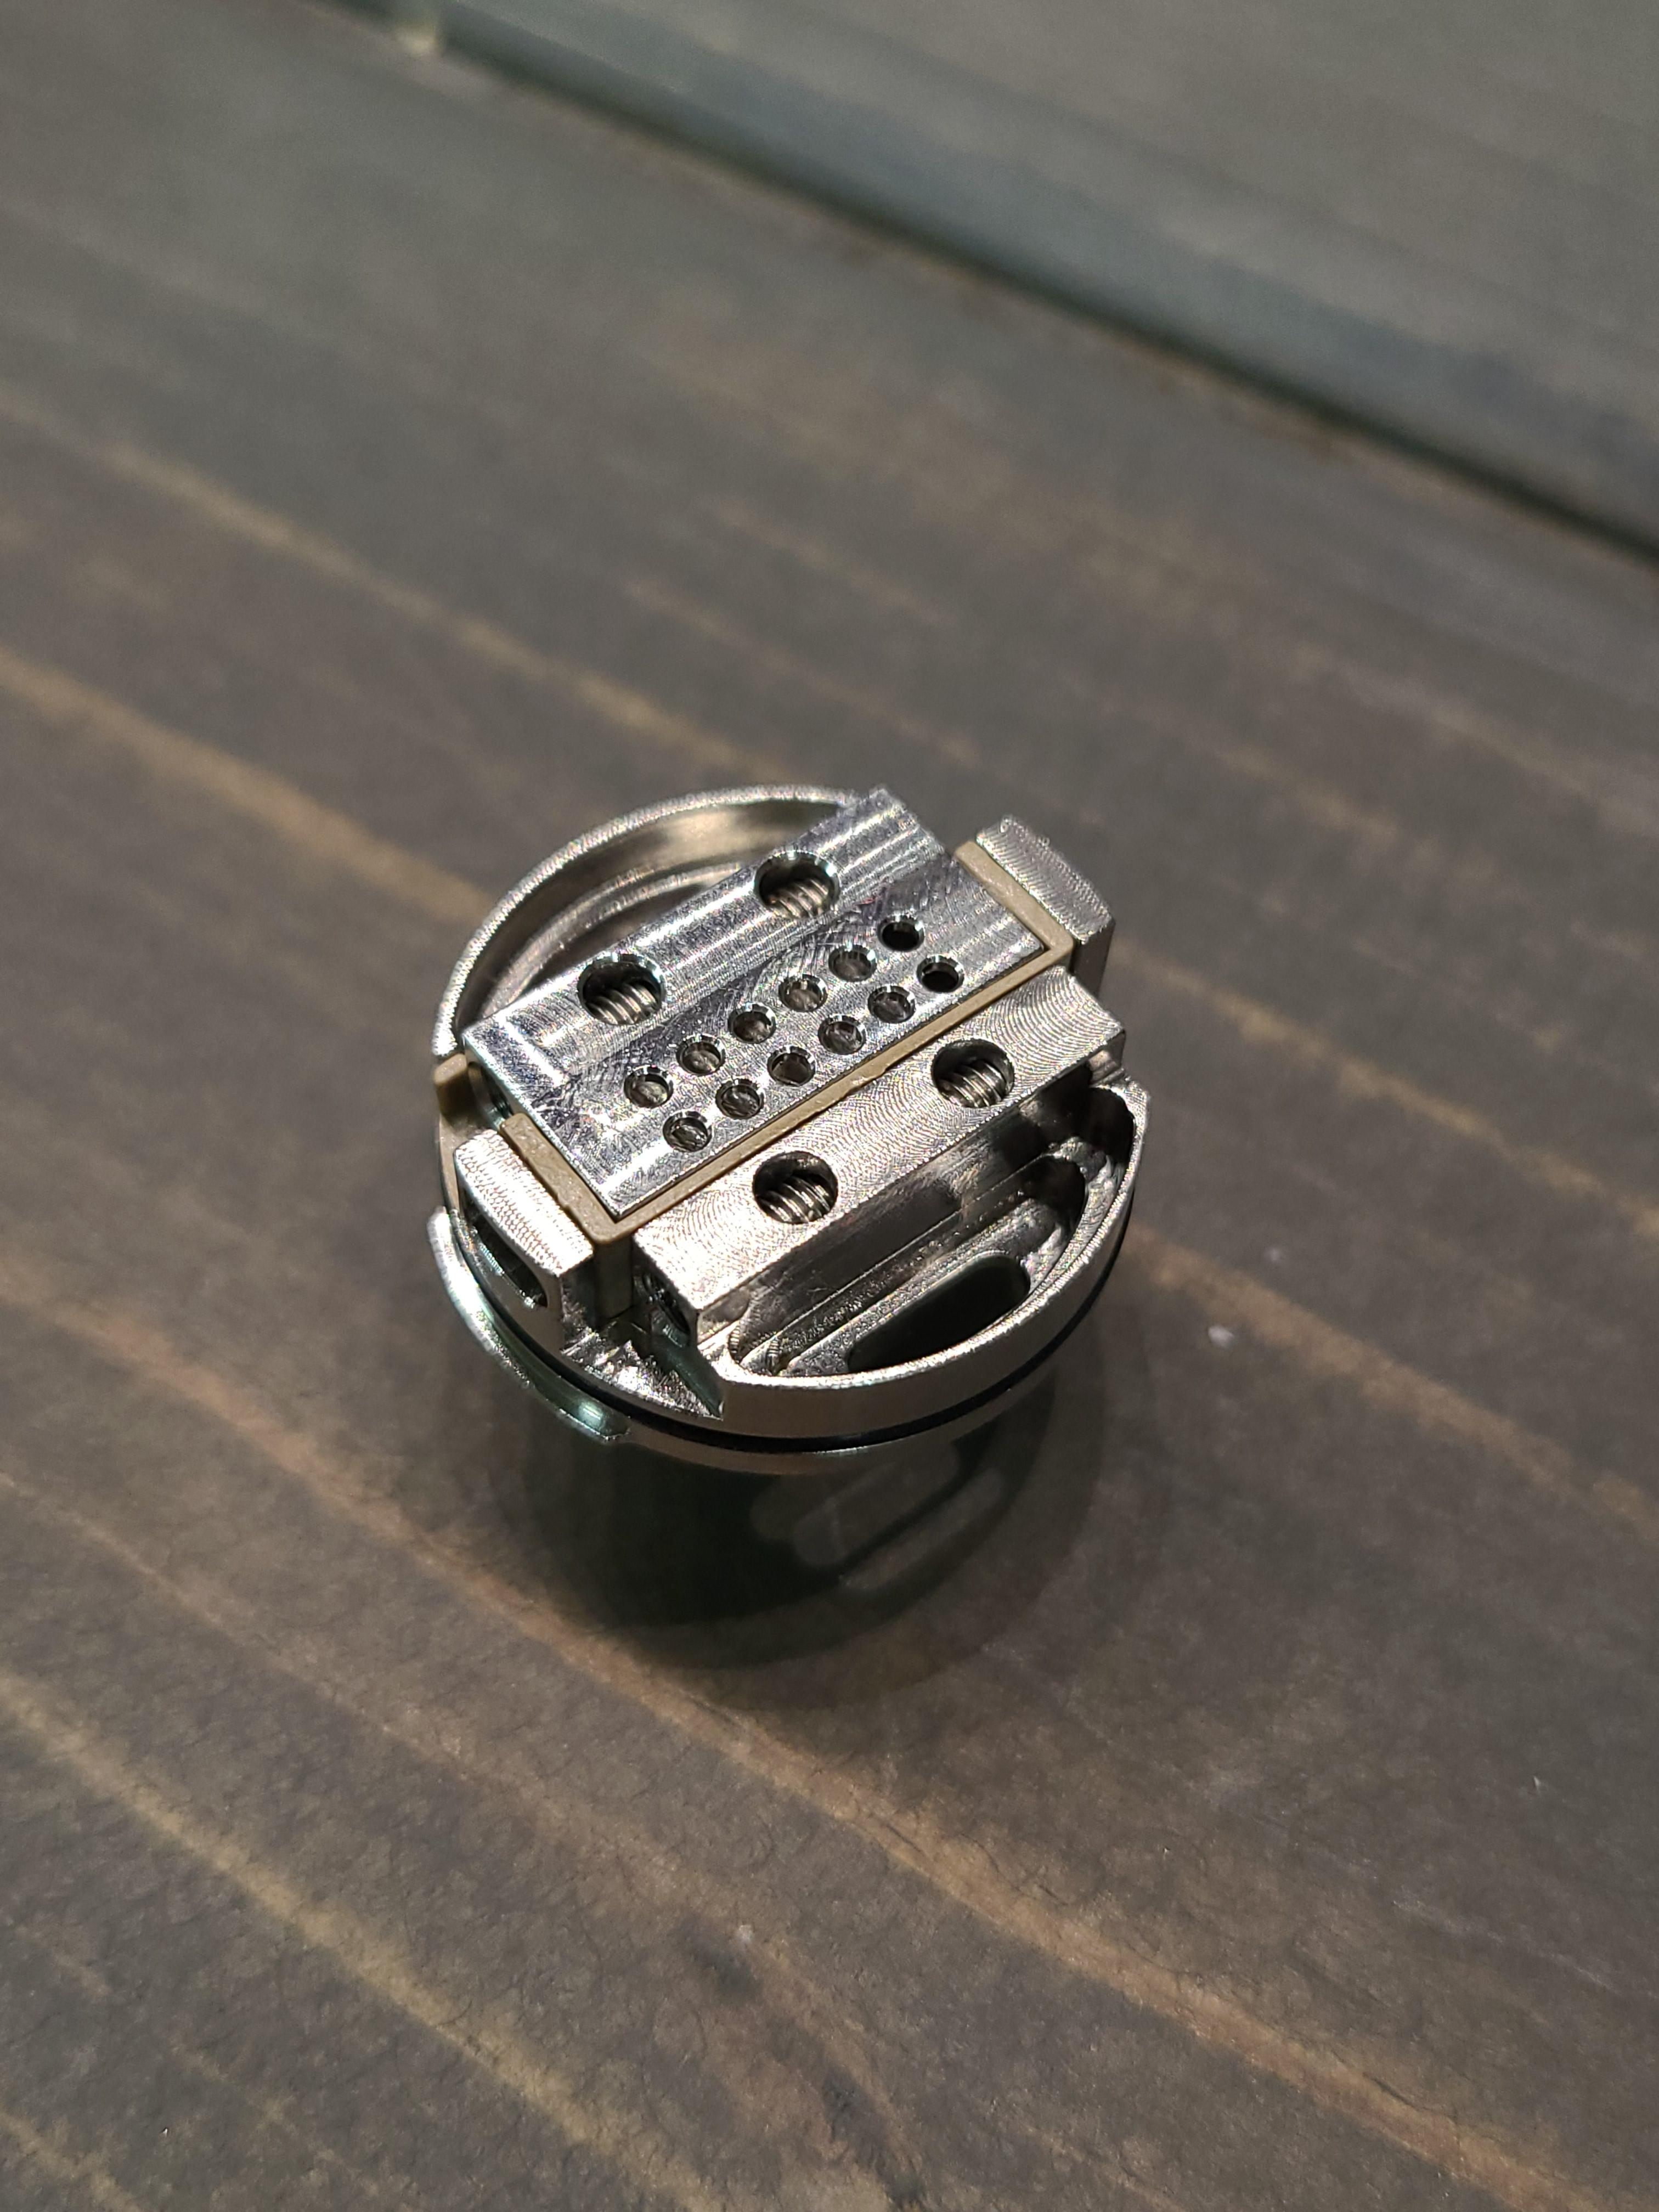
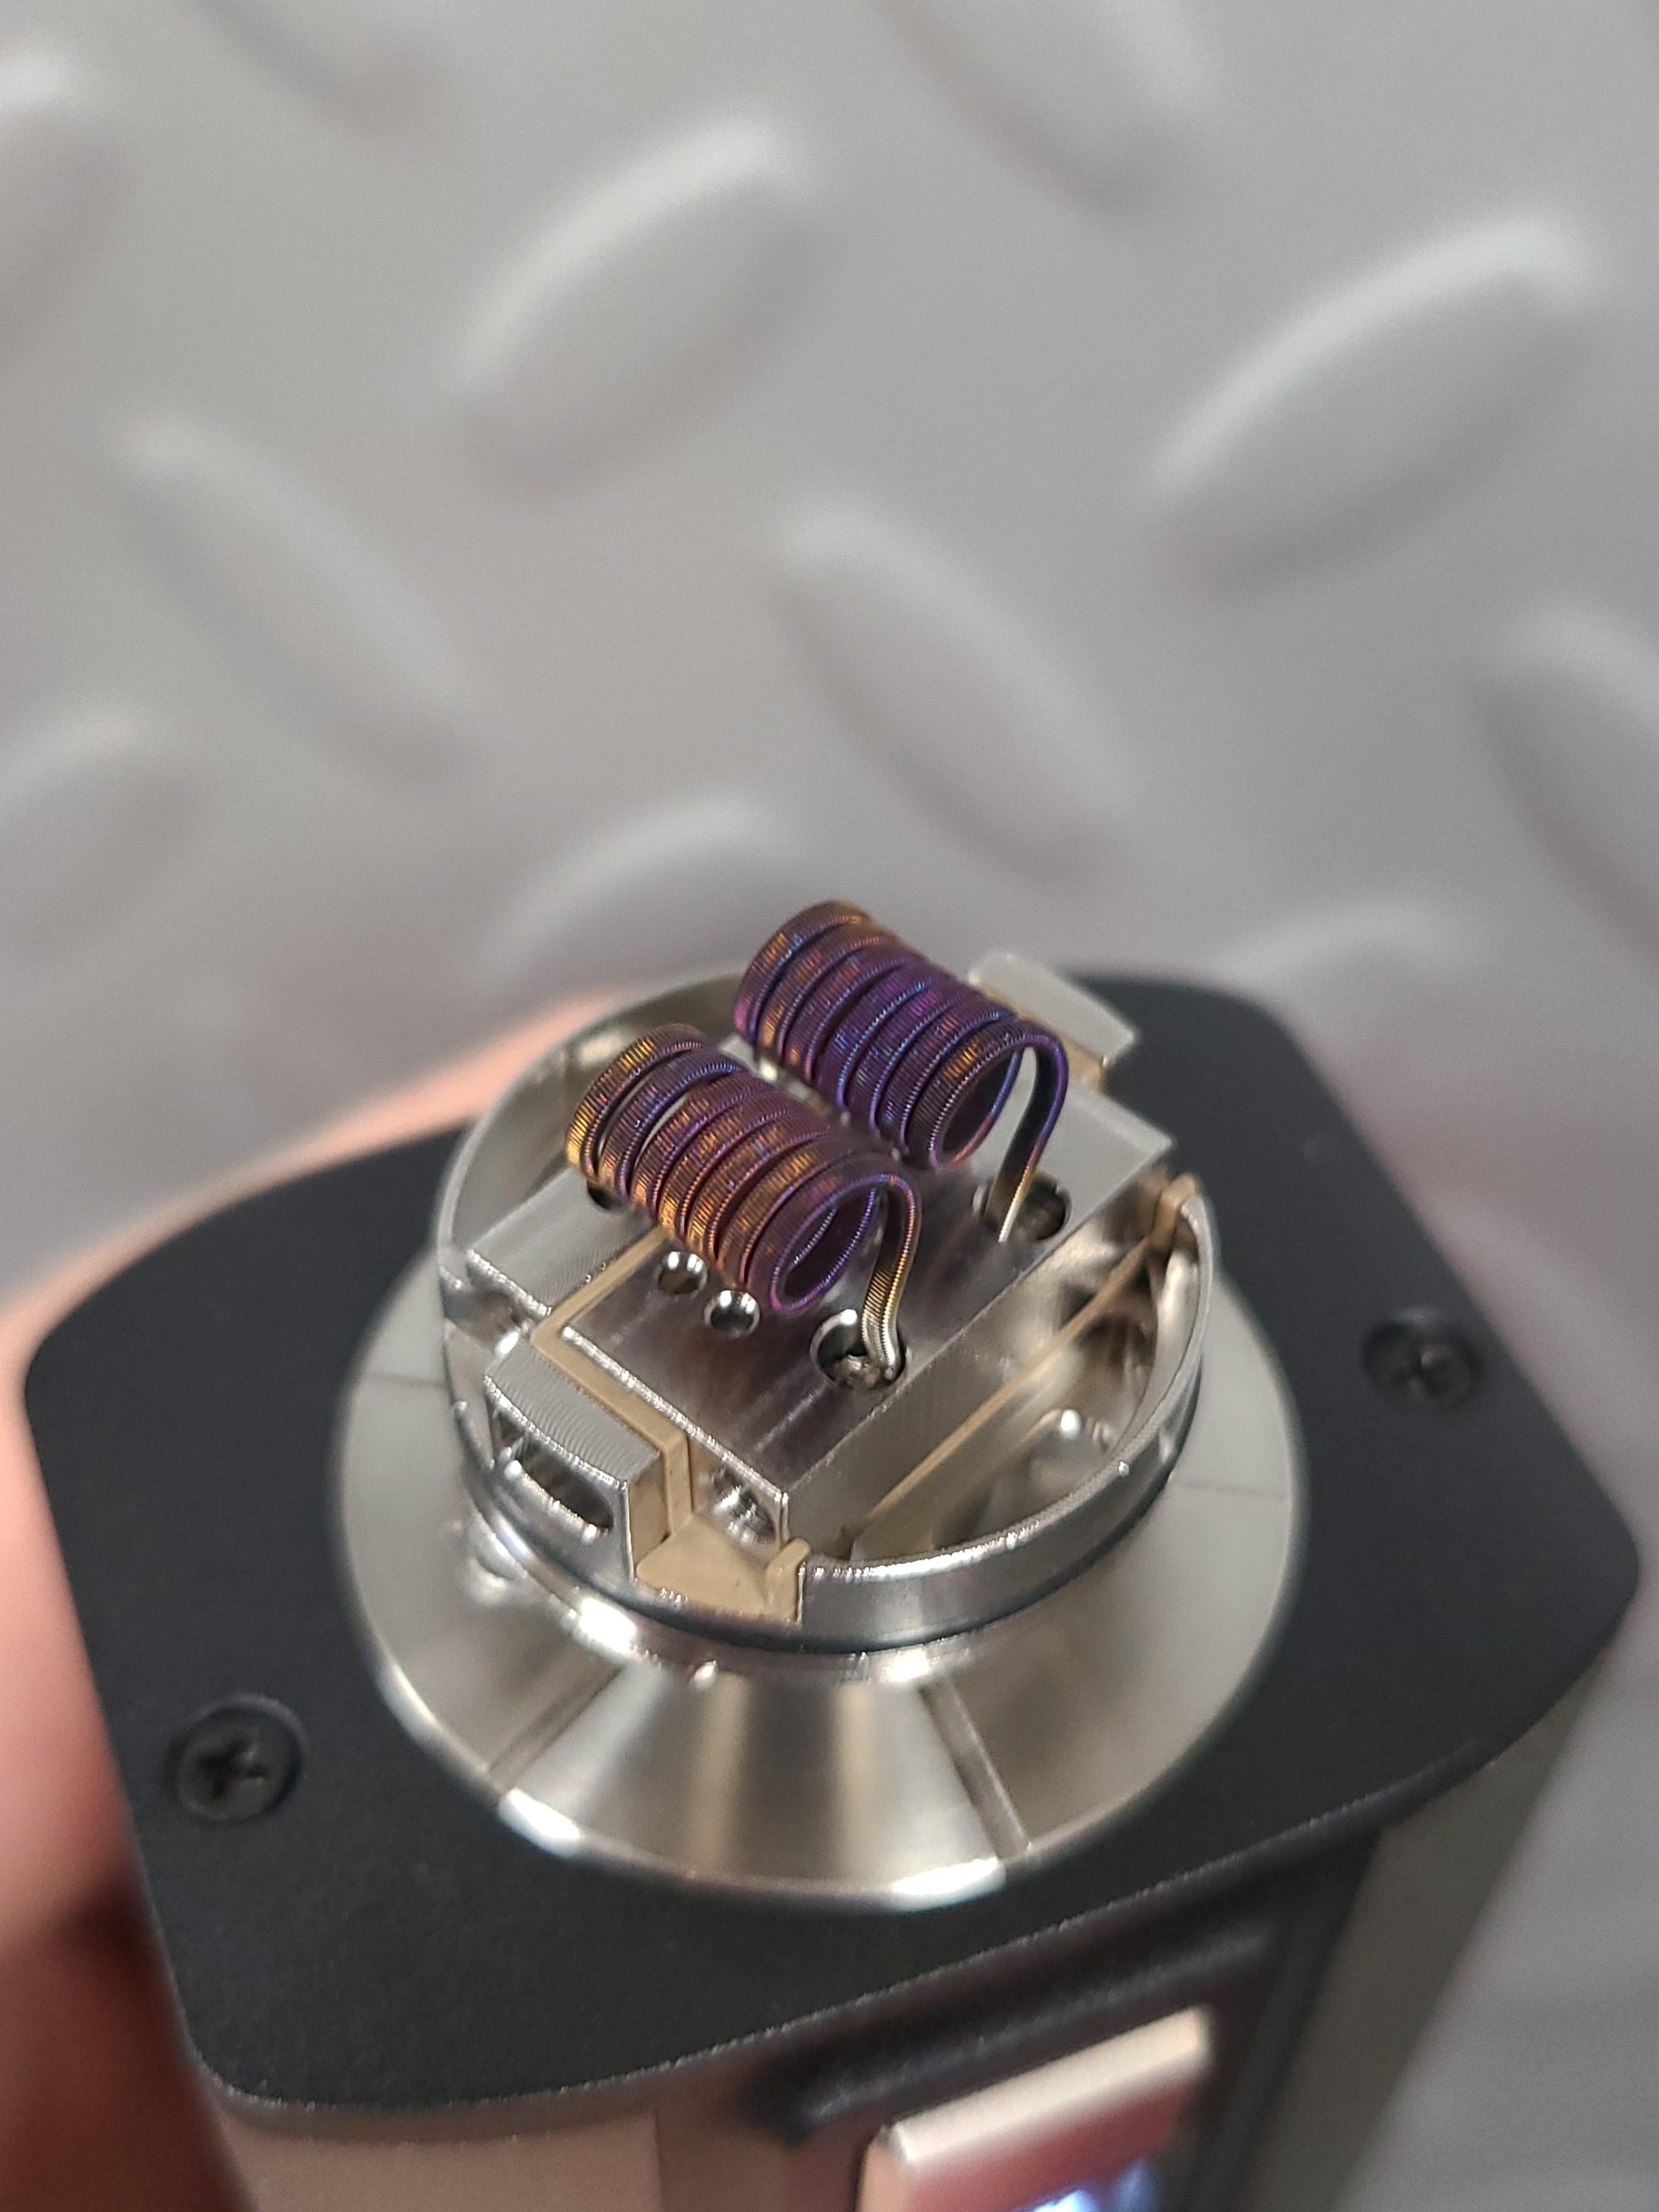
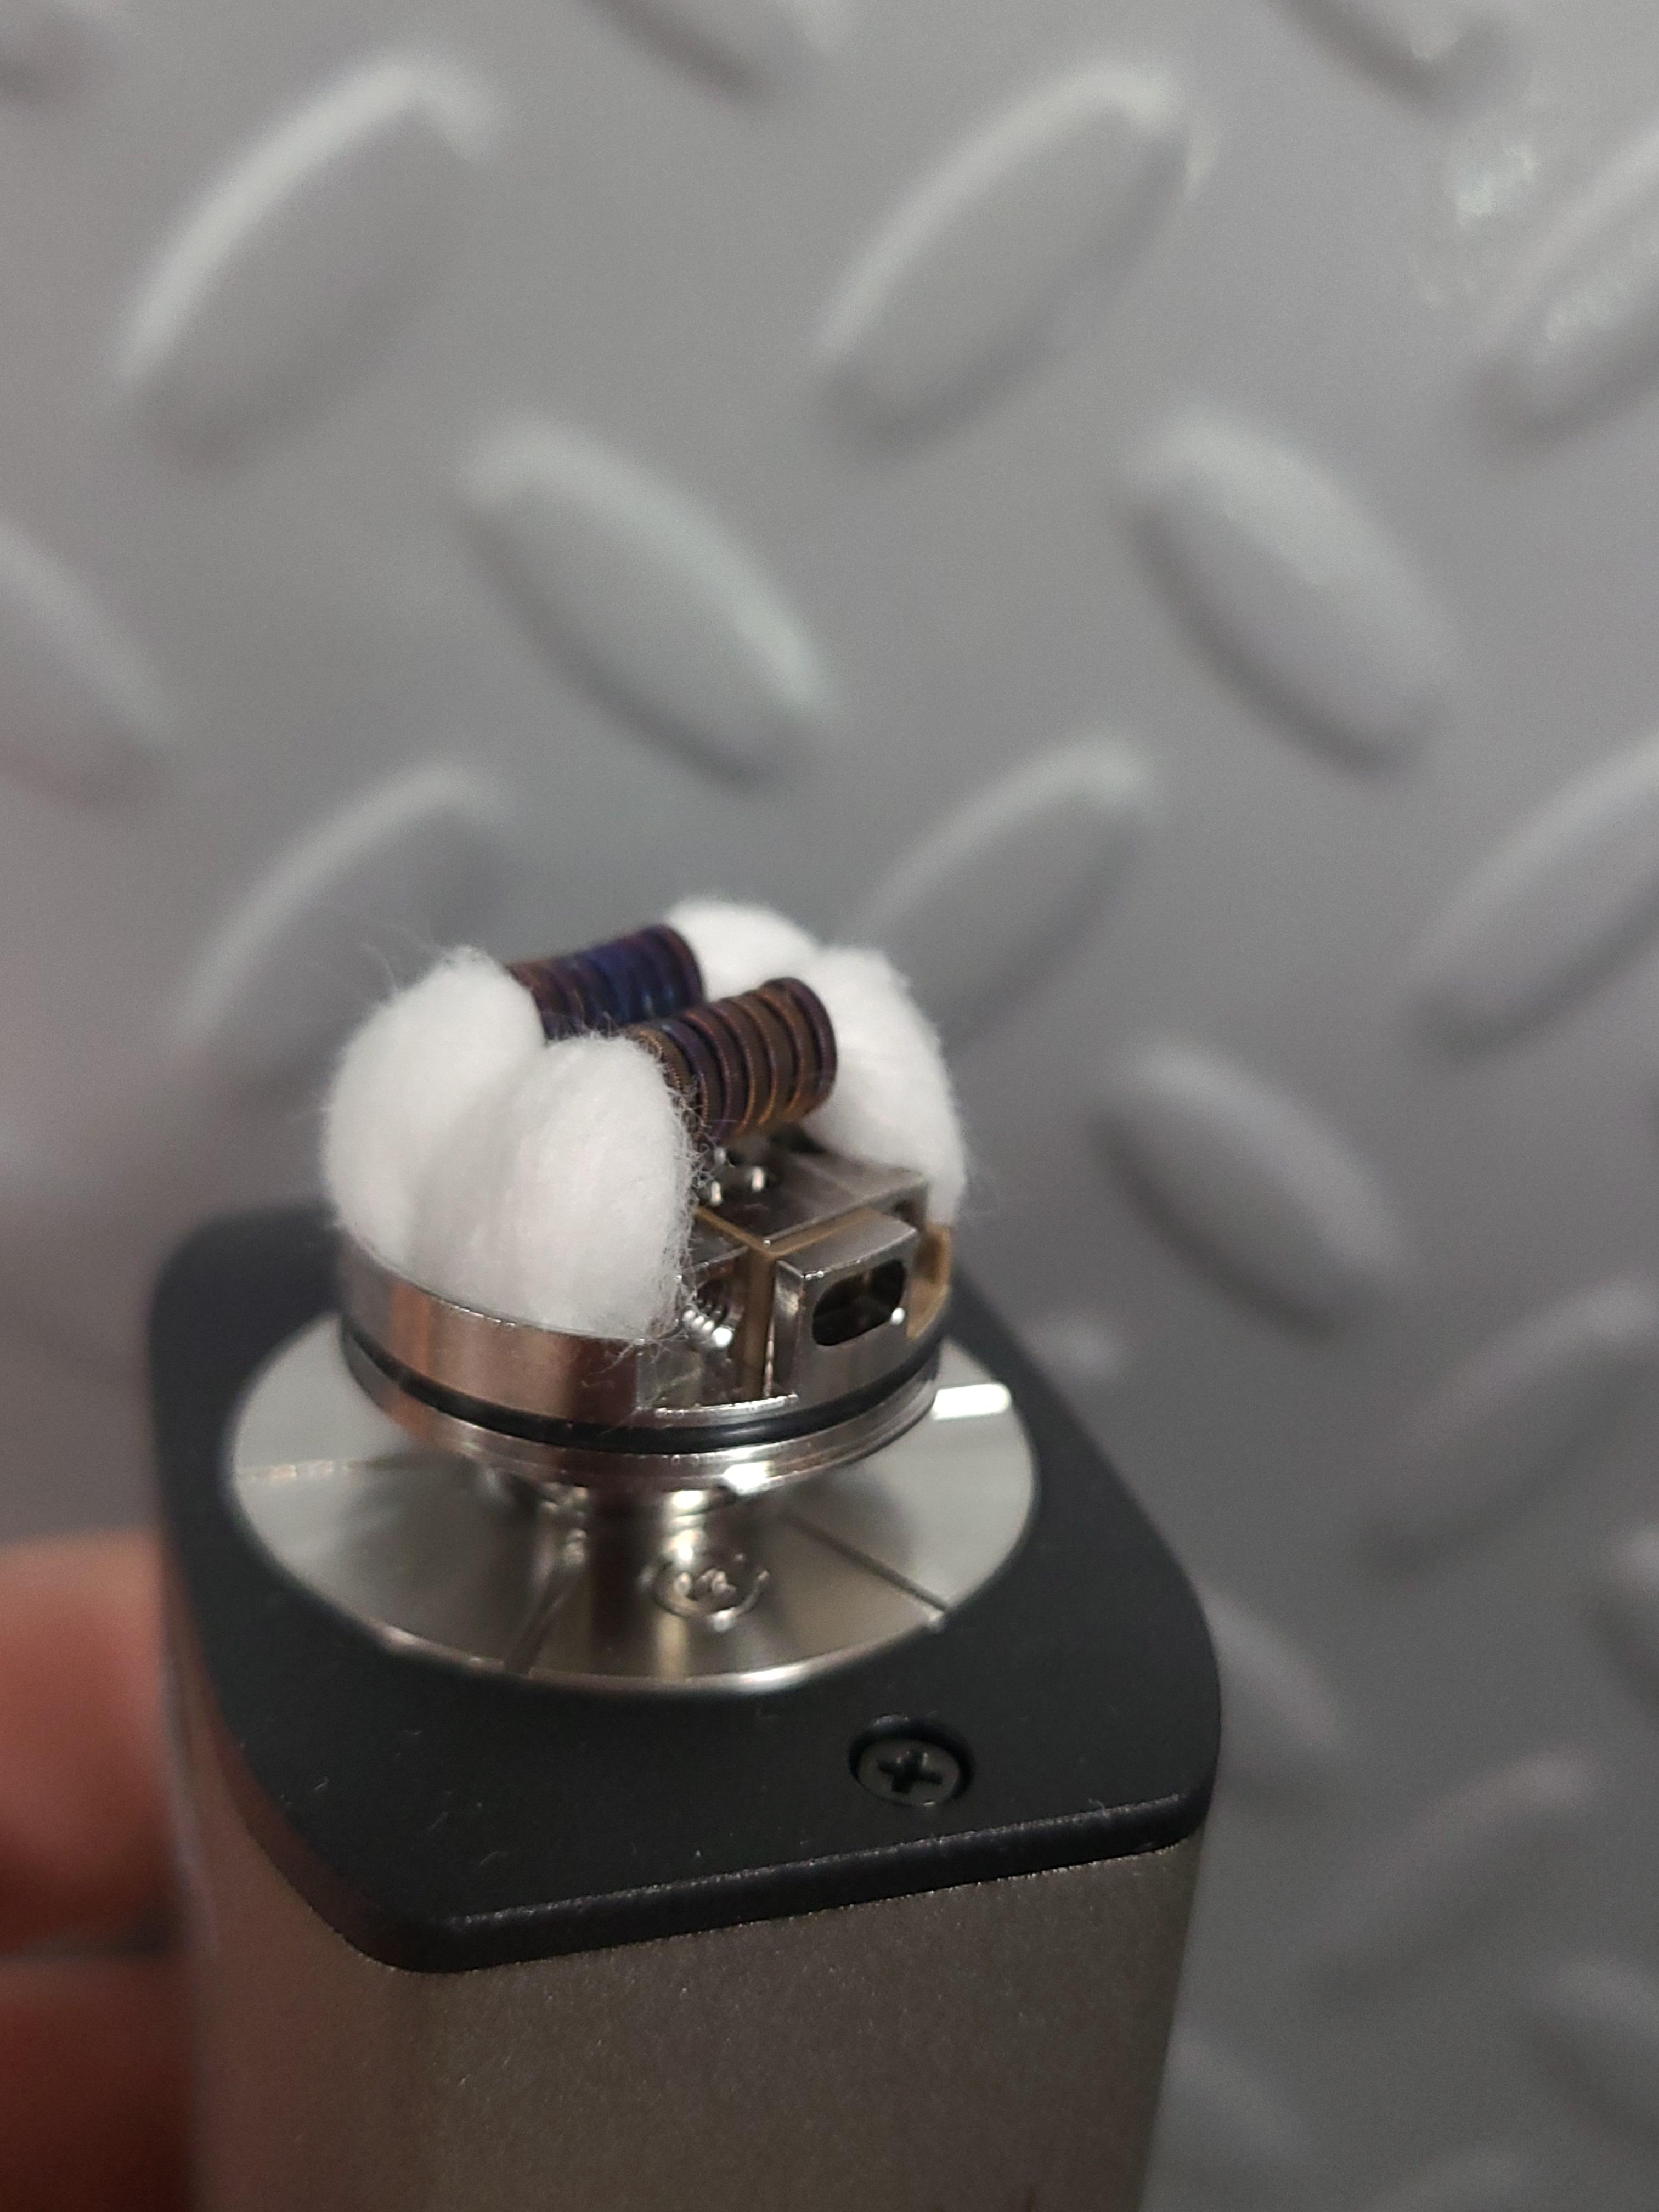
The standard building deck on the Ragnar is a postless style, kind of like what we see with the Aromamizer Plus V2. However, it also has 12 small airflow holes that sit right under the coils. Air travels through the sides of the deck and right up these holes for bottom airflow. Building on this isn’t really much different than the previous post less deck. However, one must keep in mind that this is a large atomizer, with a larger build deck, so the proper coils should be applied. The biggest factor here is wicking. If you go with 2.5 or 3mm coils, chances are you won’t have enough cotton to plug the massive wicking channels on the sides. I opted for 3.5mm fused claptons with 8 wraps. They fit like a glove and had adequate cotton without any thinning. Simply tuck that cotton on down in the sides so it is cut a hair above the bottom and you are done.
MESH DECK -
I received another Aromamizer Plus V2 Mesh deck for use with the Ragnar. One would build this the same as before, with cotton snipped so it is flat when it rests in the wicking channels. Then, when all is done, pop this into the adapter and place it in the RDTA. I opted for using the squonk pin on this, and placed the RDTA in dripper mode by removing the chimney section and threading the thing together. I did this because a future review is for the Steam Crave Hadron w/ squonk backpack. So story time out of the way, the mesh deck squonks perfectly. Liquid comes right into the cotton with the slightest of squonking pressure and wicks great every time. I found the flavor to be amazing with the setup like this and it may be one of the best mesh experiences I have ever had.
_____________________________________________________________________________________
AIR FLOW
Airflow is the game changer on this one. Not only does it have an excellent AFC with multiple settings for everyone’s desires, it also has the means to run as side airflow, bottom airflow, or multiple combinations of the two. They did well with the Aromamizer Plus V2, which added several more options over the previous, and this adds to that once again. I found that with my coils, at 85w, I enjoyed the combo of bottom airflow and just one line of airflow open. This was restricted, yet smooth, and the flavor was amazing. With the mesh deck, I ran it the same way, or with just side airflow of 2 lines. With the bottom airflow hole and the adapter, it redirects the air into the side, and it was a little whistley with the mesh deck. Not the case with the Ragnar deck, but I could hear it with that adapter and mesh deck. The airflow is a win on this, even with that little whistle in one instance.
_____________________________________________________________________________________
PHOTO GALLERY
_____________________________________________________________________________________
Hello everyone and thanks for stopping by to read another one of my reviews. Today I will be going over the Ragnar RTA by Steam Crave. The Ragnar is an absolute beast of an RTA. Measuring in at 35mm wide, and 58mm tall, with a capacity of 18ml, it is not your run of the mill atomizer. It’s also not another run of the mill RTA from Steam Crave, as for years they have had side airflow only. The Ragnar also introduces bottom airflow with the standard deck. Just to add more value to the thing, they also include a chamber reducer/adapter so all Aromamizer Plus (V1/V2) decks can also be used with this tank. Let’s stop hyping and start review, so I will get right to it eh?
DISCLAIMER: This was sent to by Steam Crave for review.
_____________________________________________________________________________________
WHAT YOU GET
- Ragnar RDTA
- 18mL glass
- Spare 18mL glass
- Chamber reducer / deck adapter
- Spare Parts
- Tools
- Paperwork
Available in black, gunmetal, and stainless steel.
STOCK SHOT
PACKAGING
OUT OF BOX
_____________________________________________________________________________________
FIRST IMPRESSIONS
Ragnar - Noun - Definition - Masculine Germanic name. Totally accurate Steam Crave. When you open this, you feel like you are handling an atomizer that isn’t messing around. It looks just beefy and gorgeous all at once. Steam Crave machining is on par as well, with nothing to complain about in that department. Measuring in at 35mm wide and 58mm tall, it has a solid width to height ratio that makes it look even heftier. However, beyond the looks comes a lot of function. For starters, Steam Crave has a modified version of the airflow they did on the Aromamizer Plus V2. Like that atomizer, the AFC has multiple settings which cover varying levels of airflow, but also added control of side or bottom airflow. I will get more into that down below. One other thing that is seen in the box is an adapter / chamber reducer. This can be used in conjunction with any of the Aromamizer Plus V1/V2 build decks, so anybody with these has even more options. With how much I have been enjoying the Aroma Plus V2 lately, I couldn’t wait to toss a build in this and start chucking.
_____________________________________________________________________________________
BUILD DECK
The standard building deck on the Ragnar is a postless style, kind of like what we see with the Aromamizer Plus V2. However, it also has 12 small airflow holes that sit right under the coils. Air travels through the sides of the deck and right up these holes for bottom airflow. Building on this isn’t really much different than the previous post less deck. However, one must keep in mind that this is a large atomizer, with a larger build deck, so the proper coils should be applied. The biggest factor here is wicking. If you go with 2.5 or 3mm coils, chances are you won’t have enough cotton to plug the massive wicking channels on the sides. I opted for 3.5mm fused claptons with 8 wraps. They fit like a glove and had adequate cotton without any thinning. Simply tuck that cotton on down in the sides so it is cut a hair above the bottom and you are done.
MESH DECK -
I received another Aromamizer Plus V2 Mesh deck for use with the Ragnar. One would build this the same as before, with cotton snipped so it is flat when it rests in the wicking channels. Then, when all is done, pop this into the adapter and place it in the RDTA. I opted for using the squonk pin on this, and placed the RDTA in dripper mode by removing the chimney section and threading the thing together. I did this because a future review is for the Steam Crave Hadron w/ squonk backpack. So story time out of the way, the mesh deck squonks perfectly. Liquid comes right into the cotton with the slightest of squonking pressure and wicks great every time. I found the flavor to be amazing with the setup like this and it may be one of the best mesh experiences I have ever had.
_____________________________________________________________________________________
AIR FLOW
Airflow is the game changer on this one. Not only does it have an excellent AFC with multiple settings for everyone’s desires, it also has the means to run as side airflow, bottom airflow, or multiple combinations of the two. They did well with the Aromamizer Plus V2, which added several more options over the previous, and this adds to that once again. I found that with my coils, at 85w, I enjoyed the combo of bottom airflow and just one line of airflow open. This was restricted, yet smooth, and the flavor was amazing. With the mesh deck, I ran it the same way, or with just side airflow of 2 lines. With the bottom airflow hole and the adapter, it redirects the air into the side, and it was a little whistley with the mesh deck. Not the case with the Ragnar deck, but I could hear it with that adapter and mesh deck. The airflow is a win on this, even with that little whistle in one instance.
_____________________________________________________________________________________
PHOTO GALLERY
_____________________________________________________________________________________