Become a Patron!

Sense Herakles RTA-2 | Product Review and Wicking Technique

PhantomOp

VU Donator
Gold Contributor
Member For 3 Years
Member For 2 Years
Sense Herakles RTA-2
Product Review and Wicking Techniques


This product was purchased from Vapor World during this year’s Christmas Sales!

All images and thoughts presented are my own opinions and based on my own impressions. Please, do your due diligence and research this product and watch/read other reviews. Knowledge is power and it is always in your best interest to have the knowledge.

Coil setup used in this review
Wire: 24g Kanthal A1 (2 strands)
Twist Pitch: 2mm
Coil ID: 3mm
Coil Wraps: 8/7
Ohm p/Coil: ~0.47 (~0.25 total)

Product Specifications
Material: Stainless Steel
Capacity: 6ml
Features: Top Filling
Avail Colors: Stainless Steel, Black, Rose Gold
Build Deck: 2-Post Velocity Style, dual wide airflow holes
Adjustable Bottom Airflow w/4 inlet holes
Adjustable Juice Flow Control
Manufacturer Product Link: http://www.szsensetech.com/ProShow.aspx?nId=mjT1k3oWbSE=

Product Packaging
The tank came packaged in a nice hard-shell plastic case that was clear tape sealed on two of the sides to keep the lid from opening during shipping.

IMG_20170114_024937561 (Medium).jpg
IMG_20170114_025021488 (Medium).jpg IMG_20170114_025056080 (Medium).jpg

Upon opening the lid of the case, you can see the tank already assembled.
IMG_20170114_025135131 (Medium).jpg

Looking closer at the packages, under the black section to the right of the tank you will notice a section that lifts up on one side. Under here is a set of basic instructions, an extra glass section, and a tube which contains the maintenance spare parts.
IMG_20170114_025201577 (Medium).jpg IMG_20170114_025321586 (Medium).jpg

  • 510 drip tip adapter
  • Extra 510 center conductor pin
  • Spare O-rings
  • Grub screws
  • Allen wrench
  • Small flat head screwdriver
 

PhantomOp

VU Donator
Gold Contributor
Member For 3 Years
Member For 2 Years
Product Inspection
Upon disassembling the tank, you will have 8 individual parts (excluding the O-rings).
IMG_20170114_025621490 (Medium).jpg


The machining of the stainless steel appears somewhat smooth with little machine oil residue, if any.
If you inspect the deck machining very closely, you can see some tooling marks.

IMG_20170114_025710983 (Medium).jpg IMG_20170114_025859135 (Medium).jpg IMG_20170114_025724531 (Medium).jpg IMG_20170114_025754521 (Medium).jpg IMG_20170114_025812545 (Medium).jpg IMG_20170114_025829963 (Medium).jpg


The threading on the 510 pin connector looks very clean with no burring or tweaked threads. While threading it into my Wismec RX200S MOD and my SMOK Alien MOD, I was not able to feel any catching.
IMG_20170114_025841521 (Medium).jpg

It is always advised to wash all parts with soap and hot water, and to do an ultrasonic cleaning of these parts (removes and loosens misc. debris) before using.

Deck Build Space
The 2-Post Velocity style decks feels very spacious to build on. I was able to easily get a 15-16 wrap (non-spaced) 24g coil on this deck without massive overhang into the juice ring. As you can see in the pictures, the 8 wrap twisted coils just started to reach the ends of the airflow holes.

IMG_20170113_213545918 (Medium).jpg
 

PhantomOp

VU Donator
Gold Contributor
Member For 3 Years
Member For 2 Years
Tank Wicking
The first week of building on this deck I had some troubles getting the wicking correct on this tank. Either I would use to much wick or to little wick and it would notoriously leak (massively) or dry hit no matter what power I would vape it at.

After trial an error, I feel that I have come up with a good wicking technique that has eliminated both of the problems. Keep in mind, this is using a single type of cotton (which is my preferred cotton) for this technique.

First, cut two strips of cotton (with the grain) at approx. 16-17mm width.
Untitled 65 (Medium).jpg

Now remove the two compressed "skin" layers from the cotton strips. This will allow the "fluffy" portion of the cotton strips to be exposed and absorb more juice quicker.
Untitled 66 (Medium).jpg

You then tight roll one end of each cotton strip so that you can slide it in the coil smoothly.
Untitled 67 (Medium).jpg

There will be slight pressure on the cotton strip as your trying to slide it into the coil. Gently hold both ends and keep a slight pressure on the strip while pulling it through each coil. This will ensure the strip does not bunch up and/or tear while you are working it into the coil.

You are now ready to trim your cotton to the length needed. With a good pair of sharp scissors, cut each end just to edge of the tank base. Once you have all four ends cut, slightly fluff out the outside portion with your tweezers. This removes any compression that may still exist from pulling it through the coils.
IMG_20170114_004504683 (Medium).jpg IMG_20170114_004520294 (Medium).jpg

Now we need to tuck the cotton down into the juice well. I will just press down on the top of the cotton end and press it place it behind the juice ring using my tweezers or the included Allen wrench.
IMG_20170114_004744586 (Medium).jpg IMG_20170114_004758173 (Medium).jpg IMG_20170114_004824138 (Medium).jpg

Once all four sides are pressed behind the ring, I will spend a little bit of time cleaning up the cotton strands and making sure it is all nice and tucked. I also make sure that the airflow channels are completely clear of cotton so that there is nothing obstructing the airflow path. If you don't have it tucked in nicely, once you prime the cotton it will expand and possibly catch on the tank while you’re putting everything back together.

You are now ready to prime the cotton with your e-juice and place the tank back onto the base. Gently slide the tank top back onto the base making sure not to smoosh or compress the cotton, then gently screw the top to the base and make sure that all everything is tight.​


Time to fill it up! Unscrew the top fill cap and add your favorite e-juice!
ejuice.jpg

Final Impressions and Thoughts
Overall, this tank appears and feels to be well made and sturdy. I like that it came with the 510 drip tip adapter so that you can put your own custom drip tip on. I also personally like the Velocity-Style build decks. They are dead simple to build on and can take some massive sized coils.

Getting the wicking correct, as with a lot of RTA/RBA tanks can be somewhat tricky. However, I am fairly new to building so I may just have to chalk it up to inexperience on some level. As time goes on, I am getting a bit better at getting the wicking down on the first, second, or third try. That is why I have included, what I have found, to be a good wicking technique for the cotton that I use.

The air flow on this tank is MASSIVE!! There is absolutely NO restriction to the airflow when you have it wide open. I did find that when you start closing the air flow control, it will “whistle” quite loudly if you take in a fast / deep air pull. To me it is kind of annoying. If you take in a slower draw, the whistling will stop.

Vapor output has always been very good, regardless of the coil and wattage operated at.

Flavor output is always very subjective. I have put standard coils, twisted coils, Clapton coils, and Fused Clapton coils in this tank now. To me, the Clapton coil variants deliver the best flavor. I haven’t gotten into Alien coils builds yet, so I can’t add those to the comparison.
 
Last edited:

PhantomOp

VU Donator
Gold Contributor
Member For 3 Years
Member For 2 Years
Sense Herakles RTA-2 - Leaking Tank Fix (Manufacturer Oversight)

Finally! I've identified the leaking RTA-2 fix!

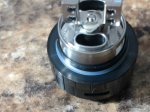
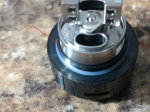
It appears that the manufacturer had an oversight while running this RTA through production (or the engineering people had their head up their ass) and failed to install a very much needed O-ring in the base of the tank. As you can see in the first picture, there is a small separation between the build deck and the base. This is allowing juice to flow freely between the two units. Why? Well, because metal against metal does NOT seal. When juice heats up, and metal heats up there is shrinkage and expansion going on. Well, it's letting juice get through.

IMG_20170205_153502216 (Medium).jpg 2017-02-05 15_44_09-IMG_20170205_153502216 (Medium)_gap.png

How to Fix
Remove the 510 pin from the base by unscrewing it out using a flat head screwdriver. Once removed, you can remove the build deck from the base.
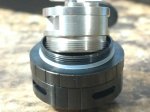
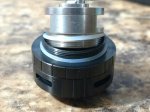
There you will notice a concave area where an O-Ring "should" have been placed. BTW -- They include the O-ring in the misc/spare parts kit. Go figure. Take one of the white O-Rings from the kit (not the smallest one) and place it on the build deck. Yes, it is a little loose, but that is OK. Then screw it all back together.

Picture 1: No O-Ring
Picture 2: With O-Ring

IMG_20170205_153100332 (Medium).jpg IMG_20170205_153334967 (Medium).jpg


Johnnytraveler

Gold Contributor
Member For 3 Years
Member For 2 Years
I just want to give you a big thanks for the o-ring fix. I really enjoy this tank but wouldn't take it outside the house because of the leaking.

Now she's good to go. Becoming one of my favorite tanks. Great flavor! Large capacity. Can't believe we got these for under $10. Should have been a hoarder. I only picked up 2 from vaporworld.

Sent from somewhere in Vietnam.
 

Pastorfuzz

Gold Contributor
Member For 4 Years
VU Patreon
I bought 20 of the RTA4's this spring for $5 each.
They came in 4 boxes of 5.
O rings were also missing from some of them also. I noticed it because all the 510 pins on the 5 in one box were very loose.
I took them apart and noticed no o rings in that same spot. It would have to seal on just the 2 steel flats.
When I checked the other boxes they were tighter, but missing the mentioned o rings also.
I went to the hardware store and bought them and never had a leaking problem after I learned how to wick properly.
I guess the guy who went to school to build these was sick on o ring day
 

VU Sponsors

Top