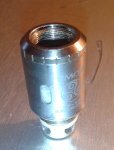
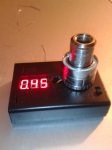
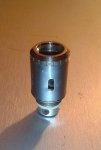
The TFV4 tricoil, may not get as much attention as it's bigger and more rowdy brother, the quad, but is in my opinion, a very very good coil. It lasted a long while, and lasted even longer sucessfully thwarting my efforts to get it apart. How to get it apart? first, a look at an intact specimen.

Next, to avoid confusion, and more importantly, typing (which I'n not great at) some part identicifation

1: Positive contact
2: Insulating grapple grommet. ( I made that up )
3: Threaded coil base
4: Coil Body
5 Coil cover
Required tools
Propane torch
Pair of vice grips, and material to protect the cover from vice grip jars.
Large screw driver.
Dremel or file
Proceedure:
1. Remove positive contact (1) and grommet (2) by pulling them off, then remove old coils and cotton by pulling them out with needle nose pliers.
2. Grasping the castelated top of the cover (5) with the protected jaws of the vise grips, place the base (3) into the flame from the torch, to heat and expand it. It won't need a lot of heat to expand the cover enough to for you to pry the base off, by placing a screwdriver inside the base and levering it out.
Let cool ( duh ) and tap the coil body (4) out the cover (5) by whacking it from the top. Dremel or file the ridge at the bast of the body (4), so the cover (5) can be removed more easily from now on.
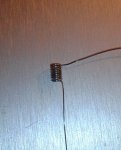
3. Make 3 coils similar to the one pictured below. I used 26 gauge Kanthal ( for a friend who has not yet overcome his superstisions regarding Stainless) 3mm ID spaced, number of wraps at your discretion.

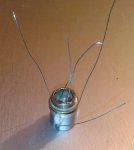
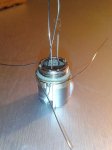
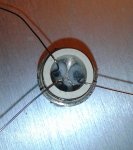
4. Wrap cotton around the coils, and insert them into the coil body (4), then passing the positive wires through the center of the base, (3) LIGHTLY set the base (3) onto the coil body (4).

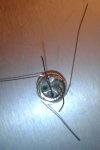
5. Bend the negative wires from the coil down, then to the side and tuck them between (3) and (4).

It should look like this from the top.

6. trim the negative wires, and tuck them in pefore pressing down, and trapping them between (3) and (4).

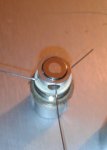
7. replace (2) and (1) and trim wires.


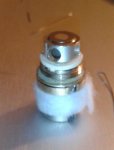
8. Wrap (4) with thin cotton and replace cover

Continued in next.
Next, to avoid confusion, and more importantly, typing (which I'n not great at) some part identicifation
1: Positive contact
2: Insulating grapple grommet. ( I made that up )
3: Threaded coil base
4: Coil Body
5 Coil cover
Required tools
Propane torch
Pair of vice grips, and material to protect the cover from vice grip jars.
Large screw driver.
Dremel or file
Proceedure:
1. Remove positive contact (1) and grommet (2) by pulling them off, then remove old coils and cotton by pulling them out with needle nose pliers.
2. Grasping the castelated top of the cover (5) with the protected jaws of the vise grips, place the base (3) into the flame from the torch, to heat and expand it. It won't need a lot of heat to expand the cover enough to for you to pry the base off, by placing a screwdriver inside the base and levering it out.
Let cool ( duh ) and tap the coil body (4) out the cover (5) by whacking it from the top. Dremel or file the ridge at the bast of the body (4), so the cover (5) can be removed more easily from now on.
3. Make 3 coils similar to the one pictured below. I used 26 gauge Kanthal ( for a friend who has not yet overcome his superstisions regarding Stainless) 3mm ID spaced, number of wraps at your discretion.
4. Wrap cotton around the coils, and insert them into the coil body (4), then passing the positive wires through the center of the base, (3) LIGHTLY set the base (3) onto the coil body (4).
5. Bend the negative wires from the coil down, then to the side and tuck them between (3) and (4).
It should look like this from the top.
6. trim the negative wires, and tuck them in pefore pressing down, and trapping them between (3) and (4).
7. replace (2) and (1) and trim wires.
8. Wrap (4) with thin cotton and replace cover
Continued in next.
Attachments
-
 before.jpg114.3 KB · Views: 30
 -
 parts.jpg157.1 KB · Views: 27
 -
 coil.jpg78.7 KB · Views: 27
 -
 loaded1.jpg134.3 KB · Views: 27
 -
 loaded top.jpg128.9 KB · Views: 26
 -
 loaded2.jpg240.9 KB · Views: 26
 -
 neg tuck.jpg88.2 KB · Views: 26
 -
 pos.jpg144.4 KB · Views: 26
 -
 pos2.jpg200.4 KB · Views: 26
 -
 cwrap.jpg46.3 KB · Views: 29

