Become a Patron!

What's your project?

Vape Fan

_evil twin_
Staff member
Senior Moderator
VU Donator
Platinum Contributor
Press Corps
Member For 5 Years
Mine was (just finished) replacing pc parts.

Started out just motherboard /ASRock B550M Pro4/and processor/AMD 5500GT, and that would have been fine, except...lol... wound up getting an AIO cpu cooler since my air cooler wouldn't fit. Usually can tell if they will or not, not this time. And an SSD cooler instead of the one that came with the board, just because I like it.

Same case, except I painted a blue stripe, silver to match the aluminum on the mb & cooler. Same RAM, power supply, Wifi/BT card, fans. Put a false bottom in the case that houses 1 fan instead of the space for 2 I had in there. I custom made it from aluminum years ago for a different case,, fits in good! Painted the multi colored exposed wire bits at the ends of the cables black, with an artist brush :)

I don't play demanding games or anything that is considered heavy use so looked for budget friendly. Was going to be 215 for mb/cpu till I added the 2 coolers, silver paint, and a case cable that I had forgotten was causing 1 of the 3 front usb's to not work. Ended up at $290. Pretty good for basically a new pc, that's from push of the button to working desktop in 13 secs.

This mb and cpu are AM4 platform(mb/cpu/ram), which is at a dead end, even tho they mysterically just came out in Jan with AM4 5500GT and 5600GT, when they've been up to AM5 for,, about a year I think? AM4 and AM5 platforms aren't compatible. And that's fine w/me, for now...
...till I move to a diff platform with most likely this case...
...newest platform, diff AIO, diff braided cables, diff fans, & dedicated gpu...adding 800+ to the budget.
For now I'll take the 290 deal and run that for a while.
Good thing I didn't see that case before I bought parts and started fixing this one :xD:

Upgraded monitor from a 2008 21"model LOL. 27"4k! Night and day. Still have the big plasma for dual display in here but may move it out since this one screen may now be enough, considering windows snap and native PBP & PIP w/monitor. As far as video content I stream only on it and rarely a movie or TV programing in office, cept news mostly and I don't have to always have eyes on that.

The circle and logo lights are white. I put a 2.5" 2nd SSD from another build on top, connected to rear usb with one of those cables that power it too. Aaand,,, I see I missed cleaning that bottom fan that's been sitting around for years, more like about a decade.
On right, lamp shining on cat. Sharper in person since this is picture of a picture of a picture.
 

Attachments

  • 1708513647192.jpeg
    1708513647192.jpeg
    1.2 MB · Views: 14
  • 1708513906695.jpeg
    1708513906695.jpeg
    3 MB · Views: 14
  • 1708513969656.jpeg
    1708513969656.jpeg
    2.2 MB · Views: 14
Last edited:
Synphul

Gold Contributor
Member For 4 Years
My current project is driving me nuts. Fricken water heater quit so did a quick check. Got replacement elements, no joy. Got replacement upper and lower thermostats, no joy. Tested the elements and they seemed good, had continuity and 12.7ohms which is in range for 4500w elements. But some people said they could give false readings.

I understand electrical, to a point. Definitely not an electrician. Checking crap with the meter and find I get 120v on both upper legs of 220v coming into the heater at the top of the thermostat. Every damn connection pretty much has 120v on it. Go to check across the 2 hots leading in, zilch. No 220v. Crap.

Went and checked the breaker box, no 220 there either. Even from the service entry cables. Started to wonder if my meter was jacked up. Dug around until I found my fluke, nope, no 220v. Something about an open lead causing each leg to read 120v to ground because of backfeeding. Idk.
So I go out to the power pole and open the box under the meter. No 220v there either. Shut the main breaker off at the head of the service entry cable to physically isolate everything else. Bridge across the two 120v legs coming immediately from the meter to the main breaker, I get like 2.75v. Checked one to ground, 122v. Checked the other, getting 80v, 33v, 57v, 18v, 35v, 53v, 24v. Just bouncing everywhere.

Thought maybe it was corrosion or something on the lug so I squirreled the lead around until I had it right against the exposed twisted copper off the problem leg and the other lead to the bare copper ground wire. Same issue. Double checked with both meters. Day 2 or 3 now without hot water, never occurred to me that the main power could be an issue. So have a call into the power co to come out and check. Hoping this fixes the issue. Right now the only appliance I have that runs 220v is the water heater so didn't notice it with anything else. Fml.

During my searches I came across someone who ran into a similar issue. They mentioned that some of their neighbors began experiencing similar problems and they'd all recently had smart meters installed. My area was a bit slow to get to them, think I got mine upgraded to a smart meter (not by choice) maybe 6-8mo ago. Now has me curious if there's some connection there. The other person who brought up smart meters didn't experience trouble with their power right away either, something like within the first year of being upgraded.
 

SnapDragon NY

Senior Moderator
Staff member
Senior Moderator
VU Donator
Diamond Contributor
Press Corps
Member For 5 Years
VU SWAT
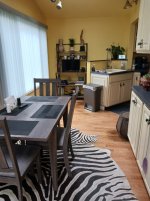
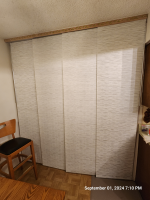
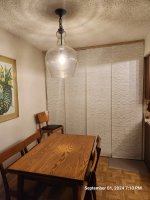
My projects have been mainly interior painting and putting furniture together. My back kitchen where my table is had a sliding glass door removed, it was dry walled but needed priming and painting. I also had to fix part of the textured ceiling from where my old skylight(since replaced) leaked above the back wall area on the vaulted ceiling. I went to Lowes to match my paint and get the dry wall compound to fix the ceiling and paint the back wall. I ordered a Bakers Rack from Amazon that I wanted to put on the back wall and also ordered a small 24" Roku TV to sit on it to keep me company while I eat my dinner. I think my project came out pretty good and glad I finally finished it.


20240411_110619.jpg
 
Last edited:

Jimi

Diamond Contributor
Member For 5 Years
My current project is driving me nuts. Fricken water heater quit so did a quick check. Got replacement elements, no joy. Got replacement upper and lower thermostats, no joy. Tested the elements and they seemed good, had continuity and 12.7ohms which is in range for 4500w elements. But some people said they could give false readings.

I understand electrical, to a point. Definitely not an electrician. Checking crap with the meter and find I get 120v on both upper legs of 220v coming into the heater at the top of the thermostat. Every damn connection pretty much has 120v on it. Go to check across the 2 hots leading in, zilch. No 220v. Crap.

Went and checked the breaker box, no 220 there either. Even from the service entry cables. Started to wonder if my meter was jacked up. Dug around until I found my fluke, nope, no 220v. Something about an open lead causing each leg to read 120v to ground because of backfeeding. Idk.
So I go out to the power pole and open the box under the meter. No 220v there either. Shut the main breaker off at the head of the service entry cable to physically isolate everything else. Bridge across the two 120v legs coming immediately from the meter to the main breaker, I get like 2.75v. Checked one to ground, 122v. Checked the other, getting 80v, 33v, 57v, 18v, 35v, 53v, 24v. Just bouncing everywhere.

Thought maybe it was corrosion or something on the lug so I squirreled the lead around until I had it right against the exposed twisted copper off the problem leg and the other lead to the bare copper ground wire. Same issue. Double checked with both meters. Day 2 or 3 now without hot water, never occurred to me that the main power could be an issue. So have a call into the power co to come out and check. Hoping this fixes the issue. Right now the only appliance I have that runs 220v is the water heater so didn't notice it with anything else. Fml.

During my searches I came across someone who ran into a similar issue. They mentioned that some of their neighbors began experiencing similar problems and they'd all recently had smart meters installed. My area was a bit slow to get to them, think I got mine upgraded to a smart meter (not by choice) maybe 6-8mo ago. Now has me curious if there's some connection there. The other person who brought up smart meters didn't experience trouble with their power right away either, something like within the first year of being upgraded.
Are you on true 220W or are you on 208W they call 220W? Areas around here have 208W and always have problems also causes things to burn out faster.
 

Vape Fan

_evil twin_
Staff member
Senior Moderator
VU Donator
Platinum Contributor
Press Corps
Member For 5 Years
I have more going on I can get done. Some small, some not so small.
A light to go under an upper cabinet, and that part needs to be painted...
under which will be a pot rack will be.
Put a finishing effect on a mantle and mount it.
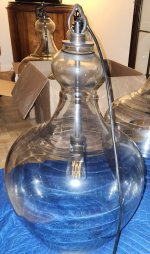
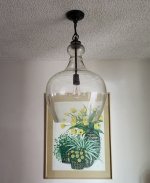
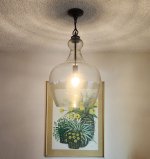
Install 4 other light fixtures. I bought a few(5) pendants of which I was going to use 1 dining area / 3 kitchen but wound up too big (there's 2 sizes avail). Someone else picked them up for me from a CL find. So I have some for sale now lol. Nice ones,,,I have a glass person that can shorten one for dining area. Even shortened still too big for kitchen.
26" tall x 17" wide/
20240409_042821.jpg
Mouthblown $349 on sale retail :eek:

I keep adding...like today a smart thermostat ,,,,:crazy:
 

Synphul

Gold Contributor
Member For 4 Years
Are you on true 220W or are you on 208W they call 220W? Areas around here have 208W and always have problems also causes things to burn out faster.
Should be true 220w. When I first got in here the place was way worse. A power line that draped over the house and was falling down then got dropped even lower when a tree fell on it. A breaker box on a pole that I think had a fuse in one side and a butterknife or something in the other in place of a larger buss fuse. A 60a panel with screw in glass fuses.

I think it was 10-12yrs or so ago the power co came out for that downed line. I had to put in a new power pole, new meter box etc. They got rid of the sketchy line over the house. A real meter box with a breaker on the pole. I pulled the old 60a screw in fuse box and switched it for a 200a panel with modern breakers.

It's an older place so wasn't really set up for 220v initially, had a gas (propane) furnace and stove. Had an old idk, 15-20gal single element 110v water heater. I replaced that with a new 220v 40gal heater and ran new 220v line from the breaker panel inside to the heater. It's been working for a few years now. After a shower the other day (shower ran a bit short which was odd), just no hot water.
Thought well damn, had an element go out or a bad thermostat. Already had to replace the thermostat once and replaced both. That was awhile back and the water heater was working fine after that repair. But now, new elements, new thermostats top and bottom for both and nada.

So I started checking power deeper and was concerned when I got 110v to ground on just about every contact - both terminals of both elements at the same time like check the upper, 110v on one screw, 110v on the other. Move positive probe to lower element, one contact then the other and 110v on each of those to ground. Then the contacts on the thermostats all reading 110v except maybe one or two. The top two read 110v each (120-122v actual) on the upper thermostat and those are the two 110v legs from the 220v wired to the top of the tank. Yet when I place the probes across those two top contacts where I should be getting 220-240v I get like 1.24v.

Tested the elements with power wires disconnected and power off, I get a continuity tone on each. I also get a resistance of 12.7ohm on each which for 4500w elements is within range (12-13ohms). I checked each element contact to the base nut, and then to the tank ground and get no tone, 0L on the meter so nothing grounded out or broken contacts on the elements. Both the old elements and new elements read the same and check fine.

That's when I started tracking back to the main 200a breaker under the meter on the lower half of the meter box. Checked the unused spades of the panel below the single breaker, no continuity between adjacent spades (2 diff legs), continuity between alternating spades (same leg). Shut that main breaker off and got no voltage from any of the spades below the breaker to ground.

Then I went above the main breaker on the pole to test the 2/0 gauge or whatever main wires extend from the meter portion of the box to the lugs of the breaker box on the pole. 2 legs there. One tests 110v (121-122v actual) to the copper ground wire that connects to the ground rod right there at the base of the meter pole. Checked the other leg to the same ground and voltage jumps all over the place but under 80v. Sometimes as low as 15-20v, other times up around 50-60v, maybe spiking to 80v before dropping back down in the 20's and 30's again.

Bridged leads across the top lugs, one lead to one leg, other lead to the other and that's where I should see 220v. Instead I get 2.5 or 2.74v (less than 3v). Being above the breaker and with the breaker disconnected that isolates any potential problem on my end just to confirm service power and it's borked. That's also where I scraped the ends of the leads against the lightly corroded lugs to improve contact and then carefully slipped the probe tip above the lug and had the tip shoved right against the copper strands of the two power legs. The other probe off the ground bar and physically against the bare copper ground wire (clean, no corrosion) with no difference in readings on either dmm.

I can't begin to trace down any other issues until I have solid 220v coming in. Last fall is when they installed the smart meter and some have suggested that it's possible the older clamps behind the meter may have become stretched some. Others have said the connector spades on the back of the new smart meters are a bit thinner than the spades on the old analog meters, so that could be the issue I guess. Whatever issue I have with an open leg somewhere backfeeding voltage and giving me screwy readings is happening on the meter side or somewhere between pole and meter.
 

Synphul

Gold Contributor
Member For 4 Years
C
I have more going on I can get done. Some small, some not so small.
A light to go under an upper cabinet, and that part needs to be painted...
under which will be a pot rack will be.
Put a finishing effect on a mantle and mount it.
Install 4 other light fixtures. I bought a few(5) pendants of which I was going to use 1 dining area / 3 kitchen but wound up too big (there's 2 sizes avail). Someone else picked them up for me from a CL find. So I have some for sale now lol. Nice ones,,,I have a glass person that can shorten one for dining area. Even shortened still too big for kitchen.
26" tall x 17" wide/
View attachment 214381
Mouthblown $349 on sale retail :eek:

I keep adding...like today a smart thermostat ,,,,:crazy:
Cool light, I like unusual stuff like that. Unfortunate that it's too big to fit your space in the kitchen.
 

Synphul

Gold Contributor
Member For 4 Years
Are you on true 220W or are you on 208W they call 220W? Areas around here have 208W and always have problems also causes things to burn out faster.
Power co checked it today. Ended up with a whole new 200a service panel and meter head. He couldn't get 220v off it either, the thing corroded so bad none of the lugs wanted to break free even with an impact and lubricant. They said they'd seen worse but were surprised how fast it corroded like that in just 10-12yrs. One of the meter connections was toasted and burnt looking. Now getting 241v in the house and water heater's working.
 

Vape Fan

_evil twin_
Staff member
Senior Moderator
VU Donator
Platinum Contributor
Press Corps
Member For 5 Years
Sold 3 for more than I have in the 5. 1 is going in DR.

Still finishing on a shelf type mantle I made and got it where I wanted after using Elmer's for crackle and 5 layers of color, and clear, but too shiny so still have clear matte to go.
 
Last edited:
Vape Fan

_evil twin_
Staff member
Senior Moderator
VU Donator
Platinum Contributor
Press Corps
Member For 5 Years
Got a few things done the past couple months.
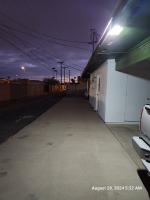
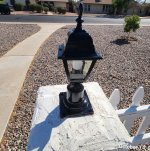
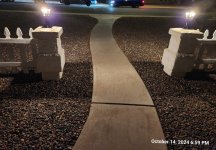
Solar motion sensor lights out back.
20240828_053246.png

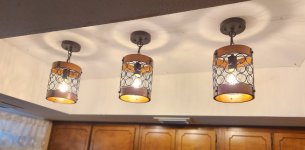
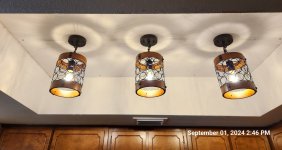
Removed florescent tubes, grid, and egg crate diffusers and made the kitchen ceiling recessed, with new lights. When it cools off around here I'll put some trim around the top corners.
20240901_144549.jpg
20240901_144619.jpg

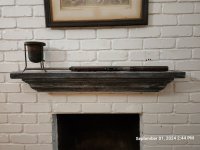
This mantle looking thing LOL, was 1 of 2 for $10 shelves at a sale. I scewed a 2x8 to the top of it, played in the paint for a while, and this is what I came up with. Don't know what I'm putting on it yet,,,and those missed mounting holes are like other things, take care of it soon when I paint most of the interior.
20240901_144455.jpg

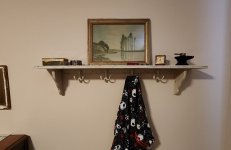
Here's what I did to the other shelf a while back. Added hooks and foo-foo'd it.
20231110_110758.jpg
 

Vape Fan

_evil twin_
Staff member
Senior Moderator
VU Donator
Platinum Contributor
Press Corps
Member For 5 Years
And, pot rack where the old ventahood used to be.
20240901_190554 - Copy.jpg
Wood stips down the sides of the cabinets, to have something to screw to.
Black paint including the bottom of the upper since that never gets a finish.
The hood was hardwired without a switch because, you know, the light and fan switch was built into it. So a thin hardwired light that has a remote. Kicker is it needs to be the scarce 10". There's a plethora of 9" and even more 12". So probly going to be this one.
 

Bliss Doubt

Platinum Contributor
Member For 5 Years
Kitchen reorg.

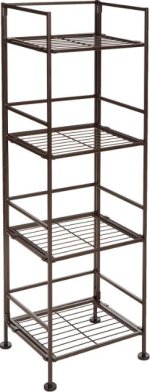
For years I've hunted for a narrow shelf rack for what seemed like wasted space between the stove and the end of the cabinets. Whatever I could find was always too wide to fit. I finally found one, 12" x 12" by 4ft, with four shelves.

Kitchen shelves.JPG

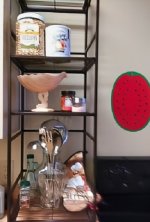
It's sturdy, but I was able to assemble it and lift it up on the counter by myself. What's on there are things that were cluttering the counter previously. The salt and pepper get to live there now, and the chili crisp I use almost every day. I use those crispy onions on the rice & beans I eat a few times a week. The peanuts go in salads and Asian dishes. There's still plenty of room to put more stuff I use every day, such as coffee. I couldn't even get the top shelf in my shot. I'll have to use the ladder to put things up there. I may get a small flat bottom basket so things like the pepper flakes don't tip into the spaces of the shelves.

Kitchen reorg 5.jpg

I was about to sell the antique shell compote dish, regretfully since it was a gift from my mom many years ago, beautiful for serving shrimp or cherry tomatoes. I just didn't have space to store it because of my prepper food. Now it can live on that shelf and remind me to use it for company.

That's a spare cutting board to the right, but I enjoy the cheerful color note just hanging there.

Which brings me to the prepper food project. I'm not doing it anymore. This is the time of year when I would have made sure not to get Doordash until all 2024 expiring cans are eaten, so I can move the 2025 to where the 2024 was, and climb the ladder to the top cabinet to bring 2026 down to where 2025 lived, and start filling the top with new 2027. No more. I'm going to use up my stores until they're gone, and replenish normally. I've lived in panic mode since 2020 over the shortages that never really happened (except the first few months when the TP shelves were empty). Yes, prices have gone up, so I like rice & beans more than I ever did, and I know how to make them good. Egg prices went into the stratosphere, but they've come back down some. The dozen you could get for around 2.50 before the inflation crisis is now 4.00, but it did get up to over 7.00 for a while.

Anyway, if you prep, your spying government knows every single thing you have bought, and in a time of famine will come knocking on your door to take your excess food supply to redistribute, unless this country seriously takes a new direction. We'll see about that, but for now I'd rather live humbly, and as Michael Pollan advised, eat little, mostly plants. Fresh is best, which is why canned foods sit forgotten, getting old while I'm eating lettuce and tomatoes, baby bok choy, broccolini.

I still want another iron shelf rack, right over the stove, but I don't have a handyman right now to nail it securely to the studs.
 

Bliss Doubt

Platinum Contributor
Member For 5 Years
I would bet that you are plenty capable of doing this.🔨

I appreciate that vote of confidence, but my concern is failing to accurately locate the studs, thus risking damage to my landlord's wall. If it's done correctly, the shelves can stay there after I'm gone, no harm no foul, but if I do a hack's job and it comes down, bringing a chunk of wall with it, wrecks the stove and gives me a concussion or kills me, we're all in trouble.
 

Lady Sarah

Diamond Contributor
Member For 5 Years
I appreciate that vote of confidence, but my concern is failing to accurately locate the studs, thus risking damage to my landlord's wall. If it's done correctly, the shelves can stay there after I'm gone, no harm no foul, but if I do a hack's job and it comes down, bringing a chunk of wall with it, wrecks the stove and gives me a concussion or kills me, we're all in trouble.
Well. There are stud sensors. There is also the knock test. The sound of knocking on the wall changes when there is a stud there versus when there ain't. You can do this.
 

Vape Fan

_evil twin_
Staff member
Senior Moderator
VU Donator
Platinum Contributor
Press Corps
Member For 5 Years
I appreciate that vote of confidence, but my concern is failing to accurately locate the studs, thus risking damage to my landlord's wall. If it's done correctly, the shelves can stay there after I'm gone, no harm no foul, but if I do a hack's job and it comes down, bringing a chunk of wall with it, wrecks the stove and gives me a concussion or kills me, we're all in trouble.
If you know where 1 stud is, they are almost always 16 inches apart, center to center. Older home may be 24".

Its just for balance/not fall over, right? The legs hold the weight? Then you could use molly bolts where there's no stud, or drywall anchors- the plastic part that goes in the hole you drill and the screw holds it in.
 

Vape Fan

_evil twin_
Staff member
Senior Moderator
VU Donator
Platinum Contributor
Press Corps
Member For 5 Years
Got the light in. Not as envisioned but close enough.
Had to be hardwired, and a remote since the house wire isn't on a switch.
So its got light temperature/color, night light, dimmable, and all that jazz lol.
light.jpg
 

Bliss Doubt

Platinum Contributor
Member For 5 Years
If you know where 1 stud is, they are almost always 16 inches apart, center to center. Older home may be 24".

Its just for balance/not fall over, right? The legs hold the weight? Then you could use molly bolts where there's no stud, or drywall anchors- the plastic part that goes in the hole you drill and the screw holds it in.

No, for a shelf about 3 ft wide x 4 ft high, with shelves about a foot deep, hanging over the stove, the stud finding etc. isn't for balance. It's to keep the thing on the wall.

I just think this one is for the handyman. I use my own girl power whenever I can, for a lot of things, and maybe I could buy a stud finder, molly bolts and all that, climb up on the ladder to affix everything, climb up again with the big rack I envision, get it all done without ruining the wall structure, hurting myself or scratching up the stove, but I'd rather leave this one to a pro.

Another handyman will come along eventually.
 

Bliss Doubt

Platinum Contributor
Member For 5 Years
Got the light in. Not as envisioned but close enough.
Had to be hardwired, and a remote since the house wire isn't on a switch.
So its got light temperature/color, night light, dimmable, and all that jazz lol.
View attachment 218430

You're getting a lot done lately. I know it feels good to relax with everything the way you want it.
 

Vape Fan

_evil twin_
Staff member
Senior Moderator
VU Donator
Platinum Contributor
Press Corps
Member For 5 Years
You're getting a lot done lately. I know it feels good to relax with everything the way you want it.
Yea, I spend more time in the kitch/dining area now, I have a tablet for TV and a new comfy chair lol, I can have a 3hr morning coffees in there np :D .
Wound down on projects for a bit. Need a break.
 

Lady Sarah

Diamond Contributor
Member For 5 Years
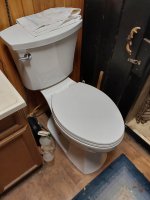
Using standard height toilets gets more difficult as we get older. Hubby and I decided to get a taller toilet, instead of using those POS plastic things to put on ours. The one we got is a Kohler, to replace the American Standard. The flushing system is much better. The seat and lid cannot be slammed, because of "soft close". It was 3 times the price of what I paid 12 years ago for the old one, but it is better, and inflation happened.

1000003838.jpg
 

SnapDragon NY

Senior Moderator
Staff member
Senior Moderator
VU Donator
Diamond Contributor
Press Corps
Member For 5 Years
VU SWAT
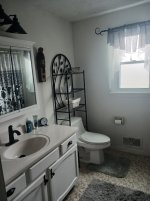
My husband and I worked on this project before he passed away. We tore out the ugly brown toilet,sink and tub and tub surround and replaced with all new white fixtures. I painted all the walls and ceiling and vanity cabinet white. Replaced the wall mirror with a medicine cabinet and installed the new light, cabinet hardware and bath fixtures. The only original things are the flooring and the vanity cabinet( I changed from wood tone to white)

20240319_161058.jpg
 

Bliss Doubt

Platinum Contributor
Member For 5 Years
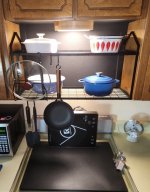
Kitchen reorg part 2, almost done.

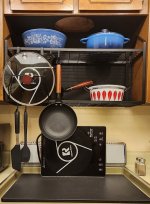
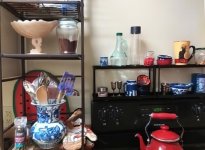
I found what works for an over-stove shelf rack I was able to do myself. It's magnetic on the bottom, and requires you have a flat top behind the burners. Mine is flat, except that the oven light switch is there, so I had to add extra magnets underneath the shelf units, to raise them enough to clear that switch. You're seeing two shelf sets side by side, where I could put attractive kitchen things like the little Wedgwood cream pitcher, the mortar & pestle, other stuff:

Kitchen reorg part 2.1.jpg

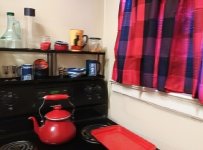
Fresh new kitchen curtains.

Kitchen reorg part 2.2.jpg

Now that they're up, I'm not crazy about the plaid, but the dark colors keep my southern exposure kitchen cooler, and in six months they'll be crusted with dust and have to be replaced anyway.

I'll add this wine box to the shelf when it arrives in a few days.

Wine box 12.JPG

I just bought it on Ebay. I've had boxes like this before, but have given them away when taking wine to dinner parties. They're all 13" tall, and about 3.5" across, so this will hold at least two 1 lb. packages of spaghetti. You can never have enough storage, and I don't want to put spices or oils in that zone above the stove heat, but dried spaghetti should be fine, and the salt can stay there.

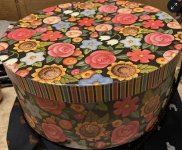
I still want something to hang above the stove. I relocated the watermelon cutting board to stand behind the tall shelf rack I showed in my previous post. I want to hang a 14" round hatbox lid, which is the easiest picture to hang without hammering nails. You can just hang it on a couple of push pins. If I can't find one of those with a cafe or bistro scene, then maybe something silly like this, for the colors:

Hat box 1.JPG

You only use the lid of the box. The bottom part can go in a closet for overflow t-shirts, socks, scarves, whatever.

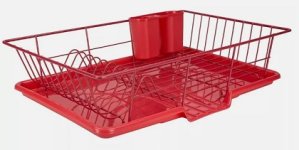
For the other side of the sink (not seen), I want one of these in red, to replace the stainless steel one I have now, to brighten up the corner between the sink and the fridge:

Red dish drainer.JPG

Parts 1 and 2 are just the one side of the kitchen. That is helping me clear the counter on the other side, so I can reorg there. I just want my kitchen to look cheerful, uncluttered and organized for ease of use. I was always thinking that if I ever wanted to roll out dough I'd have to do it on the floor.

Onward, trying to avoid spending a lot of money on it.
 
Last edited:
Bliss Doubt

Platinum Contributor
Member For 5 Years
My husband and I worked on this project before he passed away. We tore out the ugly brown toilet,sink and tub and tub surround and replaced with all new white fixtures. I painted all the walls and ceiling and vanity cabinet white. Replaced the wall mirror with a medicine cabinet and installed the new light, cabinet hardware and bath fixtures. The only original things are the flooring and the vanity cabinet( I changed from wood tone to white)

View attachment 218449

I like the peaceful, soft ebony/gray/black colors, both the kitchen and this bath.
 

RedWinter

Member For 1 Year
Fine tuning this overkill home network of mine, adding more security today. Four separate subnetworks:
- management
- private
- smart home
- guest network, bandwidth limited to very slow speeds and insanely filtered access

T7Ct7yQ.png


Funny thing is you don't see Draytek in home use except very rarely as its enterprise grade, only other person I know to have hardware from that company is one of my girlfriends 😊
 

Lady Sarah

Diamond Contributor
Member For 5 Years
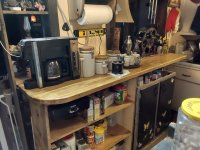
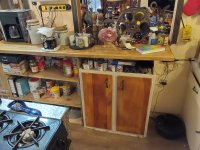
This weekend, we put in a butcher block counter for the coffee and the wine. I had just enough left over to make a new top for a small cabinet I basically use for a table with storage next to my recliner. You can see the new shelves he made as well. That ugly cabinet is fixing to get repainted.

1000004274.jpg
 

Lady Sarah

Diamond Contributor
Member For 5 Years
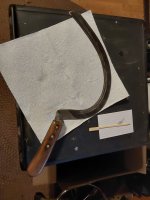
Out of boredom, I decided to restore an old sickle I got at a yard sale years ago. After removing rust, I found the maker's mark. Village Blacksmith. Watertown, Wisconsin. The company made these sickles starting in 1917, and up until around 1972, when they shut down and moved to Missouri. This one still has a edge sharp enough to hack of a limb. I kept the original hickory handle with it, only replacing the pins.

1000004683.jpg
 

Vape Fan

_evil twin_
Staff member
Senior Moderator
VU Donator
Platinum Contributor
Press Corps
Member For 5 Years
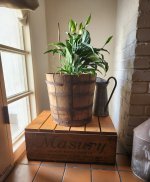
Bought a lilly. Got a few things to make it a home. Incorporating a 4-5gal primitive wood paint paste bucket, more like lead base paste for back then, and they would add linseed oil, maybe a little turpentine, and tints. So I'll line it. Plan is to use 1x's or 2'x on their edge to make a square shaped platform inside the bucket for the pot to sit on as a raised bottom, then probly mulch between the pot and the bucket.

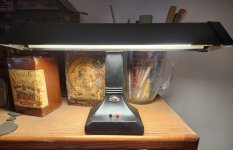
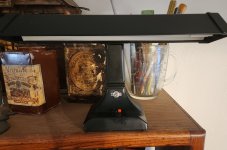
Refitting an old transformer operated desk lamp with a direct wired ballast free tube.

Not knowing anything about peace lillies, or T8 G13 tubes, I have to learn all that as I go:huh:, but I think I got it now, just a couple more things to get and put it all together. 🤞
 

VU Sponsors

Top