KingPin!
In my defence, I was left unsupervised ^^
VU Donator
Platinum Contributor
Member For 4 Years
VU Challenge Team
Reviewer
Hi Folks,
I received the Aspire Speeder Kit (4ml version) directly from Aspire after my contest win on VU!
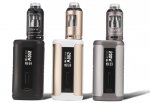
This is available to buy now. I will convey my thoughts and do my very best to provide you with enough information so you can reach your own conclusion on the product, so no recommendations from me, just a final conclusion on my personal experience with it. Please ask questions in the below if I've missed anything you want to know.
Please note: Unlike the name of the mod…This will be a comprehensive review, there’s a lot of ground to cover so Ill break it into 2 parts;
· Athos Tank First
· Speeder Mod Second
Part 1 - Athos Product Overview
· Diameter: 25mm
· Height: 58mm (51mm TPD Compliant Version)
· Weight: 48g when full with liquid
· Capacity: 4ml (2ml TPD compliant available)
· Thread: 510
· Airflow Holes: 3
· Available Coils: A3 (0.3ohm) & A5 (0.16ohm)
Speeder Product Page: http://www.aspirecig.com/aspire-kits/aspire-kits471.html
Available Colours;
Kit options: Grey, Black, Gold
Others options when bought standalone: Stainless steel, Rainbow
For Stand Alone tank info see here: http://www.aspirecig.com/aspire-tanks/athos/athos473.html

What's included in the Box?
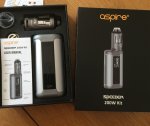
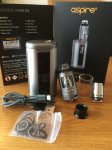
The Standard 4ml Kit Includes:
· Speeder mod
· 4ml Athos tank
· Extra A3(Kanthal AF Tri-coil head)
· Extra drip tip (Delrin wide bore drip tip)
· Spare Glass tube
· USB cable
· 12 spare O-rings
· Warning card
· User Manual
· Warranty card
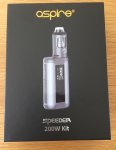
Presentation wise the Speeder 200w Kit comes in a thick cardboard box, graphics are ok Aspire could have been a little bit more creative but it’s by no means awful. The scratch and sniff is on the back along with content details.
Upon opening the box everything it’s presented well. I would like to have seen my spare coil sealed away and not just left open in the box, but nothing too much to write home about here other than that.
Looks & Initial Impressions
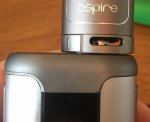
The first thing that came to mind is how good that combo looks together with the grey Athos on the Speeder they really are the perfect pairing, nice clean lines, Logos pop, it’s got a space age look to it, and probably wouldn’t look out of place as a prop on a moon base.

The tank itself is really lightweight, for its size, in fact it’s the lightest atomiser I own at this size (48g when full) perhaps they are trying to get this thing launched into space? I wonder how vapour would behave on the space station, anyway I digress. I normally prefer a bit of weight to my gear as it gives it that premium feel to it, this is pretty much aluminium where ever they can get away with it although that does mean when it’s paired with the mod it’s not top heavy which is a good thing.
The clear stock drip tip that comes with the Athos is not up to scratch if I’m honest. It’s a hard plastic, low profile and just nasty, I even had the little nib left on mine where it was cut away from the sprue.
The paint is a matt finish and textured. The tank doesn’t need a vape band because the glass is protected by the outer casing.
Unfortunately there is no RBA base to try which is a real shame for those wanting to get into coil building.
Build Quality
As mentioned in the last section the stock drip tip is nasty I really didn’t like using it. The spare Delrin wide bore is so much better, although it does look to be proprietary in that the base is large and fits over O-rings on the top cap. The top cap doesn’t accommodate 510 or any of your Grennedy style drip tips, something to note.
Top cap has plastic threading, something I’m really not a fan off as they will strip over time and there is no replacement in the kit! I would have preferred metal threading in here or at least a spare because when it goes you are screwed.
Threading is ok, a little scratchy when securing the housing to the base and when inserting the coil but I’ve used worse.
It has a press fit Airflow Control Ring! I loathe press fits although this has both a nice resistance and smooth turning to it. The reason I loathe them is I always find condensation eventually bypasses the ring and gets under the base onto the 510 plate which funnily enough is something I experienced while using this, so no real surprises there then.
Paint quality is excellent everything stood up to ultrasonic cleaning without any problems. No paint chips at the time of writing this review
Tolerances could be better on the final assembly of all the parts. The top cap doesn’t sit flush with the outer casing, and the housing is very slightly wider than the AFC ring.
Coils are decent, didn’t need to sort out the seals at the base although I did pin the wicking slots for good measure to ensure it keeps up with wicking (something I always do on the big sub ohm coils)
No issues with the positive pin under the base. It’s provided a good connection the whole time and the pin sits proud of the threads.
It is difficult to see the juice level when it falls below the window, although in fairness this is the perfect time to refill it so I’ll actually list that as a pro.
Features
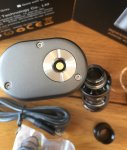
Tank breaks down into 6 parts for cleaning and maintenance.

For refilling you do have to unscrew the top cap which has decent knurling on it for grip. The single refill hole could have been a little bigger as I find I have to use my thin top refill bottles. There is a reservoir next to the juice port so overfilling isn’t really a problem when securing the top cap.
This is probably “one of”, if not “the most” airy tank I’ve ever used when leaving the airflow fully open. I don’t get it, unless you are trying to vape at extremely high wattages, why you would need this much airflow it’s overkill.
The top cap does a great job of keeping my lips from burning, this tank gets exceptionally hot when chain vaping especially on the A5 coil so to be honest I’m glad it is plastic!
The Airflow Control Ring does have a stop on it so no free turning which I prefer. It does feel scratchy when I take it off and put it back on. I keep thinking I’m sheering metal off but it doesn’t appear to be the case.
Coils take about a tank to break in, don’t know whether it was just me but both of them had a foul taste to them, more so than other pre made coils I’ve tried in the break in period, thankfully it was just a tank to break in!

I reached out to Asipre, both of the coils that come with the Kit are Kanthal so no temp control on these with the Speeder. I would like to have seen this detailed on the coils as well as the max/min range, as it stands I think we have the recommended range visible only.

Coil Report
Testing Conditions
· Using 75% VG using my normal flavour I always try for new products.
· Used Sony VTC5a batteries
· Tested on the Aspire Speeder
· Warmed coils up before taking notes at each stage
· Coils had been pinned a couple of time in each of the wicking sections
A5 Penta Coil (0.16ohm)
Rated 100 W-120W, according to the manufacturer
Tested with AFC about a third the way open as this suits my draw style.
· 90 – Muted flavour, wispy clouds, spitting from the coil, cool vape
· 100 – Flavour coming through, decent clouds, spitting from the coil, cool vape
· 110 – Flavour and clouds improving now, warmish vape
· 120 – Flavour more prominent, clouds really chucking, warm vape
· 130 - Flavour peaked here, Sweeter notes coming through, warm to hot vape
· 140 – Opened up the AFC here (two thirds open) Flavour dropped back, hot vape
· 150 – shorter pulls now, big clouds, flavour back to 110 level
· 160 - Heading towards a burnt hit here can taste it coming through.
. 200 – Yes I did push this coil to the max setting, no it was not enjoyable and yes my lungs cried! I did however only start to get burnt hit when chain vaping with AFC fully open
I settled on 123w as it had the best balance of flavour, vape temperature especially with a slightly restricted lung hit. I would say the recommended range is pretty much spot on for this coil but it handles even the biggest output the mod provides. Coil life was good at 2 weeks.
A3 Tri Coil (0.3ohm)
Rated 60 W-75W, according to the manufacturer
Tested with AFC a fifth of the way open as this suits my draw style.
· 60 – Muted flavour, wispy clouds, spitting from the coil, cool vape
· 65 – Same as 60
. 70 – Flavour and clouds improving a little now, still spitting, cool vape
· 75 – Flavour not really moving, is this thing on?, warmish vape
· 80 – Flavour is still in the background!, otherwise same as 75
· 85 – Finally there’s the flavour but it’s still not peaked! Same clouds as 80 and still warmish vape
· 90 – Good just about peaked here, jump up in clouds, warm vape
· 100 – Is the flavour going to peak? Still improving slightly same everywhere else
· 115 – Heading towards a burnt hit now, that was quick!
I settled on 86w as it had the best balance of flavour, vape temperature especially with a slightly restricted lung hit. I would say the coil is underrated by a fair margin, as was the case with the A5 coils it performs well above what’s written on it. Coil life again 2 weeks.
I received the Aspire Speeder Kit (4ml version) directly from Aspire after my contest win on VU!

This is available to buy now. I will convey my thoughts and do my very best to provide you with enough information so you can reach your own conclusion on the product, so no recommendations from me, just a final conclusion on my personal experience with it. Please ask questions in the below if I've missed anything you want to know.
Please note: Unlike the name of the mod…This will be a comprehensive review, there’s a lot of ground to cover so Ill break it into 2 parts;
· Athos Tank First
· Speeder Mod Second
Part 1 - Athos Product Overview
· Diameter: 25mm
· Height: 58mm (51mm TPD Compliant Version)
· Weight: 48g when full with liquid
· Capacity: 4ml (2ml TPD compliant available)
· Thread: 510
· Airflow Holes: 3
· Available Coils: A3 (0.3ohm) & A5 (0.16ohm)
Speeder Product Page: http://www.aspirecig.com/aspire-kits/aspire-kits471.html
Available Colours;
Kit options: Grey, Black, Gold
Others options when bought standalone: Stainless steel, Rainbow
For Stand Alone tank info see here: http://www.aspirecig.com/aspire-tanks/athos/athos473.html

What's included in the Box?
The Standard 4ml Kit Includes:
· Speeder mod
· 4ml Athos tank
· Extra A3(Kanthal AF Tri-coil head)
· Extra drip tip (Delrin wide bore drip tip)
· Spare Glass tube
· USB cable
· 12 spare O-rings
· Warning card
· User Manual
· Warranty card
Presentation wise the Speeder 200w Kit comes in a thick cardboard box, graphics are ok Aspire could have been a little bit more creative but it’s by no means awful. The scratch and sniff is on the back along with content details.

Upon opening the box everything it’s presented well. I would like to have seen my spare coil sealed away and not just left open in the box, but nothing too much to write home about here other than that.


Looks & Initial Impressions
The first thing that came to mind is how good that combo looks together with the grey Athos on the Speeder they really are the perfect pairing, nice clean lines, Logos pop, it’s got a space age look to it, and probably wouldn’t look out of place as a prop on a moon base.

The tank itself is really lightweight, for its size, in fact it’s the lightest atomiser I own at this size (48g when full) perhaps they are trying to get this thing launched into space? I wonder how vapour would behave on the space station, anyway I digress. I normally prefer a bit of weight to my gear as it gives it that premium feel to it, this is pretty much aluminium where ever they can get away with it although that does mean when it’s paired with the mod it’s not top heavy which is a good thing.
The clear stock drip tip that comes with the Athos is not up to scratch if I’m honest. It’s a hard plastic, low profile and just nasty, I even had the little nib left on mine where it was cut away from the sprue.
The paint is a matt finish and textured. The tank doesn’t need a vape band because the glass is protected by the outer casing.
Unfortunately there is no RBA base to try which is a real shame for those wanting to get into coil building.
Build Quality
As mentioned in the last section the stock drip tip is nasty I really didn’t like using it. The spare Delrin wide bore is so much better, although it does look to be proprietary in that the base is large and fits over O-rings on the top cap. The top cap doesn’t accommodate 510 or any of your Grennedy style drip tips, something to note.
Top cap has plastic threading, something I’m really not a fan off as they will strip over time and there is no replacement in the kit! I would have preferred metal threading in here or at least a spare because when it goes you are screwed.
Threading is ok, a little scratchy when securing the housing to the base and when inserting the coil but I’ve used worse.
It has a press fit Airflow Control Ring! I loathe press fits although this has both a nice resistance and smooth turning to it. The reason I loathe them is I always find condensation eventually bypasses the ring and gets under the base onto the 510 plate which funnily enough is something I experienced while using this, so no real surprises there then.
Paint quality is excellent everything stood up to ultrasonic cleaning without any problems. No paint chips at the time of writing this review
Tolerances could be better on the final assembly of all the parts. The top cap doesn’t sit flush with the outer casing, and the housing is very slightly wider than the AFC ring.
Coils are decent, didn’t need to sort out the seals at the base although I did pin the wicking slots for good measure to ensure it keeps up with wicking (something I always do on the big sub ohm coils)
No issues with the positive pin under the base. It’s provided a good connection the whole time and the pin sits proud of the threads.
It is difficult to see the juice level when it falls below the window, although in fairness this is the perfect time to refill it so I’ll actually list that as a pro.
Features
Tank breaks down into 6 parts for cleaning and maintenance.

For refilling you do have to unscrew the top cap which has decent knurling on it for grip. The single refill hole could have been a little bigger as I find I have to use my thin top refill bottles. There is a reservoir next to the juice port so overfilling isn’t really a problem when securing the top cap.
This is probably “one of”, if not “the most” airy tank I’ve ever used when leaving the airflow fully open. I don’t get it, unless you are trying to vape at extremely high wattages, why you would need this much airflow it’s overkill.
The top cap does a great job of keeping my lips from burning, this tank gets exceptionally hot when chain vaping especially on the A5 coil so to be honest I’m glad it is plastic!
The Airflow Control Ring does have a stop on it so no free turning which I prefer. It does feel scratchy when I take it off and put it back on. I keep thinking I’m sheering metal off but it doesn’t appear to be the case.
Coils take about a tank to break in, don’t know whether it was just me but both of them had a foul taste to them, more so than other pre made coils I’ve tried in the break in period, thankfully it was just a tank to break in!

I reached out to Asipre, both of the coils that come with the Kit are Kanthal so no temp control on these with the Speeder. I would like to have seen this detailed on the coils as well as the max/min range, as it stands I think we have the recommended range visible only.

Coil Report
Testing Conditions
· Using 75% VG using my normal flavour I always try for new products.
· Used Sony VTC5a batteries
· Tested on the Aspire Speeder
· Warmed coils up before taking notes at each stage
· Coils had been pinned a couple of time in each of the wicking sections
A5 Penta Coil (0.16ohm)
Rated 100 W-120W, according to the manufacturer
Tested with AFC about a third the way open as this suits my draw style.
· 90 – Muted flavour, wispy clouds, spitting from the coil, cool vape
· 100 – Flavour coming through, decent clouds, spitting from the coil, cool vape
· 110 – Flavour and clouds improving now, warmish vape
· 120 – Flavour more prominent, clouds really chucking, warm vape
· 130 - Flavour peaked here, Sweeter notes coming through, warm to hot vape
· 140 – Opened up the AFC here (two thirds open) Flavour dropped back, hot vape
· 150 – shorter pulls now, big clouds, flavour back to 110 level
· 160 - Heading towards a burnt hit here can taste it coming through.
. 200 – Yes I did push this coil to the max setting, no it was not enjoyable and yes my lungs cried! I did however only start to get burnt hit when chain vaping with AFC fully open
I settled on 123w as it had the best balance of flavour, vape temperature especially with a slightly restricted lung hit. I would say the recommended range is pretty much spot on for this coil but it handles even the biggest output the mod provides. Coil life was good at 2 weeks.
A3 Tri Coil (0.3ohm)
Rated 60 W-75W, according to the manufacturer
Tested with AFC a fifth of the way open as this suits my draw style.
· 60 – Muted flavour, wispy clouds, spitting from the coil, cool vape
· 65 – Same as 60
. 70 – Flavour and clouds improving a little now, still spitting, cool vape
· 75 – Flavour not really moving, is this thing on?, warmish vape
· 80 – Flavour is still in the background!, otherwise same as 75
· 85 – Finally there’s the flavour but it’s still not peaked! Same clouds as 80 and still warmish vape
· 90 – Good just about peaked here, jump up in clouds, warm vape
· 100 – Is the flavour going to peak? Still improving slightly same everywhere else
· 115 – Heading towards a burnt hit now, that was quick!
I settled on 86w as it had the best balance of flavour, vape temperature especially with a slightly restricted lung hit. I would say the coil is underrated by a fair margin, as was the case with the A5 coils it performs well above what’s written on it. Coil life again 2 weeks.
Last edited:


