Introduction
I never owned the original Dead Rabbit (which is why this is a standalone review, rather than a comparison) and I’m not really into dual-coil atomizers, I have however been sent a few dual-coil RDAs and RTAs over the last couple of years to review and my reviews usually follow the same pattern: strong flavor, needs too much power, it’s okay but I prefer single-coil - and then whatever I was reviewing gets cleaned up and gets to live in my closet until I can pass it on to someone.
There has only been one atomizer, a dual-coil RTA that broke that pattern and remained in my rotation, rather than living in my closet.
Is the Dead Rabbit 3 going to live in the closet or become part of my rotation as well?
More images are here
Official images are here
What do you get?
First impressions
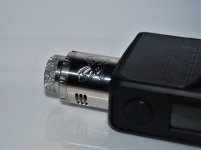
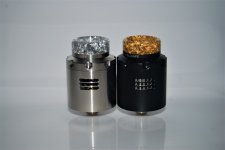
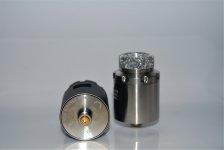
From the outside, it’s a pretty standard RDA, the logo (at least on mine) is the same color as the rest of the RDA, so it’s almost invisible, the O-ring tolerances on the airflow and deck are good.
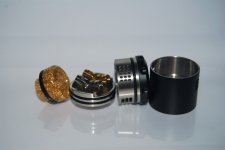
Popping the barrel off to reveal the deck is when things get a little different – it is the familiar Dead Rabbit post system, however the top of the posts are now round – how this affects the airflow will be covered later.
The barrel locks to the deck, but does allow a little movement so you can get your airflow centered if you close it down.
Build
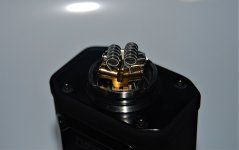
Securing the coils is really easy, just drop them in, tighten the screws, snip from under the posts, and align with a coiling rod, however coil position is left up to you.
To get my coil position perfect, I put the barrel next to the deck after the coils were secured and lifted them slightly to align with the airflow, I then pushed them towards the center a little, leaving a 1-2mm space between the coils.
The wicking is as simple as any other RDA, even when I messed up and cut my wicks too short there were no problems.
Overall, it’s a very beginner friendly RDA to work on, that allows you to play a little with coil position to get everything dialed in perfectly.
Airflow
Airflow is adjusted by rotating the top of the barrel, to reveal either three slots or a honeycomb arrangement of fifteen round holes in three rows, both the honeycomb and slot airflow are slanted down to hit the coil.
Adjustment is horizontal only, there is no option to close one row without closing the others.
The round posts are claimed to reduce turbulence inside the RDA, I’m not sure how this is supposed to work as the airflow is not hitting the rounded section of the posts, but yeah – it might do something or maybe not.
How does it perform?
I enjoyed the flexibility the airflow gave me, I usually find one airflow setting that suits me and stick with it – however, I found myself switching a lot between the honeycomb and slot airflow, both giving me different but good results.
What could be improved?
This is where I’m getting confused – was I doing dual-coil RDAs wrong all the time and this one is so easy to use, that I’ve finally got it right?
Or, is this RDA just better than all the others that I’ve used and that’s why I like it so much?
Either way, I’m enjoying this RDA a lot and it’s certainly going to remain part of my rotation.
Conclusion
While the Dead Rabbit RDA 3 is more of an evolution than a revolution, it performs well – nice airflow, good flavor, decent vapor production and a very easy build.
Disclaimer
The Dead Rabbit 3 RDA was provided for the purposes of this review by Hellvape
I never owned the original Dead Rabbit (which is why this is a standalone review, rather than a comparison) and I’m not really into dual-coil atomizers, I have however been sent a few dual-coil RDAs and RTAs over the last couple of years to review and my reviews usually follow the same pattern: strong flavor, needs too much power, it’s okay but I prefer single-coil - and then whatever I was reviewing gets cleaned up and gets to live in my closet until I can pass it on to someone.
There has only been one atomizer, a dual-coil RTA that broke that pattern and remained in my rotation, rather than living in my closet.
Is the Dead Rabbit 3 going to live in the closet or become part of my rotation as well?

More images are here
Official images are here
What do you get?
- Dead Rabbit 3 RDA
- 2×3.0mm 0.37ohm fused claptons + shoelace cotton
- squonk pin
- accessories/manual
First impressions
From the outside, it’s a pretty standard RDA, the logo (at least on mine) is the same color as the rest of the RDA, so it’s almost invisible, the O-ring tolerances on the airflow and deck are good.
Popping the barrel off to reveal the deck is when things get a little different – it is the familiar Dead Rabbit post system, however the top of the posts are now round – how this affects the airflow will be covered later.
The barrel locks to the deck, but does allow a little movement so you can get your airflow centered if you close it down.

Build
Securing the coils is really easy, just drop them in, tighten the screws, snip from under the posts, and align with a coiling rod, however coil position is left up to you.
To get my coil position perfect, I put the barrel next to the deck after the coils were secured and lifted them slightly to align with the airflow, I then pushed them towards the center a little, leaving a 1-2mm space between the coils.
The wicking is as simple as any other RDA, even when I messed up and cut my wicks too short there were no problems.
Overall, it’s a very beginner friendly RDA to work on, that allows you to play a little with coil position to get everything dialed in perfectly.

Airflow
Airflow is adjusted by rotating the top of the barrel, to reveal either three slots or a honeycomb arrangement of fifteen round holes in three rows, both the honeycomb and slot airflow are slanted down to hit the coil.
Adjustment is horizontal only, there is no option to close one row without closing the others.
The round posts are claimed to reduce turbulence inside the RDA, I’m not sure how this is supposed to work as the airflow is not hitting the rounded section of the posts, but yeah – it might do something or maybe not.

How does it perform?
- 2×26g dual core fused claptons - these came out to 0.18ohms for the pair. Firstly, I tried them at 50w with the honeycomb airflow fully open, gradually pushing them to 65w – the flavor was really good, while the vapor production was acceptable. Then I changed to the slot airflow fully open, flavor at 65w was okay, so I increased to 75w and then 85w – the flavor was good as was the vapor production. I did take this build to 100w and while the coils and RDA handled it easily, I was a little out of my comfort zone.
I enjoyed the flexibility the airflow gave me, I usually find one airflow setting that suits me and stick with it – however, I found myself switching a lot between the honeycomb and slot airflow, both giving me different but good results.

What could be improved?
- Airflow - I’d like to be able to close down individual rows of the airflow, however that would have probably resulted in not being able to have slot and honeycomb airflow, so it probably wouldn’t have been worth it.
This is where I’m getting confused – was I doing dual-coil RDAs wrong all the time and this one is so easy to use, that I’ve finally got it right?
Or, is this RDA just better than all the others that I’ve used and that’s why I like it so much?
Either way, I’m enjoying this RDA a lot and it’s certainly going to remain part of my rotation.
Conclusion
While the Dead Rabbit RDA 3 is more of an evolution than a revolution, it performs well – nice airflow, good flavor, decent vapor production and a very easy build.
Disclaimer
The Dead Rabbit 3 RDA was provided for the purposes of this review by Hellvape
