Become a Patron!

I have a general question about building coils.

lyftication

Member For 4 Years
I've basically never actually had someone teach me the right and wrongs in coil building. I've just looked up YouTube videos for different builds, and kinda went along. However, I do have problems; my coils never come out the same, I can't wrap them close together. I'm not exactly sure how to end a lead, so that it meets with the original lead perfectly. Then this causes me too many problems, like spitting, one getting hotter than the other, and just ugly coils. I want my coils to look right, if anyone has a guide, maybe a video, or can explain the process of how you build decent coils, please let me know. I'm a fan of dual coils, btw. I don't like one coil when I know two will hold more wick, and more juice. So anyone help please. I'm vaping off a Boosted Hex Ohm box mod with 2 18650 batteries, and a doge v2.
89698a85d5fd8ae6241d36add8950493.jpg


Sent from my iPhone using Tapatalk
 

BigNasty

Diamond Contributor
Member For 4 Years
ECF Refugee
Pick up a coil master coiler tool... you will be able to churn out exact coils to the point of boredom.

OK I have a 7/64ths bit I roll singles and parallels on.. I can deal with a bit o slop on them since I will use a bigger than 3.25mm tool that I have that makes them super tight.
A small torch not a lighter will help tons also.
 

dingo1799

Bronze Contributor
Member For 4 Years
Something else besides a coiler, a pair of ceramic tipped tweezers. I use a wire gizmo, only real downsides to the gizmo is the size of it, and you can only wrap 1.5 or 3 mm coils. Wrap them as tight and as pretty as you want! gonna recoil a CEO
5ABB1D64-11BE-40C1-AE62-EB354CD99DC2.jpg

27ga 317L there. Just gonna have to tweak it a hair once it's mounted
10221749.html
 
Last edited:

VapedCrusader

Custard Junkie
Gold Contributor
Member For 4 Years
Member For 3 Years
Member For 2 Years
Member For 1 Year
Member For 5 Years
even after rebuilding for almost 2 years.. I find the coil jig to be a huge help.. not only for saving time - but I know the exact ohms its going to come out to every time and the coil will be pretty much perfect..

just keep building coils and you will get better at it.. its doesn't come overnight - it takes a lot of trial and error - trust me! i got to the point very early on in my vaping career where I gave up on rebuilding because i thought i sucked at it compared to everyone else.. but I kept at it and now i'm happy with where I'm at.. and I'm a very simple coil builder - I don't build anything crazy - just enough to get the job done and to keep my from smoking - and at the end of the day thats all that matters - how you keep yourself off the cigs
 

Lefty

Silver Contributor
Member For 4 Years
Member For 3 Years
Member For 2 Years
Member For 1 Year
Member For 5 Years
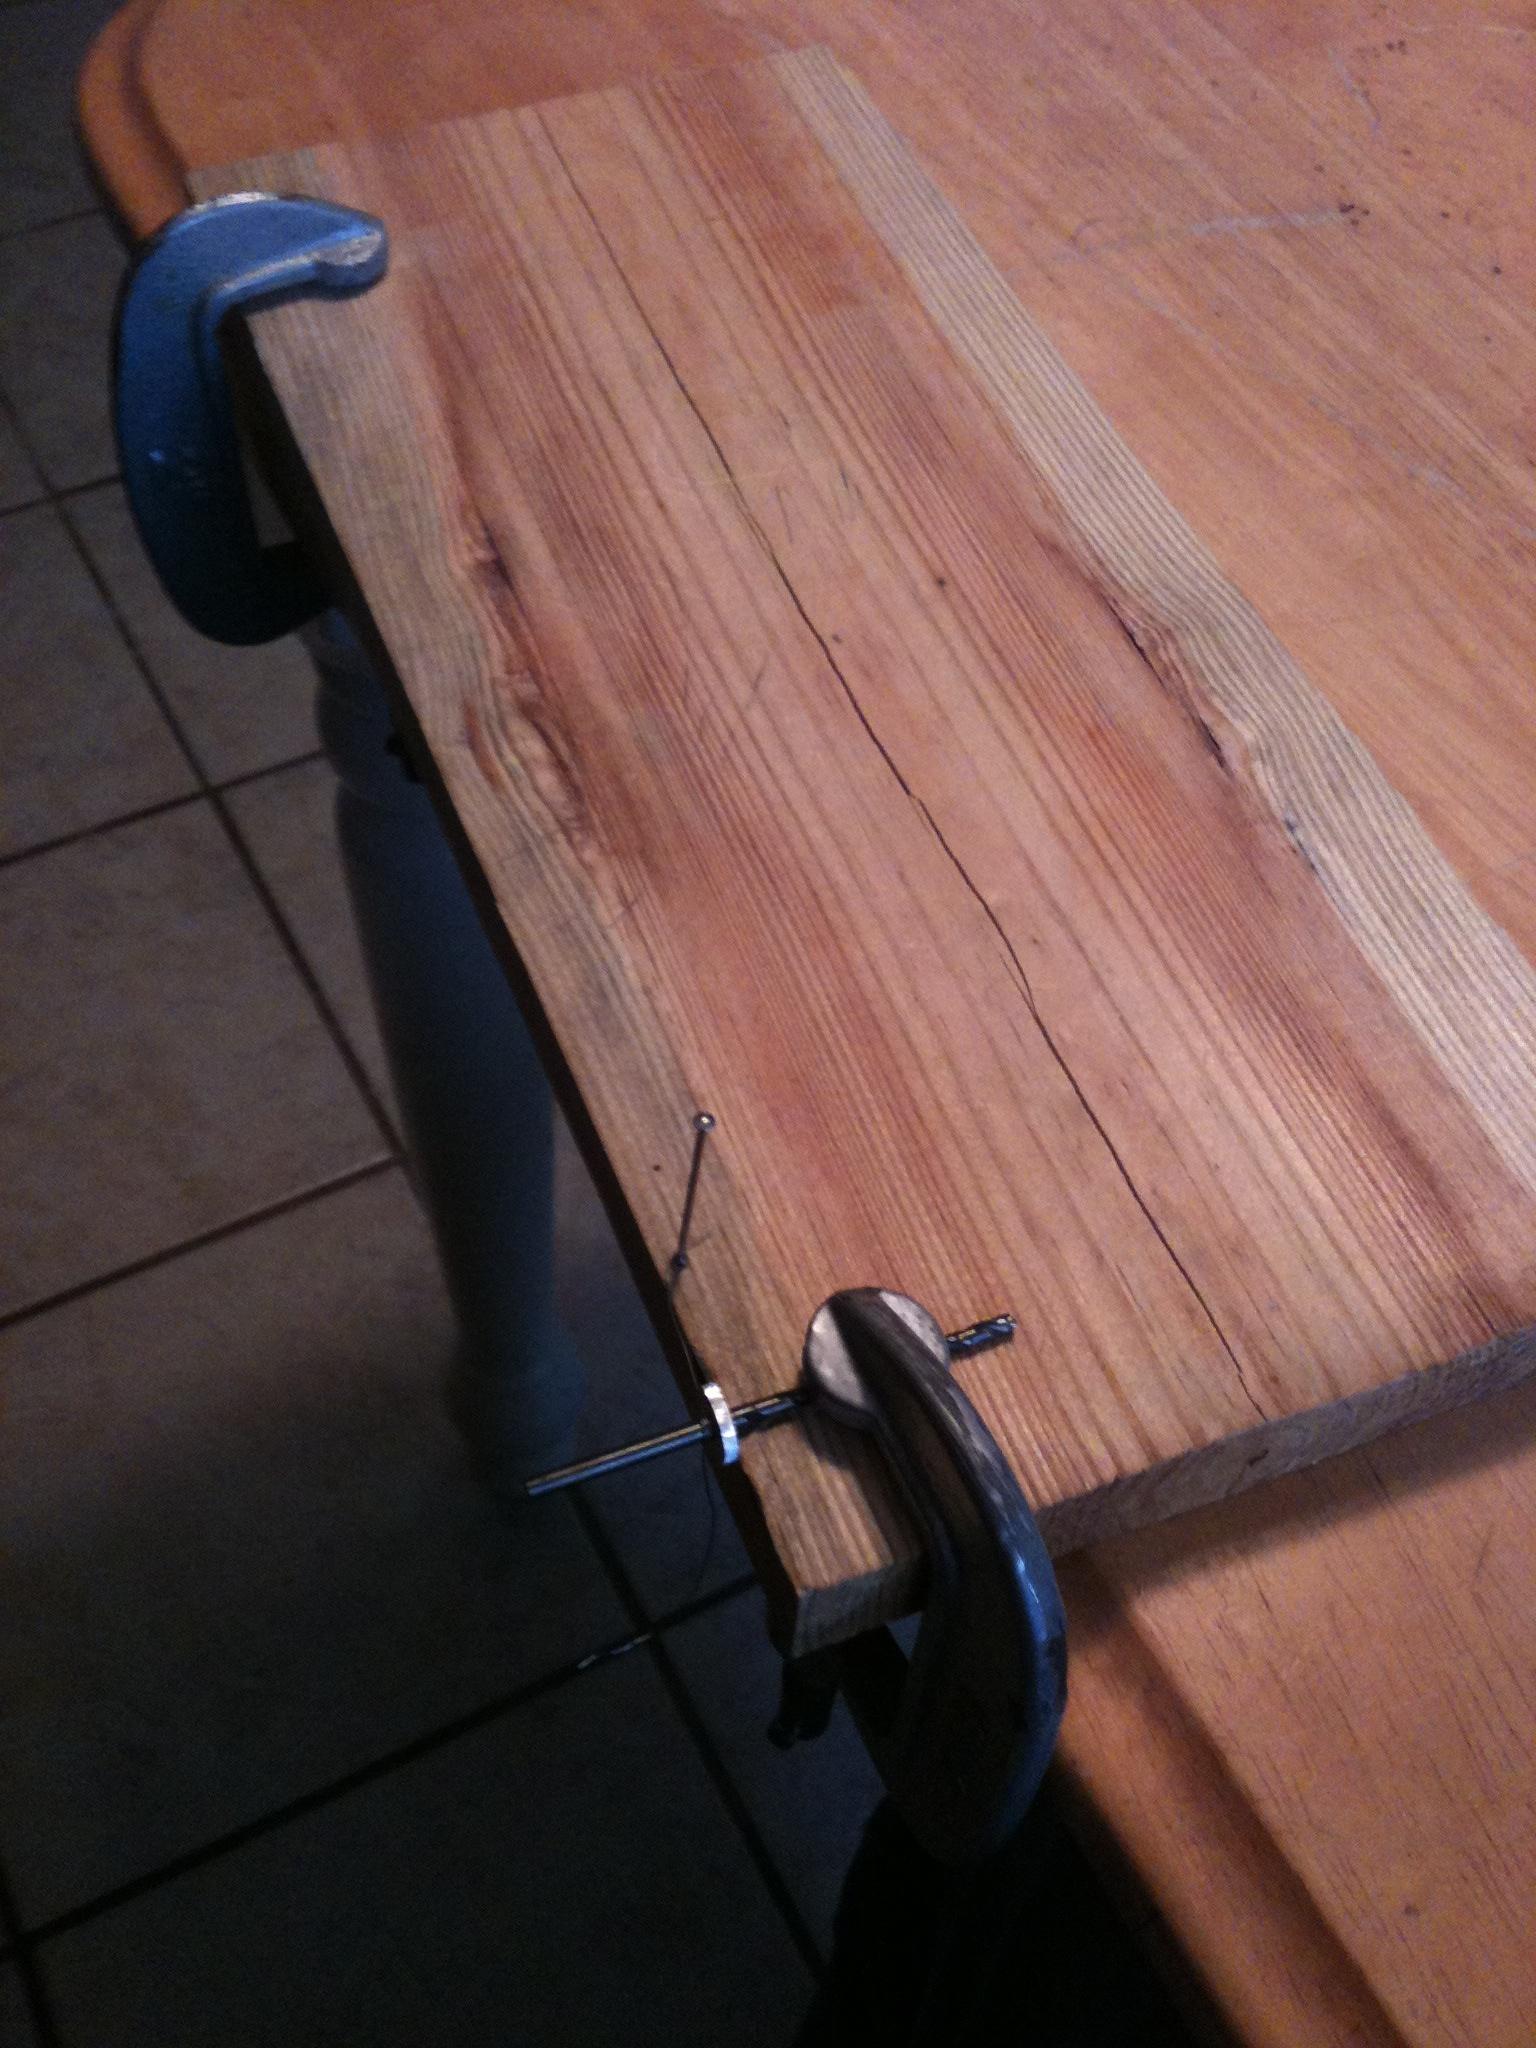
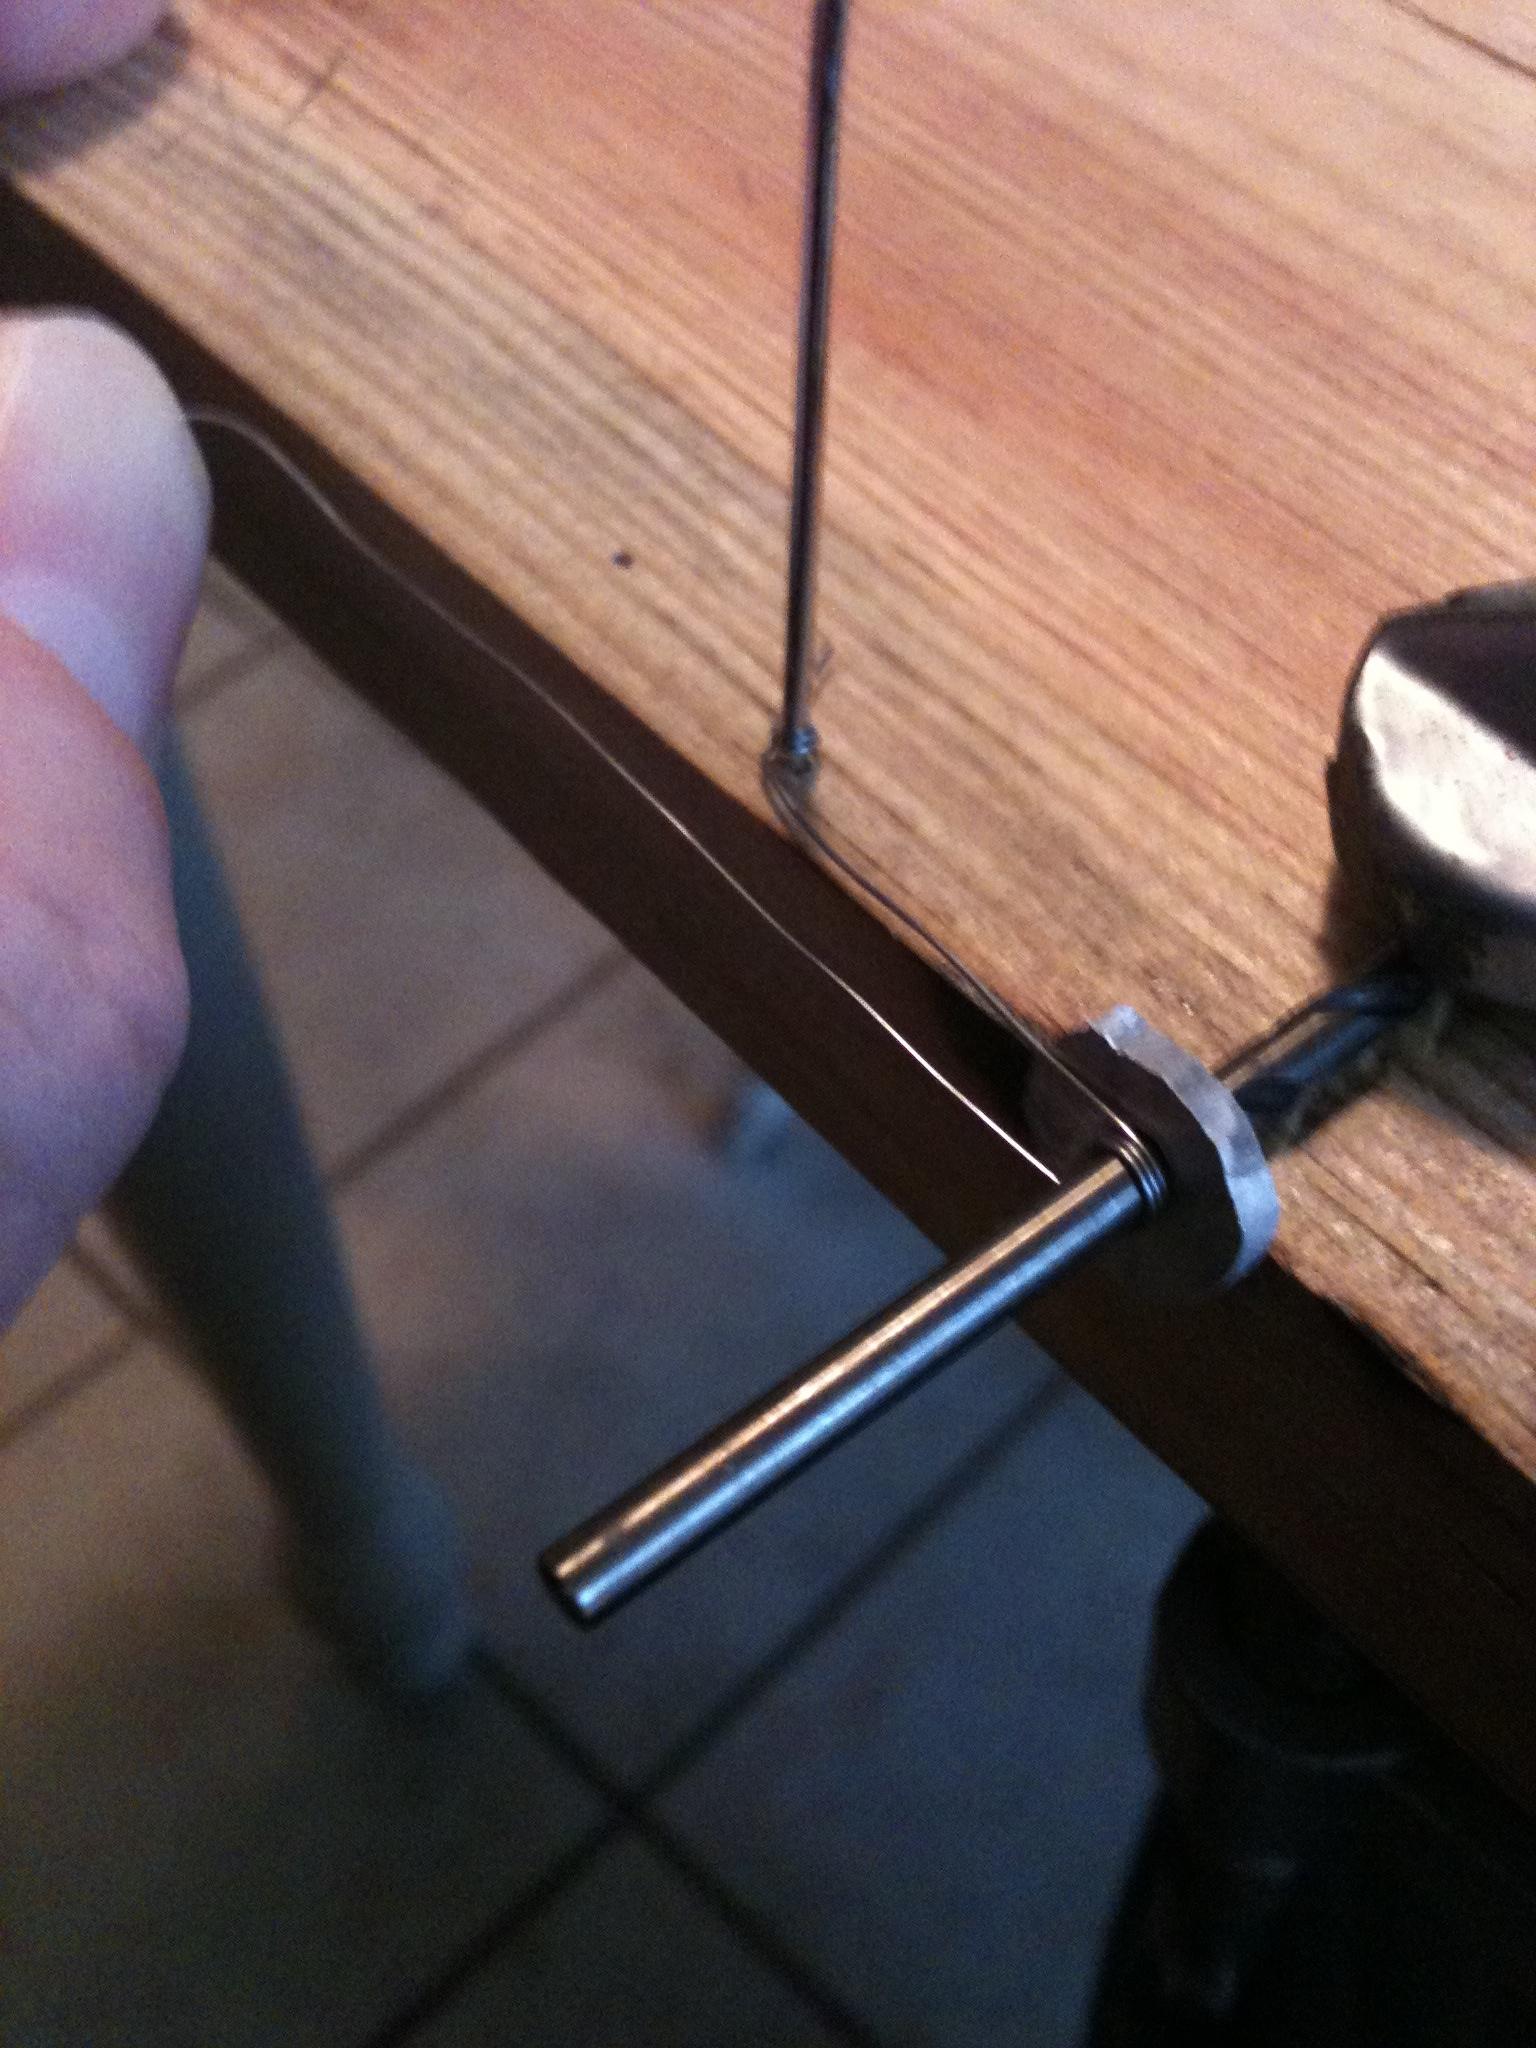
For a dirt cheap coiler, until you can get the one you want, you can make this in a minute or two.
pepper.jpg
For duals you'll want two of whatever you're using as a mandrel, be it drill bit or screwdriver, so that you can leave the coils on them when installing. This keeps them from distorting too much when positioning. If it's a drill bit just drill the cap. If it's a screwdriver just heat it up a bit and push it right through the cap quickly. Any screw you have handy to catch the wire to wrap the coil. Once you have them where you want and are ready to pulse them, pulse a few times and then lightly rake the point of your wrapping mandrel across the coils (like strumming a guitar) then pulse again. One or twice should give you an even glow from the center out on each coil. Tweezers or a pair of needle nose to very gently squeeze after a pulse if they have separated on you. If both coils aren't heating equally fast (and you have the same number of wraps on each) re-inserting the mandrel and gently repositioning the coil until they do usually works.
 

A_Wild_Yeap_Appears!

Member For 4 Years
Member For 3 Years
Member For 2 Years
Member For 1 Year
Member For 5 Years
OK, so first off I learned about the Tensioned Micro Coil build from @MacTechVpr , who really entrenched himself in the science behind wrapping a wire to turn it into what is essentially a spring. Which is awesome, right? Because a spring is a spring, is a coil, is a wire that wants to be in the shape you have wrapped it to be rather than firing it and tediously pinching and fiddling until it is how you want it. Still with me? Let me explain how I make my coils from what I learned.

First, you'll want something to wind on, my tool of choice is this, cheap and effective! Next, you'll need some tape, I use electrical tape since it can be peeled back and reused. A heavy set of lock-jaw pliers are optional, but nice to have for a few great reasons, you can use them to make twisted strands, and they are a great anchor to wrap a tensioned twisted coil! Of course you'll want some wire too.

Now, you can wrap right off the spool for a standard coil, the technique takes some practice, but hot damn does it pay in spades! I love me some twisted, so I first go to steam-engine.org and fiddle with it till I find what build I want to go with since I run a Billow(Thanks mom!) on a mech for now. So I use good ol' Ohms law to find out what the wattage I'm getting for a say, twisted 32 gauge dual coil build at 0.75 ohms, which is 23.52 watts off of a 4.2 volt single battery.Don't be intimidated by all the numbers and what not on steam-engine, embrace it, hug it, it is your best friend right now. So then I plug that wattage into the coil build page with the proper gauge selected, the proper number of coils, and the size of the screwdriver I'm working on(coils inner diameter), and the twist pitch is best found for me by taking a macro photo on my phone of the twisted wire lined up on a metric ruler, makes counting ridges so easy(also good for double checking wrap counts!) and bam my heat flux is 140, right up my alley! Nice! I also mess with the inner diameter till I find which of the screwdrivers I have would be easiest to wrap and would fit best in my Billow, meaning as close to whole wraps as I can get! 2mm and 2.4mm seem to be my most used. So now I can start twisting some wire!

I wrapped some tape around the teeth of the pliers so it doesn't just pinch and snick the wires I'm going to twist together, then I pull the length of wire I believe I need, loop one end around a screw driver and pull the two loose ends as gingerly as I can so as to not introduce unwanted stress and twists on the wires and clamp them together in the pliers. I then pull it taut from the screwdriver I looped on, and start twisting by hand then I hold the screwdriver up and just spin and spin my heavy lock-jaws till it snaps off. Be careful here, if you go too crazy then you end up kinking your wires, bad! If you have the patience you can hold the screwdriver under your foot and just sit there twisting the pliers while keeping tension on your soon to be beautiful twisted strands. I tend to re-clamp the strands once or twice after it snaps to get it extra tight, who doesn't like it tight? Now you have your twisted wire!

Ok, so now you take the correct screwdriver for the inner diameter you want, I might just be stupid but I have messed this part up before. Now you put some tape around the handle and then place the not clamped end of your twisted strand under the tape against the handle, wrap it again, bend the end poking out back over the tape and wrap again over it. Still follow? If you have the pliers, you'll want to hold them with your feet or whatever you can to keep that end stationary the whole time you are wrapping. If you are wrapping off the spool, then you might just want an eraser bit or wad of something holding the spool from unraveling(I wrap electrical tape reversed around then back over so sticky meets sticky and now I have a band to hold my wadded paper towel against the spool so that bastard doesn't ruin my day. from the pliers or the spool, you want to hold it or have it held by something to keep it in place. Why? Because this doesn't really work otherwise.

Now that you have the wire anchored and your screwdriver securely attached to the wire you can start wrapping a sweet sweet tensioned coil! Take the screwdriver and hold it perpindicular to the wire so it lays across the driver bit, and pull away from your anchor to create tension ;D yeah! Now you just start wrapping, keeping tension and the driver bit perpendicular as you wind. When you start out a great tip is to over wrap it a bit past the number you want. You'll notice that after a few winds the wire will start holding to itself on the screwdriver, this is what you want! You're making a spring coil, it will be beautiful! Once you get the wraps you want, 7 in the case of this example build, keep it under tension then ease off a bit to see how it reacts, it may loosen a little which isn't a big deal unless it loosens a lot. That means you didn't keep enough tension while winding. Practice, practice, and practice and it won't be long till you see the brilliance here and can wrap consistent coil after coil. Now take your wire cutters and cut your coil off of the wire and cut the bit taped to the handle, count your wraps and pull the end pieces away from the screwdriver much in a reverse of how it was wrapped till you have the desired count of tight wraps. At this point I'm familiar enough with my Billow that I bend and trim the legs into the desired configuration that fits into my posts. I do this while the coil is held under my thumb on the screwdriver to keep my precious coil from being warped by my leg manipulations. Better to under trim and be gentle while bending than to trim too much or bend too much! Now, I've got a sweet tensioned coil! I keep it on the screwdriver and slide the legs into the posts, position it how I want and tighten the posts down bit by bit, again keeping my coil under my thumb to keep it from warping. Once it's all nice and tight I keep it still on the screw driver and make my final adjustments, and only then do I remove the screwdriver. BAM! One coil installed.

Repeat to make an identical coil for multi-coil builds!

I take my tweezers and strum the coil a bit before firing, some light pinching is sometimes necessary if it did get a little warped, but damn does it start glowing beautifully so fast. I learned the hard way that hot legs usually mean the screws aren't fully tightened! And don't forget to trim the ends once you have the legs where you want them!

Wicking is a whole other story now, I'm still learning a lot on that end. Cheers and please let me know if I need to clarify anything!
 
Last edited:

zaroba

Gold Contributor
Member For 5 Years
A trick I used to make matching coils was to make one long coil (like 20-25 wraps), then pull it apart a bit in the middle and cut it. Then it was just a matter of unwrapping a few wraps where I had cut it to get a matching number of wraps on both pieces and have enough lead to work with. Small flat-head precision screwdrivers help with separating it to cut it and needle nose pliers are good to use to uncoil the wire and get the uncoiled wire straight again.

I always try to leave around half an inch leads on them for installing, that way the coils could be adjusted during install to make them heat evenly, or the leads can be bent to fit the posts properly if the coil itself isn't long enough to go post to post. Sometimes half a millimeter of lead is all that is needed to make the coils glow at the same time instead of half a second apart. Test fire, loosen a screw, slide in or out a bit, tighten, test again. Repeat as needed. After it's good, cut any excess off. Kinda depends on the posts of the RDA though. Might only be able to use a long lead on just the negative side or just the positive side.
 

A_Wild_Yeap_Appears!

Member For 4 Years
Member For 3 Years
Member For 2 Years
Member For 1 Year
Member For 5 Years
A trick I used to make matching coils was to make one long coil (like 20-25 wraps), then pull it apart a bit in the middle and cut it. Then it was just a matter of unwrapping a few wraps where I had cut it to get a matching number of wraps on both pieces and have enough lead to work with. Small flat-head precision screwdrivers help with separating it to cut it and needle nose pliers are good to use to uncoil the wire and get the uncoiled wire straight again.

I always try to leave around half an inch leads on them for installing, that way the coils could be adjusted during install to make them heat evenly, or the leads can be bent to fit the posts properly if the coil itself isn't long enough to go post to post. Sometimes half a millimeter of lead is all that is needed to make the coils glow at the same time instead of half a second apart. Test fire, loosen a screw, slide in or out a bit, tighten, test again. Repeat as needed. After it's good, cut any excess off. Kinda depends on the posts of the RDA though. Might only be able to use a long lead on just the negative side or just the positive side.

Great tip!!!!, I'm planning on trying a twisted triple strand 32 gauge build at 0.5 ohms on a 1.4 mm screwdriver and I'm definitely gonna try this. Here! X Scratch that. Here with updated pitch and better screwdriver choice!
 
Last edited:

dingo1799

Bronze Contributor
Member For 4 Years
OK, so first off I learned about the Tensioned Micro Coil build from @MacTechVpr , who really entrenched himself in the science behind wrapping a wire to turn it into what is essentially a spring. Which is awesome, right? Because a spring is a spring, is a coil, is a wire that wants to be in the shape you have wrapped it to be rather than firing it and tediously pinching and fiddling until it is how you want it. Still with me? Let me explain how I make my coils from what I learned.

First, you'll want something to wind on, my tool of choice is this, cheap and effective! Next, you'll need some tape, I use electrical tape since it can be peeled back and reused. A heavy set of lock-jaw pliers are optional, but nice to have for a few great reasons, you can use them to make twisted strands, and they are a great anchor to wrap a tensioned twisted coil! Of course you'll want some wire too.

Now, you can wrap right off the spool for a standard coil, the technique takes some practice, but hot damn does it pay in spades! I love me some twisted, so I first go to steam-engine.org and fiddle with it till I find what build I want to go with since I run a Billow(Thanks mom!) on a mech for now. So I use good ol' Ohms law to find out what the wattage I'm getting for a say, twisted 32 gauge dual coil build at 0.75 ohms, which is 23.52 watts off of a 4.2 volt single battery.Don't be intimidated by all the numbers and what not on steam-engine, embrace it, hug it, it is your best friend right now. So then I plug that wattage into the coil build page with the proper gauge selected, the proper number of coils, and the size of the screwdriver I'm working on(coils inner diameter), and the twist pitch is best found for me by taking a macro photo on my phone of the twisted wire lined up on a metric ruler, makes counting ridges so easy(also good for double checking wrap counts!) and bam my heat flux is 140, right up my alley! Nice! I also mess with the inner diameter till I find which of the screwdrivers I have would be easiest to wrap and would fit best in my Billow, meaning as close to whole wraps as I can get! 2mm and 2.4mm seem to be my most used. So now I can start twisting some wire!

I wrapped some tape around the teeth of the pliers so it doesn't just pinch and snick the wires I'm going to twist together, then I pull the length of wire I believe I need, loop one end around a screw driver and pull the two loose ends as gingerly as I can so as to not introduce unwanted stress and twists on the wires and clamp them together in the pliers. I then pull it taut from the screwdriver I looped on, and start twisting by hand then I hold the screwdriver up and just spin and spin my heavy lock-jaws till it snaps off. Be careful here, if you go too crazy then you end up kinking your wires, bad! If you have the patience you can hold the screwdriver under your foot and just sit there twisting the pliers while keeping tension on your soon to be beautiful twisted strands. I tend to re-clamp the strands once or twice after it snaps to get it extra tight, who doesn't like it tight? Now you have your twisted wire!

Ok, so now you take the correct screwdriver for the inner diameter you want, I might just be stupid but I have messed this part up before. Now you put some tape around the handle and then place the not clamped end of your twisted strand under the tape against the handle, wrap it again, bend the end poking out back over the tape and wrap again over it. Still follow? If you have the pliers, you'll want to hold them with your feet or whatever you can to keep that end stationary the whole time you are wrapping. If you are wrapping off the spool, then you might just want an eraser bit or wad of something holding the spool from unraveling(I wrap electrical tape reversed around then back over so sticky meets sticky and now I have a band to hold my wadded paper towel against the spool so that bastard doesn't ruin my day. from the pliers or the spool, you want to hold it or have it held by something to keep it in place. Why? Because this doesn't really work otherwise.

Now that you have the wire anchored and your screwdriver securely attached to the wire you can start wrapping a sweet sweet tensioned coil! Take the screwdriver and hold it perpindicular to the wire so it lays across the driver bit, and pull away from your anchor to create tension ;D yeah! Now you just start wrapping, keeping tension and the driver bit perpendicular as you wind. When you start out a great tip is to over wrap it a bit past the number you want. You'll notice that after a few winds the wire will start holding to itself on the screwdriver, this is what you want! You're making a spring coil, it will be beautiful! Once you get the wraps you want, 7 in the case of this example build, keep it under tension then ease off a bit to see how it reacts, it may loosen a little which isn't a big deal unless it loosens a lot. That means you didn't keep enough tension while winding. Practice, practice, and practice and it won't be long till you see the brilliance here and can wrap consistent coil after coil. Now take your wire cutters and cut your coil off of the wire and cut the bit taped to the handle, count your wraps and pull the end pieces away from the screwdriver much in a reverse of how it was wrapped till you have the desired count of tight wraps. At this point I'm familiar enough with my Billow that I bend and trim the legs into the desired configuration that fits into my posts. I do this while the coil is held under my thumb on the screwdriver to keep my precious coil from being warped by my leg manipulations. Better to under trim and be gentle while bending than to trim too much or bend too much! Now, I've got a sweet tensioned coil! I keep it on the screwdriver and slide the legs into the posts, position it how I want and tighten the posts down bit by bit, again keeping my coil under my thumb to keep it from warping. Once it's all nice and tight I keep it still on the screw driver and make my final adjustments, and only then do I remove the screwdriver. BAM! One coil installed.

Repeat to make an identical coil for multi-coil builds!

I take my tweezers and strum the coil a bit before firing, some light pinching is sometimes necessary if it did get a little warped, but damn does it start glowing beautifully so fast. I learned the hard way that hot legs usually mean the screws aren't fully tightened! And don't forget to trim the ends once you have the legs where you want them!

Wicking is a whole other story now, I'm still learning a lot on that end. Cheers and please let me know if I need to clarify anything!

I've never heard of "strumming" the coil. What I learned a while back was to give it a quick fire, then put the tool you wrapped it with back thru the coil as it cools, some strange reason it makes shorts between coils disappear.

Good tips guys, this is what forums are for!!!!
 

alex31804

Bronze Contributor
Member For 4 Years
Member For 3 Years
Member For 2 Years
Member For 1 Year
Member For 5 Years
@lyftication With your stationary hand grab one lead and whatever your wrapping around, with your wrapping hand keep tension on the wire, and start wrapping, your first few wraps might come out a little fucked up, but that's alright. When your done with your wraps (remember to take into account the first ones your removing in the total) unwind your first ugly betties, and while pinching the back of what is now your first wrap, straighten your lead. Hope that helps at all bud. Nothing is going to help more though than just sitting there and wrapping your ass off
 

tmeuan62

Member For 4 Years
Member For 3 Years
Member For 2 Years
Member For 1 Year
Member For 5 Years
Then keep watching those videos that is how i learn to do them. U will get the hag of it.
 

A_Wild_Yeap_Appears!

Member For 4 Years
Member For 3 Years
Member For 2 Years
Member For 1 Year
Member For 5 Years
Then keep watching those videos that is how i learn to do them. U will get the hag of it.

Just gotta say, that's not really constructive here. Maybe this guy doesn't really learn well from watching videos, or maybe he wants the anecdotal advice from others experiences that he can get from asking questions. You're not being bad here, it's just not helpful to tell someone that's asking a for advice after doing something to just keep doing it till they catch on. Power of information, let's go!!
 

A_Wild_Yeap_Appears!

Member For 4 Years
Member For 3 Years
Member For 2 Years
Member For 1 Year
Member For 5 Years
So I built my coils, and made an album. Hopefully it helps a little. Also, try this video for a good visual on making a tension coil. There's a lot of bs to skip through, but it should give you a good idea of what keeping tension while winding your coil actually means.
 

JOLT74

Member For 4 Years
Aside from coiler tools, if you wanna make yourself better and not just make your coils look good, only thing is practice
 
Practice is great - but so is the coil master. I manually wrapped coils for months, and got pretty good at it, but the coils that come off my coil master are prettier.

A pretty coil doesn't always = a great vape, but it helps. Keep in mind that even ugly coils will sometimes hit nicely.
 

Monotremata

Member For 4 Years
OK, so first off I learned about the Tensioned Micro Coil build from @MacTechVpr , who really entrenched himself in the science behind wrapping a wire to turn it into what is essentially a spring. Which is awesome, right? Because a spring is a spring, is a coil, is a wire that wants to be in the shape you have wrapped it to be rather than firing it and tediously pinching and fiddling until it is how you want it. Still with me? Let me explain how I make my coils from what I learned.

First, you'll want something to wind on, my tool of choice is this, cheap and effective! Next, you'll need some tape, I use electrical tape since it can be peeled back and reused. A heavy set of lock-jaw pliers are optional, but nice to have for a few great reasons, you can use them to make twisted strands, and they are a great anchor to wrap a tensioned twisted coil! Of course you'll want some wire too.

Now, you can wrap right off the spool for a standard coil, the technique takes some practice, but hot damn does it pay in spades! I love me some twisted, so I first go to steam-engine.org and fiddle with it till I find what build I want to go with since I run a Billow(Thanks mom!) on a mech for now. So I use good ol' Ohms law to find out what the wattage I'm getting for a say, twisted 32 gauge dual coil build at 0.75 ohms, which is 23.52 watts off of a 4.2 volt single battery.Don't be intimidated by all the numbers and what not on steam-engine, embrace it, hug it, it is your best friend right now. So then I plug that wattage into the coil build page with the proper gauge selected, the proper number of coils, and the size of the screwdriver I'm working on(coils inner diameter), and the twist pitch is best found for me by taking a macro photo on my phone of the twisted wire lined up on a metric ruler, makes counting ridges so easy(also good for double checking wrap counts!) and bam my heat flux is 140, right up my alley! Nice! I also mess with the inner diameter till I find which of the screwdrivers I have would be easiest to wrap and would fit best in my Billow, meaning as close to whole wraps as I can get! 2mm and 2.4mm seem to be my most used. So now I can start twisting some wire!

I wrapped some tape around the teeth of the pliers so it doesn't just pinch and snick the wires I'm going to twist together, then I pull the length of wire I believe I need, loop one end around a screw driver and pull the two loose ends as gingerly as I can so as to not introduce unwanted stress and twists on the wires and clamp them together in the pliers. I then pull it taut from the screwdriver I looped on, and start twisting by hand then I hold the screwdriver up and just spin and spin my heavy lock-jaws till it snaps off. Be careful here, if you go too crazy then you end up kinking your wires, bad! If you have the patience you can hold the screwdriver under your foot and just sit there twisting the pliers while keeping tension on your soon to be beautiful twisted strands. I tend to re-clamp the strands once or twice after it snaps to get it extra tight, who doesn't like it tight? Now you have your twisted wire!

Ok, so now you take the correct screwdriver for the inner diameter you want, I might just be stupid but I have messed this part up before. Now you put some tape around the handle and then place the not clamped end of your twisted strand under the tape against the handle, wrap it again, bend the end poking out back over the tape and wrap again over it. Still follow? If you have the pliers, you'll want to hold them with your feet or whatever you can to keep that end stationary the whole time you are wrapping. If you are wrapping off the spool, then you might just want an eraser bit or wad of something holding the spool from unraveling(I wrap electrical tape reversed around then back over so sticky meets sticky and now I have a band to hold my wadded paper towel against the spool so that bastard doesn't ruin my day. from the pliers or the spool, you want to hold it or have it held by something to keep it in place. Why? Because this doesn't really work otherwise.

Now that you have the wire anchored and your screwdriver securely attached to the wire you can start wrapping a sweet sweet tensioned coil! Take the screwdriver and hold it perpindicular to the wire so it lays across the driver bit, and pull away from your anchor to create tension ;D yeah! Now you just start wrapping, keeping tension and the driver bit perpendicular as you wind. When you start out a great tip is to over wrap it a bit past the number you want. You'll notice that after a few winds the wire will start holding to itself on the screwdriver, this is what you want! You're making a spring coil, it will be beautiful! Once you get the wraps you want, 7 in the case of this example build, keep it under tension then ease off a bit to see how it reacts, it may loosen a little which isn't a big deal unless it loosens a lot. That means you didn't keep enough tension while winding. Practice, practice, and practice and it won't be long till you see the brilliance here and can wrap consistent coil after coil. Now take your wire cutters and cut your coil off of the wire and cut the bit taped to the handle, count your wraps and pull the end pieces away from the screwdriver much in a reverse of how it was wrapped till you have the desired count of tight wraps. At this point I'm familiar enough with my Billow that I bend and trim the legs into the desired configuration that fits into my posts. I do this while the coil is held under my thumb on the screwdriver to keep my precious coil from being warped by my leg manipulations. Better to under trim and be gentle while bending than to trim too much or bend too much! Now, I've got a sweet tensioned coil! I keep it on the screwdriver and slide the legs into the posts, position it how I want and tighten the posts down bit by bit, again keeping my coil under my thumb to keep it from warping. Once it's all nice and tight I keep it still on the screw driver and make my final adjustments, and only then do I remove the screwdriver. BAM! One coil installed.

Repeat to make an identical coil for multi-coil builds!

I take my tweezers and strum the coil a bit before firing, some light pinching is sometimes necessary if it did get a little warped, but damn does it start glowing beautifully so fast. I learned the hard way that hot legs usually mean the screws aren't fully tightened! And don't forget to trim the ends once you have the legs where you want them!

Wicking is a whole other story now, I'm still learning a lot on that end. Cheers and please let me know if I need to clarify anything!
Isn't Mac a member here too? I could've sworn he was.. 8 months ago when I quit smoking, i learned everything from the man way back when I wanted to rebuild my old Protank coils.. He really does have some serious knowledge on how it all works. You should head over to ECF and find the original Protank rebuilding thread. A lot of us have posted our pin vises and 'gizmos' we made to do the whole tensioned micro coil thing. Thanks to everyone's tips there by my second Protank coil I had it down. When I 'graduated' to KFLs I just used the same method with bigger wire and I can do my Kayfun 4s in my sleep now..
 

MarkS

Gold Contributor
Member For 5 Years
A lot of good advice! I like twisted wire coils so i start with 30 gauge with a large paperclip in the chuck of a drill and needle-nose pliers. I unfold the outer part of the paperclip so only a single wire goes in the drill chuck. I work with bending it so it spins evenly on the axis. I take the wire through the paperclip at the end and pull the wire so I have about three feet of two wires. I cut the spool wire and hand twist the loose ends together for about six twists. Then I grab the twisted end with needle-nose pliers, pull tension on the wire, and start twisting with the drill slowly and gradually ramp up the RPMs to full speed while keeping tension. I've found that if you do this until the wire breaks it's just about right (for me). I then use a drill bit (1/8"), hemostats, vice-grip pliers, and a propane torch. I start by taking the wire and putting the start in the drill bit channel and hold it in place with the hemostats. I wind up the shank as tight as I can (keep tightening the the winds and pushing them together). Once all the wire is wound tight and compressed I clamp the end with the vice-grips. At this point I torch it all the way around until I've got all of it glowing red. I let it cool then remove it. Count your loops and unroll enough for your legs. Reinsert the bit, mount to your Atty, and position. Remove the bit and fire it to a red glow then let off the power, gently compress with tweezers until coil cools. Repeat bit, firing and tweezers until you are happy with the coil. Then I wick with cotton. The right amount is found with practice too.
 

vape.queen

Silver Contributor
Member For 4 Years
Member For 3 Years
Member For 2 Years
Member For 1 Year
I use my screwdriver (same mm or gauge the tiny screwdrivers are that come with most RDAs or RBAs). Ceramic tip tweezers are essential cuz you can fire up your mod and squeeze the coils without shorting out. If you look up the guy called Rip Trippers on YouTube he does great with close ups and camera work in general so its easy to see what he's doing.
 

kami917

Member For 4 Years
Member For 3 Years
Member For 2 Years
Member For 1 Year
I've basically never actually had someone teach me the right and wrongs in coil building. I've just looked up YouTube videos for different builds, and kinda went along. However, I do have problems; my coils never come out the same, I can't wrap them close together. I'm not exactly sure how to end a lead, so that it meets with the original lead perfectly. Then this causes me too many problems, like spitting, one getting hotter than the other, and just ugly coils. I want my coils to look right, if anyone has a guide, maybe a video, or can explain the process of how you build decent coils, please let me know. I'm a fan of dual coils, btw. I don't like one coil when I know two will hold more wick, and more juice. So anyone help please. I'm vaping off a Boosted Hex Ohm box mod with 2 18650 batteries, and a doge v2.
89698a85d5fd8ae6241d36add8950493.jpg


Sent from my iPhone using Tapatalk
I am same way as you I watch you tube. Seen lots of videos on rip tripper. Since I didn't have any drill bits I used screwdriver to make my coils and still do so far I did try nano, micro, diamond, and parallel coils and all worked fine so watch rip trippers video and hope that helps
db2cf273fcce1201b5756dab1956927b.jpg
 
Last edited:

CDZVaper

Bronze Contributor
Member For 4 Years
Member For 3 Years
Member For 2 Years
Member For 1 Year
Instead of holding and trying to pinch each end of the wire, I twist a key chain ring on each end. I hook one end onto a nail, hold my driver (left hand) with the size diameter bit I want and then hold the other ring on my finger (right pointer). I get great tight wraps that are even. I also use the ring method with a small coil jig that I just got.
 

lyftication

Member For 4 Years
Instead of holding and trying to pinch each end of the wire, I twist a key chain ring on each end. I hook one end onto a nail, hold my driver (left hand) with the size diameter bit I want and then hold the other ring on my finger (right pointer). I get great tight wraps that are even. I also use the ring method with a small coil jig that I just got.
Can you explain that a little bit better for me?


Sent from my iPhone using Tapatalk
 

MarkS

Gold Contributor
Member For 5 Years
I just ordered one from Lightning Vapes today. I don't know how it will perform with my twisted wire but it looks like it will do a sweet job with single wire.
 

CDZVaper

Bronze Contributor
Member For 4 Years
Member For 3 Years
Member For 2 Years
Member For 1 Year
Can you explain that a little bit better for me?


Sent from my iPhone using Tapatalk

Sure.

I took a nail and nailed it at about eye height into a door jam, inside the room though, so the door still closes.

Next, I cut my wire about 6~7 inches took 2 key chain rings and
twisted one on each end of one wire. I only use about a half inch of wire on each end to attach each ring. It will look like a mini wire saw. Also I use needle nose to get a nice tight twist, so the rings don't pull off.

Next, place one ring on the nail, hold your drill bit or whatever you arre using to make your coil on the INSIDE of the jam. I'm able to make a fist because I use a hex driver. Then just line up your bit with the nail and begin to wrap. Try to keep them ( the bit and the wire) horizontal with each other. Do that for each coil.

That's how I started making good tight coils with 24 and 26 gauge..

Remember alot of what we do, when it comes to coils is custom so use your ingenuity and create a new way if you have trouble, ya know.

Anymore questions feel free to ask.
 

lyftication

Member For 4 Years
Sure.

I took a nail and nailed it at about eye height into a door jam, inside the room though, so the door still closes.

Next, I cut my wire about 6~7 inches took 2 key chain rings and
twisted one on each end of one wire. I only use about a half inch of wire on each end to attach each ring. It will look like a mini wire saw. Also I use needle nose to get a nice tight twist, so the rings don't pull off.

Next, place one ring on the nail, hold your drill bit or whatever you arre using to make your coil on the INSIDE of the jam. I'm able to make a fist because I use a hex driver. Then just line up your bit with the nail and begin to wrap. Try to keep them ( the bit and the wire) horizontal with each other. Do that for each coil.

That's how I started making good tight coils with 24 and 26 gauge..

Remember alot of what we do, when it comes to coils is custom so use your ingenuity and create a new way if you have trouble, ya know.

Anymore questions feel free to ask.

This way seems best for someone on a budget.


Sent from my iPhone using Tapatalk
 

CDZVaper

Bronze Contributor
Member For 4 Years
Member For 3 Years
Member For 2 Years
Member For 1 Year
This way seems best for someone on a budget.


Sent from my iPhone using Tapatalk

I started doing it that because my wraps, at the time, sucked. The two ends always came unbent and lost shape. Especially with lighter guage wire. I like to take my time with my builds so they come out clean. I got a coil jig recently, so Im still getting used to that.
 

vape.queen

Silver Contributor
Member For 4 Years
Member For 3 Years
Member For 2 Years
Member For 1 Year
But if you like the coil master style... There is a knock off called the Kuro Koiler. You can find it for $5
 

vape.queen

Silver Contributor
Member For 4 Years
Member For 3 Years
Member For 2 Years
Member For 1 Year
Coil master is a knock off of the kuro. A real kuro is $20.
I think my head just exploded. I didn't know that...seems like these ppl are just going in circles making clones of each other's shit. Clones of clones....what is the world coming to...
 

BigNasty

Diamond Contributor
Member For 4 Years
ECF Refugee
Coil master is a knock off of the kuro. A real kuro is $20.
No I am pretty sure there is enough difference between the two of a crafting idea they are both clones and original ideas for builders.

Kuro is 3 separate pieces... more money.
Coilmaster is a inclusive all in one kit one cost.
 

CrazyVpr

Member For 4 Years
Member For 3 Years
No I am pretty sure there is enough difference between the two of a crafting idea they are both clones and original ideas for builders.

Kuro is 3 separate pieces... more money.
Coilmaster is a inclusive all in one kit one cost.
Coilmaster is 9 different pieces.
 

vape.queen

Silver Contributor
Member For 4 Years
Member For 3 Years
Member For 2 Years
Member For 1 Year
For me, personally, I don't see how I would need that many pieces. 3 or 4 coil size options if good....but I usually just make 1 size. Now, I understand if u have the room for multiple coils on your mod, but me, I use single coils only....I have a kayfun and a Lemo... Not much room on either for anything crazy...but if you do 2-4 coils, and have the room...coil master it up :)
 

vape.queen

Silver Contributor
Member For 4 Years
Member For 3 Years
Member For 2 Years
Member For 1 Year
I ordered a kuro koiler... It has 3 size options. Perfect for me. If I had the $20 to spend, I would have ordered the coil master just because its one of those things that's nice to have just in case.
 

MarkS

Gold Contributor
Member For 5 Years
It really all comes down to what works for you. With time, and as $ allows, you can always try something else.
 

MarkS

Gold Contributor
Member For 5 Years
Looks decent! Kind of wish I had seen this sooner... I would have had it as part of the FT order I just made B4 CNY.
 

vape.queen

Silver Contributor
Member For 4 Years
Member For 3 Years
Member For 2 Years
Member For 1 Year
There were an overwhelming amount of options on that page bro...it was crazy! I was lucky to find it, lol
 
343cddedda1368c34373e06c945ac18a.jpg


Did a build on my LEMO DROP with a jig "boom boom fun times" 2mm dowel @7 wraps 26AWG dulal coil on deck comes out 0.4 ohm vaping it on new IPV MINI @ 33W

Without the jig don't think a dual build would be within my patience to complete. But knocked that out in bout 10 mins.

Consistent. Tight. Quick. No experience with other jigs but BOOM BOOM is great!
 

VU Sponsors

Top