OK, so first off I learned about the Tensioned Micro Coil build from
@MacTechVpr , who really entrenched himself in the science behind wrapping a wire to turn it into what is essentially a spring. Which is awesome, right? Because a spring is a spring, is a coil, is a wire that wants to be in the shape you have wrapped it to be rather than firing it and tediously pinching and fiddling until it is how you want it. Still with me? Let me explain how I make my coils from what I learned.
First, you'll want something to wind on, my tool of choice is
this, cheap and effective! Next, you'll need some tape, I use electrical tape since it can be peeled back and reused. A heavy set of lock-jaw pliers are optional, but nice to have for a few great reasons, you can use them to make twisted strands, and they are a great anchor to wrap a tensioned twisted coil! Of course you'll want some wire too.
Now, you can wrap right off the spool for a standard coil, the technique takes some practice, but hot damn does it pay in spades! I love me some twisted, so I first go to steam-engine.org and fiddle with it till I find what build I want to go with since I run a Billow(Thanks mom!) on a mech for now. So I use good ol' Ohms law to find out what the wattage I'm getting for a say, twisted 32 gauge dual coil build at 0.75 ohms, which is 23.52 watts off of a 4.2 volt single battery.Don't be intimidated by all the numbers and what not on steam-engine, embrace it, hug it, it is your best friend right now. So then I plug that wattage into the coil build page with the proper gauge selected, the proper number of coils, and the size of the screwdriver I'm working on(coils inner diameter), and the twist pitch is best found for me by taking a macro photo on my phone of the twisted wire lined up on a metric ruler, makes counting ridges so easy(also good for double checking wrap counts!) and bam my heat flux is 140, right up my alley! Nice! I also mess with the inner diameter till I find which of the screwdrivers I have would be easiest to wrap and would fit best in my Billow, meaning as close to whole wraps as I can get! 2mm and 2.4mm seem to be my most used. So now I can start twisting some wire!
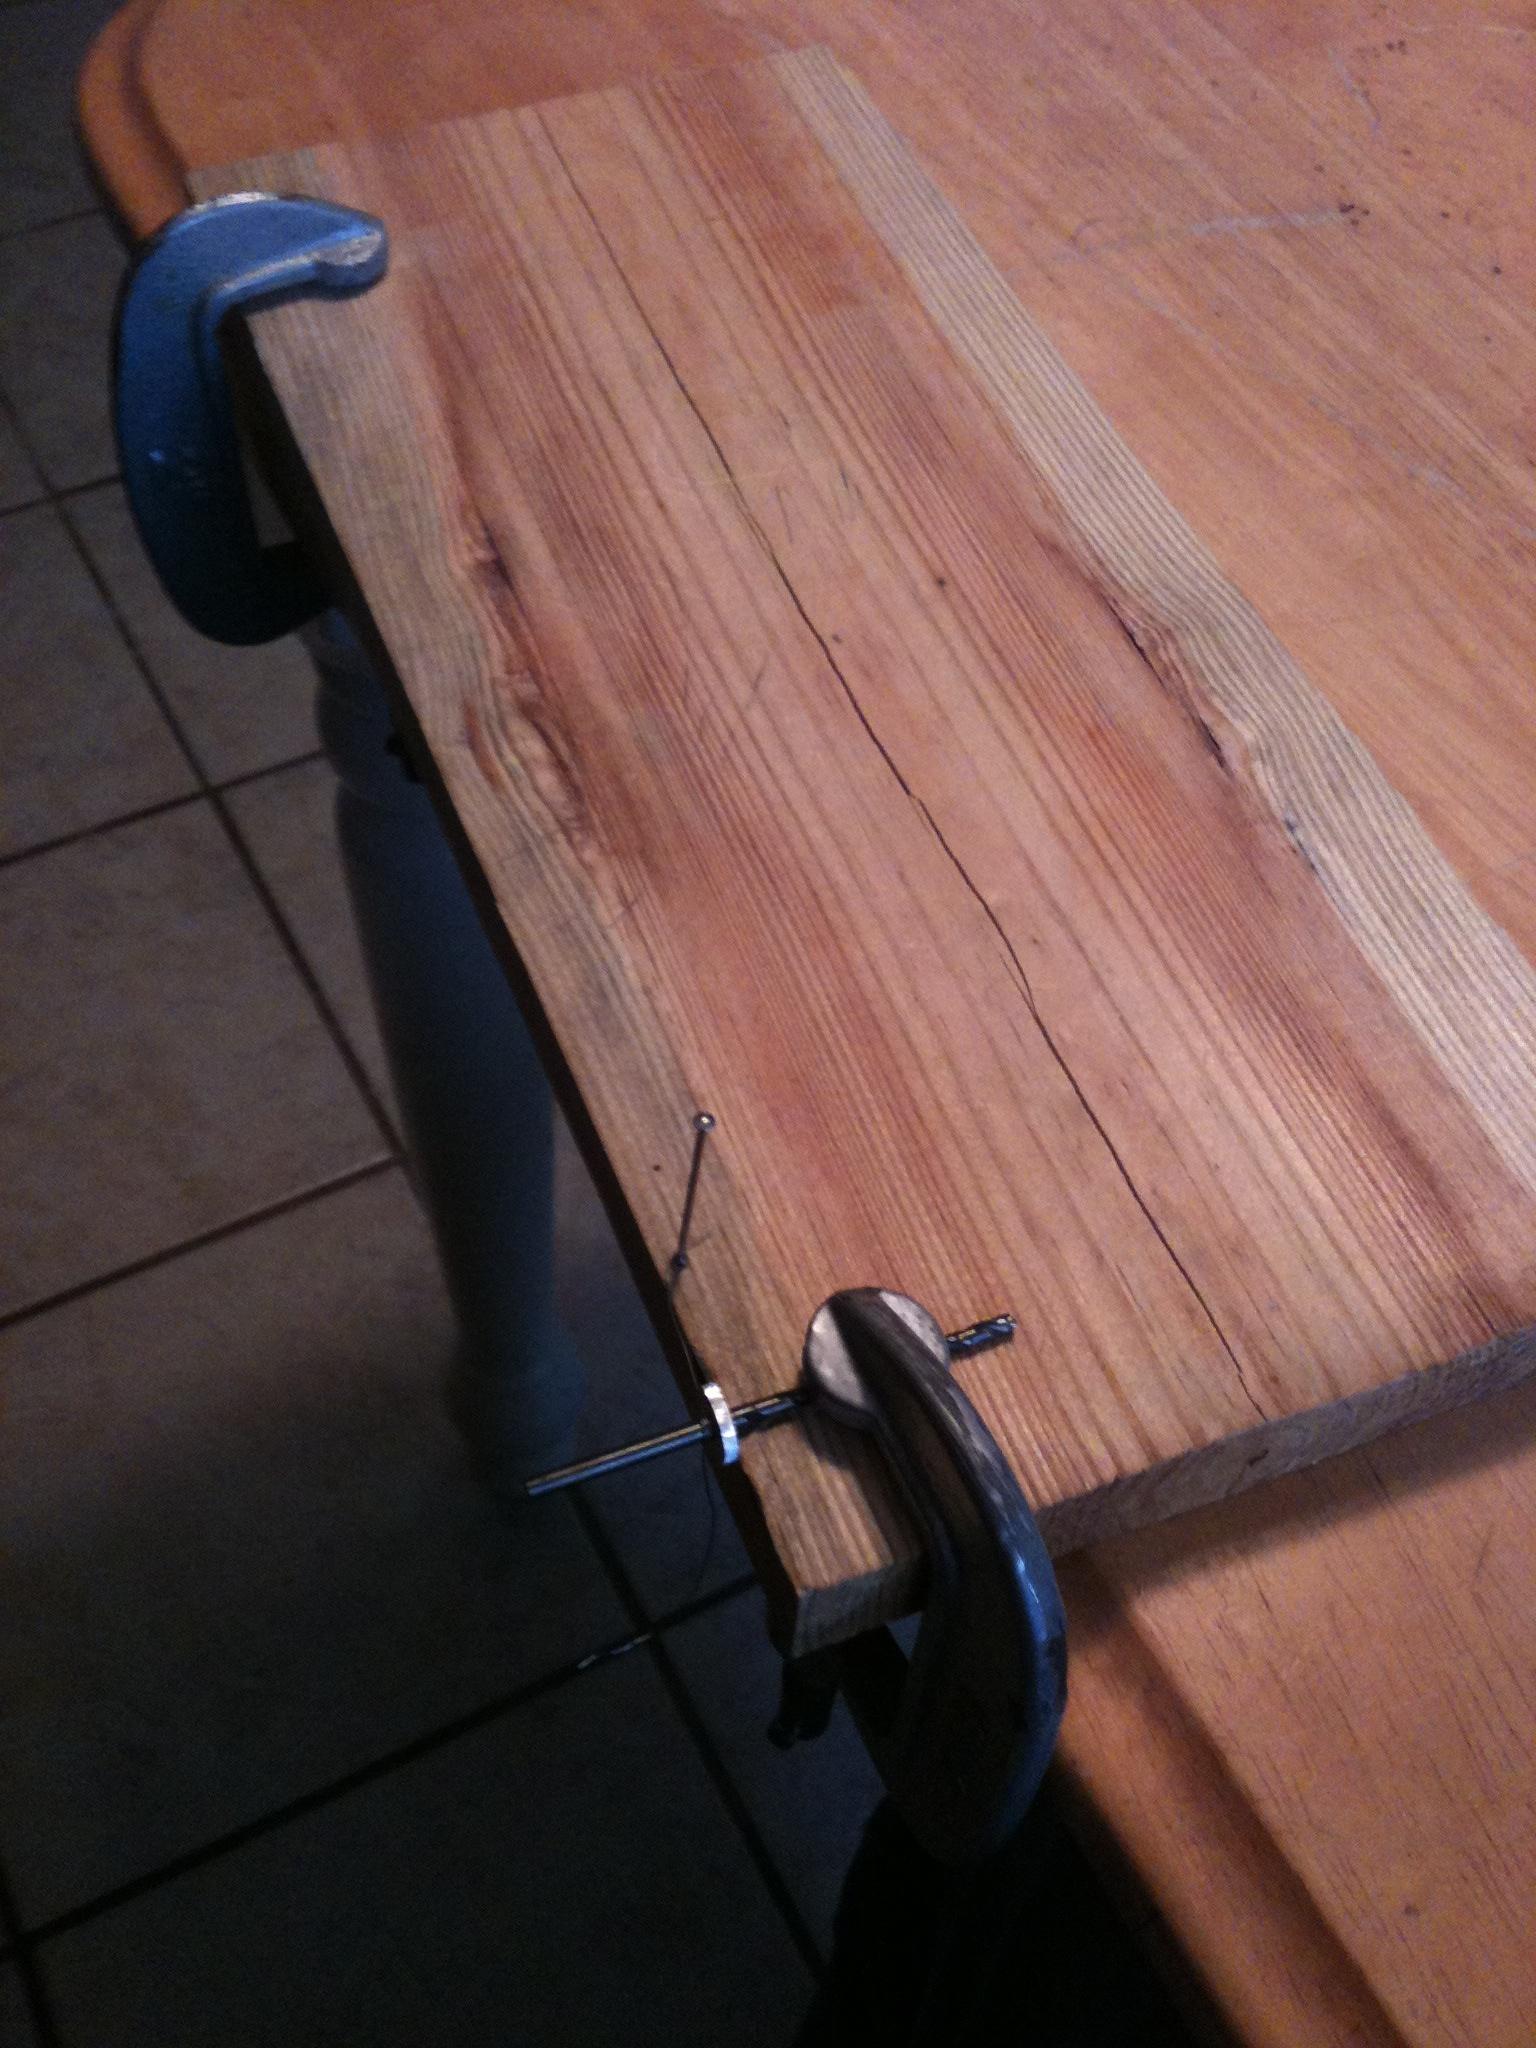
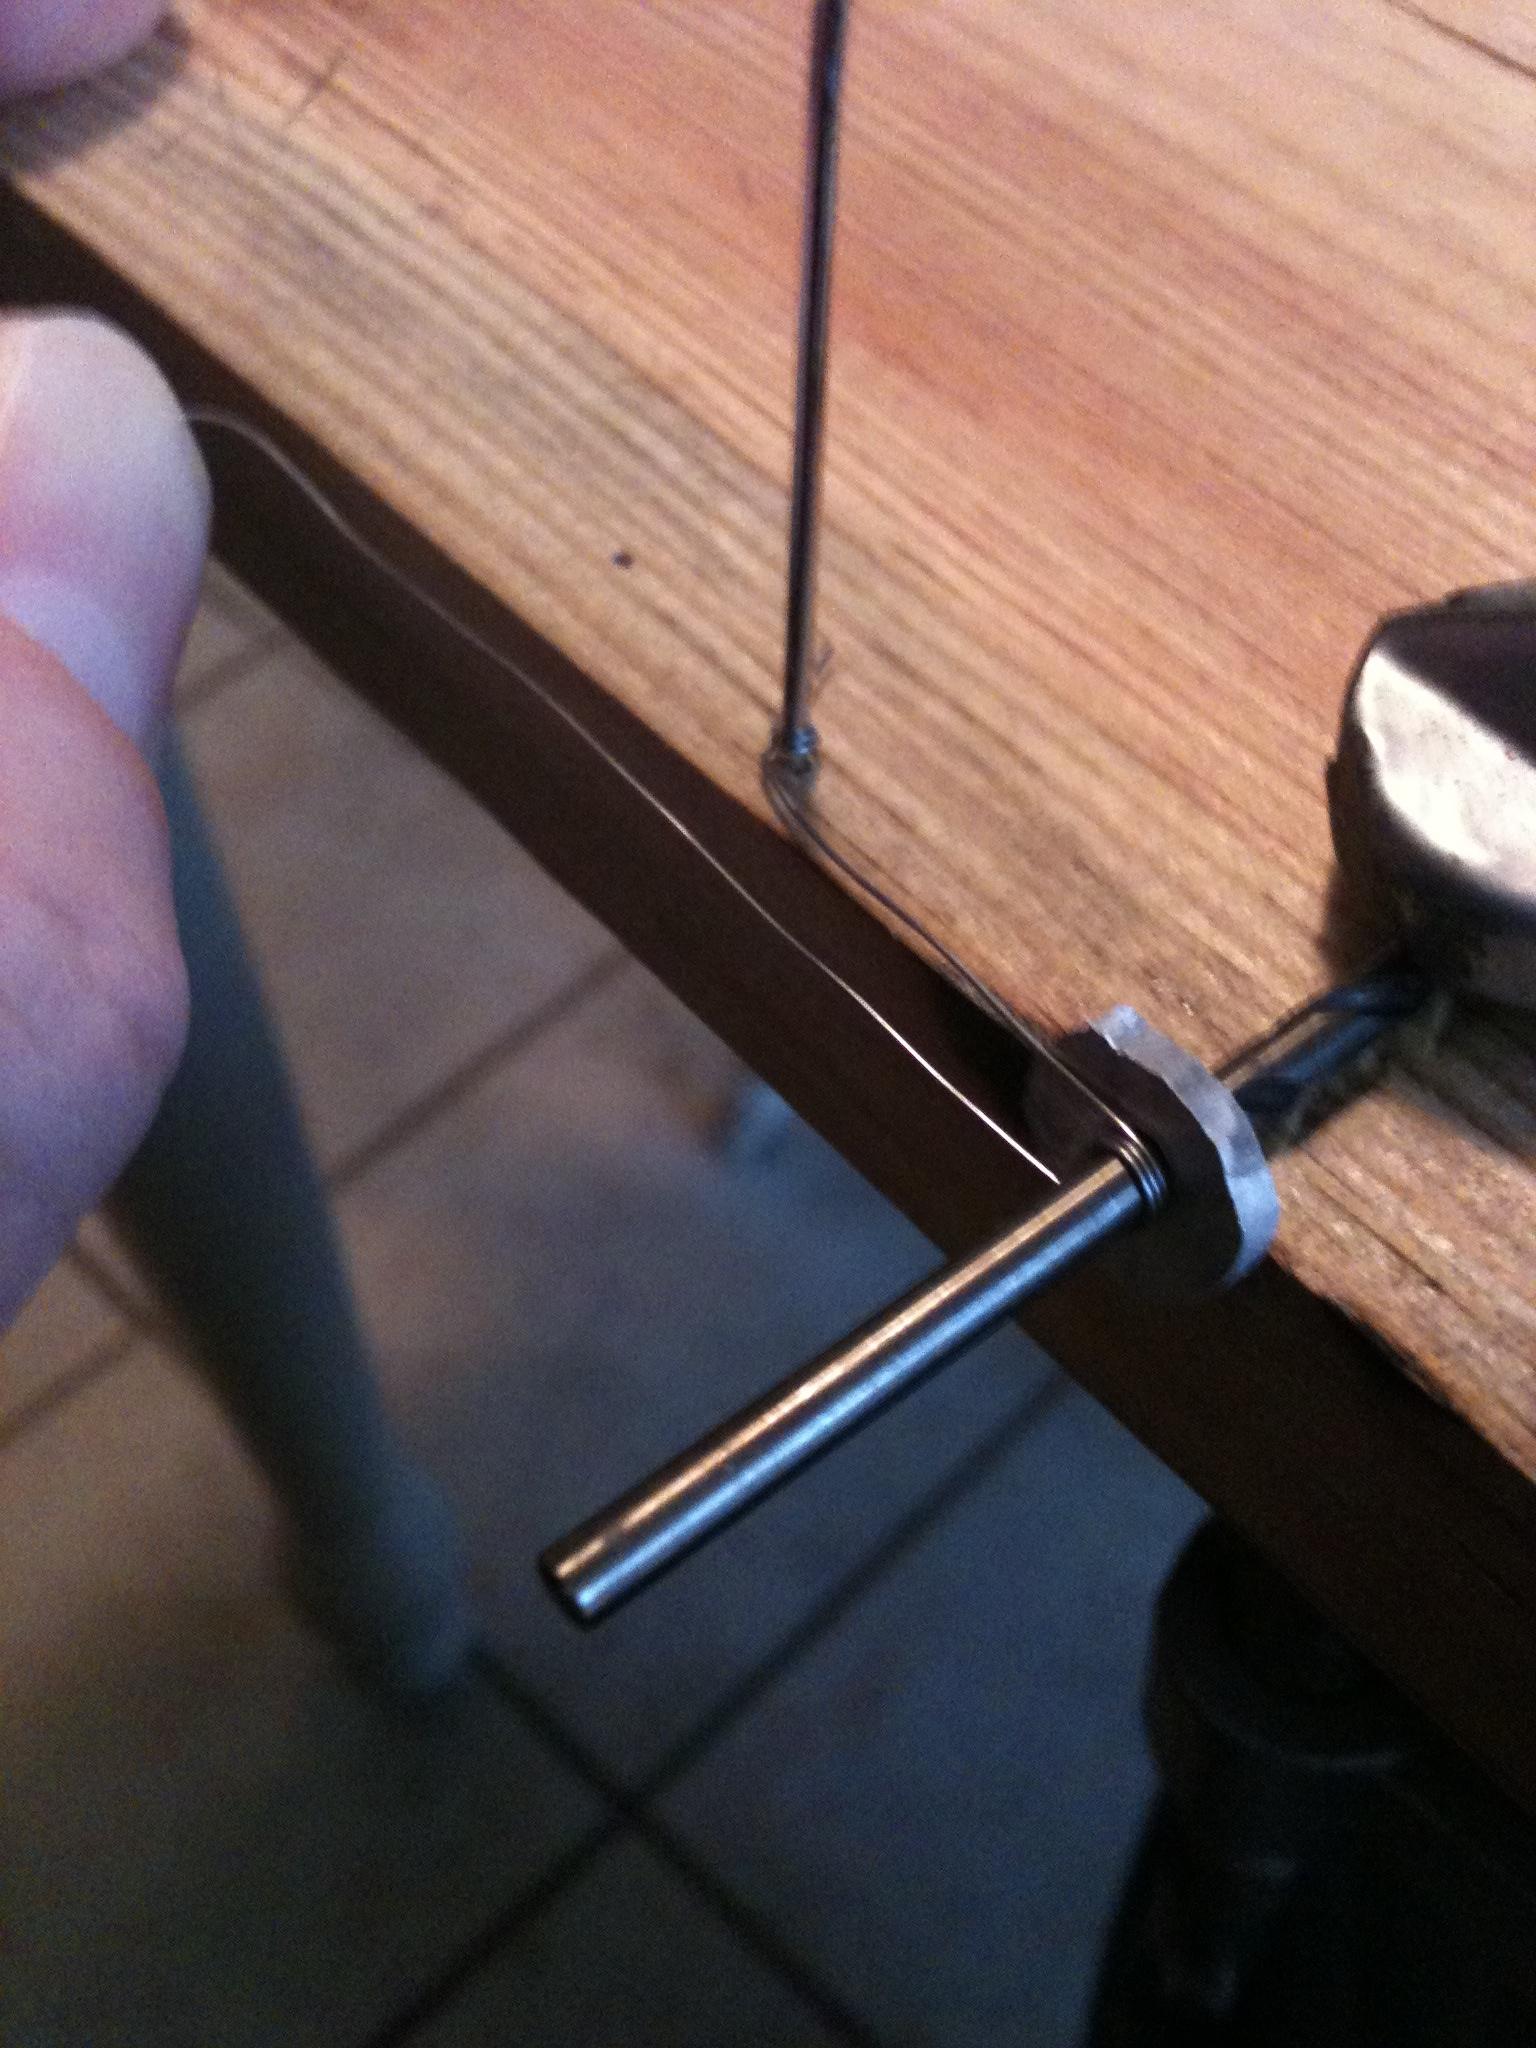
I wrapped some tape around the teeth of the pliers so it doesn't just pinch and snick the wires I'm going to twist together, then I pull the length of wire I believe I need, loop one end around a screw driver and pull the two loose ends as gingerly as I can so as to not introduce unwanted stress and twists on the wires and clamp them together in the pliers. I then pull it taut from the screwdriver I looped on, and start twisting by hand then I hold the screwdriver up and just spin and spin my heavy lock-jaws till it snaps off. Be careful here, if you go too crazy then you end up kinking your wires, bad! If you have the patience you can hold the screwdriver under your foot and just sit there twisting the pliers while keeping tension on your soon to be beautiful twisted strands. I tend to re-clamp the strands once or twice after it snaps to get it extra tight, who doesn't like it tight? Now you have your twisted wire!
Ok, so now you take the correct screwdriver for the inner diameter you want, I might just be stupid but I have messed this part up before. Now you put some tape around the handle and then place the not clamped end of your twisted strand under the tape against the handle, wrap it again, bend the end poking out back over the tape and wrap again over it. Still follow? If you have the pliers, you'll want to hold them with your feet or whatever you can to keep that end stationary the whole time you are wrapping. If you are wrapping off the spool, then you might just want an eraser bit or wad of something holding the spool from unraveling(I wrap electrical tape reversed around then back over so sticky meets sticky and now I have a band to hold my wadded paper towel against the spool so that bastard doesn't ruin my day. from the pliers or the spool, you want to hold it or have it held by something to keep it in place. Why? Because this doesn't really work otherwise.
Now that you have the wire anchored and your screwdriver securely attached to the wire you can start wrapping a sweet sweet tensioned coil! Take the screwdriver and hold it perpindicular to the wire so it lays across the driver bit, and pull away from your anchor to create tension ;D yeah! Now you just start wrapping, keeping tension and the driver bit perpendicular as you wind. When you start out a great tip is to over wrap it a bit past the number you want. You'll notice that after a few winds the wire will start holding to itself on the screwdriver, this is what you want! You're making a spring coil, it will be beautiful! Once you get the wraps you want, 7 in the case of this example build, keep it under tension then ease off a bit to see how it reacts, it may loosen a little which isn't a big deal unless it loosens a lot. That means you didn't keep enough tension while winding. Practice, practice, and practice and it won't be long till you see the brilliance here and can wrap consistent coil after coil. Now take your wire cutters and cut your coil off of the wire and cut the bit taped to the handle, count your wraps and pull the end pieces away from the screwdriver much in a reverse of how it was wrapped till you have the desired count of tight wraps. At this point I'm familiar enough with my Billow that I bend and trim the legs into the desired configuration that fits into my posts. I do this while the coil is held under my thumb on the screwdriver to keep my precious coil from being warped by my leg manipulations. Better to under trim and be gentle while bending than to trim too much or bend too much! Now, I've got a sweet tensioned coil! I keep it on the screwdriver and slide the legs into the posts, position it how I want and tighten the posts down bit by bit, again keeping my coil under my thumb to keep it from warping. Once it's all nice and tight I keep it still on the screw driver and make my final adjustments, and only then do I remove the screwdriver. BAM! One coil installed.
Repeat to make an identical coil for multi-coil builds!
I take my tweezers and strum the coil a bit before firing, some light pinching is sometimes necessary if it did get a little warped, but damn does it start glowing beautifully so fast. I learned the hard way that hot legs usually mean the screws aren't fully tightened! And don't forget to trim the ends once you have the legs where you want them!
Wicking is a whole other story now, I'm still learning a lot on that end. Cheers and please let me know if I need to clarify anything!


")
