KingPin!
In my defence, I was left unsupervised ^^
VU Donator
Platinum Contributor
Member For 4 Years
VU Challenge Team
Reviewer
Hello Folks,
You know how sometimes you see a picture of a product and think ….meh <queue the emoji movie>, at this point you’ve lowered your expectations, but you finally see it in the flesh and your opinion completely changes, Well that’s exactly the feeling I got with today’s review. This is one great looking mod, more specifically the gunmetal version!
Heaven Gifts kindly sent me this for review. Don’t worry I haven’t gone all gushy, good or bad it all goes in. I don’t like making recommendations in my reviews, instead I present you with my findings to help bolster your research should you be interested in the product.
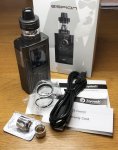
The Kit Includes:
Part 1 – The ProCore X Tank
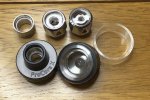
Manufacturer ProCore X Specs:
The paintwork is a metallic matt and matches the mod pretty closely. Moving around the tank, all threading seems to be in good shape.
The tanks breaks down in 5 or 6 parts with the extension


Starting with the drip tip. I had real difficulty removing it to begin with, even damaging it in the process. When I finally managed to remove the bugger I saw there were 3 O-rings holding it in place which is completely overkill! even lubed up i struggle to get this off the tank.
It’s a 10mm bore proprietary female design so you won’t be swapping that out unless you don’t mind the look of exposed O-rings. I found it to be a little too short and thin so heat transfer does become noticeable when chain vaping (especially using a restricted draw on the 0.25ohm coil).
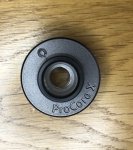
The top cap incorporates the refill mechanism which is a push and lift design, it’s quite tight to begin with but will break in after a while. Opening the cap exposes two small juice ports which are fairly small, however will accommodate either PET or Unicorn bottles. Quite how the hinge fairs after many months of use is my only concern but for now I have to say it works fine and seals the chamber well.
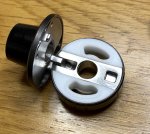
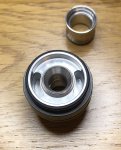
The glass section is nice and thick. If you do happen to break one you’ll only have the option of running the larger (or smaller spare depending which one you break) as there is no direct replacement included.
Moving down to the bottom and the base, it’s a single piece. The Airflow Control ring has a stop point which always helps with disassembly. It has a really smooth turning and has very little vertical play. Fully open it exposes two 14mm by 3mm slots. These seem large but it’s fairly restricted wherever it’s placed
Underneath the base the Positive pin sits ever so slightly proud at the bottom. I would like to have seen this extended slightly but it’s not caused me any issues to date.

All in all there’s not much to this tank to be honest, it’s a simple template I’ve seen a few times before.
How’s the Vape?
The ProCore C1 - 0.25 ohm coil is rated between 30-50 Watts, best between 35–45W.
The ProCore C1-S 0.4 coil is rated between 40-100 watts, best between 60-80W
· Unfortunately my coil was a dud test failed
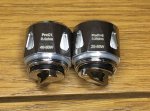
The coils look slightly different but they are the same type used by many Sub Ohm Tanks out there now, the “Smok baby beast coil size”. In all honesty if you do pick this up in the kit consider using other coils because there are better alternatives out there.

There is no RBA deck provided which is a shame because that could have been its redeeming feature on the vape test.
Pro’s
Do I slam this tank or not that’s the question, the issue right now is the coils that come with it! on that basis its bloody awful, the flavour was underwhelming for that massively long 7 days and let’s not mention the dud (it happens sometimes). I’m irked about the quality control in all honesty.
But here’s the thing it’s the coils I have the issue with, not the tank (other than the drip tip) and they can be swapped out for other brands. This is the one saving grace for this tank, and for this reason it avoids a wrathful closing. It doesn’t leak, the tanks quality was good, it matches the mod, it’s got a decent refill mechanism, but for the time I did get to use it monitoring its flavour, I feel there are better alternatives out there.
Right onto the mod!
You know how sometimes you see a picture of a product and think ….meh <queue the emoji movie>, at this point you’ve lowered your expectations, but you finally see it in the flesh and your opinion completely changes, Well that’s exactly the feeling I got with today’s review. This is one great looking mod, more specifically the gunmetal version!
Heaven Gifts kindly sent me this for review. Don’t worry I haven’t gone all gushy, good or bad it all goes in. I don’t like making recommendations in my reviews, instead I present you with my findings to help bolster your research should you be interested in the product.

The Kit Includes:
- Joyetech ESPION 200W TC Box Mod
- One Joyetech ProCore X Sub-Ohm Tank
- One ProC1 0.4 ohm Coil
- One ProC1-S 0.25 ohm Coil
- 2ml Glass Tank Section and Chimney
- 4.5ml Glass Tank Section and Chimney
- USB Cable
- Spare Parts
- User Manuals
- Warning Card
- Available Colours: Black, Gunmetal, Blue
- Available from: https://www.heavengifts.com/search?q=espion
Part 1 – The ProCore X Tank

Manufacturer ProCore X Specs:
- Diameter: 25mm
- Height: 44mm (53mm with the 4.5ml extension)
- Refill: Flip Top (Dual Fill Ports)
- Capacity: 2ml or 4.5ml (with the Extender)
- Airflow: 2 slots
- Coils: The ProC series (includes only ProC1 0.4 ohm & ProC1-S 0.25ohm)
- Drip Tip: Proprietary 10mm Bore, Delrin
- Materials: Stainless Steel & Glass
The paintwork is a metallic matt and matches the mod pretty closely. Moving around the tank, all threading seems to be in good shape.
The tanks breaks down in 5 or 6 parts with the extension


Starting with the drip tip. I had real difficulty removing it to begin with, even damaging it in the process. When I finally managed to remove the bugger I saw there were 3 O-rings holding it in place which is completely overkill! even lubed up i struggle to get this off the tank.
It’s a 10mm bore proprietary female design so you won’t be swapping that out unless you don’t mind the look of exposed O-rings. I found it to be a little too short and thin so heat transfer does become noticeable when chain vaping (especially using a restricted draw on the 0.25ohm coil).

The top cap incorporates the refill mechanism which is a push and lift design, it’s quite tight to begin with but will break in after a while. Opening the cap exposes two small juice ports which are fairly small, however will accommodate either PET or Unicorn bottles. Quite how the hinge fairs after many months of use is my only concern but for now I have to say it works fine and seals the chamber well.


The glass section is nice and thick. If you do happen to break one you’ll only have the option of running the larger (or smaller spare depending which one you break) as there is no direct replacement included.
Moving down to the bottom and the base, it’s a single piece. The Airflow Control ring has a stop point which always helps with disassembly. It has a really smooth turning and has very little vertical play. Fully open it exposes two 14mm by 3mm slots. These seem large but it’s fairly restricted wherever it’s placed
Underneath the base the Positive pin sits ever so slightly proud at the bottom. I would like to have seen this extended slightly but it’s not caused me any issues to date.

All in all there’s not much to this tank to be honest, it’s a simple template I’ve seen a few times before.
How’s the Vape?
The ProCore C1 - 0.25 ohm coil is rated between 30-50 Watts, best between 35–45W.
- The wattage range was not accurately stated I couldn’t pass 31.5 watts
- Resistance was out by 0.02 ohms
- It took 8ml to break in.
- I was vaping it with the airflow half open for the most part.
- Flavour was ok but I felt I needed to bump up to wattage to get more from it. If I did I would start to get a burnt hit (even with wide open airflow)
- Decent hit, with average vapour production, but requires a longer draw.
- I felt I had to stick with the 2ml tank at all times to squeeze out that flavour as such refill was required every 20 minutes with moderate vaping.
- On a positive note the rubber seal and wire at the base of the coil didn’t need sorting before priming and using.
- Coil lasted just over a week.
The ProCore C1-S 0.4 coil is rated between 40-100 watts, best between 60-80W
· Unfortunately my coil was a dud test failed
The coils look slightly different but they are the same type used by many Sub Ohm Tanks out there now, the “Smok baby beast coil size”. In all honesty if you do pick this up in the kit consider using other coils because there are better alternatives out there.


There is no RBA deck provided which is a shame because that could have been its redeeming feature on the vape test.
Pro’s
- Simple Design with an easy refill mechanism
- Decent capacity at 4.5ml
- No leaking didn’t even get condensation build up
- Thick glass tank section
- Draw caters for both airy and restricted draw vapers
- Decent machining and finish
- Is compatible with smok baby beast sized coils (it’s going to need them!)
- Couldn’t remove the drip tip easily
- Proprietary drip tip that felt a little too short and too thin
- Lack of an RBA deck
- Dud coil (yes it sometimes happens even to decent tanks)
- Short coil life and overrated wattage range, I wanted to push the coil harder and couldn’t consider other aftermarket options.
Do I slam this tank or not that’s the question, the issue right now is the coils that come with it! on that basis its bloody awful, the flavour was underwhelming for that massively long 7 days and let’s not mention the dud (it happens sometimes). I’m irked about the quality control in all honesty.
But here’s the thing it’s the coils I have the issue with, not the tank (other than the drip tip) and they can be swapped out for other brands. This is the one saving grace for this tank, and for this reason it avoids a wrathful closing. It doesn’t leak, the tanks quality was good, it matches the mod, it’s got a decent refill mechanism, but for the time I did get to use it monitoring its flavour, I feel there are better alternatives out there.
Right onto the mod!
Last edited:

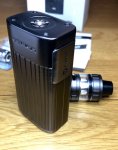

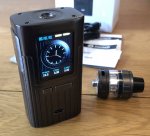
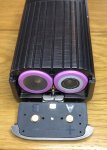
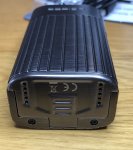
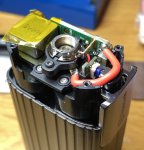
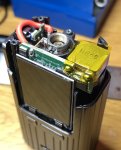
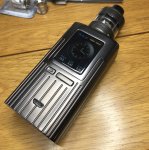
 love the mod in power mode I’ve had some crazy leaks using the kylin mini this has just shrugged it off and cracked on it’s gonna be a beater for sure haha hoping I’ll get to try out Arctic Fox at some point never used it
 love the analogue myself and having the puff counter on the front display although to begin with it looks like it only has four digits once you get past 9999 is carries on adding sitting pretty in the high teens now