KingPin!
In my defence, I was left unsupervised ^^
VU Donator
Platinum Contributor
Member For 4 Years
VU Challenge Team
Reviewer
Hi Folks,
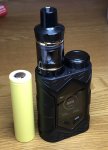
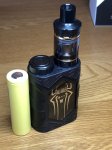
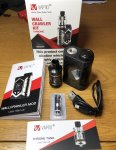
There’s a fair few kits sharing similar designs (at least on the outside) to the product I’ll be reviewing today. They have the battery tube cap on top, take a single battery, and are designed for portability and ease of use. Overall they enjoy a large degree of success with new and existing vapers alike. Vaptio have decided to join their ranks and sent me the WallCrawler kit (including the Throne tank) for the once over.
I don’t like to make recommendations in my reviews, rather I’ll go through all of my findings with this particular kit to help bolster your research should you be interested in the product.
As usual I’ll cover the tank first and then the mod.
Part 1 the Throne Tank
Throne Manufacturer Specs
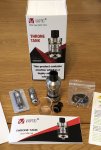
Impressions & Build Quality
The first thing to go over is the name “Throne” and talking about vaping on the throne. I feel obligated to mention this, I don’t know what it’s like where you are but In the UK “just nipping off to sit on the Throne” is slang for something you might associate with…..well you know what I mean, all of us do it even the queen!. Not subtle enough? try the term VooPoo then. It’s been difficult to shake this image since I’ve been using this tank. I appreciate Vaptio probably had to steer clear of the name Crown because of Uwell’s tank series, more specifically the Crown 3 which also has the quick coil change system.
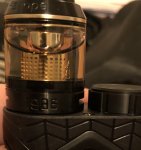
Naming aside the finish and machining are excellent throughout, and the threading is buttery smooth, they’ve done a cracking job. There was one downside though the tank smelled heavily of machine oil and required a very deep clean before I felt comfortable to use it.
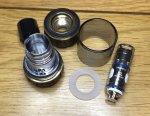
If you buy the Wall Crawler as a kit, you get just one drip tip option and there is no replacement glass. However should you opt to buy the tank as a standalone, you are given a Mouth to Lung (MTL) narrow bore drip tip, similar to the one found on the VandyVape Berserker, a standard wide bore 510 and a spare glass section. I’m really disappointed that the kit didn’t include these “extras” as well and it will be going down as a con because everyone needs a spare glass and the whole point of the tank is to use it in either Direct Lung (DL) or MTL vaping, it’s even got a coil designed for both in the kit.
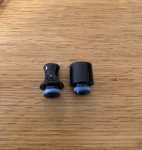
In terms of the material of the tip I don’t believe either are Delrin because when I chain vape at higher wattages they get pretty hot, however both are comfortable in the lower wattage ranges.
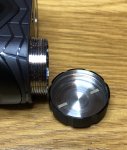
The top cap is a solid piece of stainless steel. Even at moderate temperatures it will get hot. This is a top fill design and there is no refill port, imagine here the Aspire Cleito (original and Exo) or the original VandyVape Kylin before they modified the design, where you just take off the top cap and plonk the juice straight into the tank. The only thing stopping you from doing this is that rubber seal, which doesn’t need to be in there…I swiftly took mine out to squeeze out an extra bit of capacity.
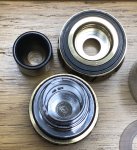
Removing the top cap exposes the inside of the tank. Much like their C-II tank there is juice flow control. The juice ports close automatically as you unscrew, then open when you tighten it back up. You can also adjust the juice flow by twisting the top cap which comes in handy.
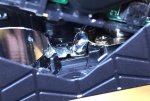
The coil system is actually much like the crown 3 although instead of undoing the base you can get to it by removing the top cap. It was fine to leave the tank full with juice whilst switching coils. In fact I took my time to wipe around inside with a tissue then plonk in the new coil.
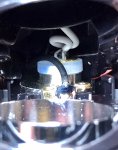
At the top of each coil there’s little “sticky out ears” which slot into place ensuring the coil is always correctly aligned with the juice ports. The ports themselves have an edge that blocks off any gap meaning it’s very difficult to experience juice lock. Wicking was something I never had an issue with, in fact quite the opposite where restricting the flow was sometimes required.
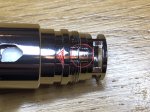
There is one thing I noticed about this whole experience; while coil swapping has been designed around speed and ease, its impacted upon the refilling experience. To me its makes logical sense to place importance on refilling because well…. you have to do it far more often. The Vaptio Frogman’s quick release system was fantastic why not merge the two systems together?
What happens on the Throne is every time you refill it you spend a while undoing it, in that process the coil lifts ever so slightly (remember it’s sealed so this doesn’t matter) what happens though is your mod keeps thinking you’ve got a new atomiser on top! Then you have to really tighten the top cap to re-engage the coil in order for the mod to pick it up again. I find this annoying and it causes my OCD to go crazy. On the WallCrawler mod it’s not such a problem because it automatically detects the coil when you've screwed it back on tight, but on others I kept receiving the new atomiser message every time.
The 0.25 ohm coil is Ni/Cr according to Vaptio. Their N1 Pro is capable of firing Ni80 in Temp control so I gave it a go. It didn’t even pick it up? So I have no idea what the mix of chromium and nickel is, but it’s supposedly Ni80. So for now I’m going to say these are not true Ni80 coils.
Moving down to the base of the tank the Air Flow Control (AFC) ring sits just a couple of mm higher than the base. So when it’s screwed into the mod you can turn it without any problem. The AFC does have a lock point which is good for disassembly. I noticed a little bit of vertical play in the AFC but it’s only very slight.
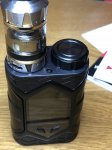
Finally the positive pin sits slightly proud of the negative threading which I always like to see.

There’s a fair few kits sharing similar designs (at least on the outside) to the product I’ll be reviewing today. They have the battery tube cap on top, take a single battery, and are designed for portability and ease of use. Overall they enjoy a large degree of success with new and existing vapers alike. Vaptio have decided to join their ranks and sent me the WallCrawler kit (including the Throne tank) for the once over.
I don’t like to make recommendations in my reviews, rather I’ll go through all of my findings with this particular kit to help bolster your research should you be interested in the product.
As usual I’ll cover the tank first and then the mod.
Part 1 the Throne Tank
Throne Manufacturer Specs
- Width 23.5mm
- Height 54.9mm
- Capacity 2ml
- Metal: SS 304
- Airflow slots: 2
- Hot-Swap Tech coil change system
- Direct Lung and Mouth To Lung
- 1 x Throne Tank
- 1 x Throne D1 coil 0.25 ohm coil Ni/Cr (pre installed)
- 1 x Throne D2 Coil 1.2ohm coil Kanthal (FeCrAl)
- 1 x User Manual
- 1 x spare parts


Impressions & Build Quality
The first thing to go over is the name “Throne” and talking about vaping on the throne. I feel obligated to mention this, I don’t know what it’s like where you are but In the UK “just nipping off to sit on the Throne” is slang for something you might associate with…..well you know what I mean, all of us do it even the queen!. Not subtle enough? try the term VooPoo then. It’s been difficult to shake this image since I’ve been using this tank. I appreciate Vaptio probably had to steer clear of the name Crown because of Uwell’s tank series, more specifically the Crown 3 which also has the quick coil change system.
Naming aside the finish and machining are excellent throughout, and the threading is buttery smooth, they’ve done a cracking job. There was one downside though the tank smelled heavily of machine oil and required a very deep clean before I felt comfortable to use it.

If you buy the Wall Crawler as a kit, you get just one drip tip option and there is no replacement glass. However should you opt to buy the tank as a standalone, you are given a Mouth to Lung (MTL) narrow bore drip tip, similar to the one found on the VandyVape Berserker, a standard wide bore 510 and a spare glass section. I’m really disappointed that the kit didn’t include these “extras” as well and it will be going down as a con because everyone needs a spare glass and the whole point of the tank is to use it in either Direct Lung (DL) or MTL vaping, it’s even got a coil designed for both in the kit.

In terms of the material of the tip I don’t believe either are Delrin because when I chain vape at higher wattages they get pretty hot, however both are comfortable in the lower wattage ranges.
The top cap is a solid piece of stainless steel. Even at moderate temperatures it will get hot. This is a top fill design and there is no refill port, imagine here the Aspire Cleito (original and Exo) or the original VandyVape Kylin before they modified the design, where you just take off the top cap and plonk the juice straight into the tank. The only thing stopping you from doing this is that rubber seal, which doesn’t need to be in there…I swiftly took mine out to squeeze out an extra bit of capacity.

Removing the top cap exposes the inside of the tank. Much like their C-II tank there is juice flow control. The juice ports close automatically as you unscrew, then open when you tighten it back up. You can also adjust the juice flow by twisting the top cap which comes in handy.
The coil system is actually much like the crown 3 although instead of undoing the base you can get to it by removing the top cap. It was fine to leave the tank full with juice whilst switching coils. In fact I took my time to wipe around inside with a tissue then plonk in the new coil.
At the top of each coil there’s little “sticky out ears” which slot into place ensuring the coil is always correctly aligned with the juice ports. The ports themselves have an edge that blocks off any gap meaning it’s very difficult to experience juice lock. Wicking was something I never had an issue with, in fact quite the opposite where restricting the flow was sometimes required.

There is one thing I noticed about this whole experience; while coil swapping has been designed around speed and ease, its impacted upon the refilling experience. To me its makes logical sense to place importance on refilling because well…. you have to do it far more often. The Vaptio Frogman’s quick release system was fantastic why not merge the two systems together?
What happens on the Throne is every time you refill it you spend a while undoing it, in that process the coil lifts ever so slightly (remember it’s sealed so this doesn’t matter) what happens though is your mod keeps thinking you’ve got a new atomiser on top! Then you have to really tighten the top cap to re-engage the coil in order for the mod to pick it up again. I find this annoying and it causes my OCD to go crazy. On the WallCrawler mod it’s not such a problem because it automatically detects the coil when you've screwed it back on tight, but on others I kept receiving the new atomiser message every time.
The 0.25 ohm coil is Ni/Cr according to Vaptio. Their N1 Pro is capable of firing Ni80 in Temp control so I gave it a go. It didn’t even pick it up? So I have no idea what the mix of chromium and nickel is, but it’s supposedly Ni80. So for now I’m going to say these are not true Ni80 coils.
Moving down to the base of the tank the Air Flow Control (AFC) ring sits just a couple of mm higher than the base. So when it’s screwed into the mod you can turn it without any problem. The AFC does have a lock point which is good for disassembly. I noticed a little bit of vertical play in the AFC but it’s only very slight.

Finally the positive pin sits slightly proud of the negative threading which I always like to see.

Last edited:

