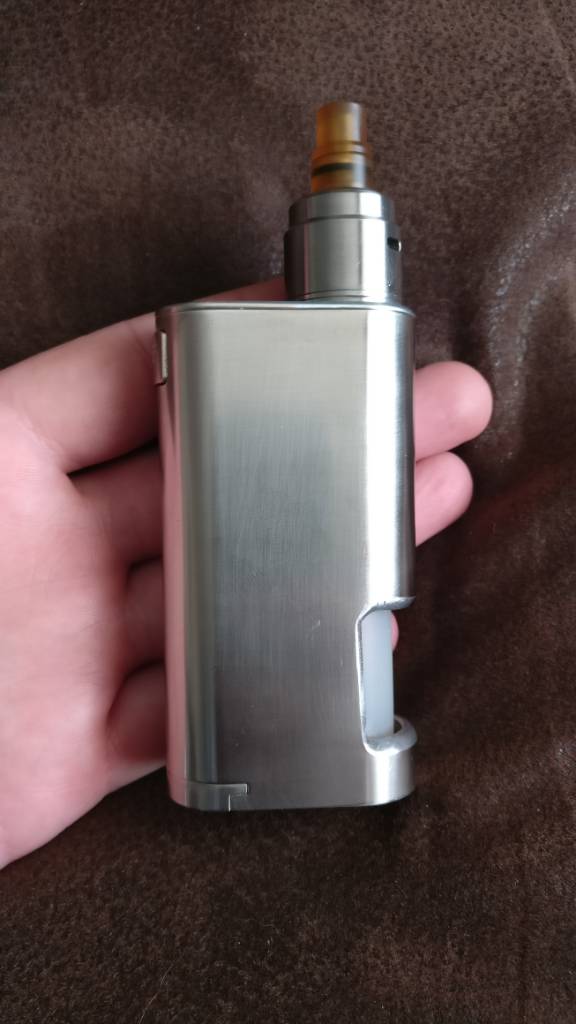
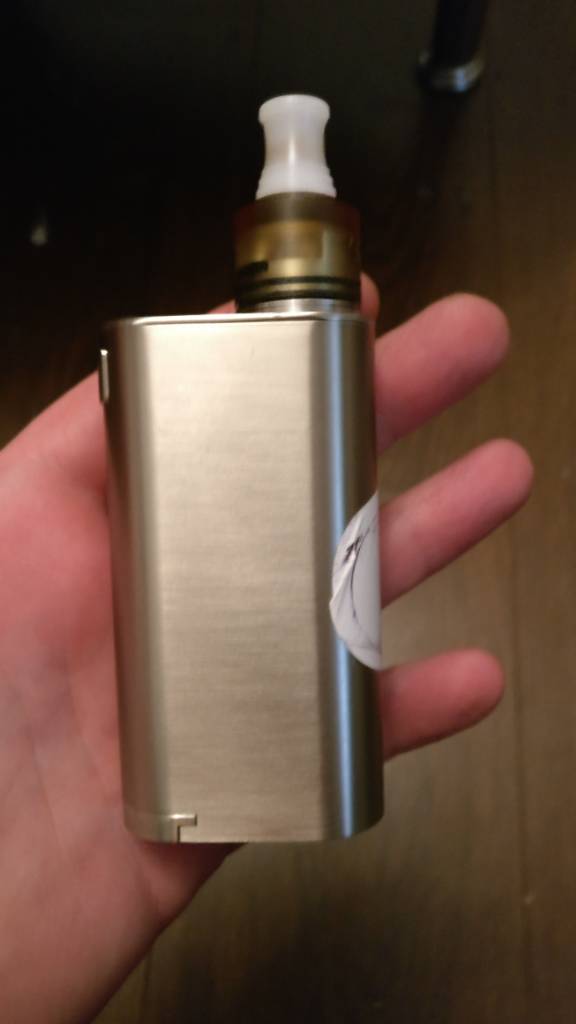
Ok so here is a little view and steps to bottom feed Noisey Cricket V2 conversation.
Parts
Noisey Cricket V2
Mod maker bf 510 ,
Or one from Fasttech with the threaded contact nut to 510 pin (needs to be threaded for metal feed tube). 510 link below ... https://www.fasttech.com/p/8689000
Mod maker bf metal feed tube
Mid maker bottle that fits the feed tube
Silicone bottle washers
Soldering iron ( one joint to solder 2 to desolder)
Dremel cutting discs
Dremel,
Time an patience.
Take the blk tap off top plate off the top of the mod
to get to screws to allow dismantling of mod ,
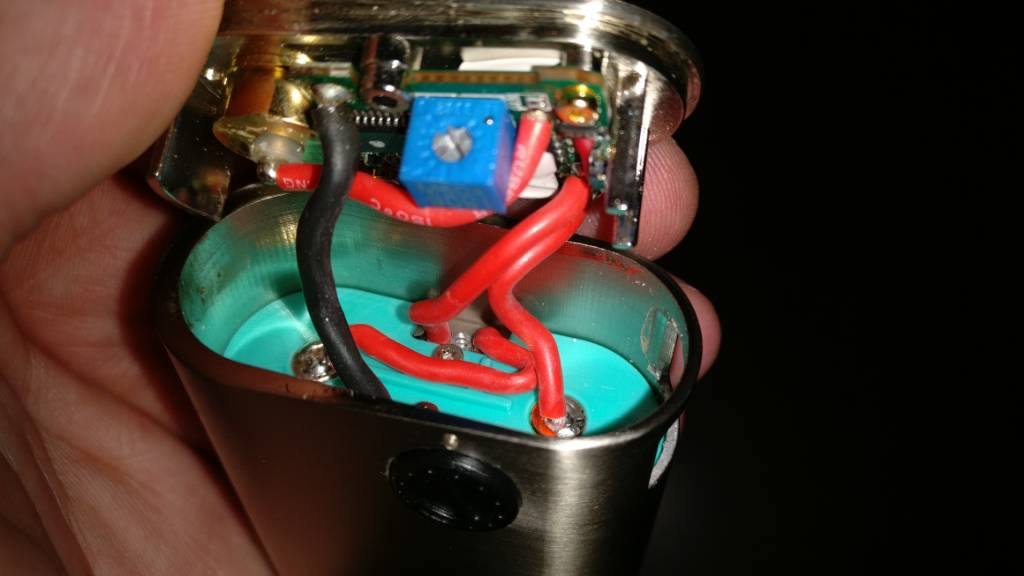
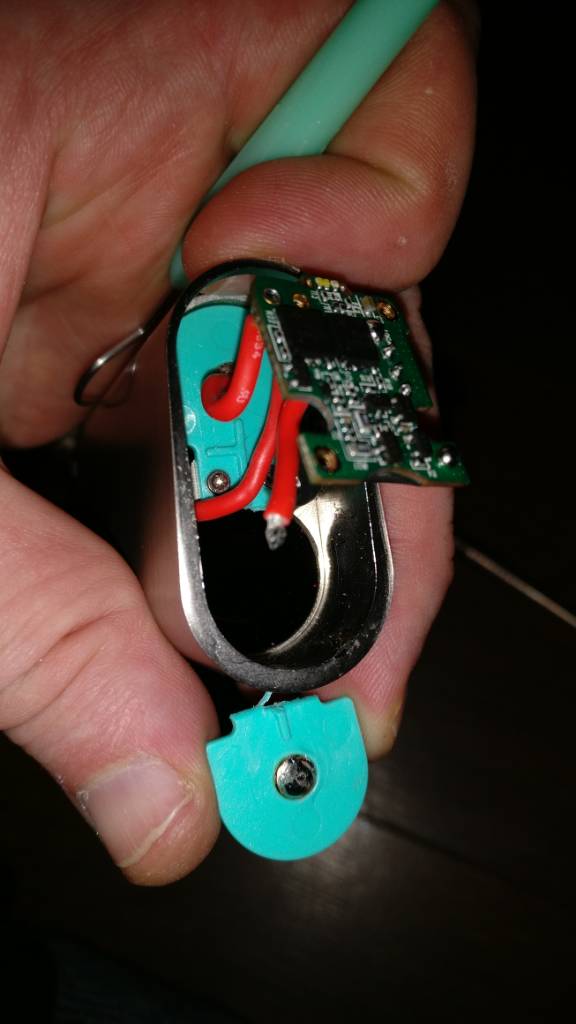
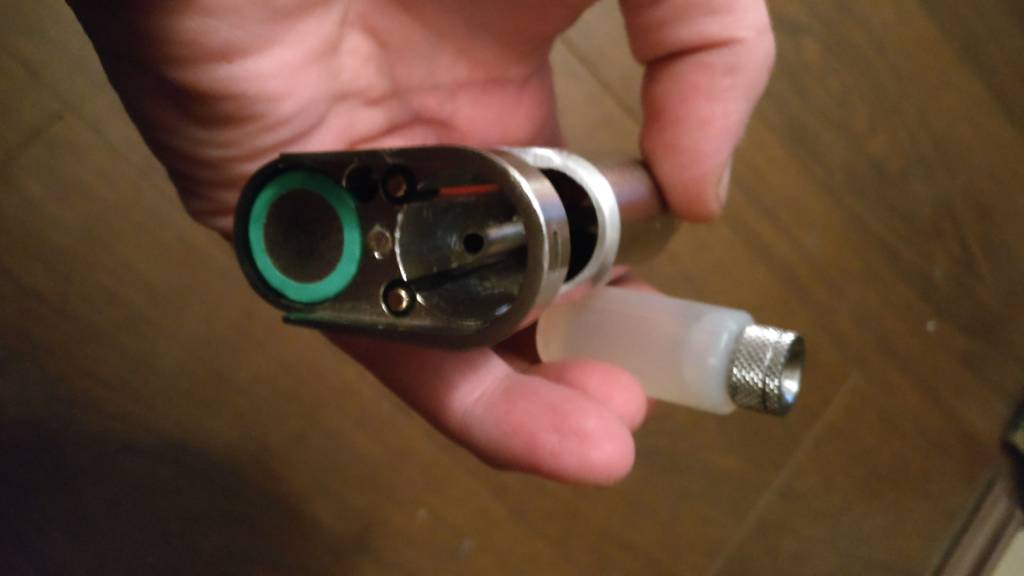
Take top off mod , and side , potential meter off, allows you to lift pcb and top off,
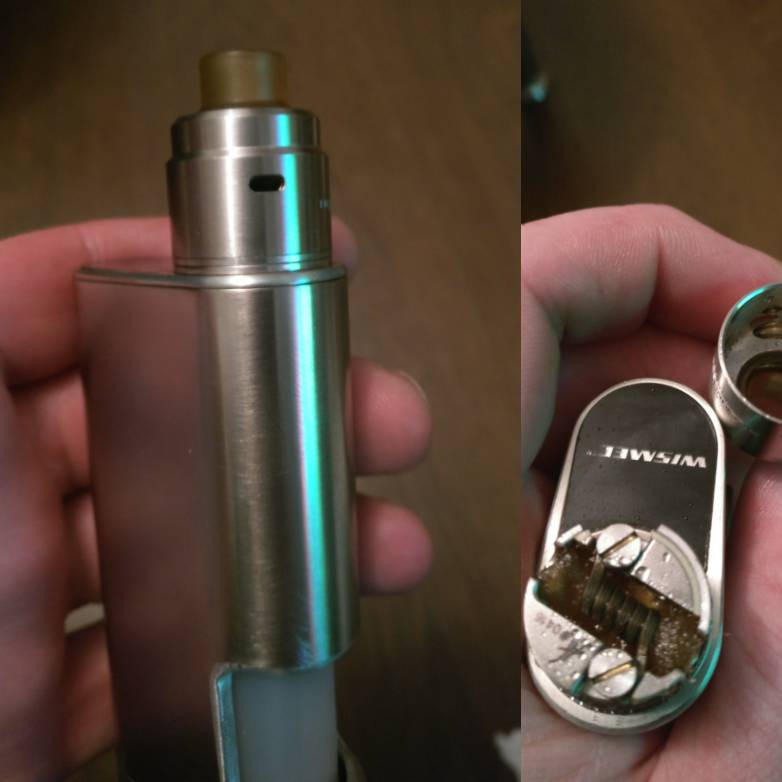
Once inside , unscrew 2 screw to the board allows top plate to come off , and unsolder the postative 510 wire from the 510
Then the postative wire to battery contacts unsolder one of them,
Directly under the 510
its the one in pic now hanging over the side of the mod directly under where 510 sits ,
( this will be where bf 510 sits down into battery tube )
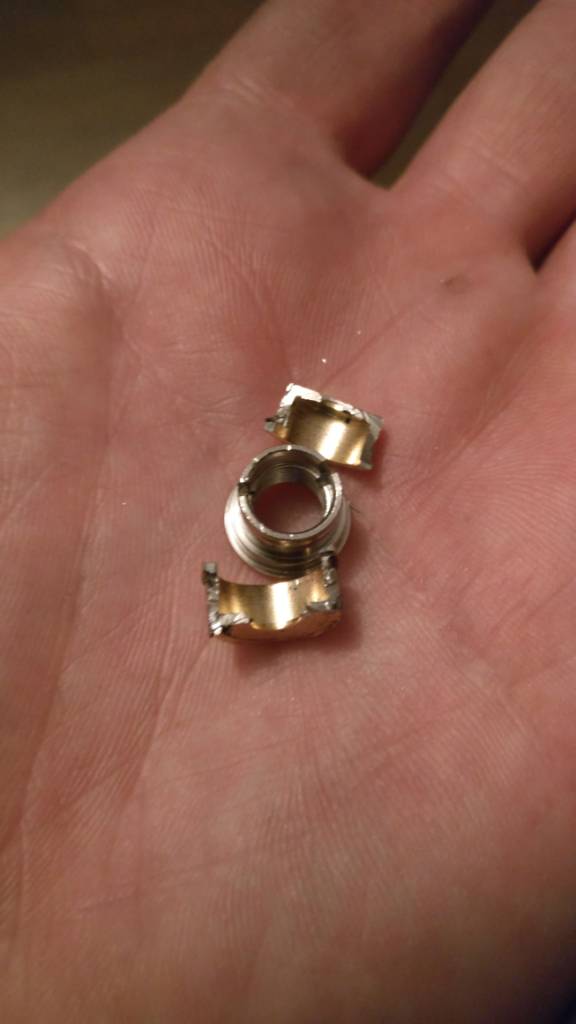
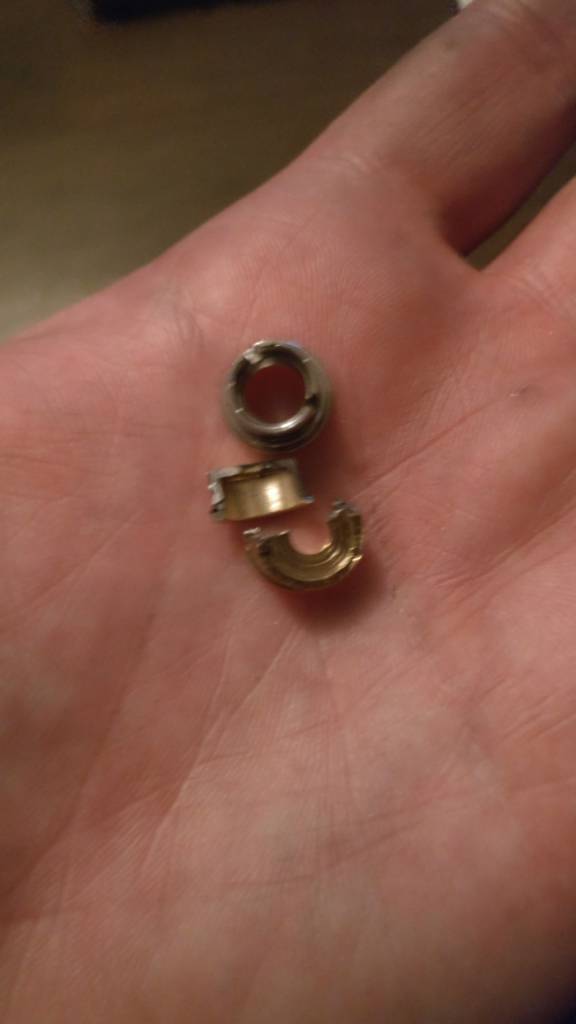
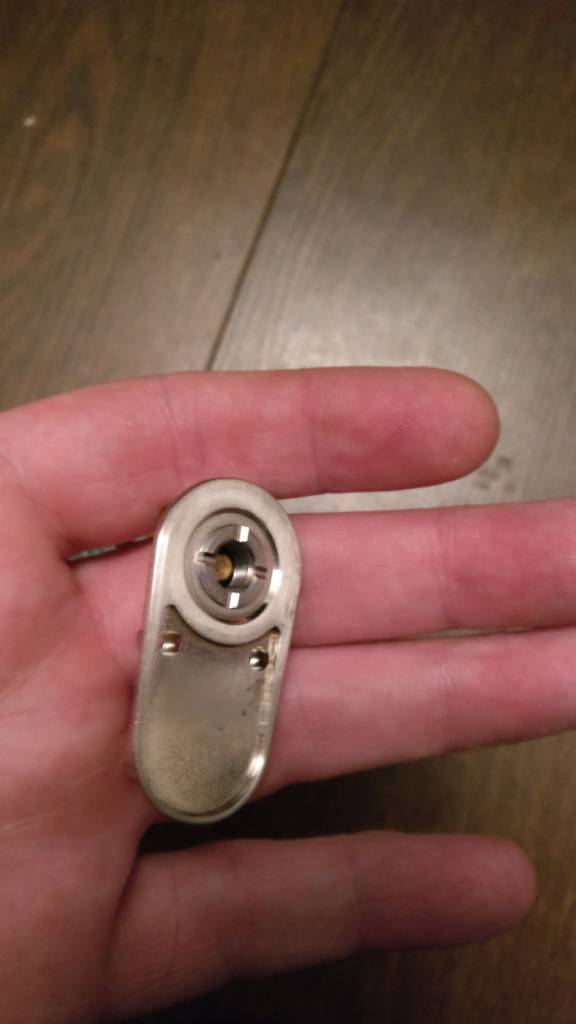
so the green plastic contact part will need removing too ,
The green plastic that is the top posative contacts for both cells. It has 2 screws in the center take them out,
and remove the green plastic,
You now cut the green plastic in half pictured to remove the part under 510 ,
leaving the 2 screw points on the green plastic
to still be to attach to mod
and the half that sits under PCB still intact ,
now screw it back in leaving one side open directly under the 510
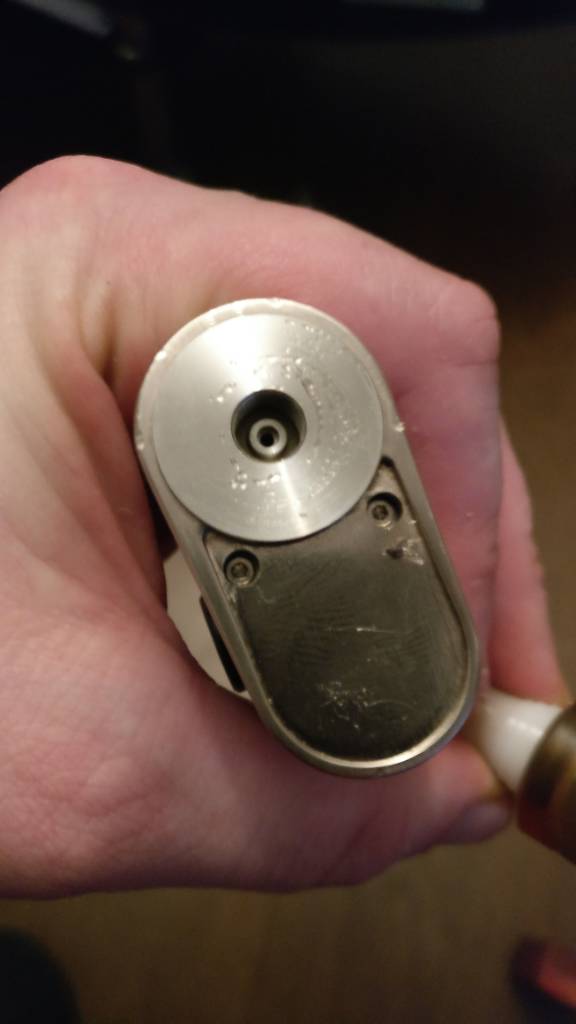
Mods Top plate .
Remove the 510,
i found this to be a pain
so after I had unsoldered the 510 wire off the 510 i was able to work away from the mod and remove the 510 by splitting it apart with a screw driver , ( not easy but do able )
That allowed me to just have access to 510 an top plate to them remove 510 without damaging anything else
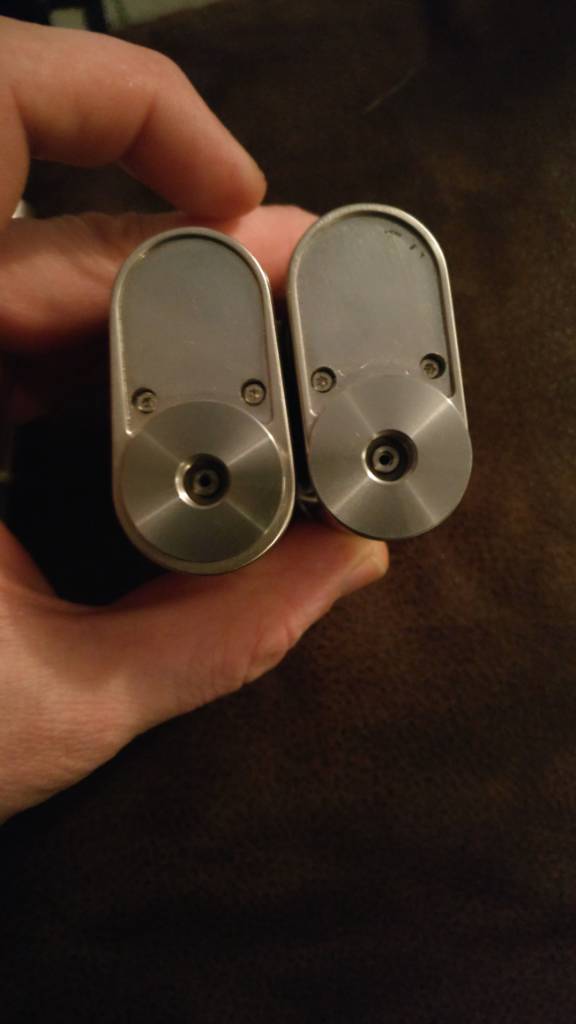
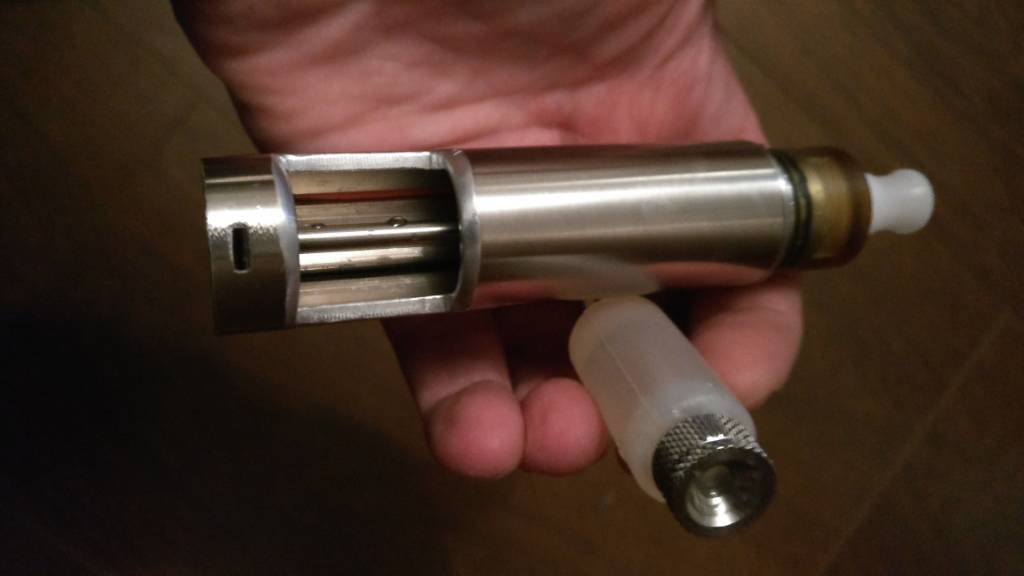
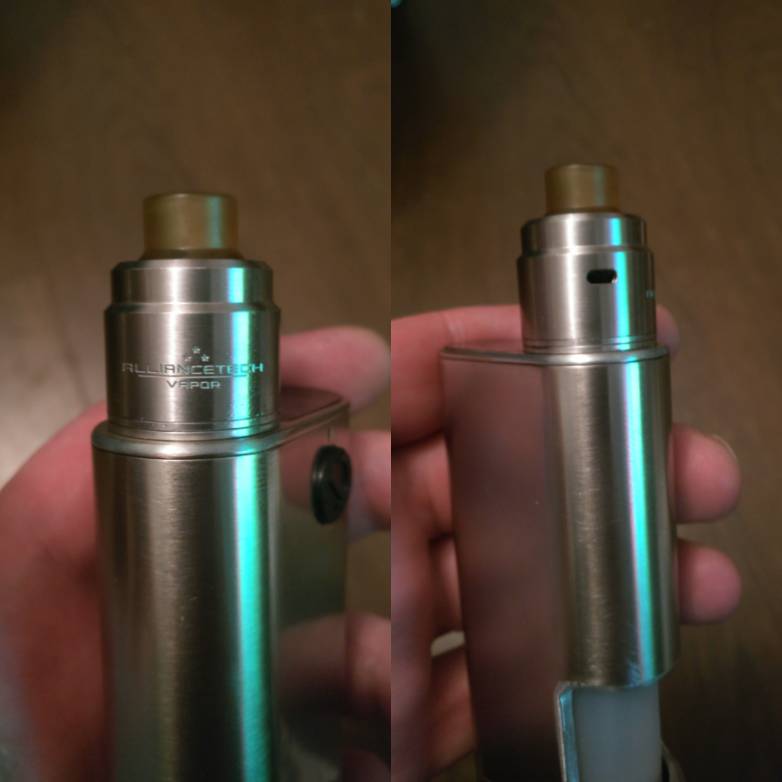
once done you can install your new mod maker Bf 510 onto the top plate , with a threaded 510 pin , needs to be threaded to allow the bf feed tube to screw onto it,
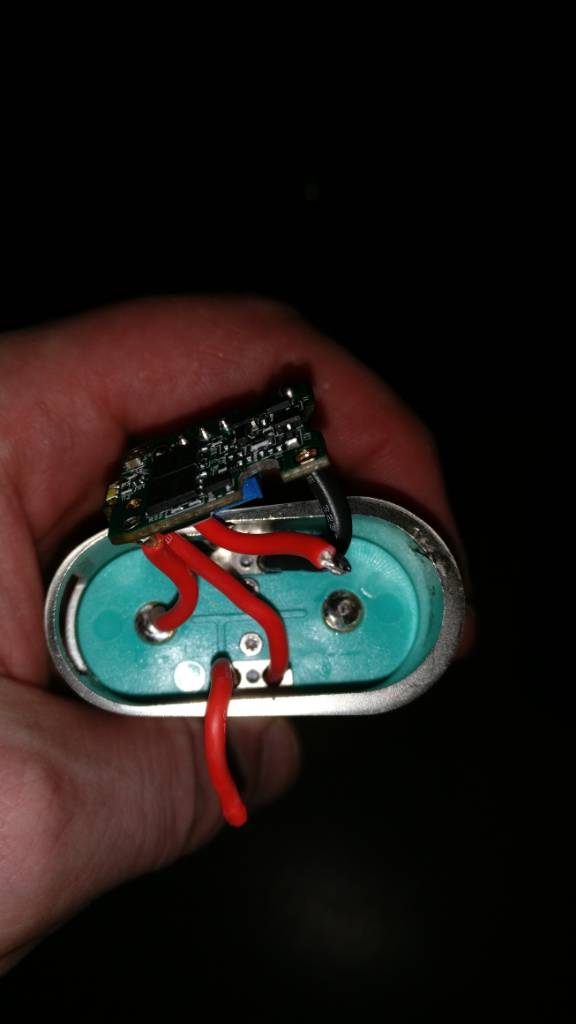
Remove the posstive wire that connected the postative battery contact ( green plastic )you removed earlier,
remove the wire right down to the base of the mod this has a spring and contact that touches the bottom plate for P an S, this is not needed , so remove that piece of wire,
After you have installed your 510 , you solder the 510 posstive ring to the posative wire that comes from pcb - contact and connect up the 510.
You can assemble mod again and check if it still works using PCB with bottom battery plate in P mode for single cell ( all good )
Or skip.
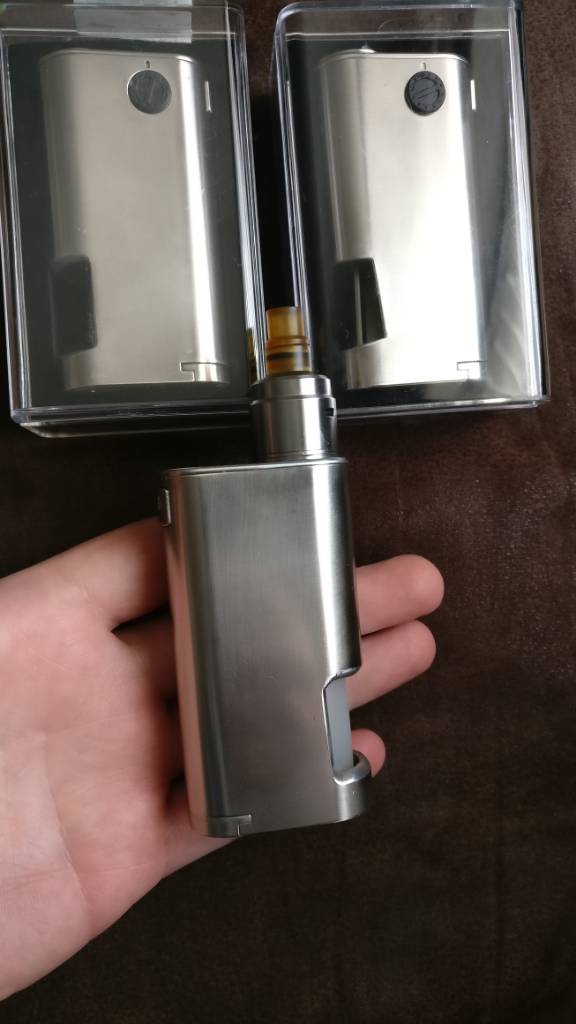
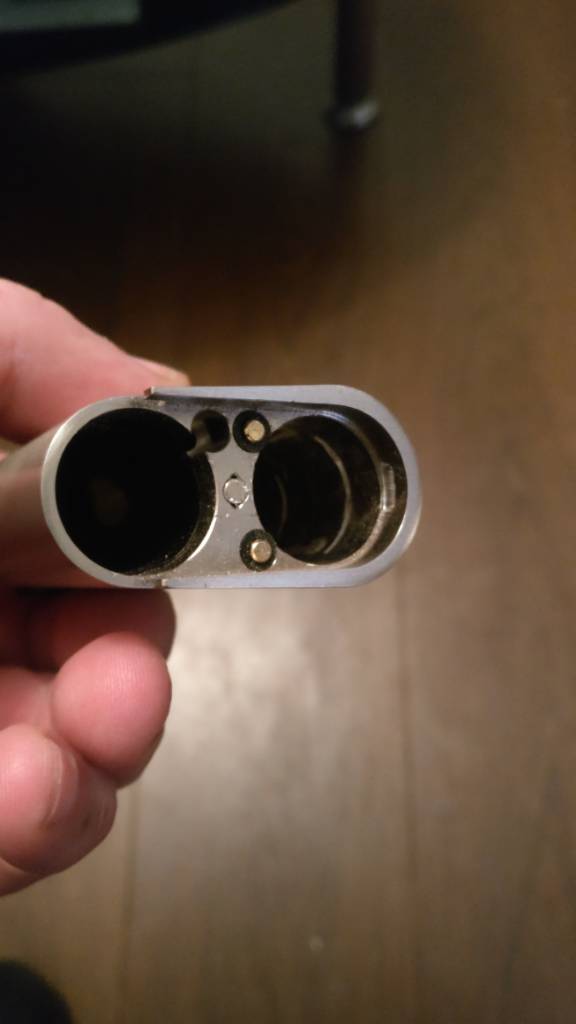
Then disassemble again. Once tested, to cut feed tube and sqounker hole , so these are best done whilst its all disassembled again.
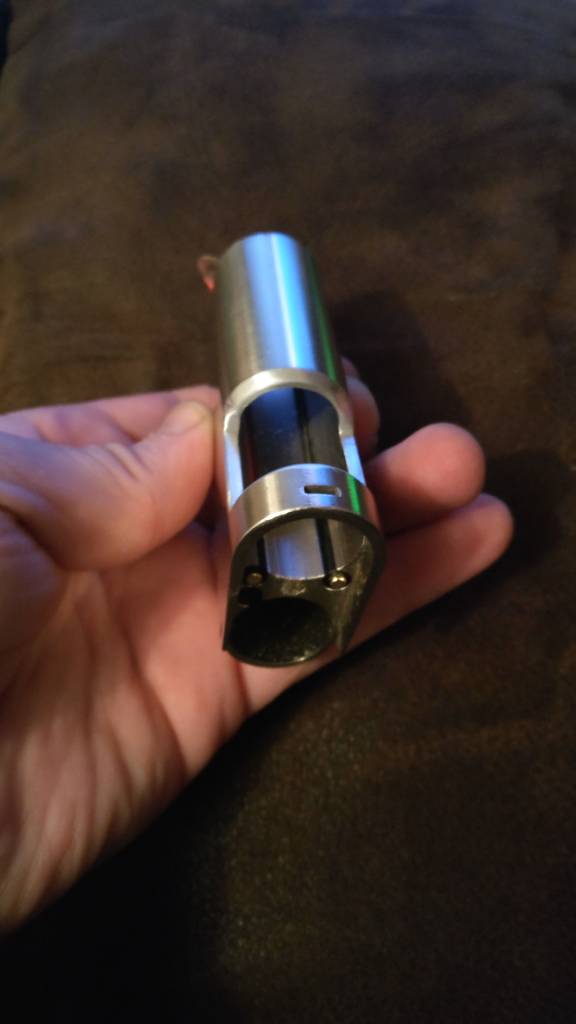
Using a mod maker metal 510 feed tube and the mod maker posative 510 pin , screw the tube onto the 510 , work out the length of tube needed then cut to required length ,
Remove the feed tube or can be damaged .
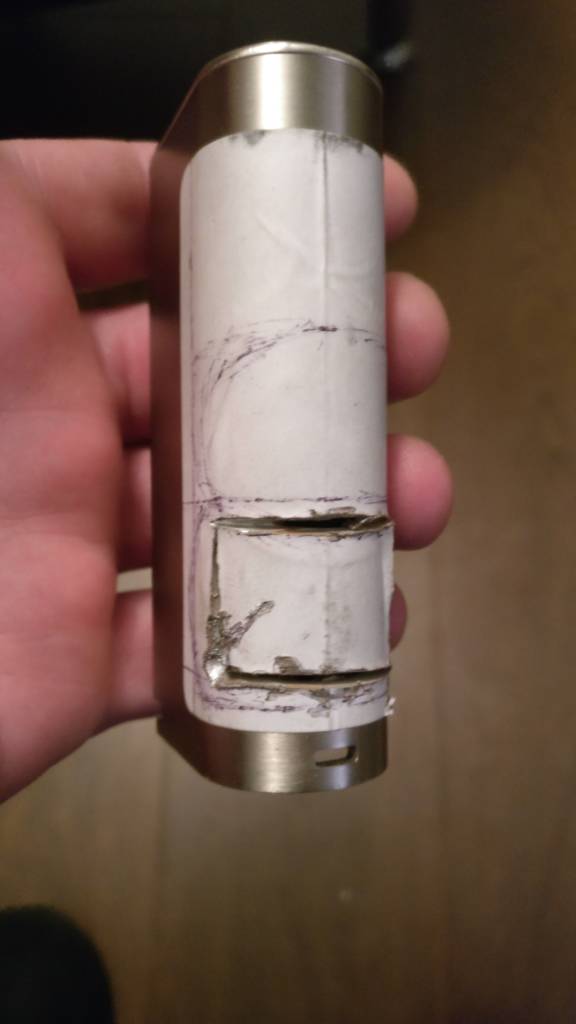
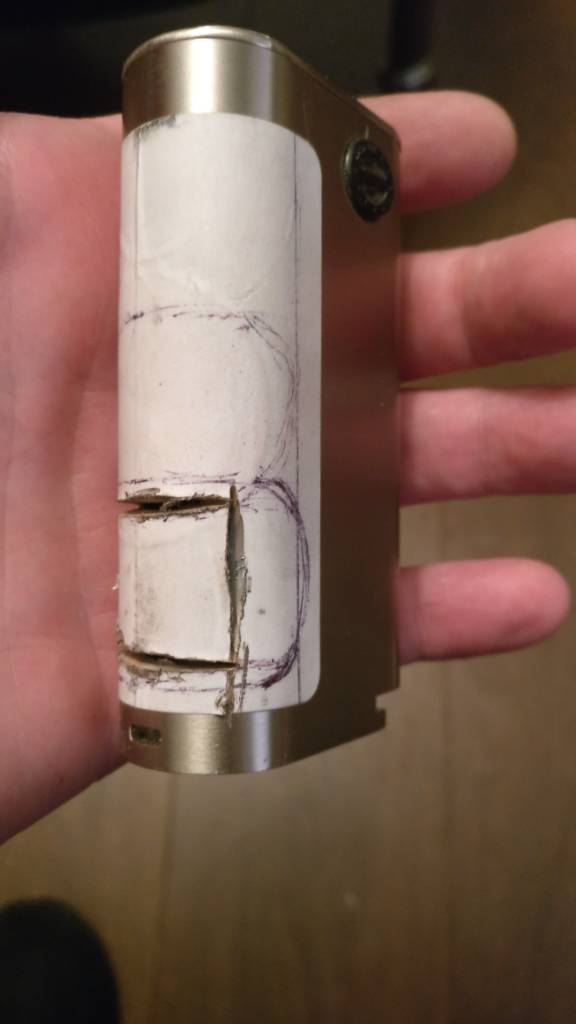
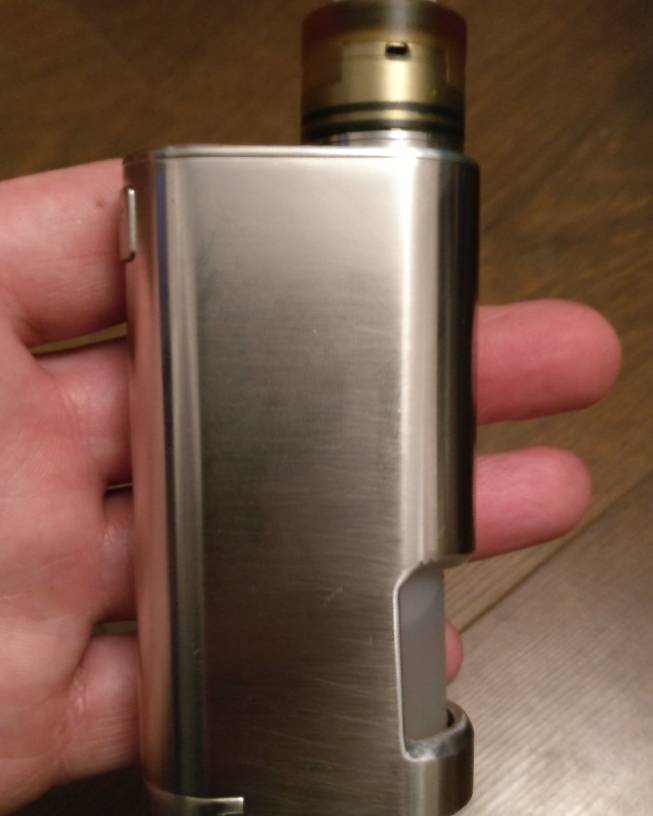
Now use tape or sticker / label an place over front of mod 510 side and mark out where you want your sqounker hole to be ,
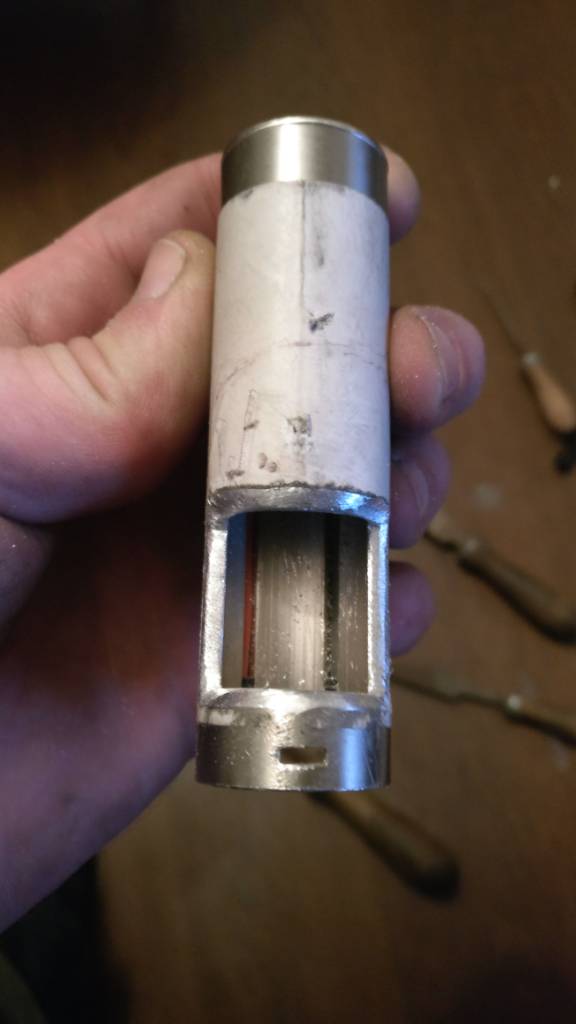
Using a dremel / rotary tool and cutying disks , cut a hole out of the front of the mod for Sqounking with , then just file + sand smooth to size shape you want ,
Clean mod and metal filings off mod and board ect ,
Re-attache your sqounker metal feed tube to 510 cut to length ,
Assemble the the pcb to the top plate and 510 , re- assemble the mod ,
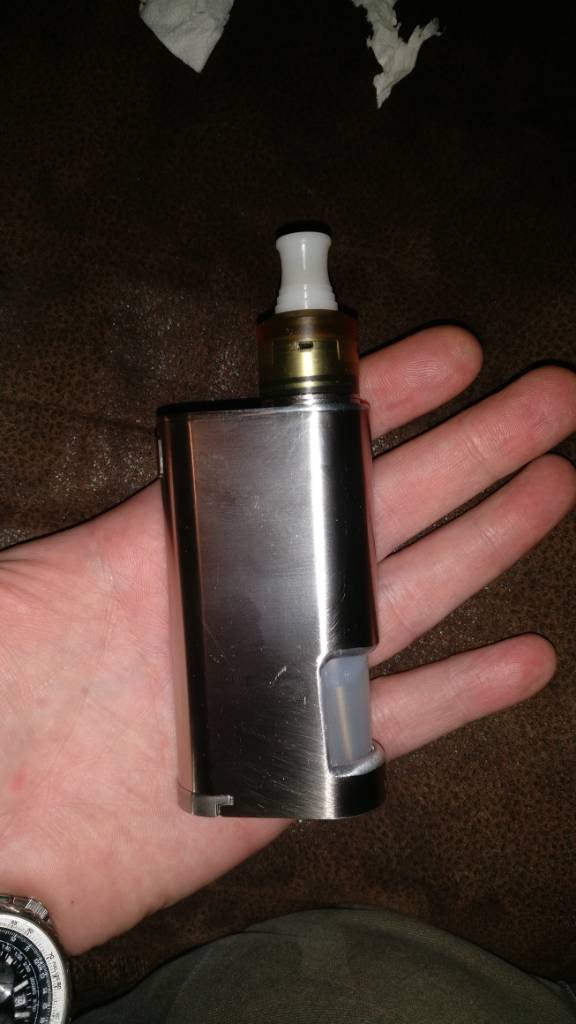
Using a mod maker Sqounker bottle with a cap wide enough to
Fit the feed tube , and a silicone washer inside bottle to seal tube and bottle cap , fill bottle attach to feed tube and slide into sqounker tube, insert battery an vape enjoy ,
Hope this helps anyone ,
You will still have a working On / Off , and low voltage protection . Same as in P mode on a Normal NC v2 in P mode, but will only be one cell being used.
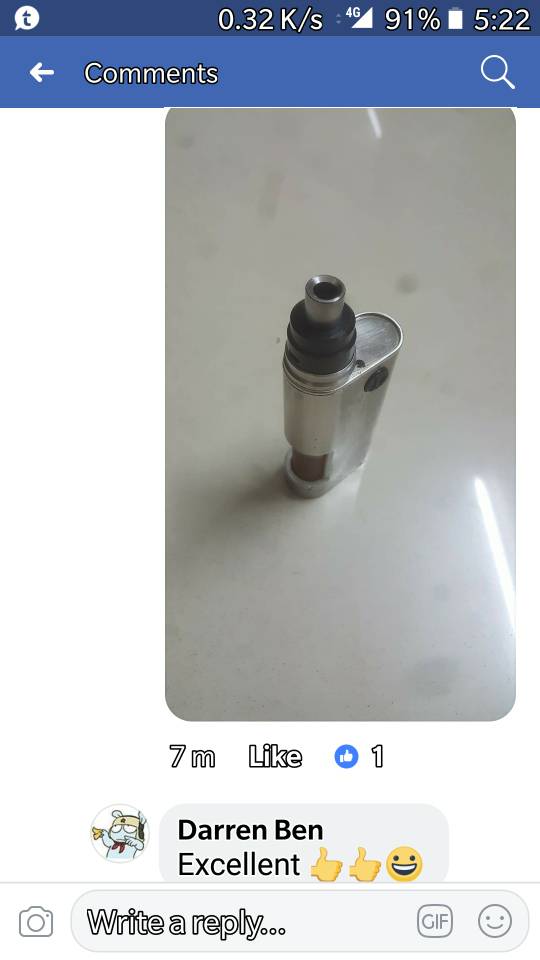
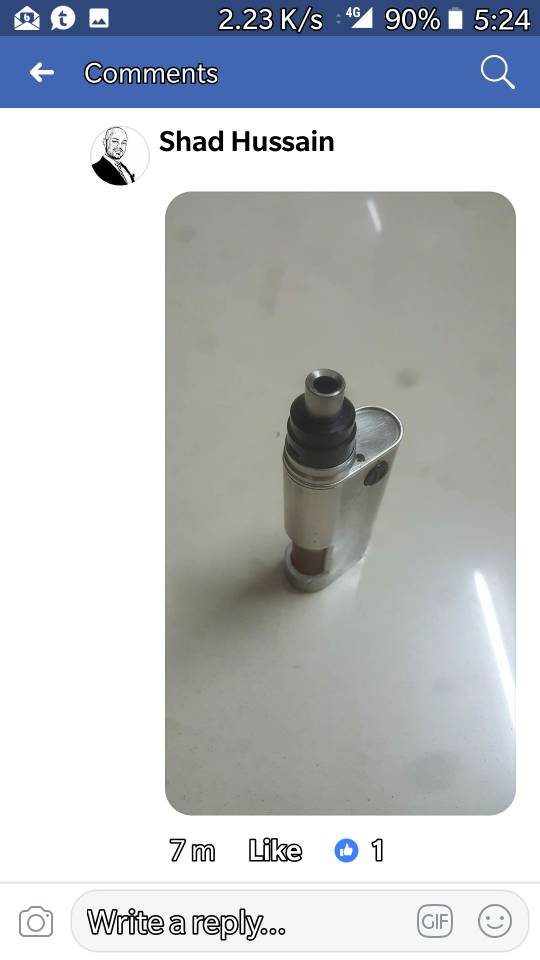
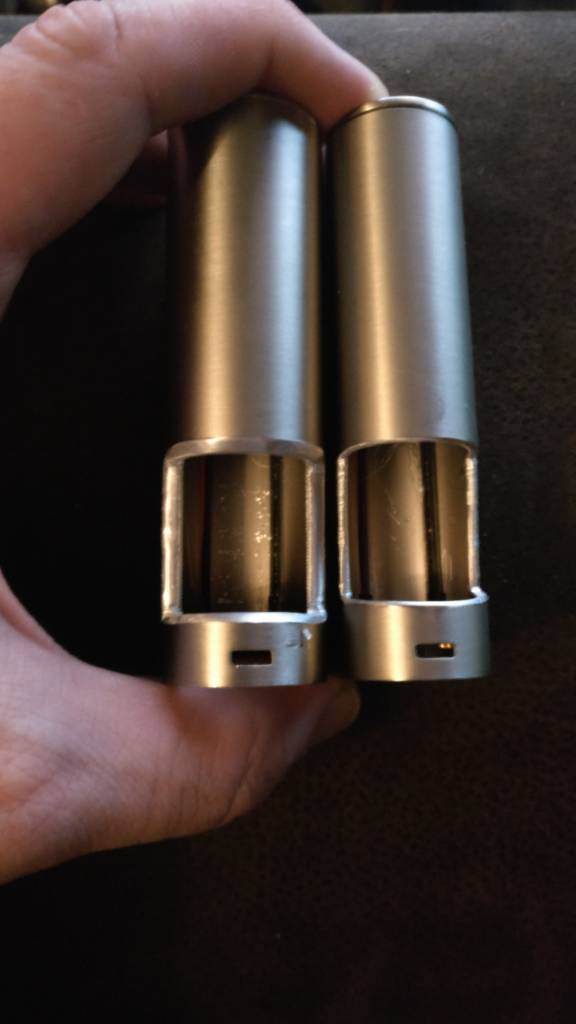
Feed tubes last pic,


Sent from my ONEPLUS A3003 using Tapatalk
Also be aware the sqounker tube is part of the 510 posative contact ,
So as a caution if using a metal cap on your sqounker bottle choose one smaller than outside of bottle diameter to be safe most are , but be aware,
An not to have it touching the inside of the mod. Can also cut to size your included battery sleeve inserts ,

Parts
Noisey Cricket V2
Mod maker bf 510 ,
Or one from Fasttech with the threaded contact nut to 510 pin (needs to be threaded for metal feed tube). 510 link below ... https://www.fasttech.com/p/8689000
Mod maker bf metal feed tube
Mid maker bottle that fits the feed tube
Silicone bottle washers
Soldering iron ( one joint to solder 2 to desolder)
Dremel cutting discs
Dremel,
Time an patience.
Take the blk tap off top plate off the top of the mod
to get to screws to allow dismantling of mod ,
Take top off mod , and side , potential meter off, allows you to lift pcb and top off,
Once inside , unscrew 2 screw to the board allows top plate to come off , and unsolder the postative 510 wire from the 510
Then the postative wire to battery contacts unsolder one of them,
Directly under the 510
its the one in pic now hanging over the side of the mod directly under where 510 sits ,
( this will be where bf 510 sits down into battery tube )
so the green plastic contact part will need removing too ,
The green plastic that is the top posative contacts for both cells. It has 2 screws in the center take them out,
and remove the green plastic,
You now cut the green plastic in half pictured to remove the part under 510 ,
leaving the 2 screw points on the green plastic
to still be to attach to mod
and the half that sits under PCB still intact ,
now screw it back in leaving one side open directly under the 510
Mods Top plate .
Remove the 510,
i found this to be a pain
so after I had unsoldered the 510 wire off the 510 i was able to work away from the mod and remove the 510 by splitting it apart with a screw driver , ( not easy but do able )
That allowed me to just have access to 510 an top plate to them remove 510 without damaging anything else
once done you can install your new mod maker Bf 510 onto the top plate , with a threaded 510 pin , needs to be threaded to allow the bf feed tube to screw onto it,
Remove the posstive wire that connected the postative battery contact ( green plastic )you removed earlier,
remove the wire right down to the base of the mod this has a spring and contact that touches the bottom plate for P an S, this is not needed , so remove that piece of wire,
After you have installed your 510 , you solder the 510 posstive ring to the posative wire that comes from pcb - contact and connect up the 510.
You can assemble mod again and check if it still works using PCB with bottom battery plate in P mode for single cell ( all good )
Or skip.
Then disassemble again. Once tested, to cut feed tube and sqounker hole , so these are best done whilst its all disassembled again.
Using a mod maker metal 510 feed tube and the mod maker posative 510 pin , screw the tube onto the 510 , work out the length of tube needed then cut to required length ,
Remove the feed tube or can be damaged .
Now use tape or sticker / label an place over front of mod 510 side and mark out where you want your sqounker hole to be ,
Using a dremel / rotary tool and cutying disks , cut a hole out of the front of the mod for Sqounking with , then just file + sand smooth to size shape you want ,
Clean mod and metal filings off mod and board ect ,
Re-attache your sqounker metal feed tube to 510 cut to length ,
Assemble the the pcb to the top plate and 510 , re- assemble the mod ,
Using a mod maker Sqounker bottle with a cap wide enough to
Fit the feed tube , and a silicone washer inside bottle to seal tube and bottle cap , fill bottle attach to feed tube and slide into sqounker tube, insert battery an vape enjoy ,
Hope this helps anyone ,
You will still have a working On / Off , and low voltage protection . Same as in P mode on a Normal NC v2 in P mode, but will only be one cell being used.
Feed tubes last pic,
Sent from my ONEPLUS A3003 using Tapatalk
Also be aware the sqounker tube is part of the 510 posative contact ,
So as a caution if using a metal cap on your sqounker bottle choose one smaller than outside of bottle diameter to be safe most are , but be aware,
An not to have it touching the inside of the mod. Can also cut to size your included battery sleeve inserts ,
Last edited: