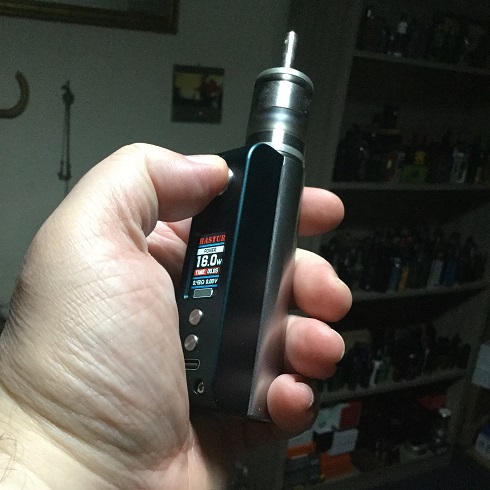
Hi Vaping Underground members, In this review i take a look at the Artemis MTL RTA from Cthulhu Mod. The Artemis MTL RTA was supplied for the purpose of this review by Joshua from Cthulhu Mod.
https://www.cthulhumod.com/artemis-mtl-rta/
Introduction
Cthulhu Mod was the first manufacturer i came across that bridged that gap with some of their early RDA's and RTA's between mainstream and High End while keeping prices reasonable, of course now Thunderhead Creations and BP Mods are very similar with both Dovpo and Aspire with their Manufacture collaborations also upping their game in this regard!
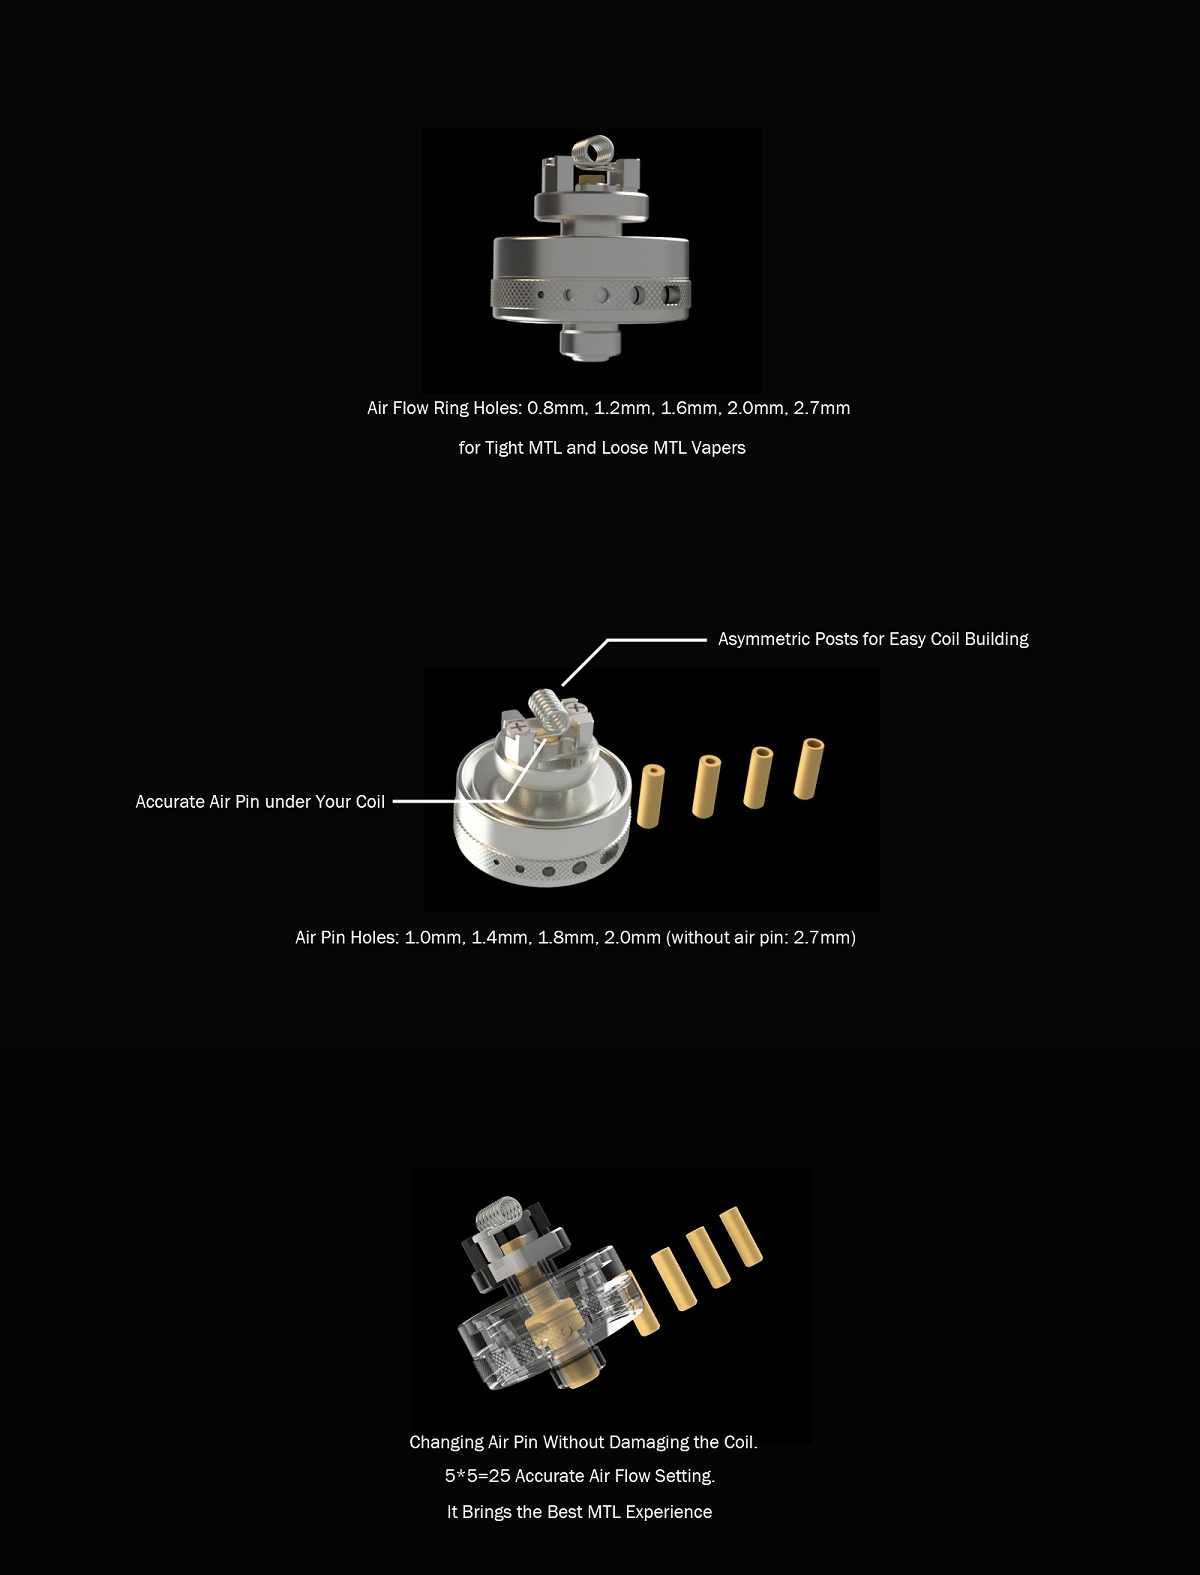
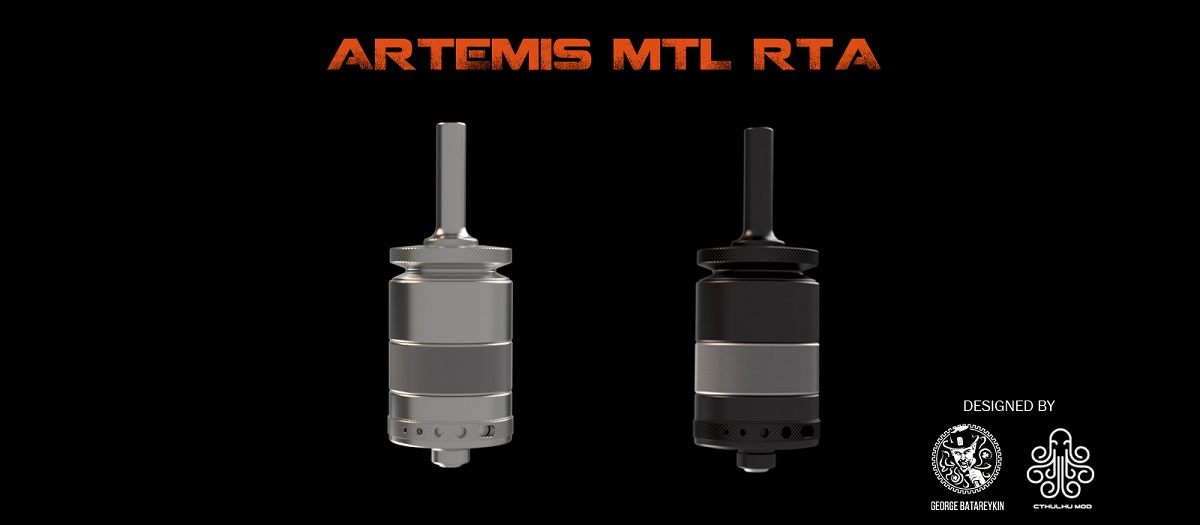
Cthulhu Mod despite recently releasing a couple of Mods are rebuildable specialists and here we have their latest MTL RTA The Artemis. With a unique look and clever way of inserting airflow pins which allows swapping out while not disturbing your build this has a very interesting design. With adjustable AFC also having 5 settings and 4 different bore size airflow pins plus the option of no airflow pin gives 25 different airflow settings ranging from tight MTL to loose MTL, and even sketchy RDL. Also coming with alternative matching smoked tube and 510 drip tip and packaged in a useful deep tin with screw lid let's check out The Artemis MTL RTA from Cthulhu Mod!
___________________________________________________________________
In The Box
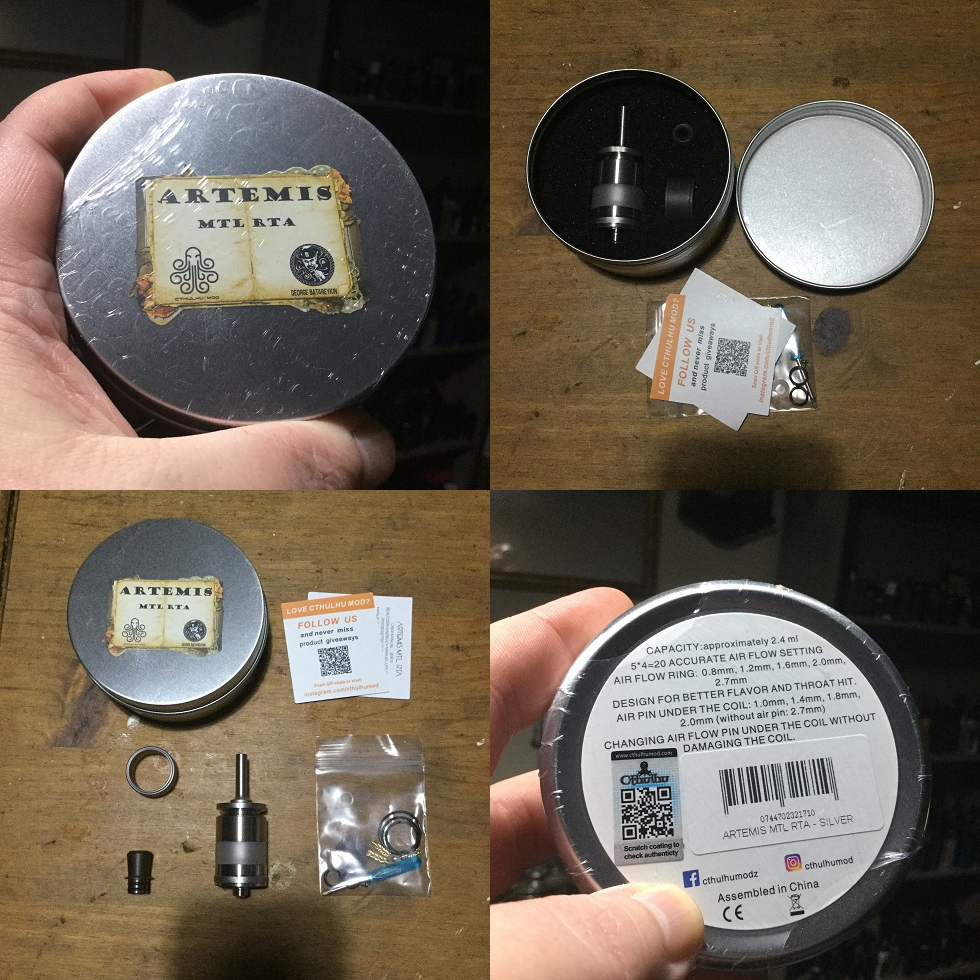
Contents:
Artemis MTL RTA
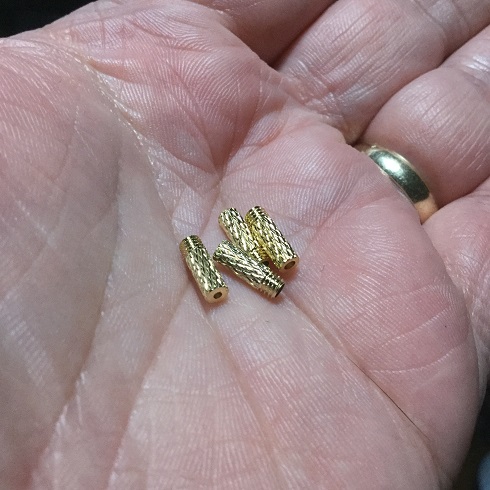
1.0mm, 1.4mm, 1.8mm, 2.0mm air pins
Alternative 510 smoked drip tip
Alternative Smoked Poly Carbonate tube section
Spare O-rings & Post screws
Legendary Blue handled Screwdriver
Manual
___________________________________________________________________
Aesthetics
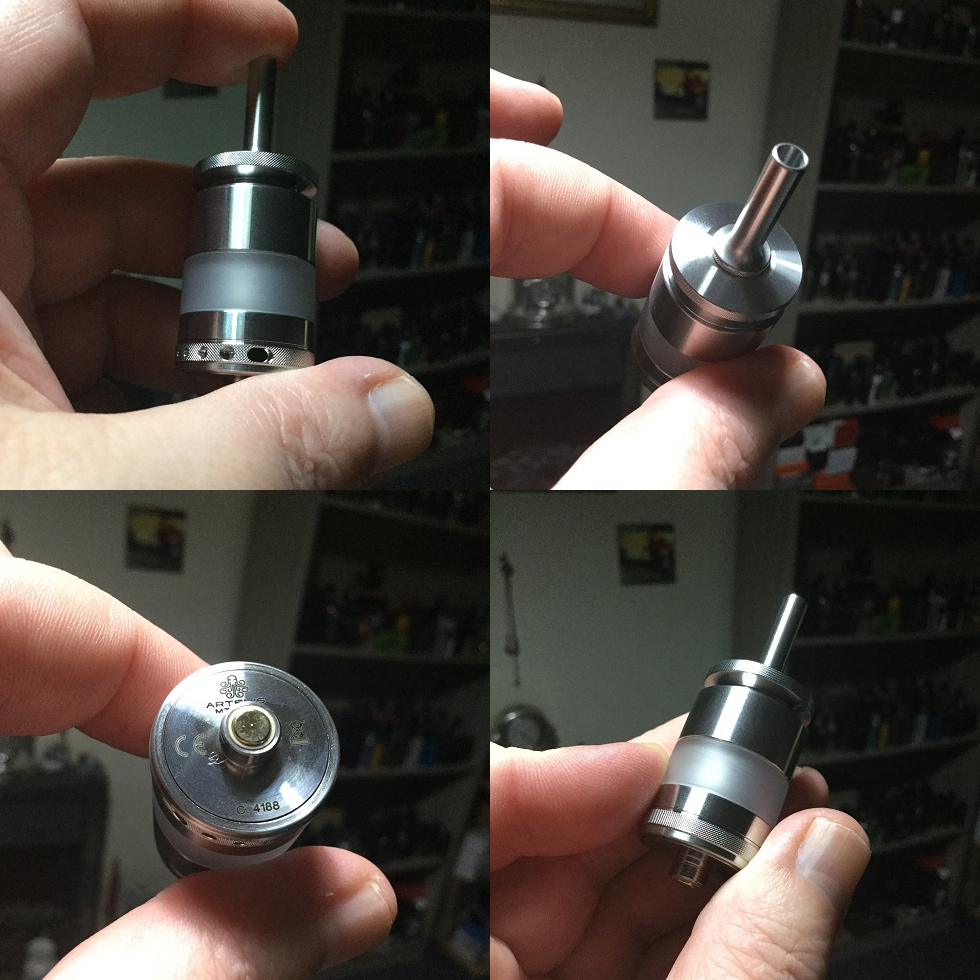
I have always liked how Cthulhu Mod package their products, at one time they use to come in flip lid boxes with cushioned lining and a hemp like material on the outside with a nice badge and cord with tassel to finish it off! Nowadays we have more toned down packaging as they instead come in useful deep tins. Here we have a deep round tin with screw lid and on opening my eyes met a high end looking RTA, spare smoked tube and spare smoked drip tip in their own compartments within the foam inner lining! I received the Stainless Silver version which comes with a Stainless Steel very long narrow bore MTL 510 drip tip and frosted Poly carbonate tube, the option is Stainless Steel or Black.
Up top we have the top-cap which goes inwards before protruding out again, when removing you will see the actual practical top-cap ends with an O-ring seal and then we get that protruding extension almost giving it a double top-cap look, a very unique aesthetic look which gets added to further with that pre-installed long narrow drip tip!
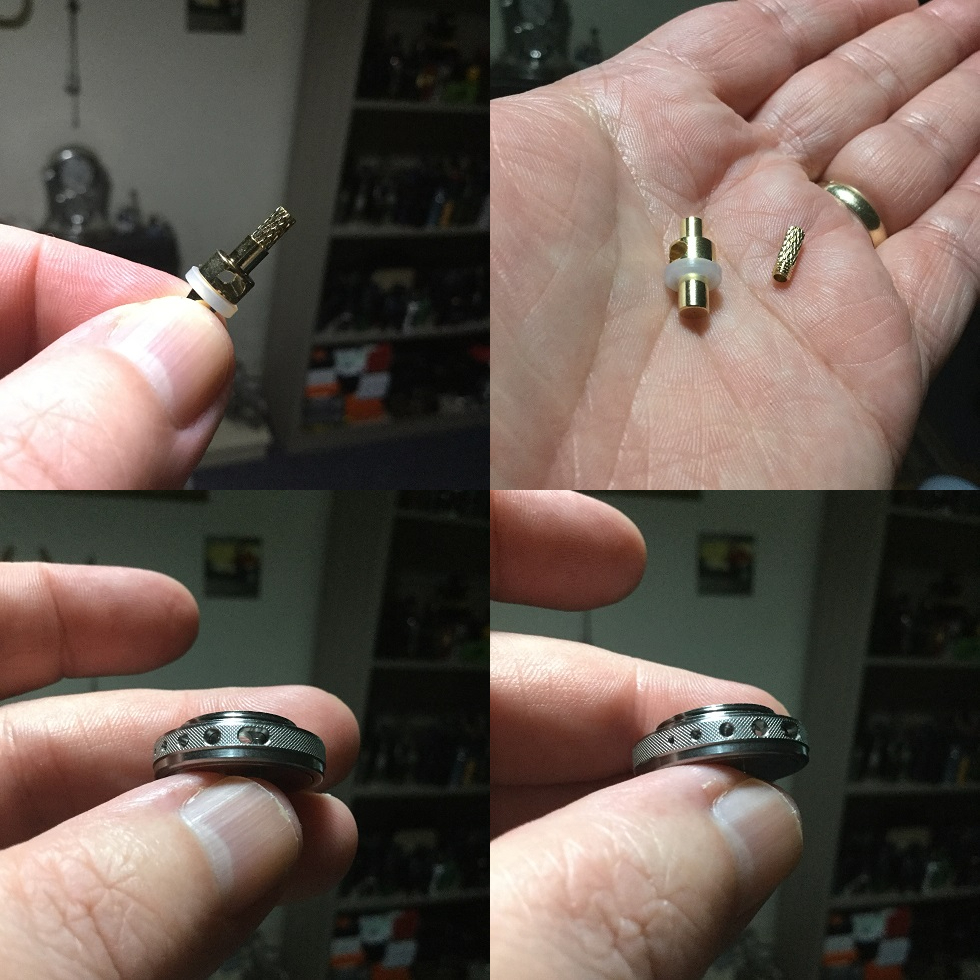
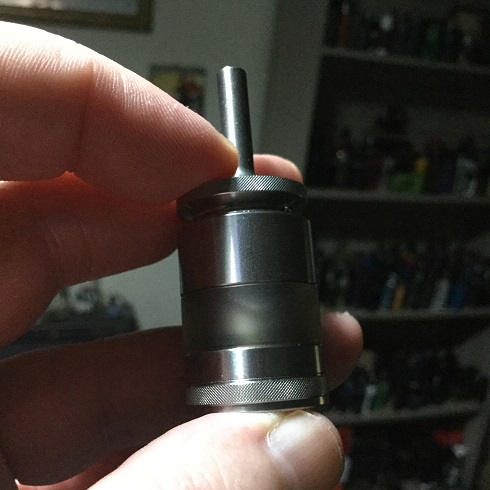
We then have an upper Stainless Steel sleeve followed by narrow frosted tube. Below the tube we have a further Stainless Steel section followed by an airflow control ring with aggressive fine knurling.
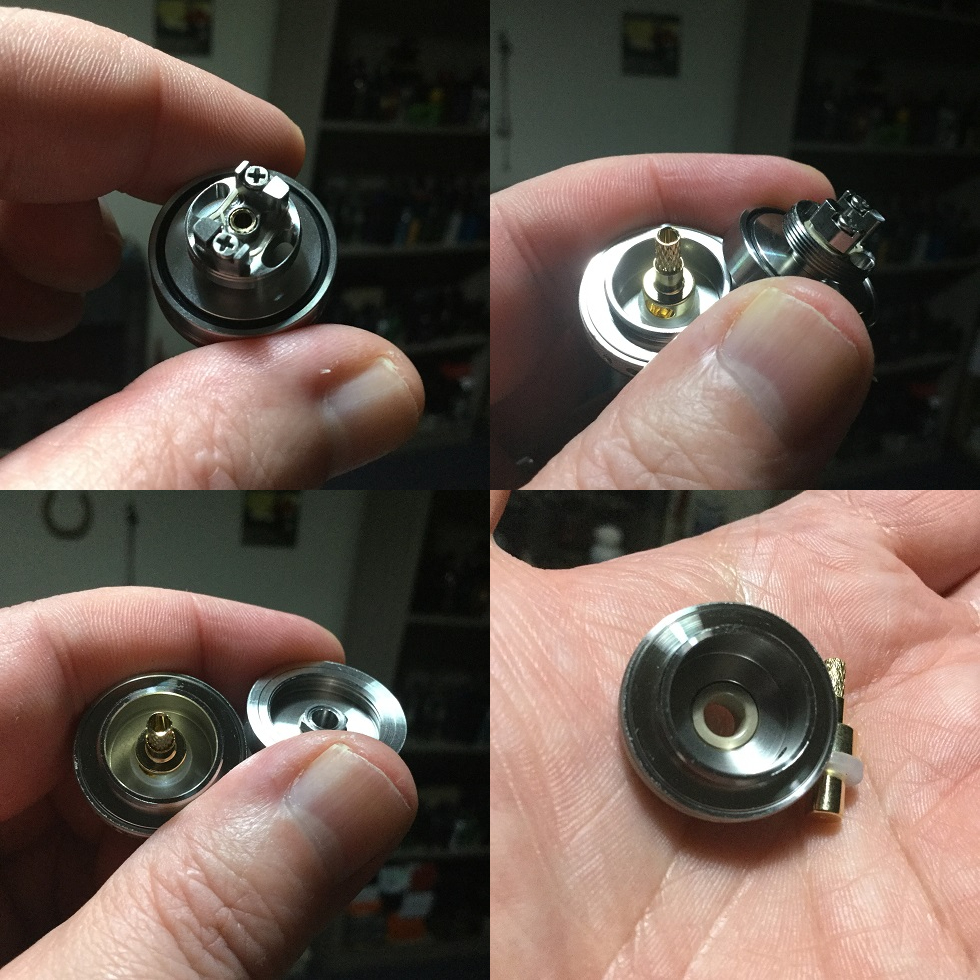
Moving to the underside of the base we have the usual etched safety marks and branding then although the 510 pin can be removed when the base is separated from the deck when the tank is screwed together it's fixed so can't be adjusted, it's gold plated and protrudes slightly!
The Artemis has a SS304 construction, all threading and tolerances are spot on! The build quality and looks are much more in common with my high end rebuildable atomizers than most of my mainstream rebuildables but it comes at a very affordable price!
___________________________________________________________________
Artemis MTL RTA Specs and Features:
Diameter: 22 mm / 0.86 in
Height: 35 mm / 1.37 in (without drip tip)
Weight: 53g
High Quality 304 Stainless Steel Machining
Poly Carbonate tank tube
Air Flow Ring: 0.8mm, 1.2mm, 1.6mm, 2.0mm, 2.7mm
Air Pin under Coil: 1.0mm, 1.4mm, 1.8mm, 2.0mm (without air pin: 2.7)
Capacity: 2.4 ml
5*5=25 accurate air flow setting.
Changing Air Flow Pin under Coil without Damaging the Coil
Design for Tight MTL and Loose MTL Vapers
Asymmetric Posts for Easy Coil Building
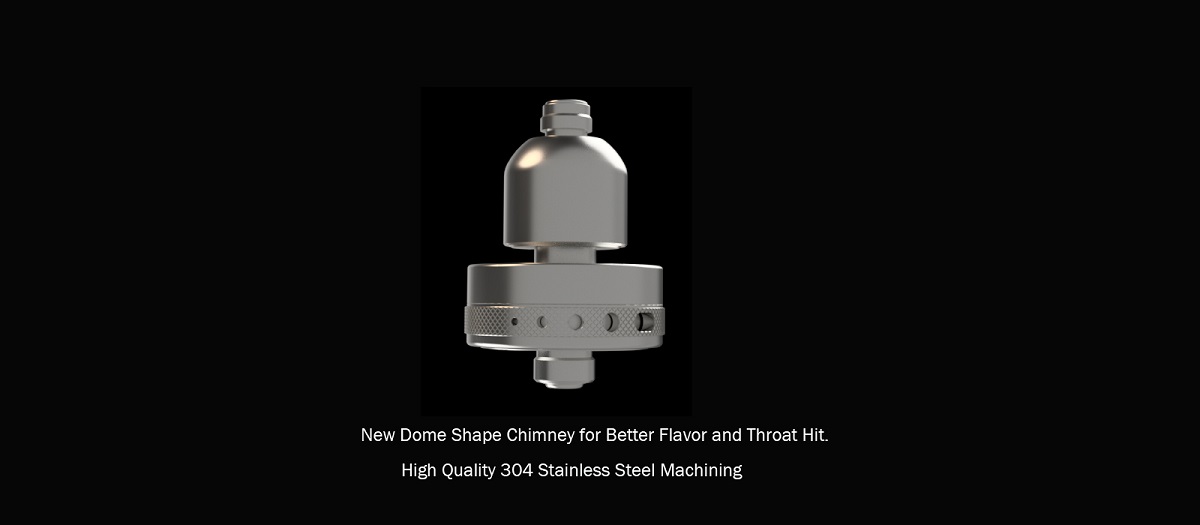
New Dome Shape Chimney for Better Flavour and Throat Hit
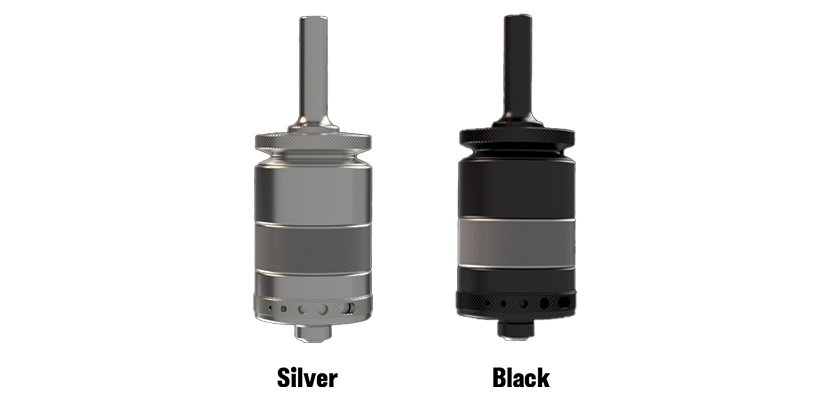
Colours: Stainless Silver, Black
___________________________________________________________________
What You Receive?
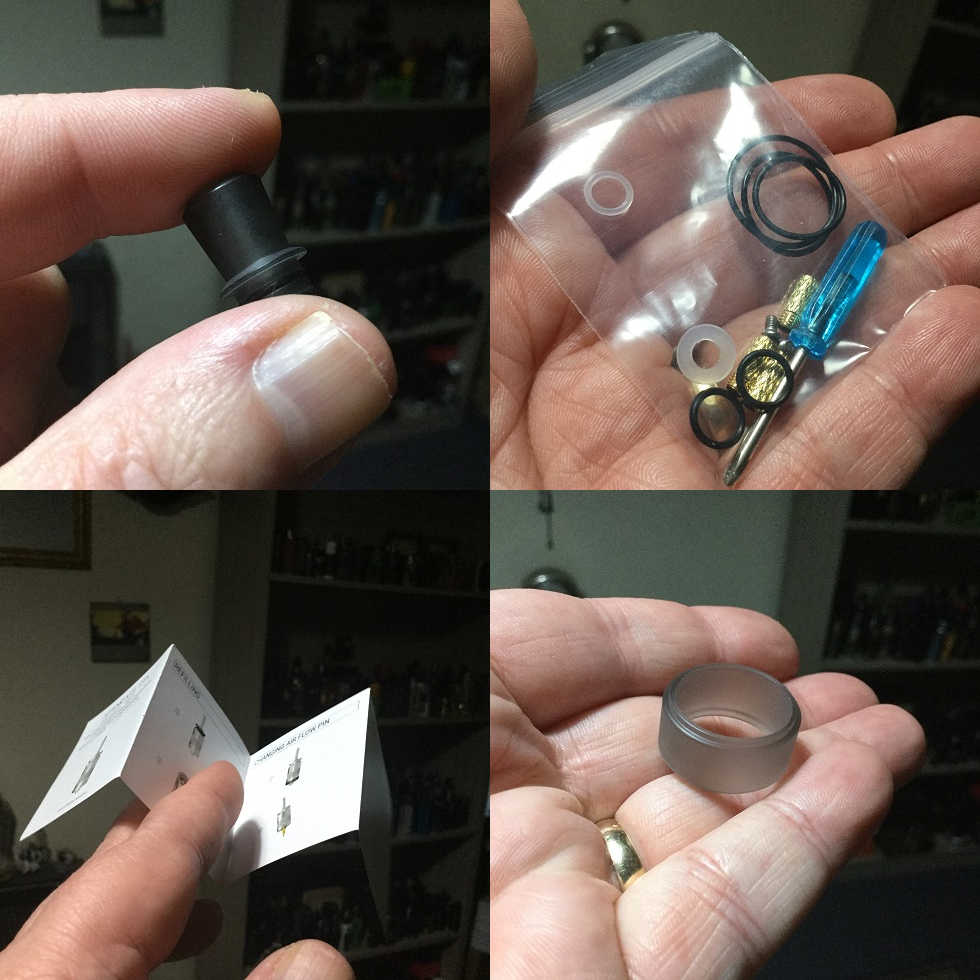
You receive the 22mm in diameter Artemis RTA with pre-installed Stainless Steel long narrow 510 drip tip, narrow frosted Poly Carbonate tube section and one of the airflow pins also fixed in position.
You also get a smoked lower profile 510 alternative drip tip, matching smoked Poly Carbonate tube, 3 more airflow pins with different internal bores, Spare post screws, O-rings and of course both paperwork and the famous Blue Philips screwdriver!
___________________________________________________________________
It's Various Parts
The Artemiis consists of a 510 fitting drip tip followed by a unique looking top-cap. We then have a one piece 304 Stainless Steel section that consists of the upper sleeve, fill ports, air pipe and chamber which has really nice machined inner doming!
We then have the frosted tube section followed by base section which consists of the GTA style deck section and removable base with airflow control ring! The base section unscrews from the deck to allow the airflow pins to be swapped out but this will be covered in another section. With the top-cap removed we have 3 thin spokes and then large fill ports between, very similar to the Mercedes Benz badge so nearly entirely filling area which i like because it means any nozzle or glass dropper will be suitable.
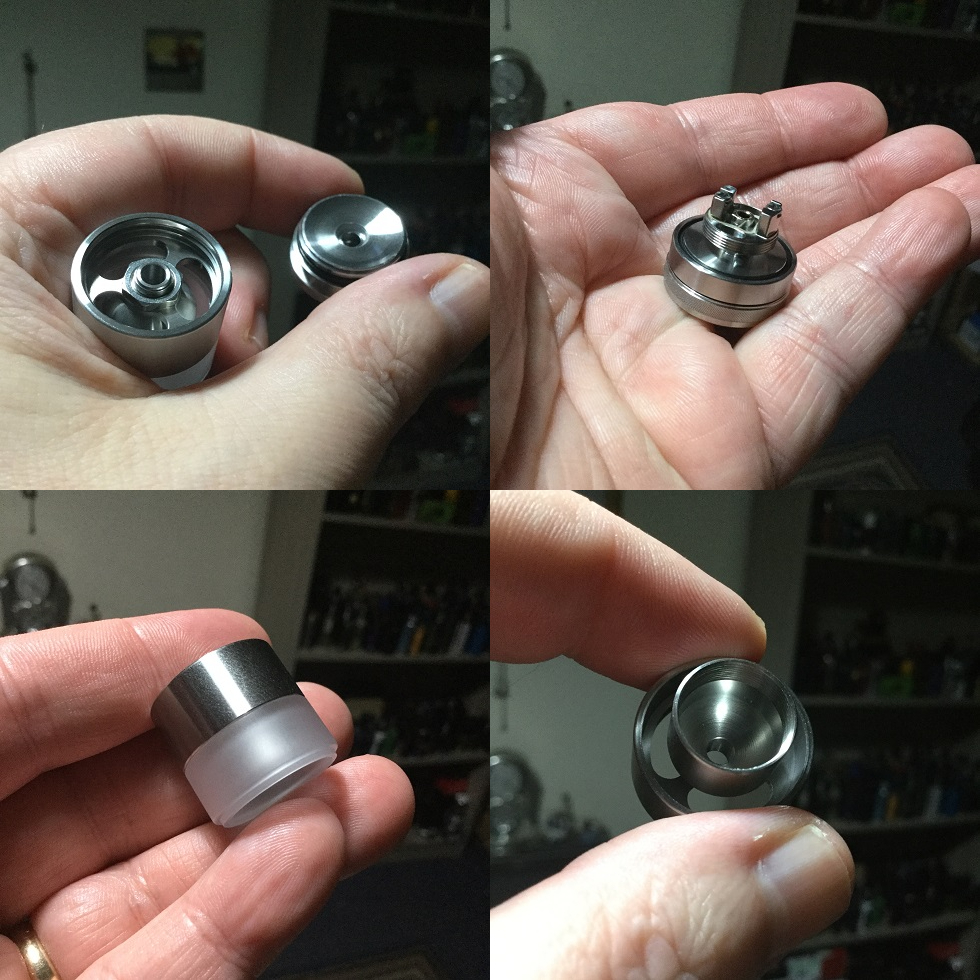
The top-cap both simultaneously screws to the inner of the outer sleeve section and central air pipe before the seal completes with a thick O-ring. Going back to the Poly Carbonate tube which can be removed by simply putting a finger or thumb in the chamber and then using another finger or thumb on the outside of the tube just pinch and out it pops, putting back in place whether it be the frosted or alternative smoked tube is just the case of press fitting into place.
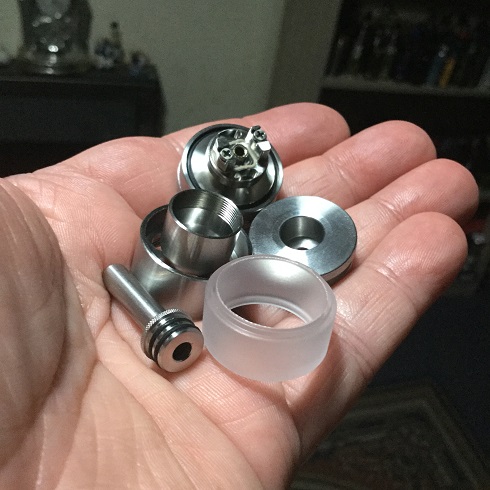
I like the way the tube just gets precision fitted into place both to the upper sleeve and base sections as it doesn't rely on either threading and/or O-rings for it's seal so no need to worry about an O-ring wearing, snapping or moving out of perfect position and no worries about threading between metal and Poly Carbonate which can be dodgy!
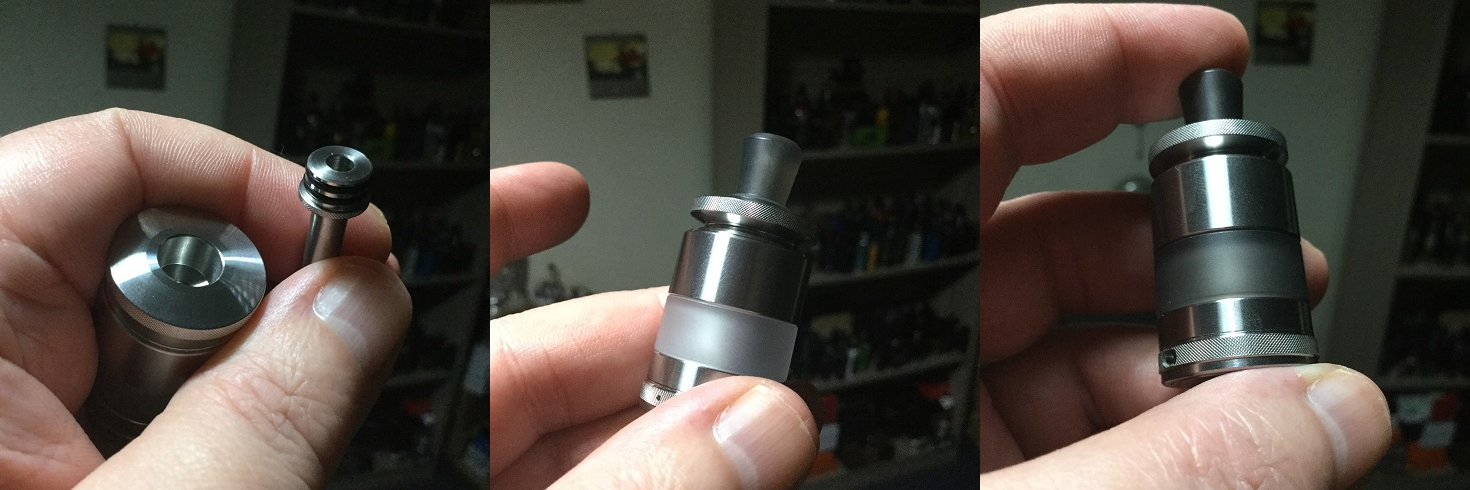
As well as the long narrow Stainless Steel drip tip and frosted tube you can fit the alternative drip tip and/or smoked tube or with it being a 510 standard drip tip fitting use another drip tip if you prefer!
___________________________________________________________________
Review Continued Below:
https://www.cthulhumod.com/artemis-mtl-rta/

Introduction
Cthulhu Mod was the first manufacturer i came across that bridged that gap with some of their early RDA's and RTA's between mainstream and High End while keeping prices reasonable, of course now Thunderhead Creations and BP Mods are very similar with both Dovpo and Aspire with their Manufacture collaborations also upping their game in this regard!
Cthulhu Mod despite recently releasing a couple of Mods are rebuildable specialists and here we have their latest MTL RTA The Artemis. With a unique look and clever way of inserting airflow pins which allows swapping out while not disturbing your build this has a very interesting design. With adjustable AFC also having 5 settings and 4 different bore size airflow pins plus the option of no airflow pin gives 25 different airflow settings ranging from tight MTL to loose MTL, and even sketchy RDL. Also coming with alternative matching smoked tube and 510 drip tip and packaged in a useful deep tin with screw lid let's check out The Artemis MTL RTA from Cthulhu Mod!
___________________________________________________________________
In The Box

Contents:
Artemis MTL RTA
1.0mm, 1.4mm, 1.8mm, 2.0mm air pins
Alternative 510 smoked drip tip
Alternative Smoked Poly Carbonate tube section
Spare O-rings & Post screws
Legendary Blue handled Screwdriver
Manual
___________________________________________________________________
Aesthetics
I have always liked how Cthulhu Mod package their products, at one time they use to come in flip lid boxes with cushioned lining and a hemp like material on the outside with a nice badge and cord with tassel to finish it off! Nowadays we have more toned down packaging as they instead come in useful deep tins. Here we have a deep round tin with screw lid and on opening my eyes met a high end looking RTA, spare smoked tube and spare smoked drip tip in their own compartments within the foam inner lining! I received the Stainless Silver version which comes with a Stainless Steel very long narrow bore MTL 510 drip tip and frosted Poly carbonate tube, the option is Stainless Steel or Black.
Up top we have the top-cap which goes inwards before protruding out again, when removing you will see the actual practical top-cap ends with an O-ring seal and then we get that protruding extension almost giving it a double top-cap look, a very unique aesthetic look which gets added to further with that pre-installed long narrow drip tip!
We then have an upper Stainless Steel sleeve followed by narrow frosted tube. Below the tube we have a further Stainless Steel section followed by an airflow control ring with aggressive fine knurling.
Moving to the underside of the base we have the usual etched safety marks and branding then although the 510 pin can be removed when the base is separated from the deck when the tank is screwed together it's fixed so can't be adjusted, it's gold plated and protrudes slightly!
The Artemis has a SS304 construction, all threading and tolerances are spot on! The build quality and looks are much more in common with my high end rebuildable atomizers than most of my mainstream rebuildables but it comes at a very affordable price!

___________________________________________________________________
Artemis MTL RTA Specs and Features:
Diameter: 22 mm / 0.86 in
Height: 35 mm / 1.37 in (without drip tip)
Weight: 53g
High Quality 304 Stainless Steel Machining
Poly Carbonate tank tube
Air Flow Ring: 0.8mm, 1.2mm, 1.6mm, 2.0mm, 2.7mm
Air Pin under Coil: 1.0mm, 1.4mm, 1.8mm, 2.0mm (without air pin: 2.7)
Capacity: 2.4 ml
5*5=25 accurate air flow setting.
Changing Air Flow Pin under Coil without Damaging the Coil
Design for Tight MTL and Loose MTL Vapers
Asymmetric Posts for Easy Coil Building
New Dome Shape Chimney for Better Flavour and Throat Hit
Colours: Stainless Silver, Black

___________________________________________________________________
What You Receive?
You receive the 22mm in diameter Artemis RTA with pre-installed Stainless Steel long narrow 510 drip tip, narrow frosted Poly Carbonate tube section and one of the airflow pins also fixed in position.
You also get a smoked lower profile 510 alternative drip tip, matching smoked Poly Carbonate tube, 3 more airflow pins with different internal bores, Spare post screws, O-rings and of course both paperwork and the famous Blue Philips screwdriver!

___________________________________________________________________
It's Various Parts
The Artemiis consists of a 510 fitting drip tip followed by a unique looking top-cap. We then have a one piece 304 Stainless Steel section that consists of the upper sleeve, fill ports, air pipe and chamber which has really nice machined inner doming!

We then have the frosted tube section followed by base section which consists of the GTA style deck section and removable base with airflow control ring! The base section unscrews from the deck to allow the airflow pins to be swapped out but this will be covered in another section. With the top-cap removed we have 3 thin spokes and then large fill ports between, very similar to the Mercedes Benz badge so nearly entirely filling area which i like because it means any nozzle or glass dropper will be suitable.

The top-cap both simultaneously screws to the inner of the outer sleeve section and central air pipe before the seal completes with a thick O-ring. Going back to the Poly Carbonate tube which can be removed by simply putting a finger or thumb in the chamber and then using another finger or thumb on the outside of the tube just pinch and out it pops, putting back in place whether it be the frosted or alternative smoked tube is just the case of press fitting into place.

I like the way the tube just gets precision fitted into place both to the upper sleeve and base sections as it doesn't rely on either threading and/or O-rings for it's seal so no need to worry about an O-ring wearing, snapping or moving out of perfect position and no worries about threading between metal and Poly Carbonate which can be dodgy!
As well as the long narrow Stainless Steel drip tip and frosted tube you can fit the alternative drip tip and/or smoked tube or with it being a 510 standard drip tip fitting use another drip tip if you prefer!

___________________________________________________________________
Review Continued Below:

