Learning to rebuild these will need to be a group effort. I had one to play with... but destroyed it in the process of figuring out how to get it apart.
Related comments are below each pic.

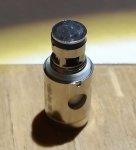
Pic 1: The whole atty
I didn't get the coil out successfully when removing the firing pin and grommet. Some of the coil came out with it and unraveled.
As far as I could reconstruct, the inside diameter (ID) is 4mm with 8 wraps. The wire is .36mm which puts it at 27 gauge. Approx 14.5mm of wire. Obviously, the ID and wraps are subject to change.
I've heard two YouTube reviewers give different descriptions of the wire in these things. Once said stainless steel. The other said stainless-coated nickel. Both apparently got this info from Kanger. I contacted Kanger over a month ago, and have not heard back. Because... Kanger.
1. Locate the ends of the wires. At the top of the photo is the firing pin and grommet. Look just under the grommet, at the far left side. There's a notch. That's where one of wires sits. There's another on the other side. When you pull these two pieces out, keep your fingernails away from the wires.
2. Get your nails under the firing pin ONLY and pull slowly. Wiggle a bit if necessary.
3. Gently work out the grommet. Yeah, it's a pain.

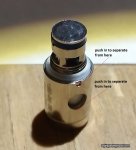
PIC 2: My stupidity is showing
This is the clean atty, without the firing pin, the grommet and the coil/cotton. I can't show you a photo of the coil/cotton, because I threw away the unraveled parts a few weeks ago. Because I'm an idiot.
People will look at this and think it's one piece. It's actually two. The telling sign is just to the left of that silicone O ring. See that notch? Bingo.
4. Keep the coil/cotton in place.
5. Remove the O ring if you want, but you can leave it in place as well.
For the next pic, you'll need to know what the "top" and "bottom" are. The "top" of the atty is the "sleeve"... the hollow piece that allows you to look inside when it's assembled. The "bottom" is where the firing pin and grommet were, and where the O ring sits in the photo.

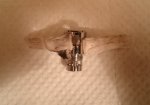
Pic 3: Why I hate disposable attys
I tried twisting the sleeve and bottom apart. The bottom broke into pieces. This is because pressure holding the two pieces together is stronger than the metal. Anyone who has rebuilt older versions of Kanger attys knows what I'm talking about.
6. Get something that will grip the top part of the sleeve. That strange contraption in the photo is a fencing pliers, which is 100% perfect for removing sleeves from Kanger attys. Or just use any stupid grabby thing.
7. TAP the bottom out. You do this by getting a micro screwdriver (I used a 3mm version) and putting it down inside the atty, making sure it touches the side/edge. Now get a rubber mallet and gently tap the screwdriver, forcing the bottom piece out of the sleeve.
The photo shows the sleeve and (broken) bottom piece almost completely separated. You will wish you had three hands for this. I held the fencing pliers with my feet.

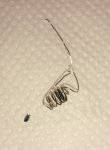
Pic 4: Everything but the firing pin and grommet
The two pieces on the left are destroyed pieces of the bottom that snapped off. The piece on the right is the sleeve.
The glorious piece in the middle is what you're going to rebuild on. With the sleeve off, you should be able to stick a vertical coil in there.
8. Start figuring out how to rebuild these things.
What I need from extremely helpful people
--Pics of the coil and the cotton bacon surrounding it, hopefully intact.
--An idea of where they sat in that middle piece. If you can tap out of the sleeve with the coil/cotton still sitting perfectly, all the better.
--Any clue of what wicking might be inside the coil, not just the bacon surrounding it.
Thanks.
Related comments are below each pic.

Pic 1: The whole atty
I didn't get the coil out successfully when removing the firing pin and grommet. Some of the coil came out with it and unraveled.
As far as I could reconstruct, the inside diameter (ID) is 4mm with 8 wraps. The wire is .36mm which puts it at 27 gauge. Approx 14.5mm of wire. Obviously, the ID and wraps are subject to change.
I've heard two YouTube reviewers give different descriptions of the wire in these things. Once said stainless steel. The other said stainless-coated nickel. Both apparently got this info from Kanger. I contacted Kanger over a month ago, and have not heard back. Because... Kanger.
1. Locate the ends of the wires. At the top of the photo is the firing pin and grommet. Look just under the grommet, at the far left side. There's a notch. That's where one of wires sits. There's another on the other side. When you pull these two pieces out, keep your fingernails away from the wires.
2. Get your nails under the firing pin ONLY and pull slowly. Wiggle a bit if necessary.
3. Gently work out the grommet. Yeah, it's a pain.

PIC 2: My stupidity is showing
This is the clean atty, without the firing pin, the grommet and the coil/cotton. I can't show you a photo of the coil/cotton, because I threw away the unraveled parts a few weeks ago. Because I'm an idiot.
People will look at this and think it's one piece. It's actually two. The telling sign is just to the left of that silicone O ring. See that notch? Bingo.
4. Keep the coil/cotton in place.
5. Remove the O ring if you want, but you can leave it in place as well.
For the next pic, you'll need to know what the "top" and "bottom" are. The "top" of the atty is the "sleeve"... the hollow piece that allows you to look inside when it's assembled. The "bottom" is where the firing pin and grommet were, and where the O ring sits in the photo.

Pic 3: Why I hate disposable attys
I tried twisting the sleeve and bottom apart. The bottom broke into pieces. This is because pressure holding the two pieces together is stronger than the metal. Anyone who has rebuilt older versions of Kanger attys knows what I'm talking about.
6. Get something that will grip the top part of the sleeve. That strange contraption in the photo is a fencing pliers, which is 100% perfect for removing sleeves from Kanger attys. Or just use any stupid grabby thing.
7. TAP the bottom out. You do this by getting a micro screwdriver (I used a 3mm version) and putting it down inside the atty, making sure it touches the side/edge. Now get a rubber mallet and gently tap the screwdriver, forcing the bottom piece out of the sleeve.
The photo shows the sleeve and (broken) bottom piece almost completely separated. You will wish you had three hands for this. I held the fencing pliers with my feet.

Pic 4: Everything but the firing pin and grommet
The two pieces on the left are destroyed pieces of the bottom that snapped off. The piece on the right is the sleeve.
The glorious piece in the middle is what you're going to rebuild on. With the sleeve off, you should be able to stick a vertical coil in there.
8. Start figuring out how to rebuild these things.
What I need from extremely helpful people
--Pics of the coil and the cotton bacon surrounding it, hopefully intact.
--An idea of where they sat in that middle piece. If you can tap out of the sleeve with the coil/cotton still sitting perfectly, all the better.
--Any clue of what wicking might be inside the coil, not just the bacon surrounding it.
Thanks.


