Become a Patron!

The Official Coil Photography Thread

CrazyChef v2.0

Gold Contributor
ECF Refugee
VU Challenge Team
Member For 5 Years
Reddit Exile
VU Patreon
Build a great set of coils and wanna be able to get great pics of 'em? Then you're in the right place!
All hints, tips, techniques, tutorials, etc. are welcome here!

This thread is primarily a photography Q&A/tutorial 'how-to' thread. For posts showing your coils and coiling techniques, please post them in the POST YOUR BUILDS thread.
 
Last edited:

Vape Fan

_evil twin_
Staff member
Senior Moderator
VU Donator
Platinum Contributor
Press Corps
Member For 5 Years
Do I have to build them? And do they have to be great? :huh:
By techniques you mean hints, tips, tutorials,,,,for 1st time rebuildable user wanting to know how, to say, dry burn for example, up to advanced/professional wire/coil builder- right?
Or is this thread just for the advanced builder that wants to get good pics?
 
Last edited:

Vape Fan

_evil twin_
Staff member
Senior Moderator
VU Donator
Platinum Contributor
Press Corps
Member For 5 Years
I knew it wasn't coil building or coil wire building because yeah, there is enough for that.
I just figured pictoral for other coil aspects would be helpful to some.

So it's more like
The Official Coil Photography Tutorial Thread
instead of
The Official Coil Tutorial Photography Thread
got it.
 
Last edited:

SteveS45

Diamond Contributor
ECF Refugee
Member For 5 Years
Only problem I have had taking pictures of my coils was from the heat making wavy lines in the coils from the air moving around the coils. Only way I found to stop it was to use the HD settings for the camera.
 

CrazyChef v2.0

Gold Contributor
ECF Refugee
VU Challenge Team
Member For 5 Years
Reddit Exile
VU Patreon
I knew it wasn't coil building or coil wire building because yeah, there is enough for that.
I just figured pictorial for other coil aspects would be helpful to some.

So it's more like
The Official Coil Photography Tutorial Thread
instead of
The Official Coil Tutorial Photography Thread
got it.
Yup! :D
 

CrazyChef v2.0

Gold Contributor
ECF Refugee
VU Challenge Team
Member For 5 Years
Reddit Exile
VU Patreon
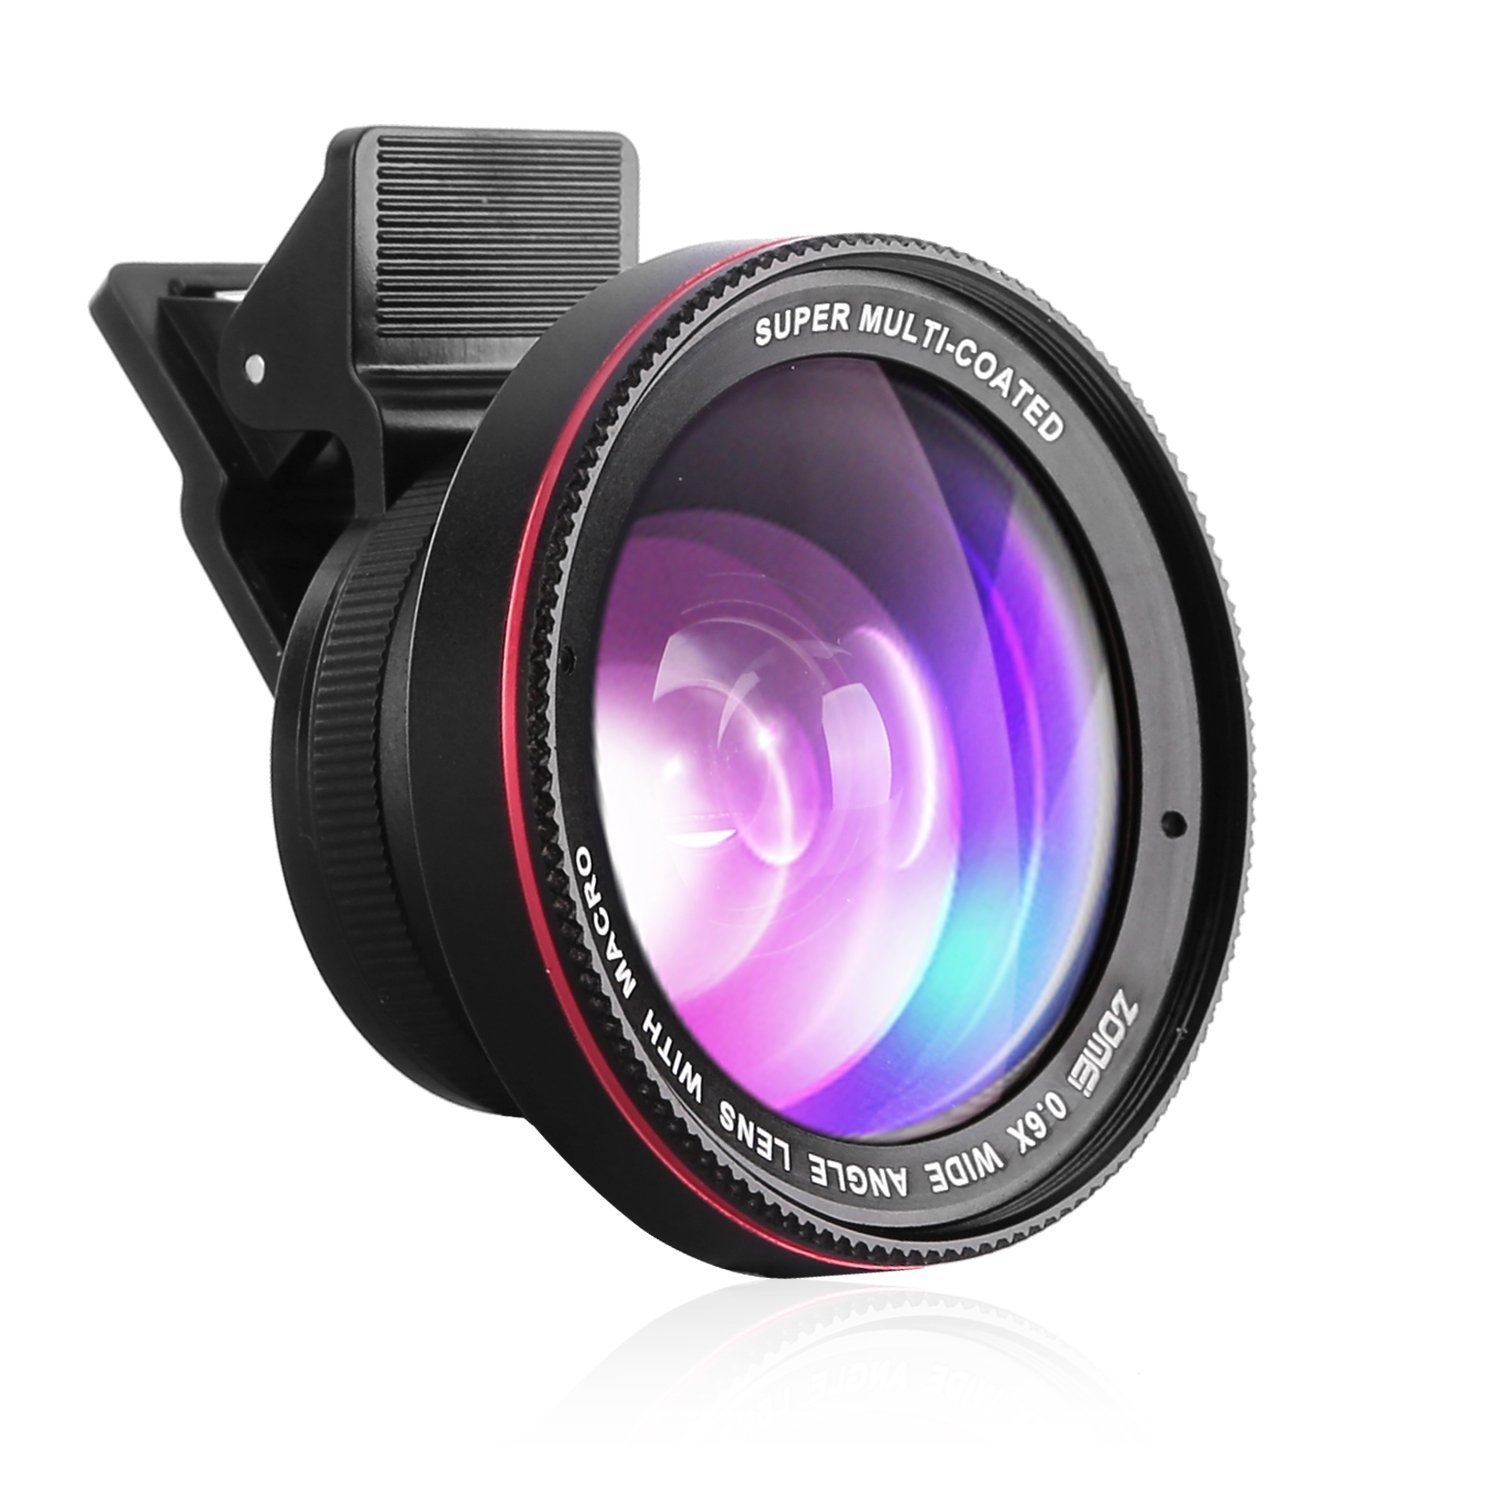
Here's a macro lens that I use with my phone's camera that works pretty well. I get mine at Amazon, although I'm sure they're available on eBay and other places as well.

71FFiQJLqSL._SL1500_.jpg
 

MrMeowgi

The Vapin' Drummer
VU Donator
Diamond Contributor
Member For 4 Years
Here's a macro lens that I use with my phone's camera that works pretty well. I get mine at Amazon, although I'm sure they're available on eBay and other places as well.

71FFiQJLqSL._SL1500_.jpg
I got mine off the wish app. Fisheye,wide and macro. Of course the wide angle didn't work. But all I needed was the macro.

Sent from my Nexus 6P using Tapatalk
 

raymo2u

VU Donator
Platinum Contributor
Member For 4 Years
Unlisted Vendor
Ill write up a good post about using both a normal phone and a camera for focus stacking and editing when I can. I will add to this post as I go...

For phones that Zomei 37mm was my personal favorite out of all the available lenses, it gives amazing depth of field per shot while still having great clarity for its super cheap cost.

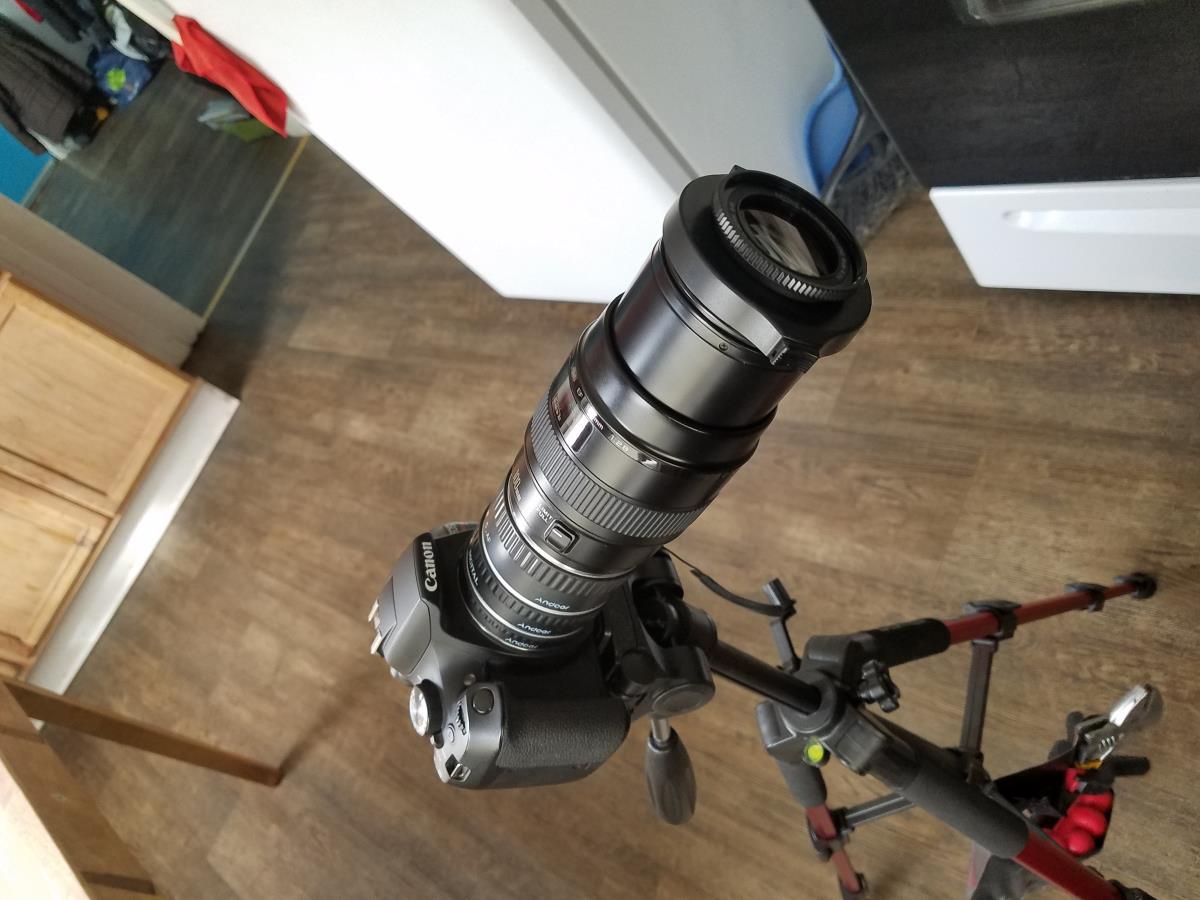
Just a tip for those that want to dig a bit deeper and use a actual camera you can get a nice Canon T5i for really cheap now, I would get a dedicated macro lens like the Canon 60mm EF-s (the lens I use) or the Oshiro 60mm. I would check out Ebay and used Camera/Lenses and you can really get the cost down to start up and use it for much more then just coil photography. The Oshiro is full manual so you do all the focus stacking with a macro rail, the Canon EF-S you can use your phone to focus stack with Auto Focus (AF).

Make sure to Download a Focus Stacking Program like Helicon Focus or Photoshop. You will also want to have a Editing Program like Photoshop or Paint.net to fix small things like dust and scratches....this is where the most time is invested.

Rough List of everything Involved for basic shooting and rough cost estimate:
Camera and Lens (Depending on what you get, where you get it and its condition, price will differ.) but will use Canon as Example.

Canon T5i Body ($350 New)
Canon 60mm EF-S ($280 Used but Mint Condition)
Zomei Tripod ($30)
Decent Fabric Lightbox ($40)
5500K Lighting ($30)
Helicon Focus ($30 per Year)
Photoshop ($10 per Month with Creative Cloud)
32GB SD Card ($15)

It may seem like its alot but remember, this is a skill you can use to promote products for companies or yourself in the future, or find a million other uses for all of this besides this one outlet.

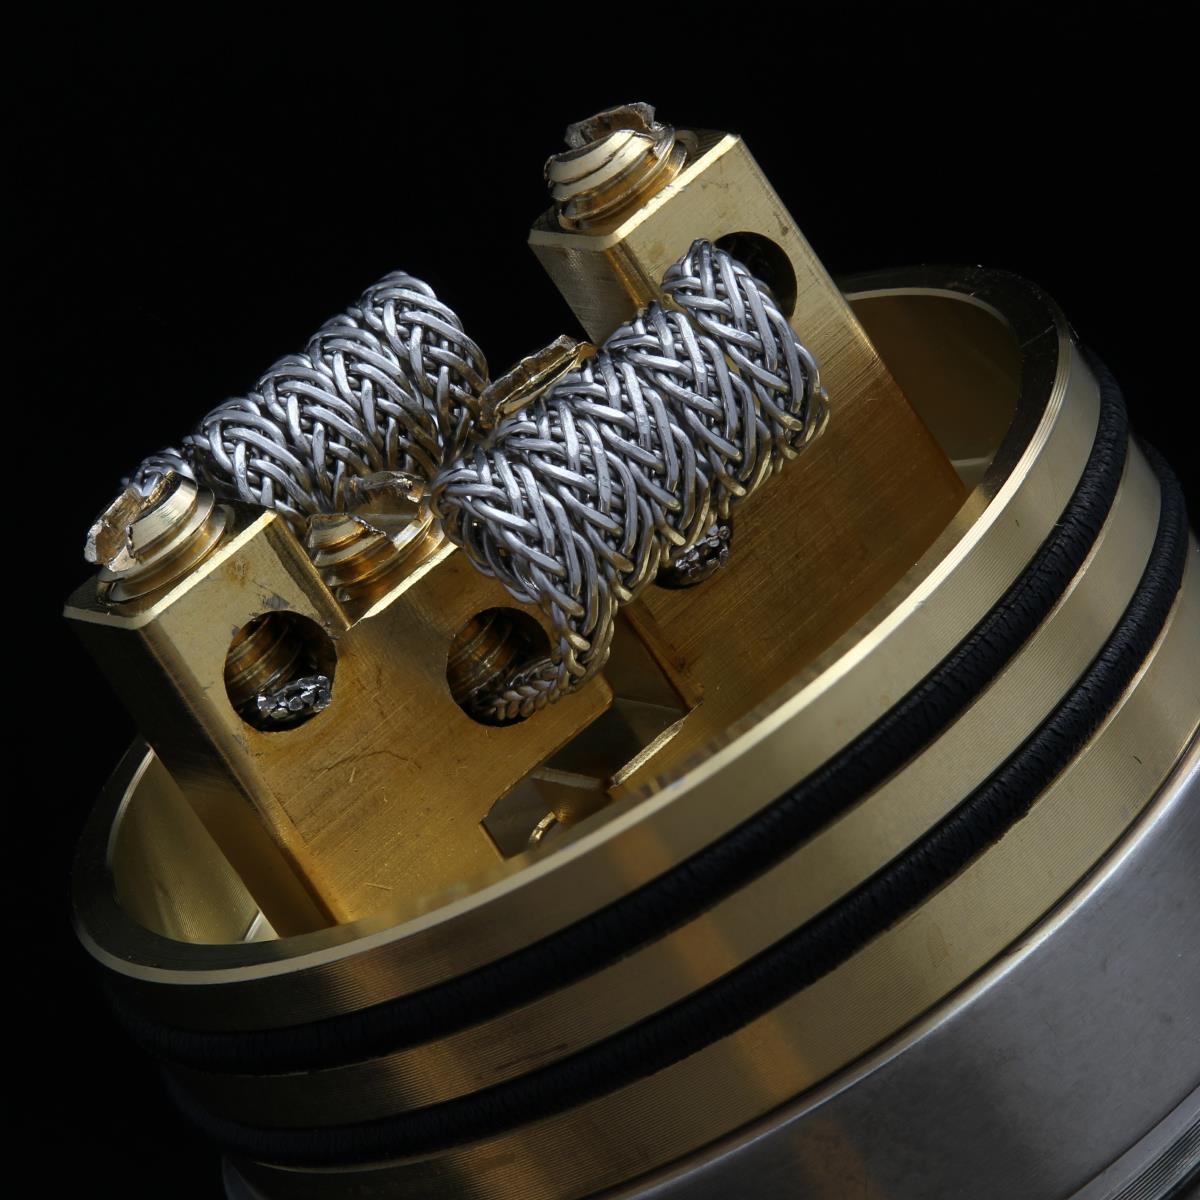
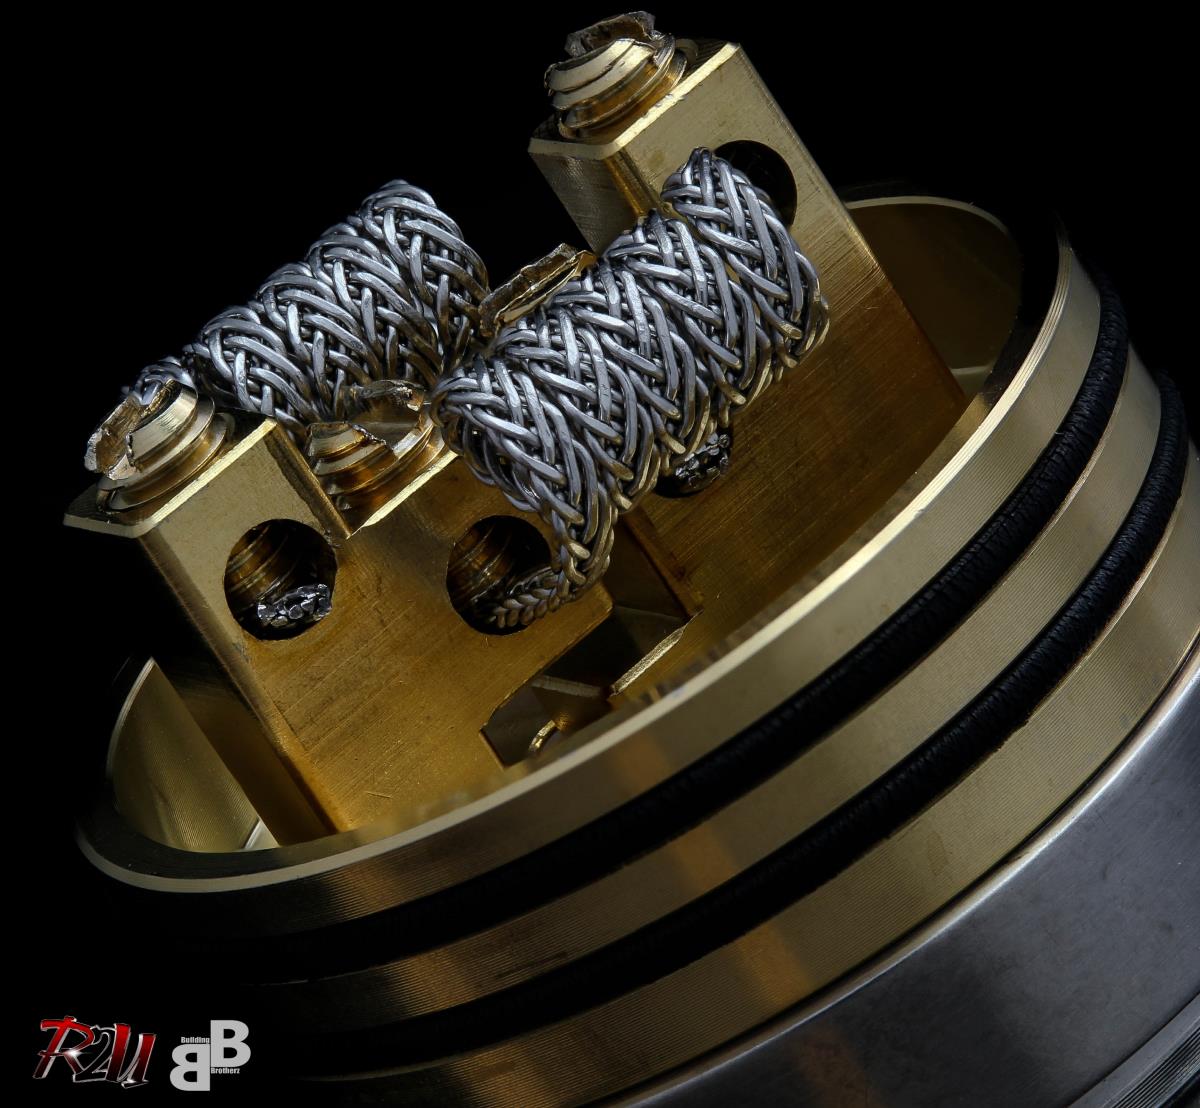
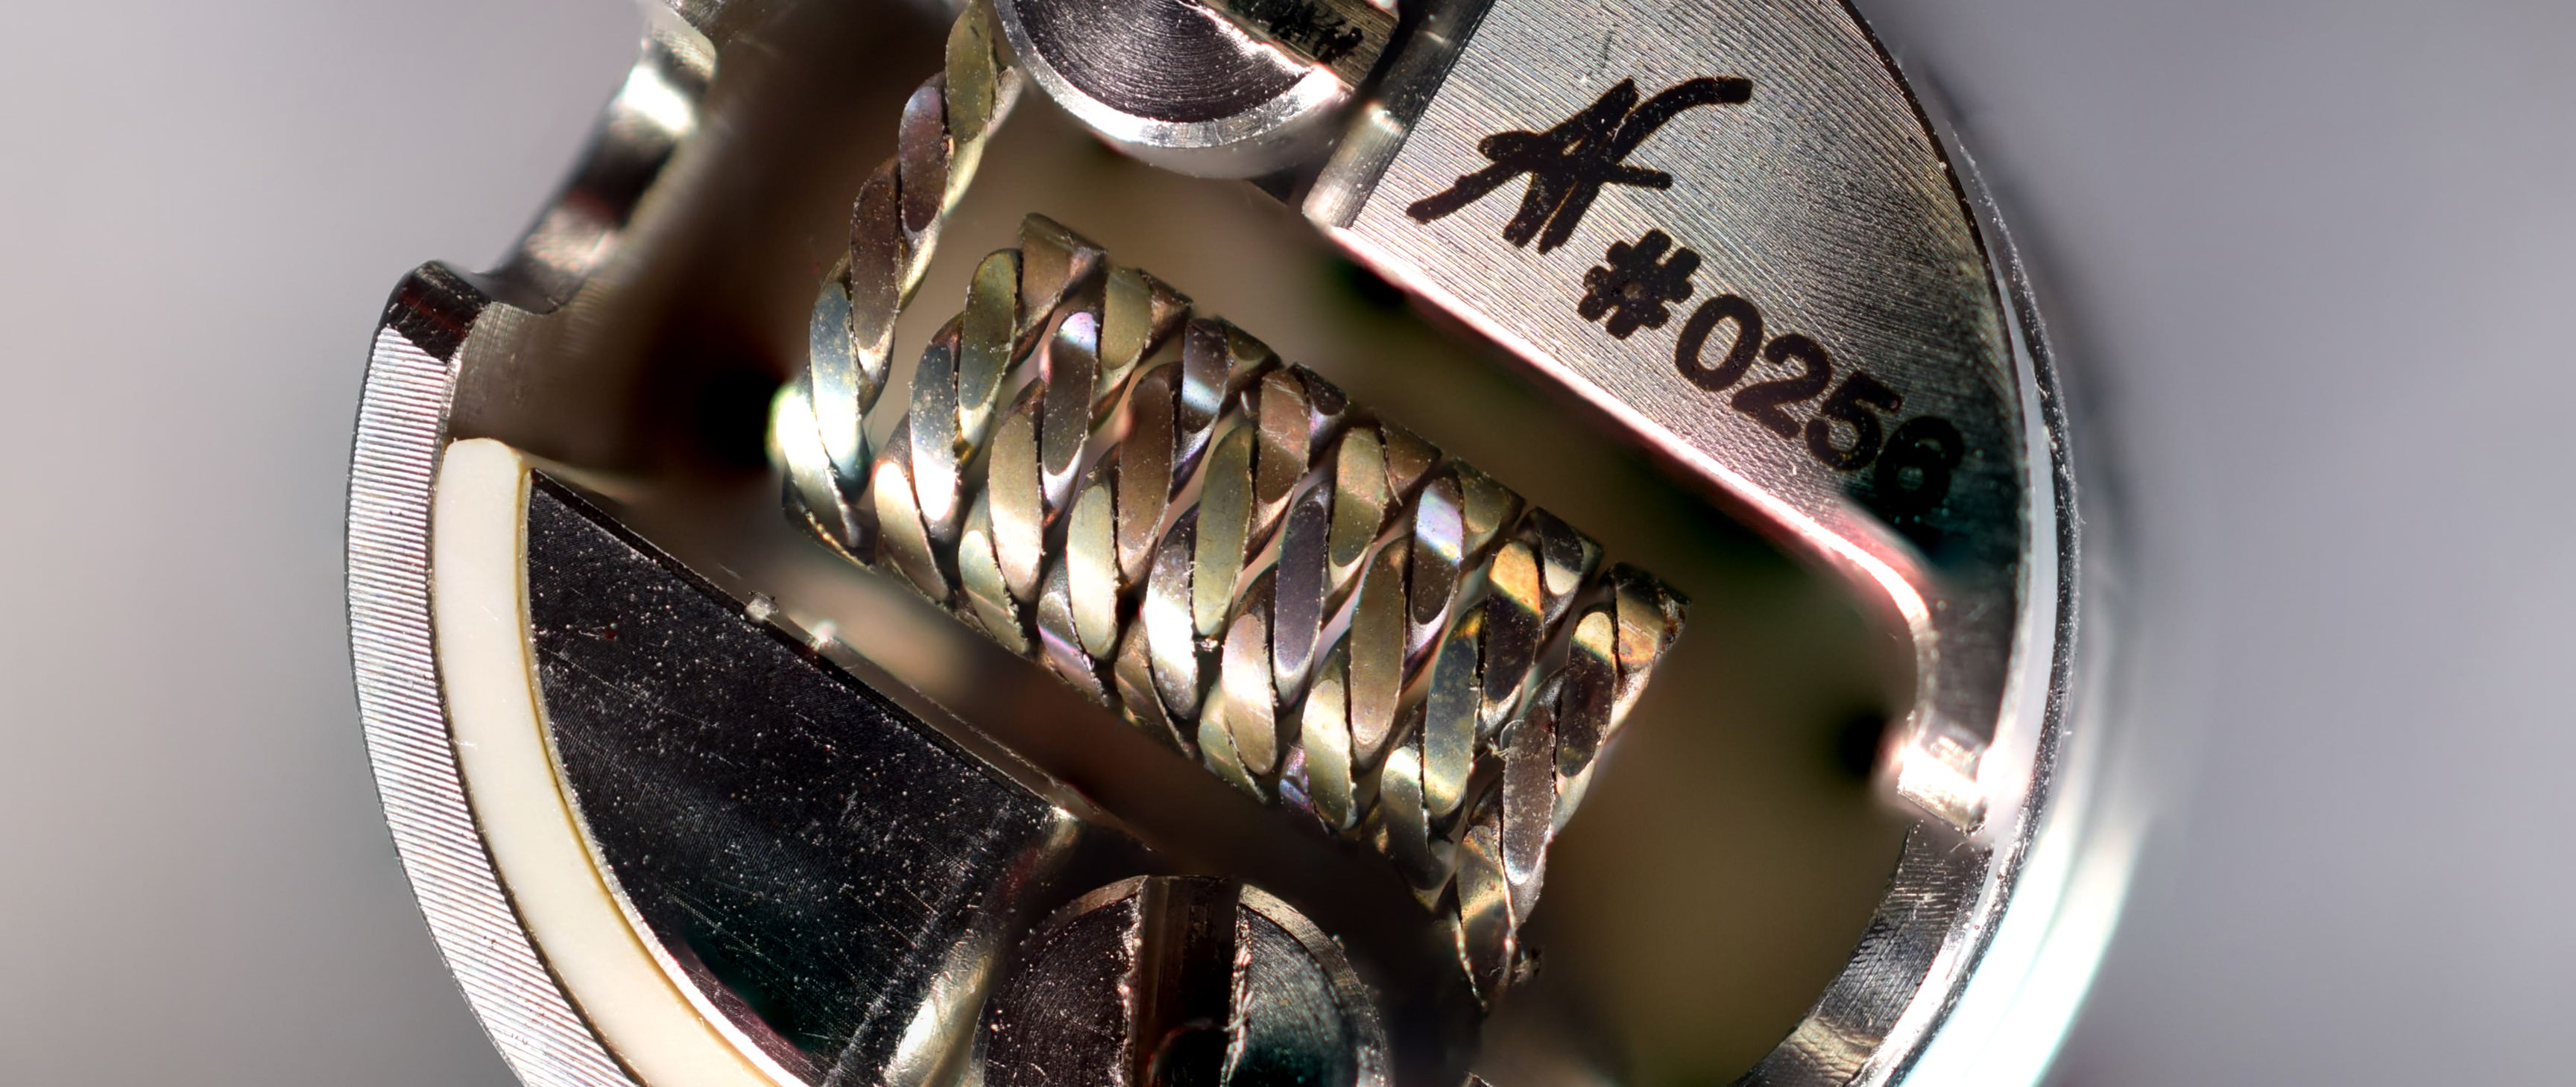
Canon T6 with 60mm EF-s Macro Lens ([F6.3/.08"] About 15 and 22 Images Stacked with Helicon and Edited with Photoshop). KTX V1.5 RDA by Myself and KingTu..
28436309_136907180471402_2339962719039389696_n.jpg
28433222_2141505535878398_466267662607974400_n.jpg


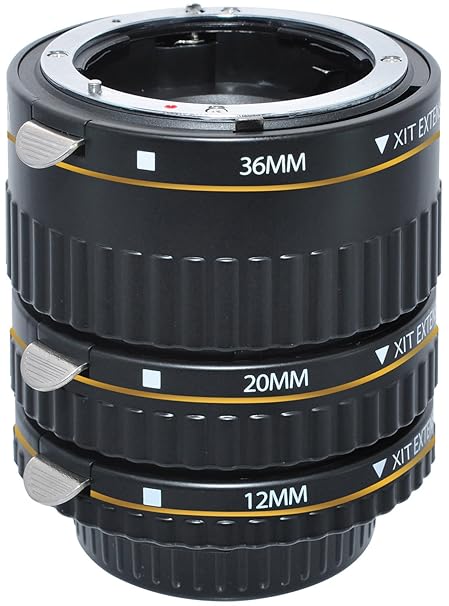
The closer you get to the subject your shooting the less depth of field your camera sees, you will need to take more shots the closer it is, your Fstop also plays a large role with Depth of field but I will get more into that later on. For the shots closer than this a extension tube or Raynox Clip on lens can be used but the more you add to magnify your subject the multiplier for shots needed for clarity goes up.

Focus Stacking is taking a shot of your subject with a sliver of it in focus, then moving the camera or adjusting the lens to shoot sliver by sliver until you have bits of a entire clear picture. You would then use Helicon Focus or another stacking program to merge all of these photos together and form one clean image.

You will want to learn how to use the Fstop and Shutter speed/ISO to get the lighting and detail you want, this seems very frustrating at first but once you get a grip on it it becomes second nature. The bigger the number the more is in focus per shot but your aperture closes down more so you will need to adjust the Shutter Speed or ISO to give you more light or the images will be darker the larger the number. For shooting in Macro most of the time I prefer a smaller number, a smaller number brings in more light to the sensor and gives you much more detail per shot but the depth of the focus per shot is very limited....but we are already shooting slivers at a time with macro so who cares..

So much Magnification you can see Atoms Fart.
48d5e4e0c04be21245325f922b932634.jpg


Your settings will really be dialed in depending on your lighting, start off with ISO 100 and Fstop at F9 and then play with the Shutter speed to get it where you want the lighting to be, you will need to take a picture to actually see what your settings are doing. Once you find the settings you like then move on to shooting your subject.

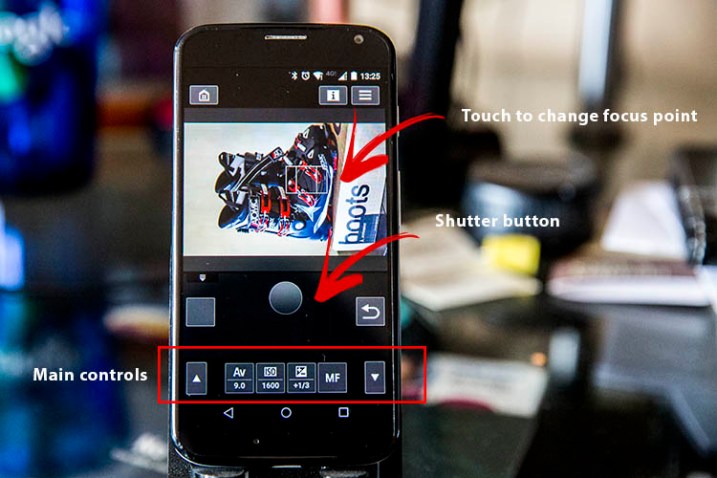
If using the 60mm EF-S or other Lenses with AF (Auto Focus) you can download the app for your camera and use your phone to do all the work, this makes it a breeze and very very quick. You will set up the camera and subject how you want it, make sure its in the minimal lens focus distance and then put the closest edge in focus, take a shot. Then you will hit the >> arrow on the app, take another shot and repeat until everything has come and gone out of focus. Always shoot front to back and try not to double shoot, also try to keep the order correct-dont back track. Then pick a different angle and start again.

Suzi-Pratt_Canon-Wifi-1.jpg


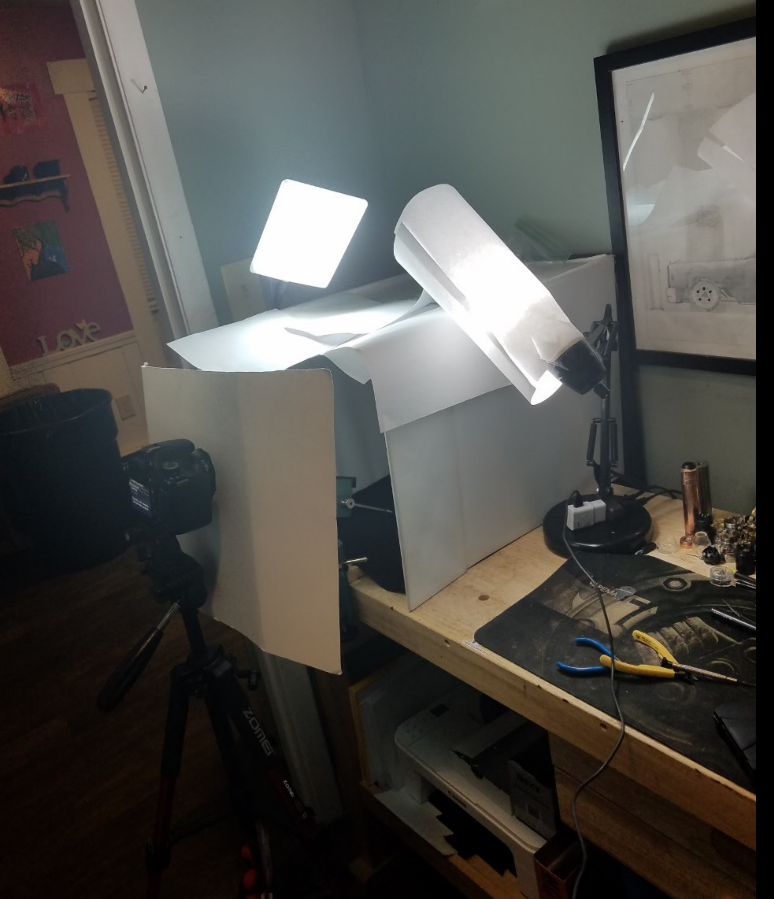
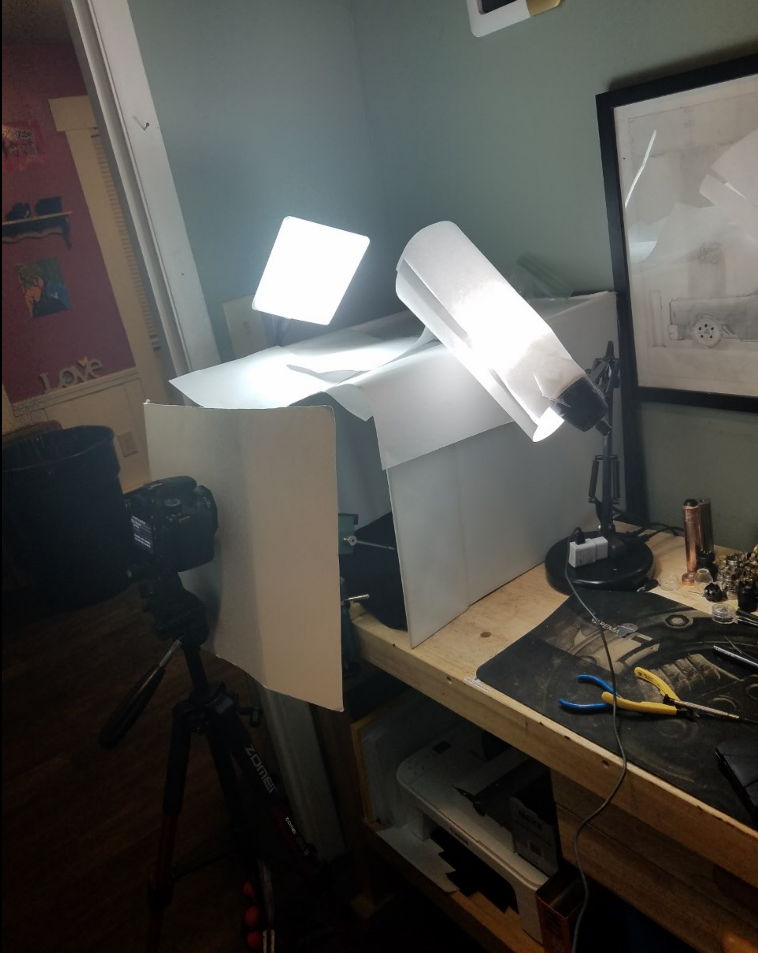
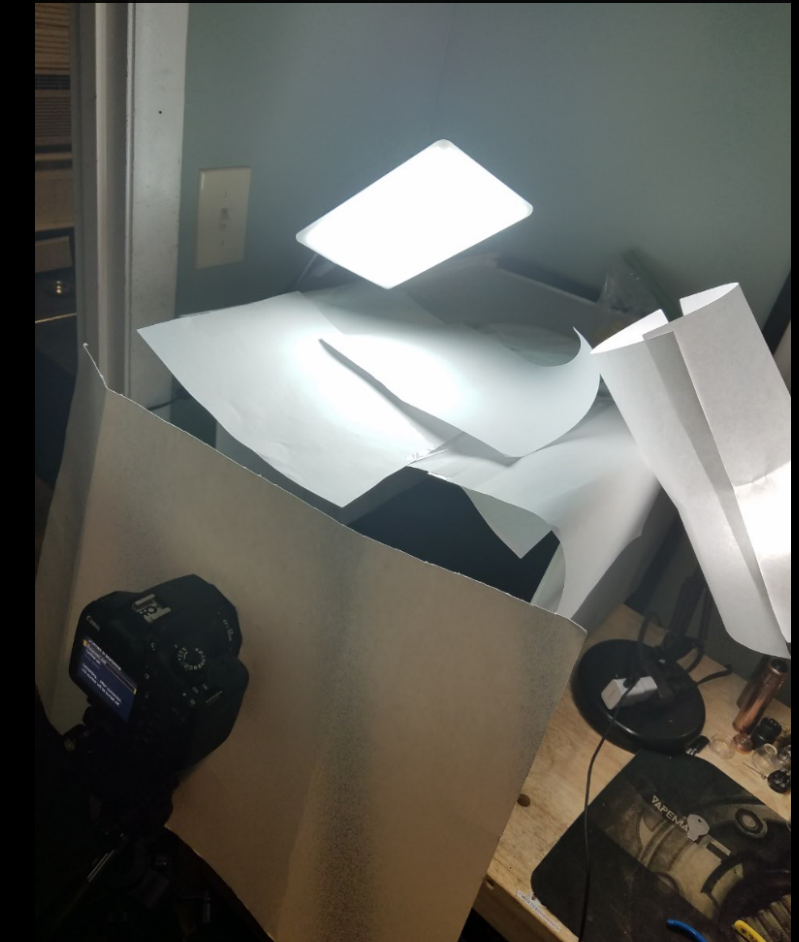
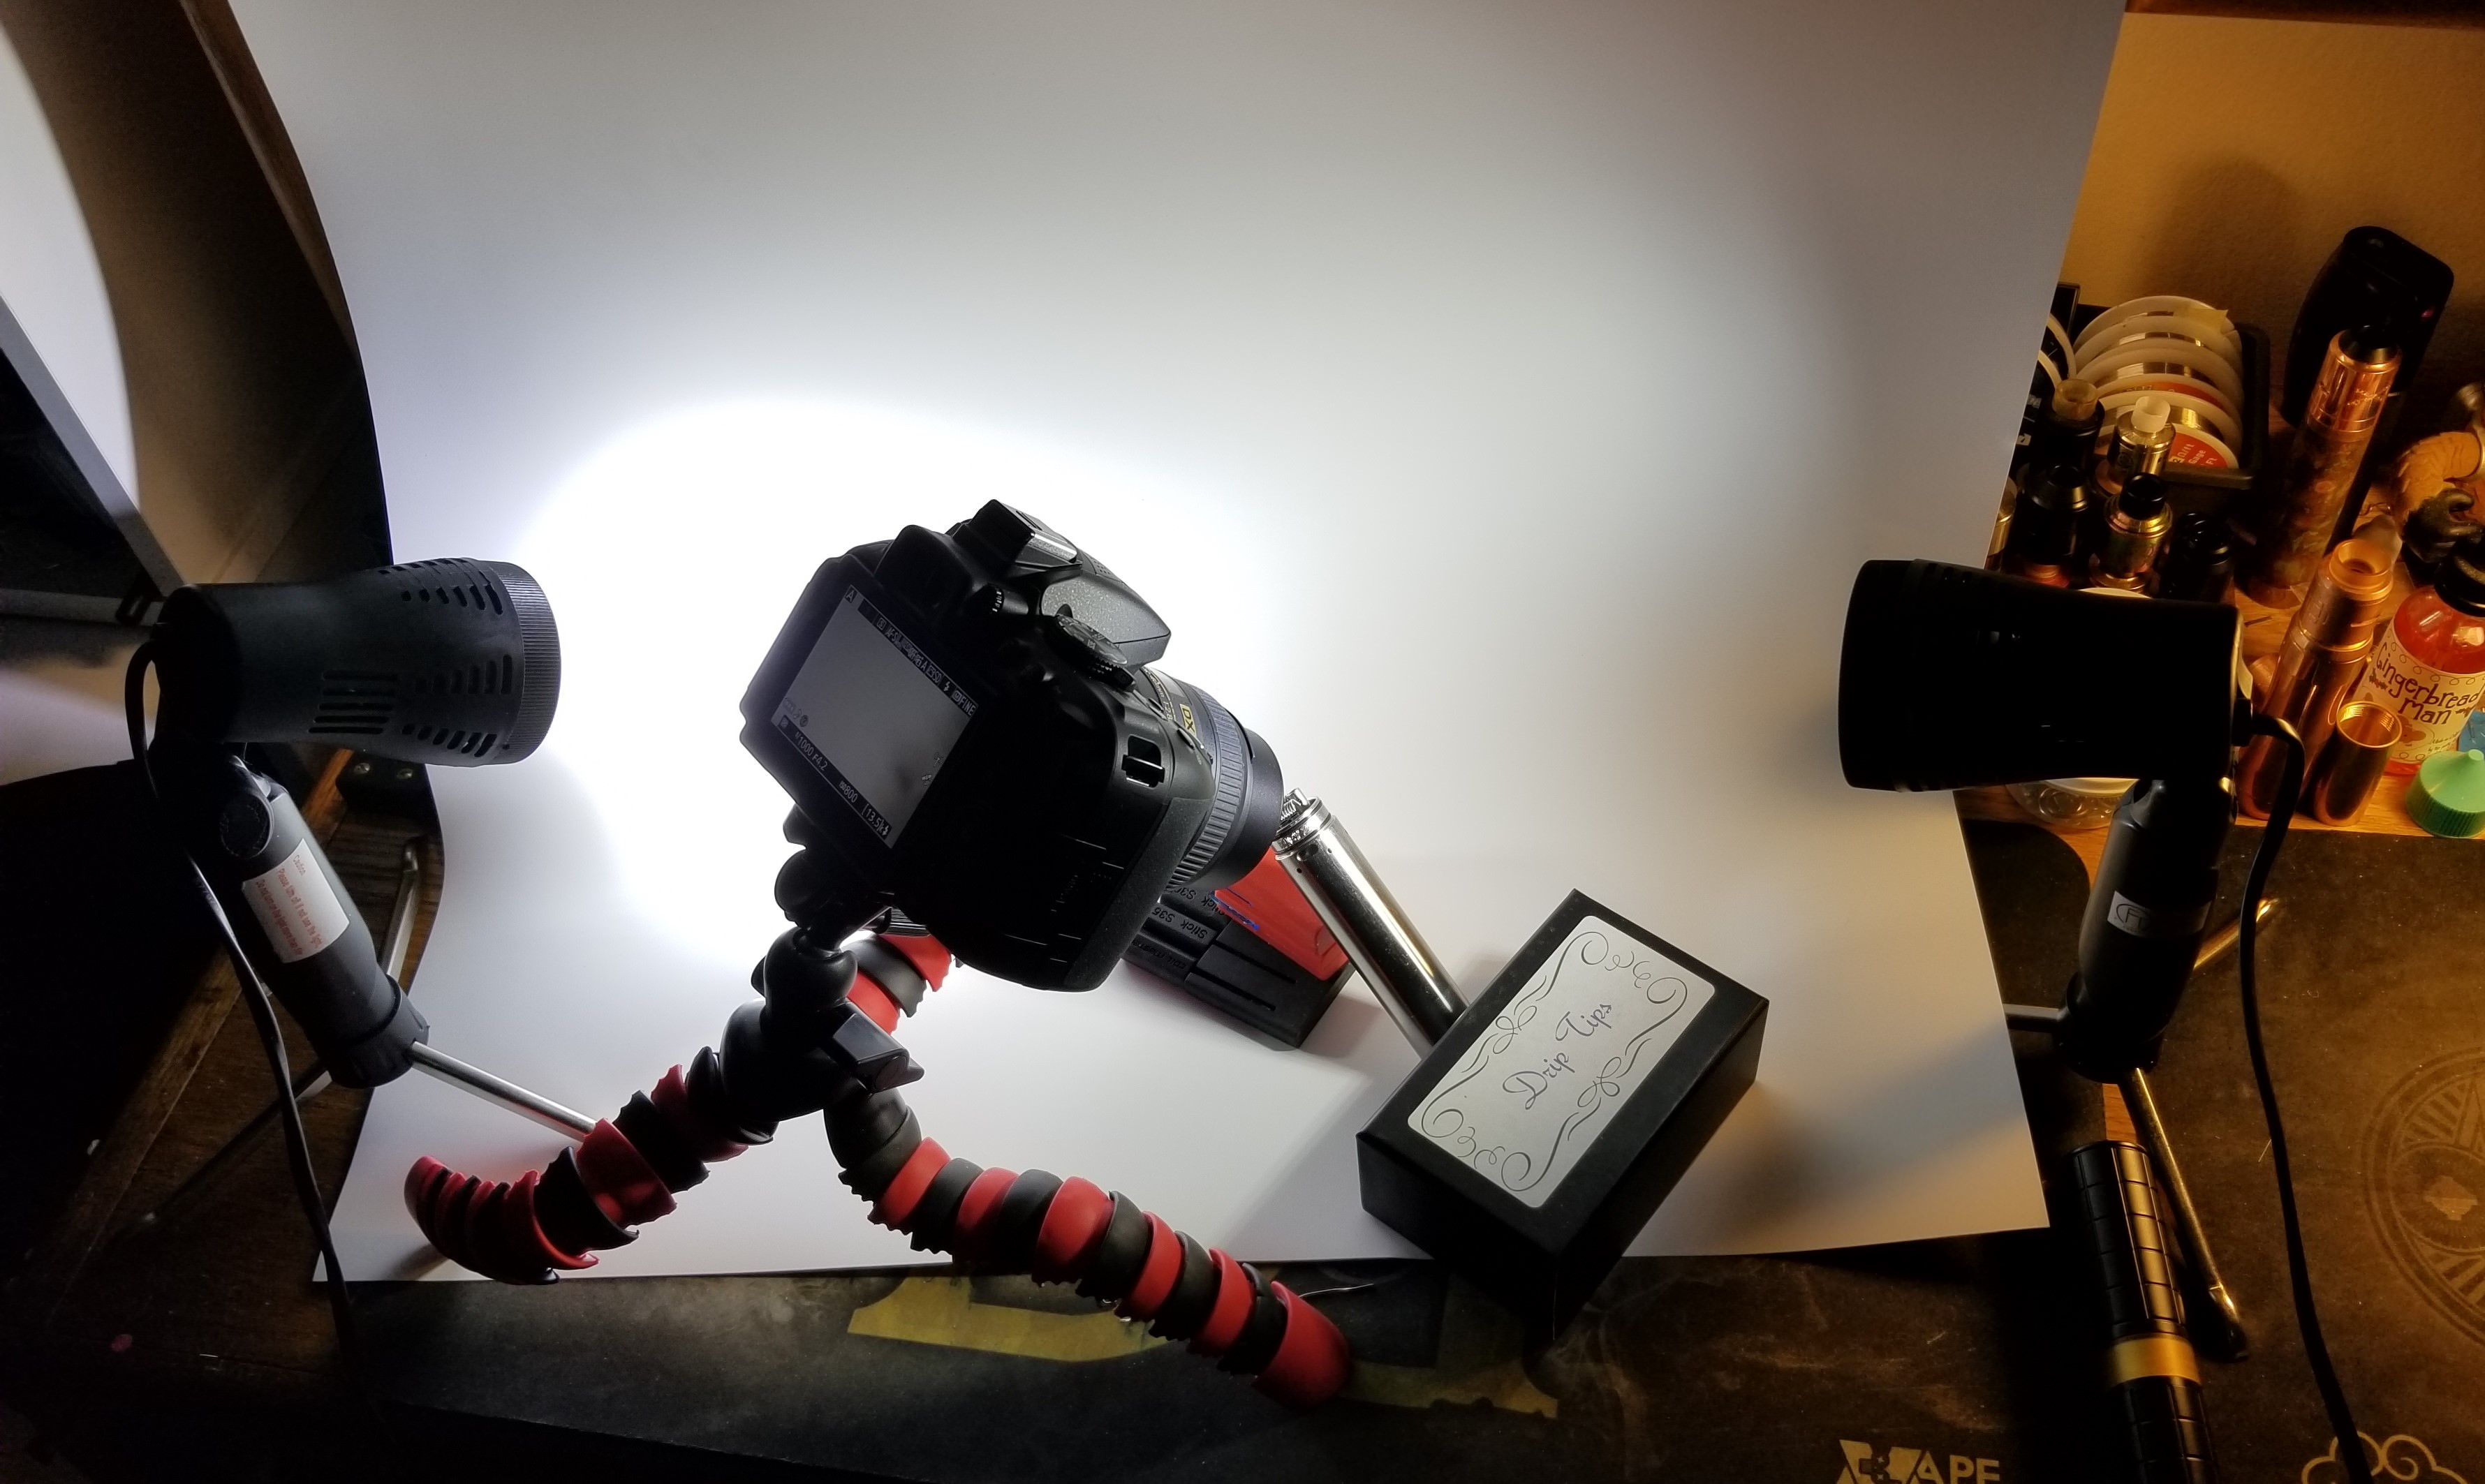
My LIghtbox/Lighting Setup:

2e8b2628b31d64e5a4649766cab0a799.png
b155e11e32970ef1c290245559aff11a.png


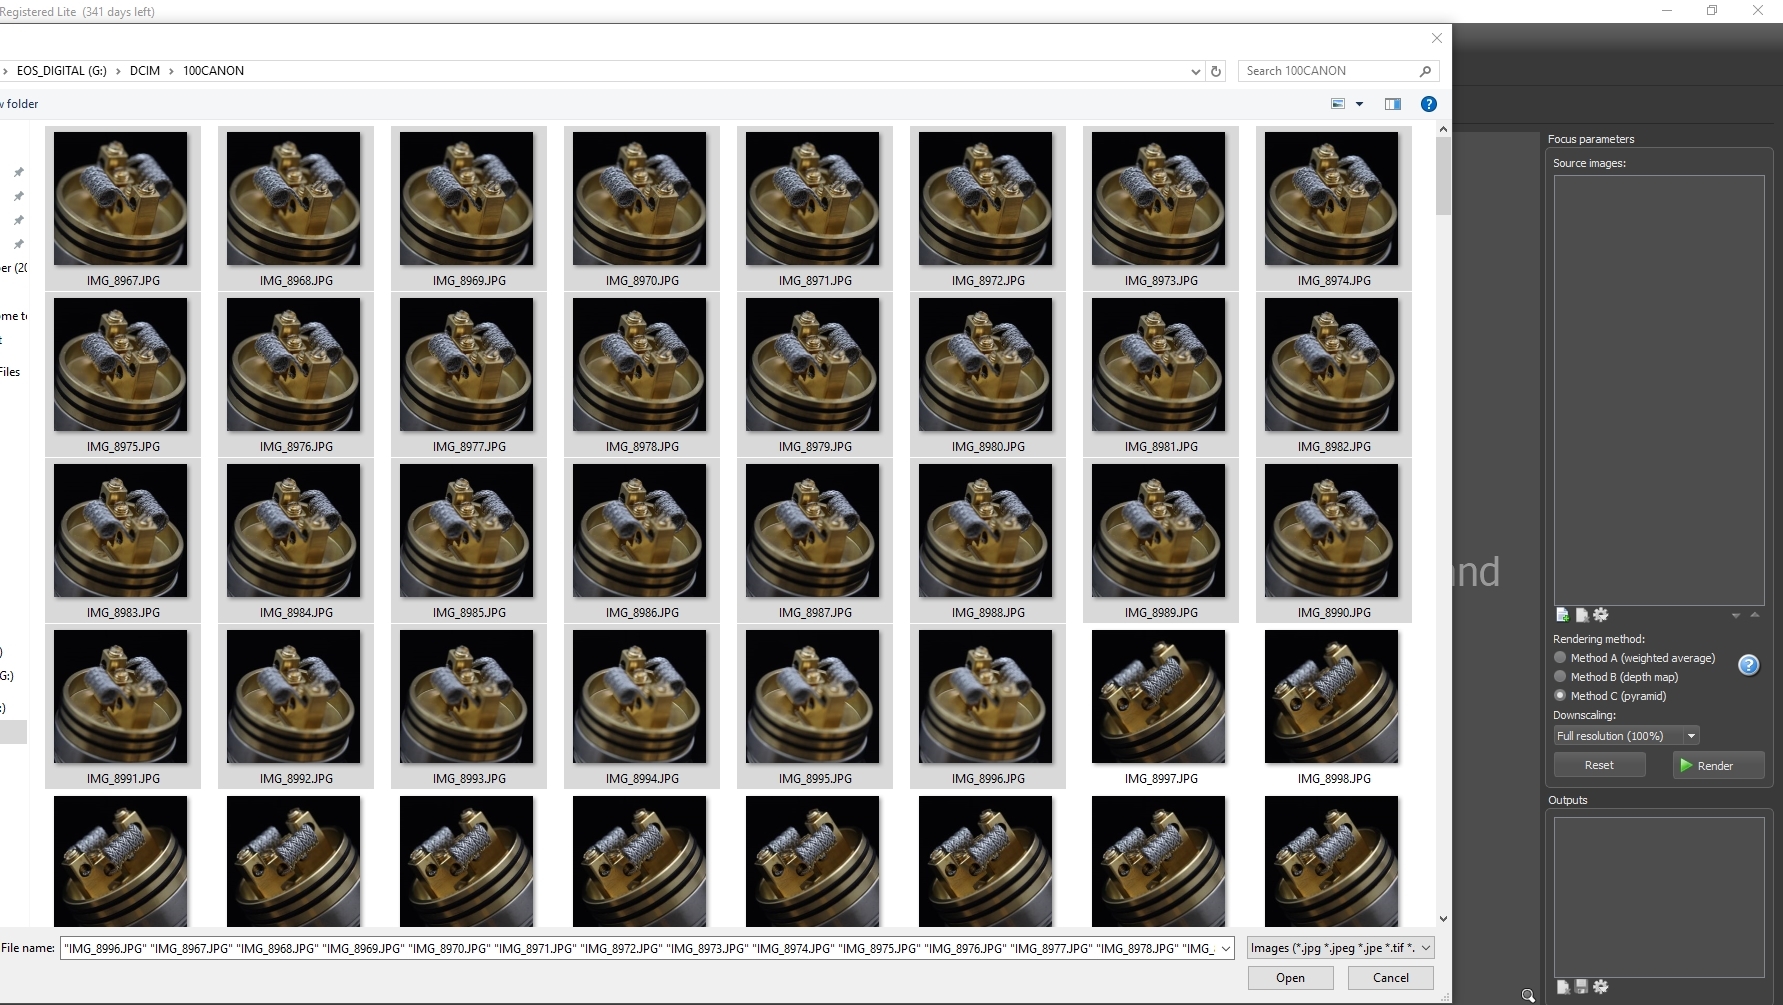
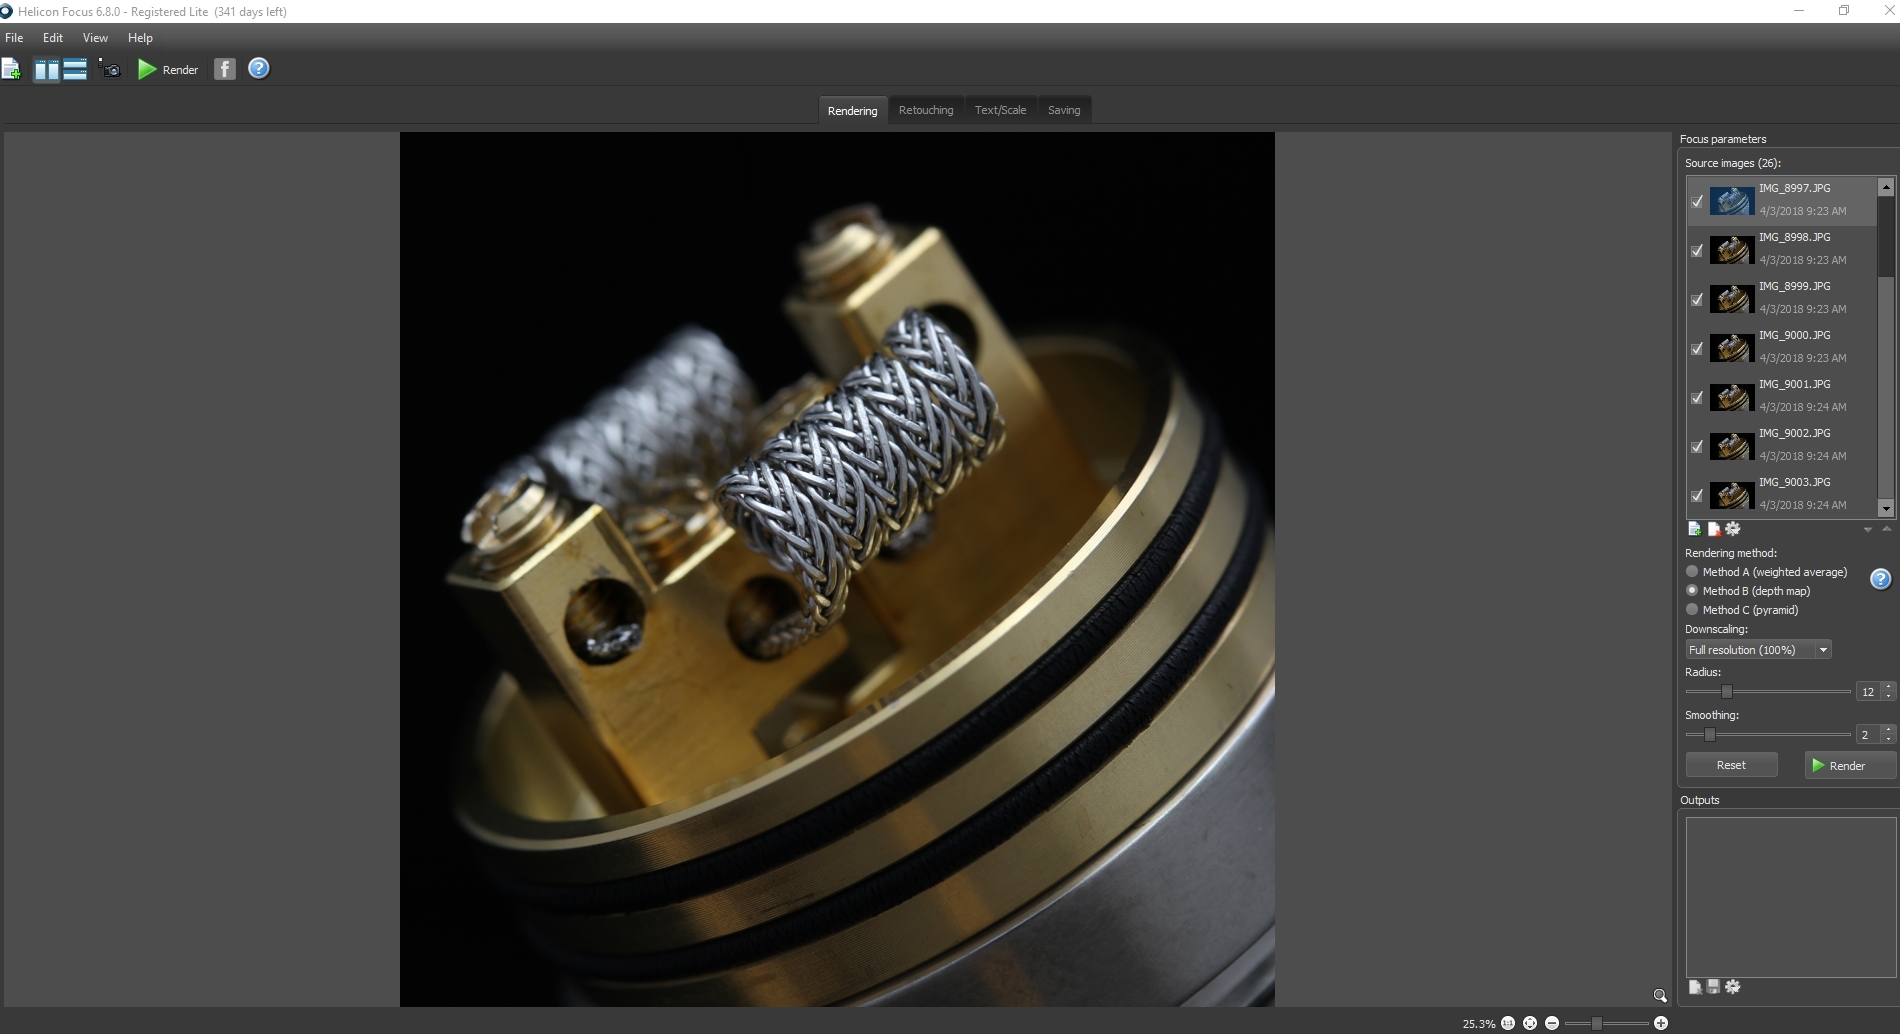
After you have a few different angle eject your SD Card and Battery (always toss it on the charger after shooting) and pop your SD into the PC, open Helicon. Select all the images for the angle you want to stack, be sure to go through and delete all duplicates or blurry pictures, and find which stack setting you would like to use, I prefer Option B (Depth Map) with 12 Radius and 2 Smoothing. Depth map will put all the pictures in order (if you did mess up with shooting) and the pictures are always much more clear and vibrant then with the other options. Stack them and save them if there are errors try changing the options or settings and try again.
d5e7a73a48976593f358592d7fccce86.jpg
8cf868d47adf03d2ca5d86fdca714bc2.jpg


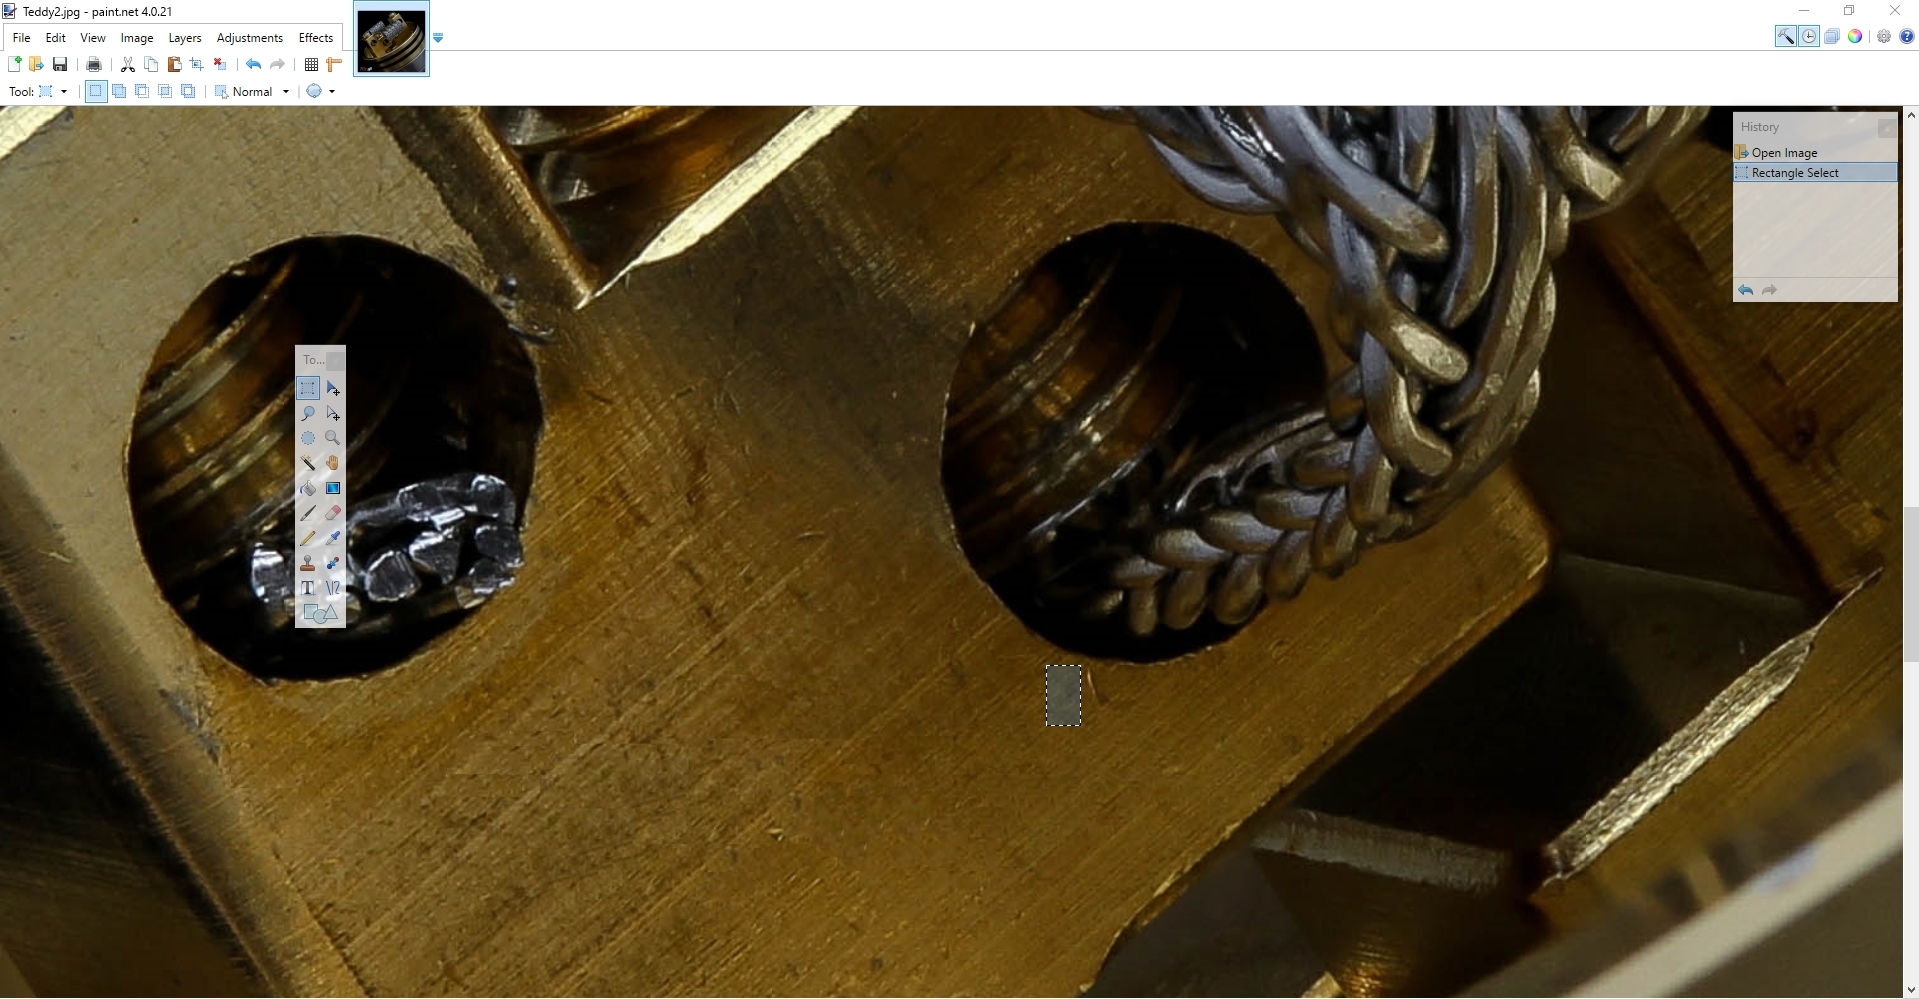
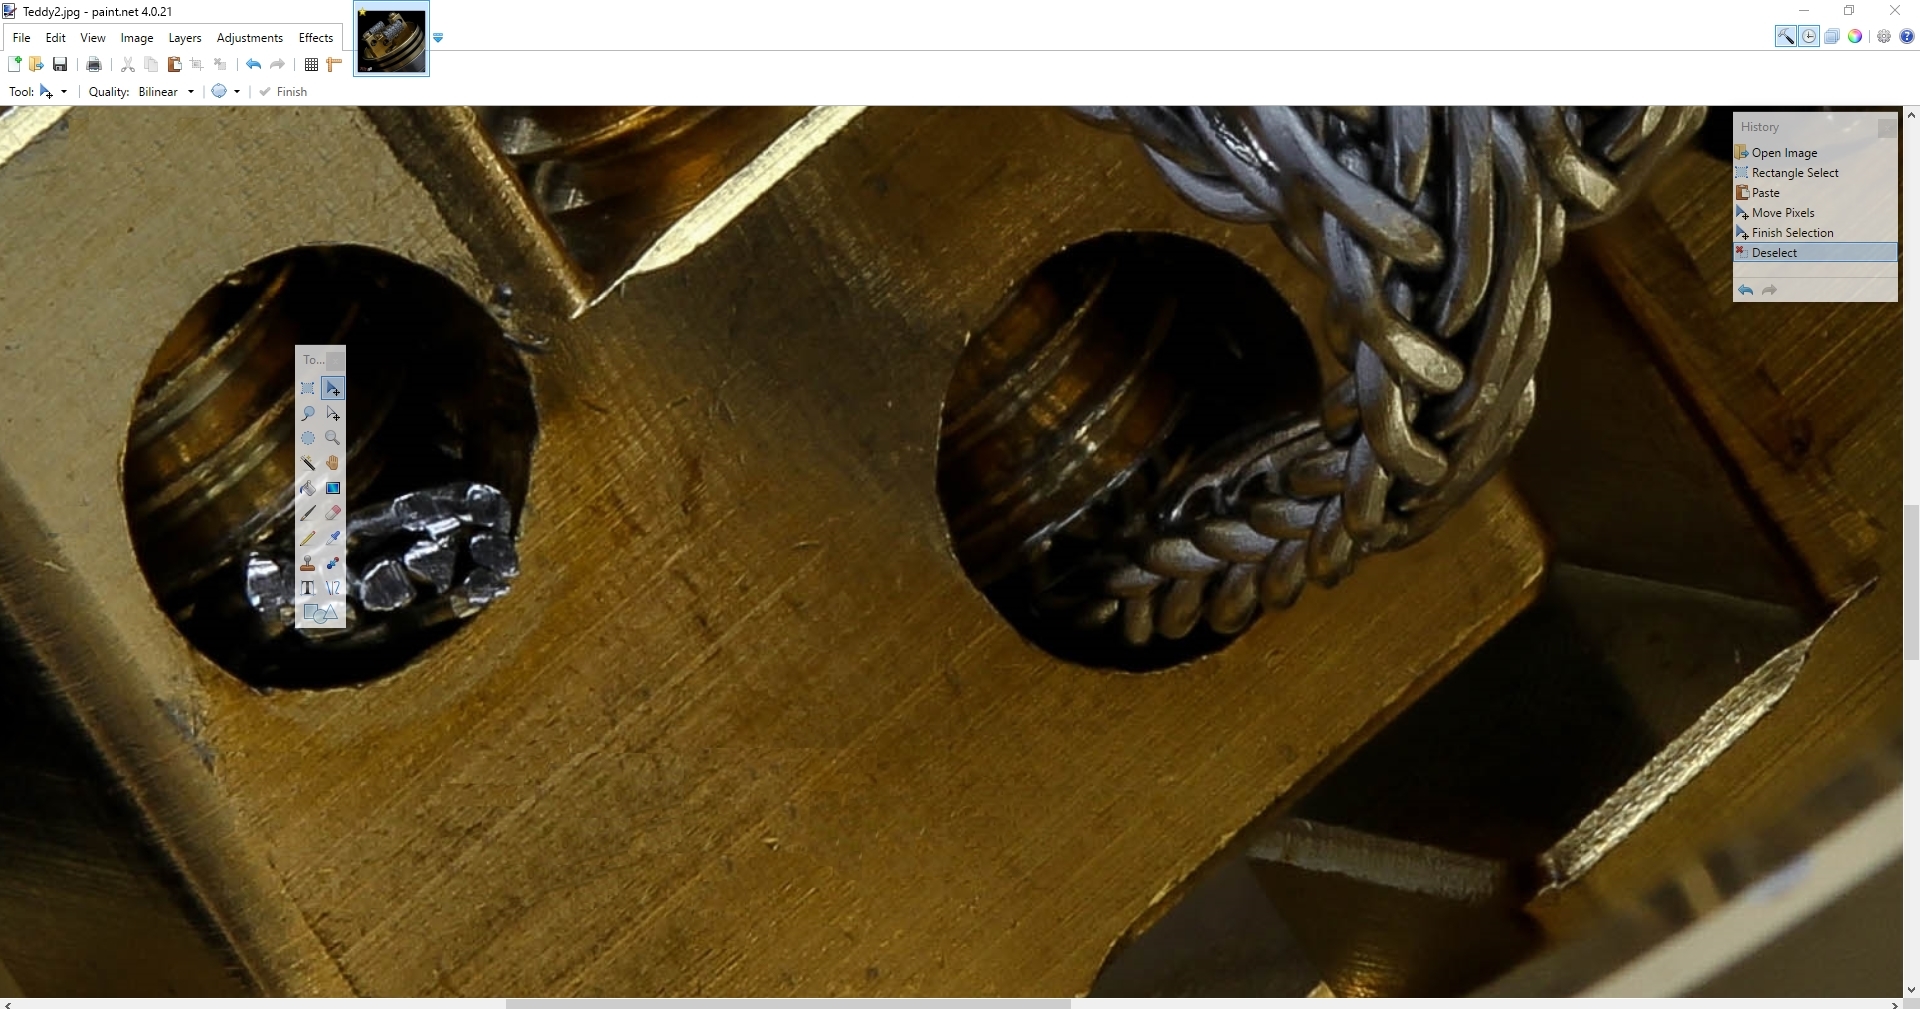
Once your done Stacking open up Paint.net or Photoshop/Lightroom and select your Pictures.I like touching up with some Contrast, Sharpening and then editing all the crap off the picture...but start with the Contrast and Sharpen, only add a few bumps of each and use your eye to be the judge of how much. At first this should be enough for a great looking picture but if your anal like me about pictures you will want to learn how to use the clone tool or select area and copy/paste to fix any issues your can. I like to select just beside the dust or scratch and then copy the small area and paste it over the issue, blend it as nice as you can.

Removing Scratch with Select Area and Copy/Paste using Paint.net
9bff5d66ca9727dc90cf9a4757b12697.jpg
8f615963e63064fa56cbc4daaee43022.jpg


Then use a Black brush to black out the background but make sure to soften the brush as low as it can go so it doesnt look like it was done by you.

Before Editing and After:

c6a9160a727cf1ab680f07e281afd06d.jpg
2c72331eb22b8aca9dd4dae1a2fe6554.jpg


After adding Logos or Watermarks and Cropping the Image you should have a half decent picture to post! Hopefully this helped you envision what I go through everyday to put out the pictures I post :D:D:D I will be adding pictures and cleaning up this rough tutorial as soon as I can, thanks for reading!!
 
Last edited:

CrazyChef v2.0

Gold Contributor
ECF Refugee
VU Challenge Team
Member For 5 Years
Reddit Exile
VU Patreon
You will want to learn how to use the Fstop and Shutter speed/ISO to get the lighting and detail you want, this seems very frustrating at first
This is why I'm still using my camera phone. I bought the Nikon D3300 with the standard lens included, and got the Nikkor 40mm f/2.8 AF macro lens. Got 'em specifically for coil shots. I have no idea how to use them. The D3300 doesn't have WiFi, so I think I'll probably sell the body and get the D5500 upgrade (or better) so I can use the various apps available for it.
 

CrazyChef v2.0

Gold Contributor
ECF Refugee
VU Challenge Team
Member For 5 Years
Reddit Exile
VU Patreon
Dammit! This thread just cost me $450... I ordered the Nikon D5300 (w/wifi) - body only. I can use the lenses/batteries/etc. from the D3300 with it. Now to figure out if I should keep the D3300 body or sell it on a photography forum.
 

mach1ne

Gold Contributor
Member For 4 Years
great thread :cheers: ill try to do a writeup/screenshots specifically for photoshop focus stacking in relation to coil porn.
Dammit! This thread just cost me $450
im a little worried about that myself. my phone/clip on is doing good, but i think it mostly feels good compared to that magnifying glass i was using previously. when i look at rays camera shots, my phone/macro shots are not as good any more lololol

thanks for the comprehensive tutorial and breakdown of the hardware you use ray :cheers: thanks for the thread chef :cheers: do you mind if i link this into the other official threads so they are all like a directory to each-other?
 

CrazyChef v2.0

Gold Contributor
ECF Refugee
VU Challenge Team
Member For 5 Years
Reddit Exile
VU Patreon
ill try to do a writeup/screenshots specifically for photoshop focus stacking in relation to coil porn.
Looking forward to it!
do you mind if i link this into the other official threads so they are all like a directory to each-other?
How do you do that? Also, if this takes off, I wouldn't mind seeing it as a sticky.
 

raymo2u

VU Donator
Platinum Contributor
Member For 4 Years
Unlisted Vendor
Dammit! This thread just cost me $450... I ordered the Nikon D5300 (w/wifi) - body only. I can use the lenses/batteries/etc. from the D3300 with it. Now to figure out if I should keep the D3300 body or sell it on a photography forum.
Dont worry...itll will be a lump that will glaze over once you start getting results with it brother ;)

Just imagine how I felt spending $500 on my Nikon P900 less then a month ago, it popped off my tripod the other night and landed on concrete smashing the glass in the lens....there goes another $350 ;)

Ive spent maybe $1800 in camera equipment so far....hoping to buy the Sony Ar7 III used and a lens for it this year,
 

mach1ne

Gold Contributor
Member For 4 Years
How do you do that? Also, if this takes off, I wouldn't mind seeing it as a sticky.
i just have an intro paragraph thats in all of the 'official' threads i started that says 'we have an official alien, staple, braid, clapton etc etc, but i make the 'alien' a link back to the alien thread, 'staples' to the thread etc. when i make a new official thread i go back and edit the link into the intros of the rest so they are all, always linked together. the only one of mine that got sticked so far is the steam engine one.

edit - @CrazyChef v2.0 i put a link to this in all of the official threads i have an intro in, as well as the sticked steam engine tutorial.
 
Last edited:

f1r3b1rd

https://cookingwithlegs.com/
Staff member
Senior Moderator
VU Donator
Diamond Contributor
VU Challenge Team
Member For 5 Years
VU Patreon
Just wondering on the software side:

Has anyone tried using Lightroom or GIMP?

I’m not a builder or really into coil porn, but I do play around with drone photography (mostly video)

With landscapes, I start with raw photos and make them as flat as possible. I then go on with Lightroom to add in the color, saturation, exposure and clarity.
 

Carambrda

Platinum Contributor
ECF Refugee
Member For 5 Years
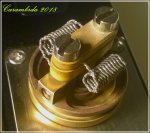
This pic was taken with just my old Nokia Lumia 625 phone and one separate LED lamp instead of the camera flash, nothing else... not even a tripod. The only editing I did aside from cropping my frame and adding my logo text was a filter effect in Paint 3D to liven up the color profile giving it a sense of warmth.

stapled tiger.jpg
 

CrazyChef v2.0

Gold Contributor
ECF Refugee
VU Challenge Team
Member For 5 Years
Reddit Exile
VU Patreon
Has anyone tried any of the Helicon software? I'm looking at the remote control software mainly, but I like the option of having the integrated stacking software as an option.
 

CrazyChef v2.0

Gold Contributor
ECF Refugee
VU Challenge Team
Member For 5 Years
Reddit Exile
VU Patreon
So the Nikon D5300 came in today. I downloaded a trial version of the Helicon Remote software to use the iPad for all camera functions. I missed a few spots in the pics for the stack, but not too bad. This was a 27 pic stack. I really want your critiques about this photo - mainly what's wrong with it and/or what can be done better. I know I missed a few points, but I still haven't learned the software yet, and I still have no knowledge of how to use a camera properly.

ktl95ng.jpg
 

CrazyChef v2.0

Gold Contributor
ECF Refugee
VU Challenge Team
Member For 5 Years
Reddit Exile
VU Patreon
I'm thinking I tried to photograph too large of an area, and should have concentrated more on just the build deck and the coils.
 

CrazyChef v2.0

Gold Contributor
ECF Refugee
VU Challenge Team
Member For 5 Years
Reddit Exile
VU Patreon
Sometimes I wonder about my sanity... Apparently, I was using the macro lens completely wrong. I didn't know that the tube extended... I need to let my battery recharge, and have another go at it. Hopefully I'll have some positive results shortly.
 

CrazyChef v2.0

Gold Contributor
ECF Refugee
VU Challenge Team
Member For 5 Years
Reddit Exile
VU Patreon
Better, but still lacking. I couldn't seem to get the camera to focus on the bottom of the RDA for some reason. This one is 75 images taken via Helicon Remote and stacked in Photoshop. I did a little bit of clean up (stray cotton fibers, etc.) in Photoshop, but that's it.

dqDcdc5.jpg
 

zephyr

Dirty Pirate Meg
VU Donator
Gold Contributor
Member For 4 Years
Unlisted Vendor
Better, but still lacking. I couldn't seem to get the camera to focus on the bottom of the RDA for some reason. This one is 75 images taken via Helicon Remote and stacked in Photoshop. I did a little bit of clean up (stray cotton fibers, etc.) in Photoshop, but that's it.

dqDcdc5.jpg


Whoa. :D awesome!
 

MrMeowgi

The Vapin' Drummer
VU Donator
Diamond Contributor
Member For 4 Years
Better, but still lacking. I couldn't seem to get the camera to focus on the bottom of the RDA for some reason. This one is 75 images taken via Helicon Remote and stacked in Photoshop. I did a little bit of clean up (stray cotton fibers, etc.) in Photoshop, but that's it.

dqDcdc5.jpg
Badass looking coil man

Sent from my Nexus 6P using Tapatalk
 

CrazyChef v2.0

Gold Contributor
ECF Refugee
VU Challenge Team
Member For 5 Years
Reddit Exile
VU Patreon
Badass looking coil man

Sent from my Nexus 6P using Tapatalk
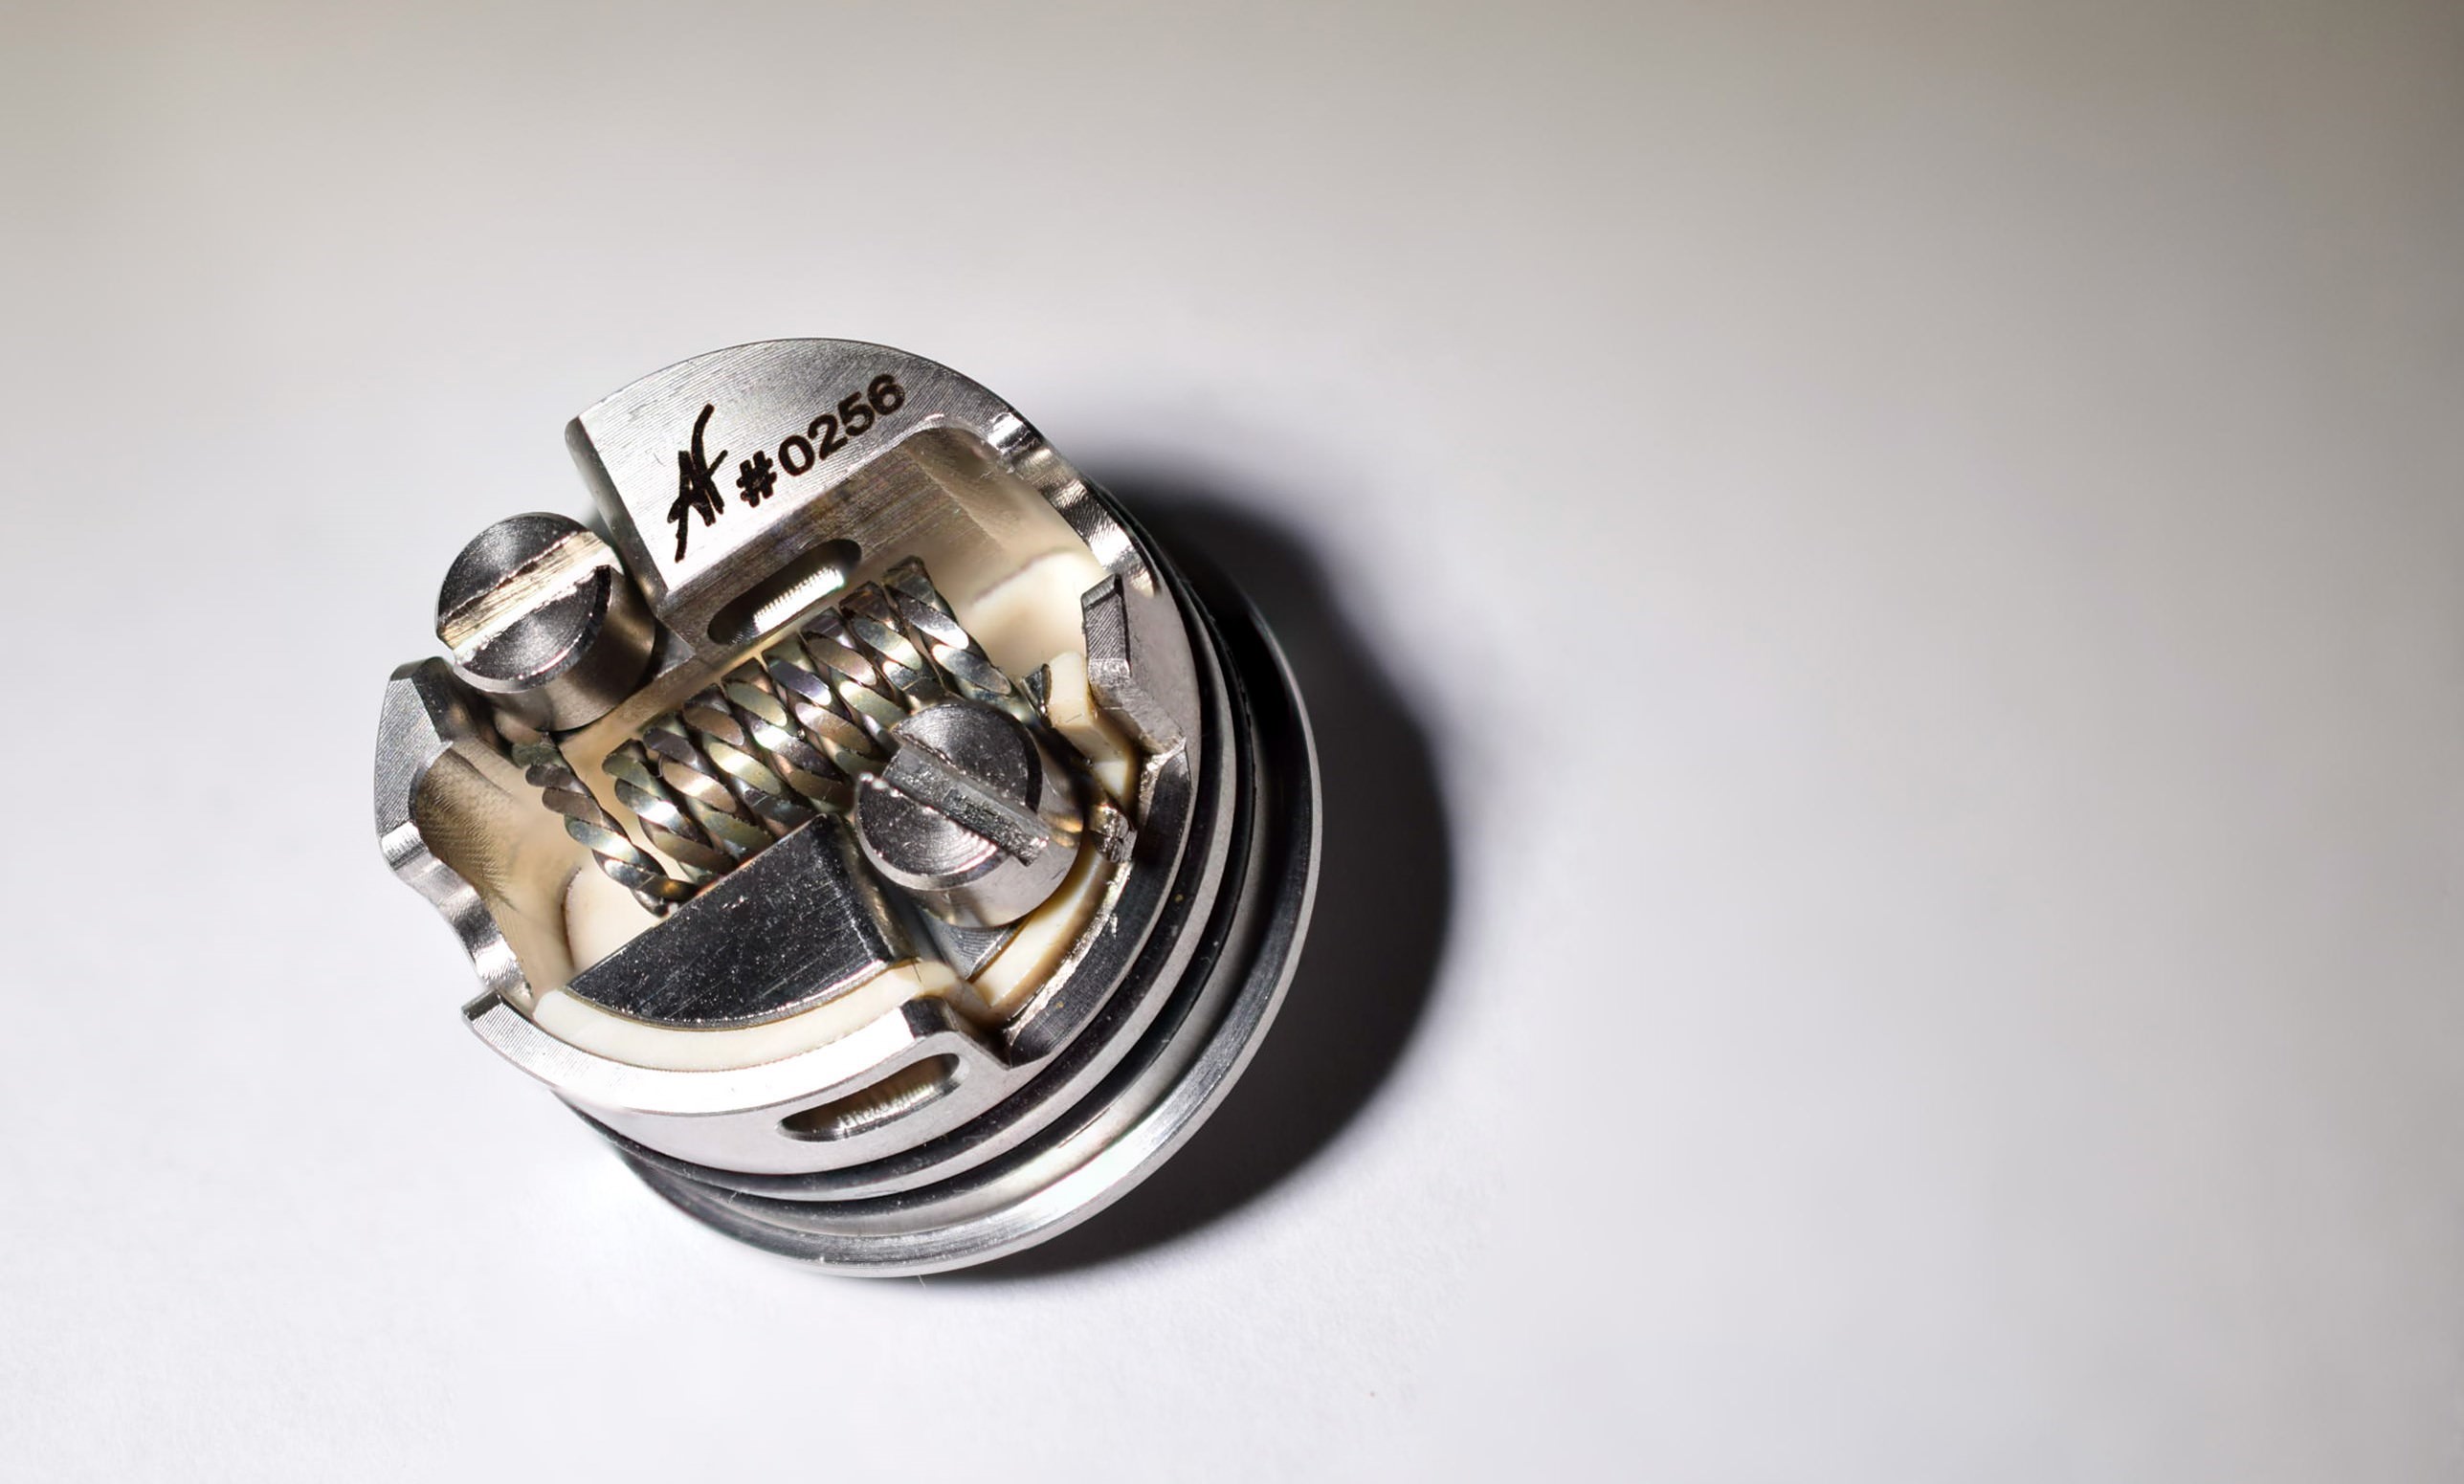
Thanks! It's just a 3 core twisted wire that I pulsed for color a while ago. I don't remember if it was polished or flattened with a hammer. It's been in my coil graveyard pile for a while. It's one each SS316L, N80, and KA1. I think it's 26g, but not sure.
 

raymo2u

VU Donator
Platinum Contributor
Member For 4 Years
Unlisted Vendor
Just wondering on the software side:

Has anyone tried using Lightroom or GIMP?

I’m not a builder or really into coil porn, but I do play around with drone photography (mostly video)

With landscapes, I start with raw photos and make them as flat as possible. I then go on with Lightroom to add in the color, saturation, exposure and clarity.
I may do a break down with LR and PS (when I get a better grip on PS) but LR is pretty easy.

More stacking practice. Still getting the shadow... :oops:
Also not getting anywhere near the detail I wanna get. Hopefully that'll get better when the extension tubes get here.

g9lhkP8.jpg

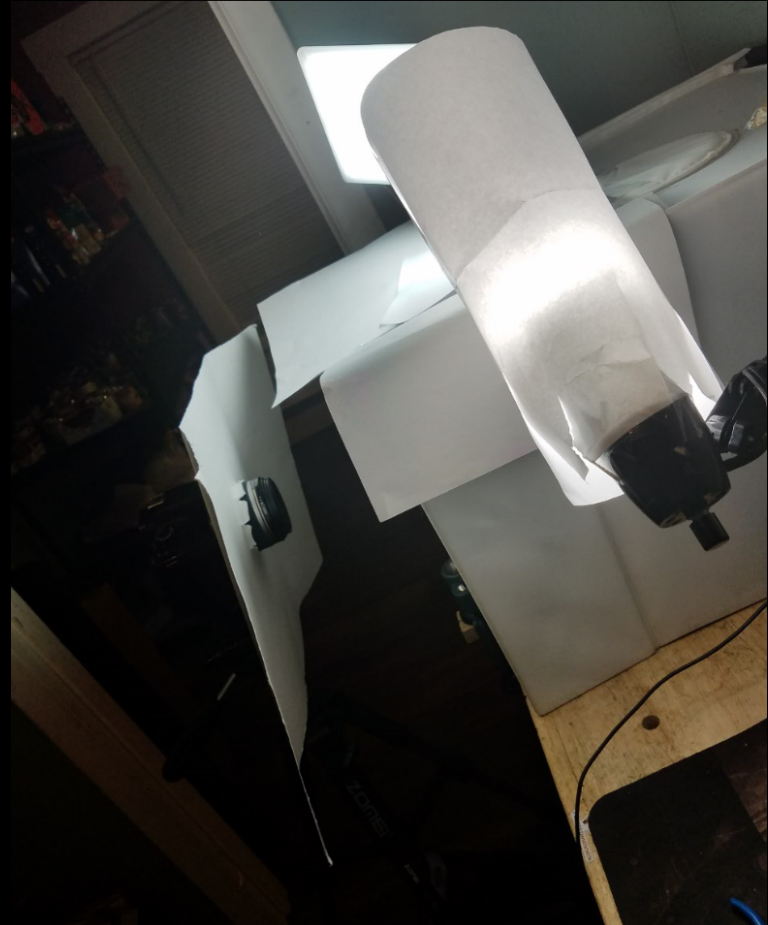
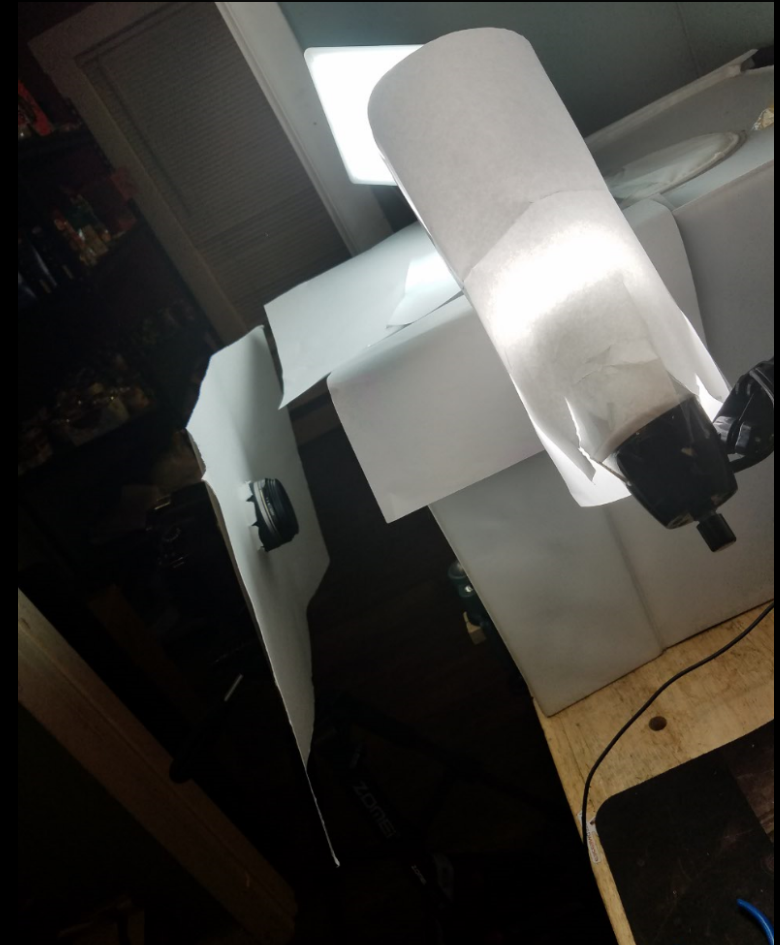
If you want to remove Shadows you will want atleast 2 lights either behind the subject pointing towards the camera or in front of subject heavily diffused pointing at the subject. I like the lighting behind and reflecting off a paper I have around my lens, giving a soft, smooth light everywhere the camera will see. Make sure to turn off your Rooms normal light when shooting so the warmth isnt injected into the shot.

Have your subject held by a alligator clip raised off the work surface (atleast 2 inches) and as far forward from your backdrop (especially with blacks). This helps make the backdrop hide inconsistencies or dust, and makes black backdrops darker.

This is what I was doing previous to this past week on Instagram.
I was using a cloth light box with barn doors, using a LED lamp and a Architecture Lamp (both 5500k lights) and have them bounce the light off the camera paper onto the subject while also filling light in from the sides, getting a decent amount of coverage. My only issue with this setup was it took up 1/3 of my bench and the tripod feet would constantly be stuck on the leg of the bench which became frustrating, other than that it was great.

5df36265e0d2e39482434f1737ac6f0b.png
7be12a77eac4566f679d5c0e0de30afa.png
9fc85cf47d0cb08469459355d599a544.png


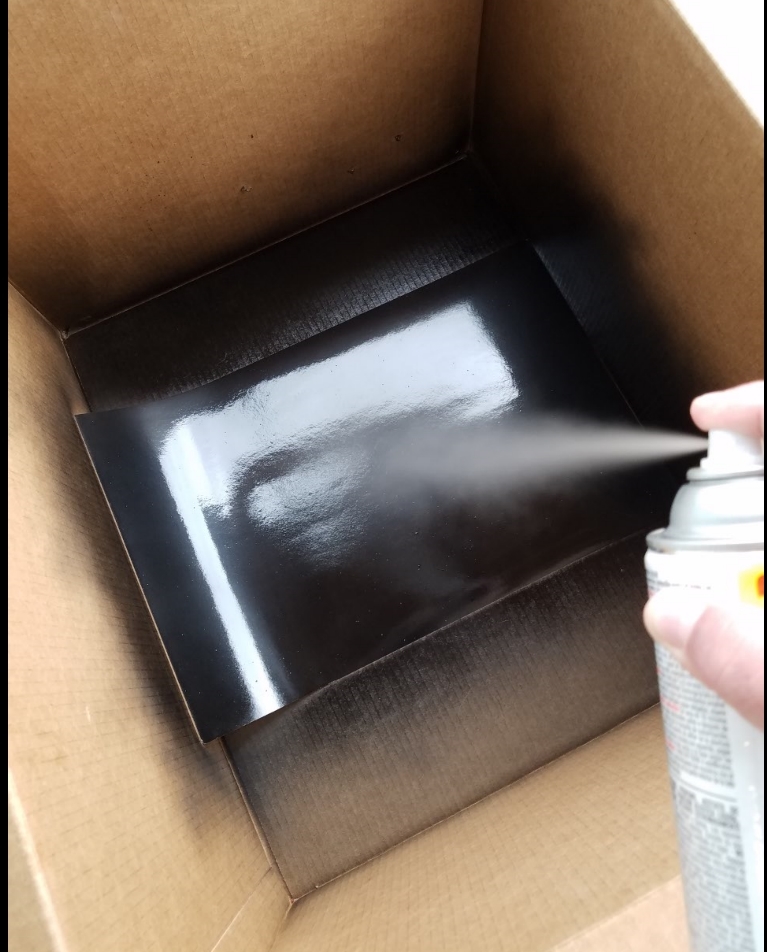
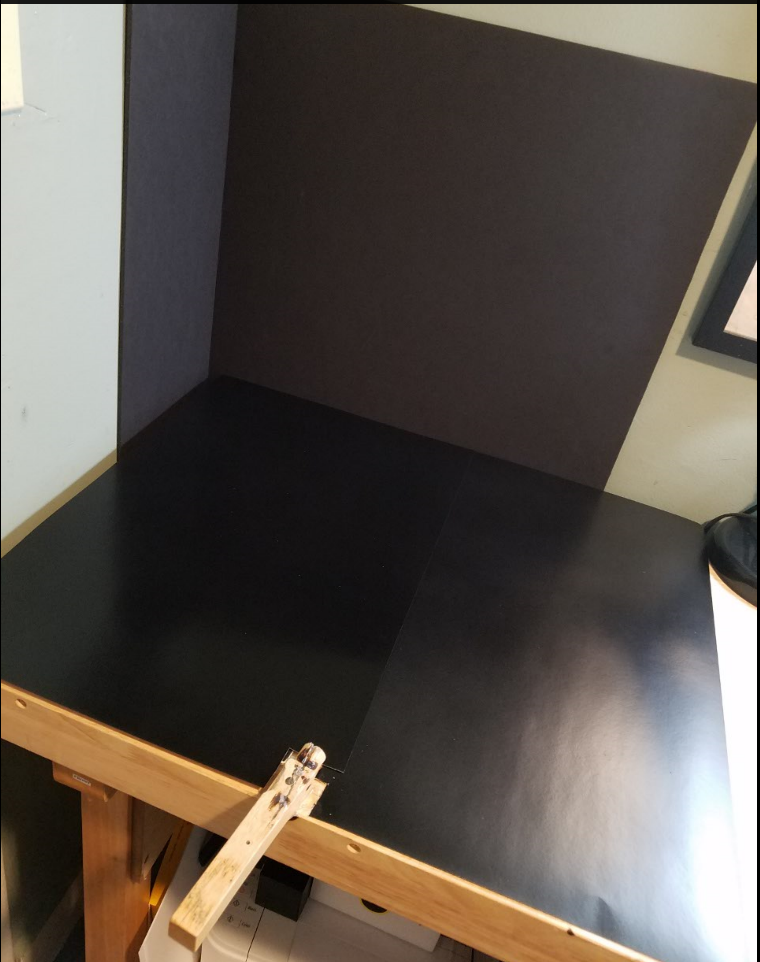
I am still trying to find something that works as well that doesnt take up as much space and is easily created, these were my steps to lay the surface area and backdrop.


I started with White Poster Paper and sprayed it with Gloss Black Spray Paint. Then I laid the Poster Paper on the Bench and used Black Foam Board for the Walls, using Double Sided Tape to secure them. (The Painted Paper dried and both looks the same now)

807325cba25bb017d763ebd792f552c4.jpg
77b8e733e67e3d756897f61b822a28b4.png


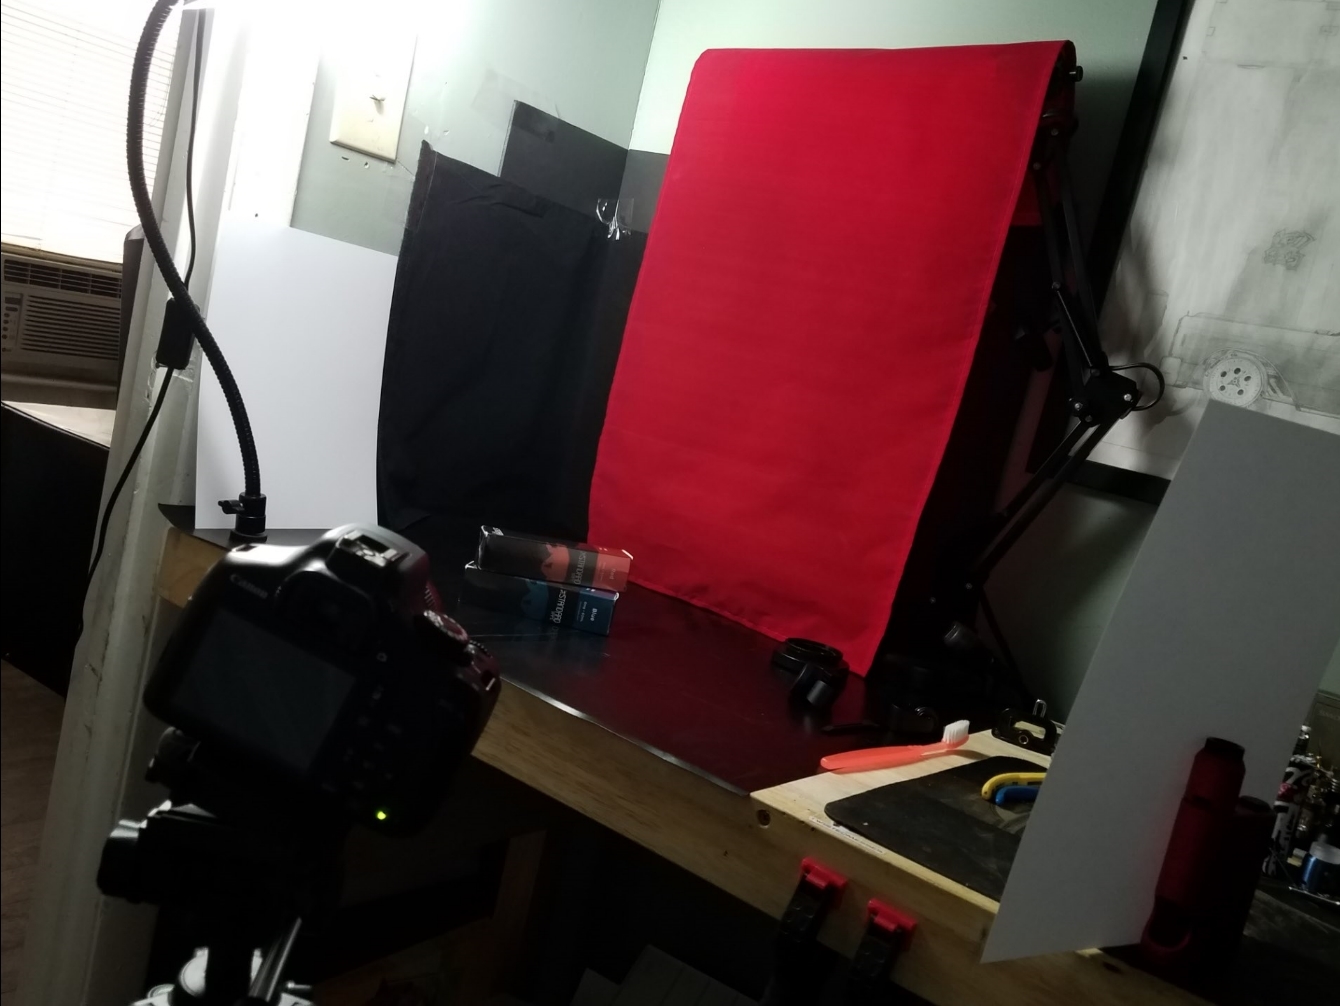
Adding a Red Cloth Backdrop or others I can easily make the background different, using nothing but diffused lighting I now have a massive photo space. I can use white paper to reflect light to where I need it also.

8024bfdc497818ff0343e343f1707a3f.jpg
af8309b928766804bbfbb05a7669fa0a.jpg


If I take white paper (printer paper) and have it standing at the sides of the subject I can get really close for macro shots and not worry about lighting. This only shows you that you dont need to spend a bunch of money on a studio-like area to get some great shots....

Gumm2.jpg Single5.jpg Single4.jpg Single3.jpg Storm11.jpg Storm5.jpg
 
Last edited:

CrazyChef v2.0

Gold Contributor
ECF Refugee
VU Challenge Team
Member For 5 Years
Reddit Exile
VU Patreon
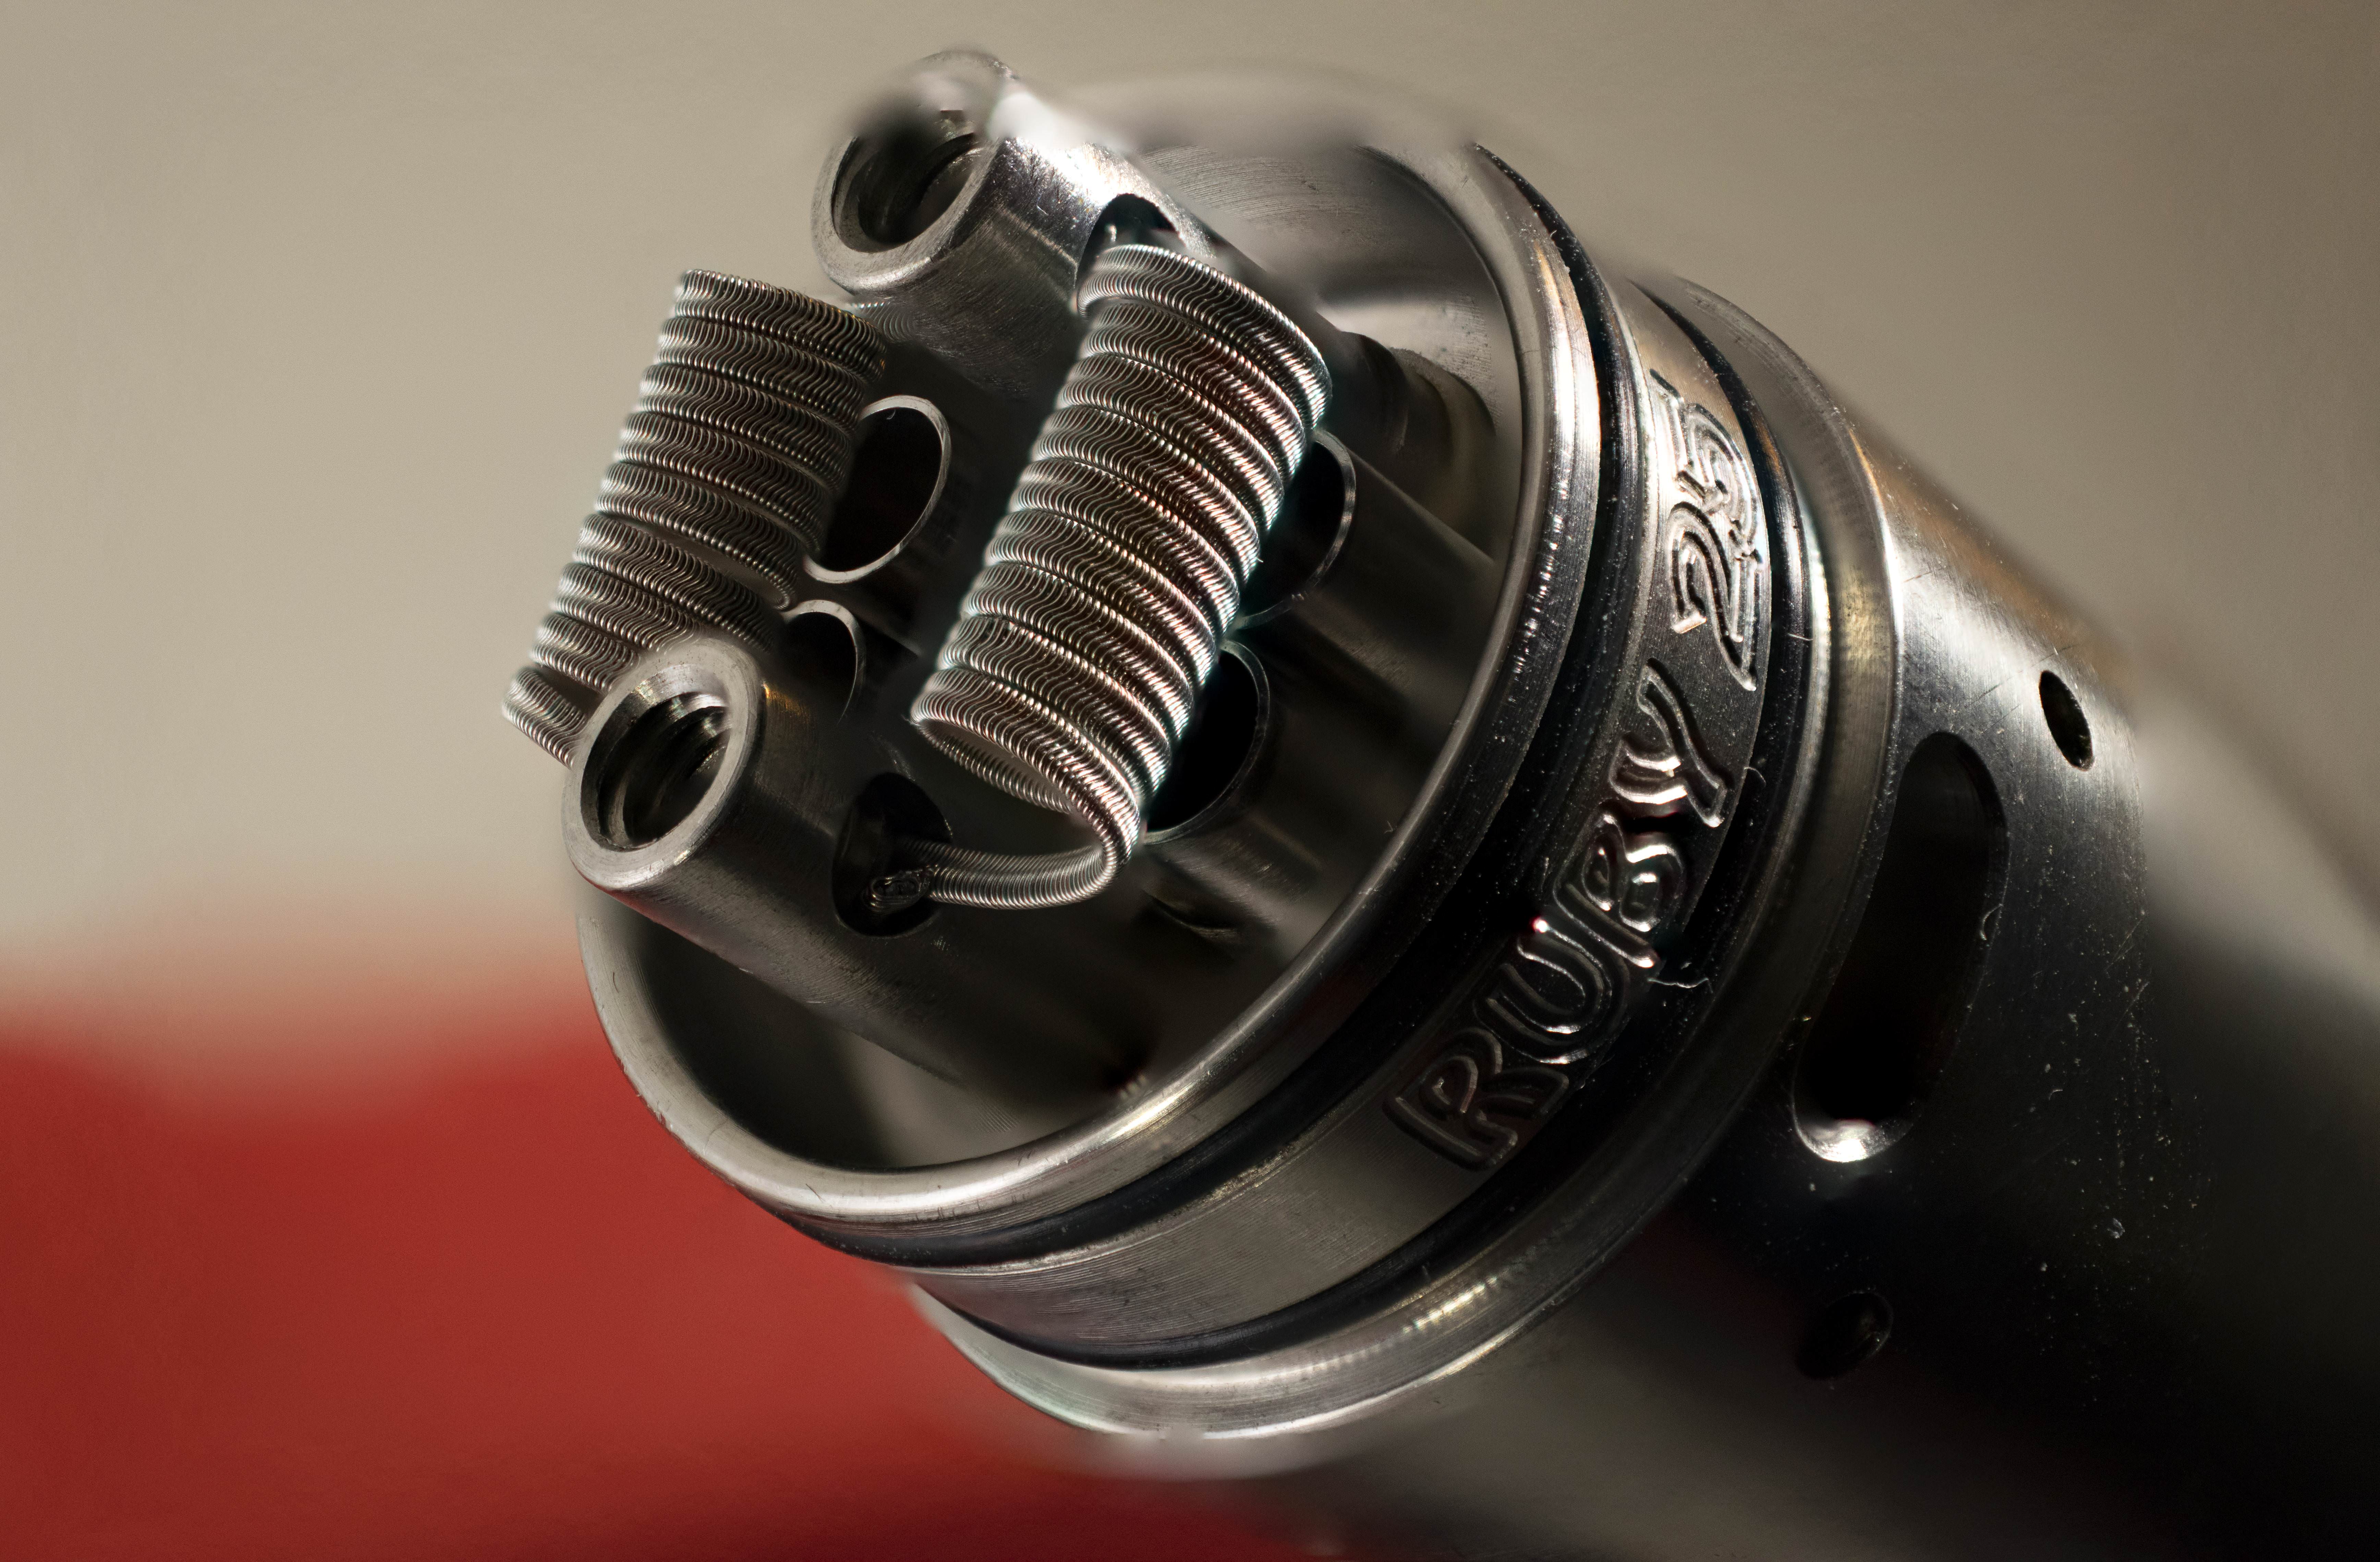
I put a new build in the Ruby and figured I might as well get some more photography practice in. The more I try this, the more I realize there is to learn. You guys with the IG Macro Monday pics are definitely a talented bunch! I really need to set aside some time to learn the basics of manual camera operations.

So anyways, this is a stack of 35 images taken with Helicon Focus. I stacked them in Photoshop, and did a little retouching in Lightroom. For some reason, I'm still not getting everything in focus with the auto focus steps in Helicon Remote. So, the first pic is what I shot with, the 2nd is the stacked and unedited pic, and the third is obviously the edited pic.

Now I'm gonna wick this thing and juice it up with some Dinner Lady Lemon Tart. If you haven't tried it, it's delicious!


A4AJ8iF.jpg

HVTjw1J.jpg

fCoAb0t.jpg
 

MoFasterMo

Bronze Contributor
Member For 4 Years
Dammit! This thread just cost me $450... I ordered the Nikon D5300 (w/wifi) - body only. I can use the lenses/batteries/etc. from the D3300 with it. Now to figure out if I should keep the D3300 body or sell it on a photography forum.
LOL... and so it begins.
If you thought vaping could get expensive just wait, your wish list will always have about $3000.00 dollars worth of equipment on it no mater how much you spend.
Then you will start working on making a living with it to justify the cost. (so you can buy more gear)
God help you, you've just entered the abyss. :cheers:
 

CrazyChef v2.0

Gold Contributor
ECF Refugee
VU Challenge Team
Member For 5 Years
Reddit Exile
VU Patreon
LOL... and so it begins.
If you thought vaping could get expensive just wait, your wish list will always have about $3000.00 dollars worth of equipment on it no mater how much you spend.
Then you will start working on making a living with it to justify the cost. (so you can buy more gear)
God help you, you've just entered the abyss. :cheers:
Yup! I already have my eye on a 100mm macro lens...
 

MoFasterMo

Bronze Contributor
Member For 4 Years
Actually, I have been toying with the idea. With the possible demise of my vaping business due to the looming FDA deeming regs, I need to look for my future income possibilities.
Consider autos and real estate photography, it pays the bills.
I live in a town of about 35,000 and shoot 10,000 pictures about every 30 to 40 days. (not all are used)
 

mach1ne

Gold Contributor
Member For 4 Years
finally with the tutorial. sorry for the delay.

focus stacking in photoshop is pretty much automated. most of your success will stem from the actual photographs you start with...the quality of which depends entirely on your skill level and hardware. for coil shots you will likely need some kind of macro lens in addition to your camera (phone or otherwise).

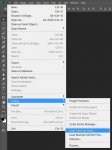
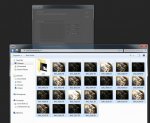
my setup is just an iphone 6s and a clip on macro lens for now. its not the best, but it will get us through the tutorial, so lets get to work. the idea is that your macro lens will not likely be able to focus on the whole subject (your coils/deck) at once...so you have to take a series of shots with different parts in focus, then stitch them together. once i get my pics off the phone, i group them into folders, so that each folder is one 'shot'/camera angle/series (which can be composited from any number of pictures). open up photoshop and go to file>scripts>load files into stack
1loadstack.JPG
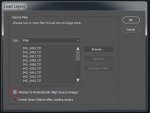
2select.JPG

make sure to select "attempt to automatically align source images"
3align.JPG

once its all loaded up (this can take a minute, depending on your computer and the amount and size of photos you are working with) you get this
4loaded.JPG

you can see all the pics in the layers panel on the right. select them all and right click on one of them and choose 'group from layers'
5group.JPG

i fucked up screen shotting this part, but once you have your group (like a folder with all the layers in it), right click on it, and choose duplicate group' so you have a backup copy of the pics handy. click the little eyeball beside the layer thumbnail for the first group to turn off its visibility (its just a backup so we dont want to do anything to it).

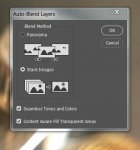
now open the visible group, select all the layers in it and go to edit>auto-blend layers
5.5blend.JPG

make sure to select 'stack images' and check the two boxes off in the blend options
6blend.JPG
when its finished (again this could be a bit of a wait) youll get whatever results you get from the automation and your starting photos
7blended.JPG

ok you can see that the back coil and the posts are a bit more in focus as a result of doing this, but its a bit washed out/over exposed looking. this is because i had enabled auto exposure bracketing on my phones camera app, which takes the picture multiple times at different exposure levels. this can help when you are stacking the pics because there is lots of color information to work with, from dark shadows to bright highlights. usually this is averaged out pretty good, but in this case, the bright shots brought it up too much. to fix this im gonna just delete this group, and redo the automatic blend with some of the brighter pics removed from the stack. when i do this ill delete the group, then i will duplicate the original/invisible/backup group we made at the start over again, and work again with the duplicate...but before i blend them again, ill remove the three brightest shots...
8redo.JPG
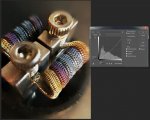
and the result is much better already.
9better.JPG

at this point you are in photoshop, so do whatever you want to touch up your pic. one thing to take note of that could be confusing for someone who is new at photoshop is that when you come out of the auto-blend layers function, photoshop will often forget to deselect the last part of the pic it was working on. hit ctrl-d to do that (or go to select>deselect in the toolbar). when there is a selection made in photoshop, everything you do will only apply to the selected area, so if you are trying to do something and nothing appears to be happening, its probably that there is only a tiny sliver of something selected and you need to deselect it...

i tend to prefer a less is better kind of editing, so all i usually do is hit up the curves menu (pic limit reached...continued in next post)
 
Last edited:

MoFasterMo

Bronze Contributor
Member For 4 Years
I found a website that finally explains aperture (F-Stops), shutter speed, and ISO settings in a way that I can understand. Gonna have to try some more stuff soon.
https://improvephotography.com/photography-basics/
To get your head around aperture, shutter speed and iso, and how they work together do a search for camera exposure simulators like this one http://www.canonoutsideofauto.ca/play/
I would also shoot in RAW format (if your software is compatible) and force yourself to shoot in manual mode as much as possible. You will be glad you did latter on.
 

zephyr

Dirty Pirate Meg
VU Donator
Gold Contributor
Member For 4 Years
Unlisted Vendor
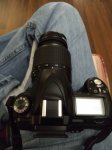
Getting a Nikon D50...TONIGHT!

Out of town tonight, can't wait to get home with this

IMG_20180603_221934-1209x1612.jpg

I guess I should update this - I was incredibly stoked to get a "real" camera, but it's old, lower MP than my phone, and with no macro lense it's pointless for coil shots. However, the color it gives is closer to real, so there is that...

Time to get a 37mm clip on for my phone, instead
 
Last edited:

VU Sponsors

Top