Become a Patron!

Kangertech NEbox leak

Hi, I recently invested in a Nebox and no matter what ive done it viciously leaks. I have switched back and forth between rbas and ssoc coils. The leaking seams to subside while using an rba coil and making sure it is not screwed in to tight to not defeat the o ring purpose, however I absolutely suck at re-wicking the coils and I can not figure this out for the life of me. Even worse is I work in a vapor store, (not for but we share a building) and because of that I was able to get this nebox for a lower price but no one ever mentioned any leaking problems with it and even now ive gone back to them two or three times trying to fix the leaking and no one seems to be able to know how to fix it or even that it has a leaking problem. I've spent like two weeks reading a lot of different stuff online and nothing is working. I even went to a different vapor store in my area and the guy said he had no clue and couldnt even teach me how to re wick an rba for some stupid reason. Im on a huge money crunch right now after the holidays and do not have more money to drop on yet another set up..

If anyone can please give me some tips or advice on this it would be really appreciated im starting to get very frustrated.
 
Ive also been storing it differently, upside down and on its side NEVER standing up. even when charging. Keeping tank half way full (i usually dont even go half way but 1/3) nothing, still leaks. ive lost like a whole bottle of ejuice out of the bottom air flow. ive only had this thing for about a month.
 
Last edited:

Neunerball

Platinum Contributor
Member For 4 Years
Member For 3 Years
ECF Refugee
You checked all the o-rings, or even replaced them? If an o-ring doesn't seal off properly, air can get into the tank, thus causing leaking.
 

AmandaD

Platinum Contributor
Member For 4 Years
I've been using the stock OCC coils, and yes it does leak if a) the juice level gets to about half way, or b) there's a rapid temp change (such as when I get up in the morning and put the heat on).

Seems to be a common problem, but I can live with it as I only generally use it overnight or when I'm out and about. I charge it on its side, which seems to work well also.
 

Lost

Silver Contributor
Member For 4 Years
Member For 3 Years
I even went to a different vapor store in my area and the guy said he had no clue and couldnt even teach me how to re wick an rba for some stupid reason.

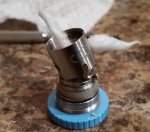
I slammed this out to show the best way I've found, so far, to wick for the Nebox. Please don't give me crap about the condition of the coil, or the fact that I still don't have enough cotton coming out of the juice holes/sleeve.

Benefits of this build are quicker wicking, and no flooding of the atty, which is what can cause the leak through the bottom/air hole.

Kanger RBA Rebuild 1.jpg
PIC 1: Cotton through coil.

Kanger RBA Rebuild 2.jpg
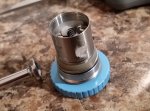
Pic 2: Cotton through one hole, other end sits up through the RBA. Make sure your sleeve is facing the right way.

Kanger RBA Rebuild 3.jpg
Pic 3: Cotton still dry. Push cotton through other hole with a smallish object. Flat head micro screwdriver, for example. Pull both ends. Note that I still don't have quite enough cotton sticking out. But my wife says this particular rush job was still fine... quick juice flow, no leaks.

Kanger RBA Rebuild 4.jpg
Pic 4: Fluff cotton outside holes. Prime cotton, but don't prime a lot. Cut cotton relatively flush. Take your screwdriver and move this outside cotton around a bit so it's all around the juice holes, and so it sits as close as possible to the RBA. Reason: There's not much wiggle room in the Nebox for all sorts of wicking that might be poking out.

=======

I'd like to tell you that your B&M guy is an effing moron. But the simple fact is that there are just way too many people working at shops that might only be good at retail juice and selling hardware that they carry. It's hard to find employees that know everything about such a quickly evolving market.

The more DIY you get in to, the more you're on your own. Especially with juice, since even the owners/managers who know aren't going to want to waste their time teaching you how to NOT buy their retail juices. As for coils/rebuilding/batteries/ohms law, I don't even ask any more.

Hope this helps. Critique all you want. I'd be more than happy to start wicking differently, if someone has a better way.
 

Erik13

Member For 4 Years
Member For 3 Years
Member For 2 Years
Member For 1 Year
I haven't had any leaks other than when I charged it standing up. Maybe you got a bad one
 

OBDave

VU Donator
Gold Contributor
Member For 4 Years
Wicking looks pretty good to me, though I have yet to try rebuilding since miserable failure with the Subtank Mini RBA's too-tiny juice slots and a butchered attempt at filing out the cap...wife stopped using her Nebox and reverted to a Crown/Sig100 setup too, but still won't let me mangle her factory coil "because I'll go back to it soon, y'know?"
 

Lost

Silver Contributor
Member For 4 Years
Member For 3 Years
a butchered attempt at filing out the cap

Was going to do that last week, and chickened out. Had the tank w/ me during the holiday get-togethers, and just left the mod in my pocket to keep the juice a little warmer. Got me through.

Will be doing a new FT order soon, so I might as well order a few extra/newer RBA's... backup for her and an upgrade for me. Then I can try the filing/drilling and not care whether it turns out or not.
 

purpleduck

Member For 4 Years
Member For 3 Years
Member For 2 Years
Member For 1 Year
I gave up on rebuilding the coil for the nebox. There just isn't enough room in there for me. I bought a box of nickel coils and have had no leak problems. Also, for any of you that would like air flow on your nebox you can buy a drip tip from sweet vapes with air flow for less than 5 bucks. It works great.

Sent from my LG-G4 using Tapatalk
 

DevAuto

Gold Contributor
Member For 4 Years
ECF Refugee
Reviewer
Vape Media
I don't have an nebox, but the rba in the pics looks identical to my subtank mini rba (for all I know it's the same one). The wicking job looks pretty good, the only observation I would make is that once the wick is through both holes in the sleeve, I pull it gently until it is "tight", then lift the sleeve about 3/4 of the way off the base. This gets an even amount of "flex" in the cotton when you push the sleeve back down and tighten it. This helps to completely fill the holes in the sleeve with enough cotton to keep juice flow into the wick at optimum levels and not allow too much in.

HTH!
 

DevAuto

Gold Contributor
Member For 4 Years
ECF Refugee
Reviewer
Vape Media
Thanks @DevAuto I'll give that a try
BTW ... forgot to mention, I've found with mine that a 3mm internal diameter coil gives the best amount of cotton to fill the holes, I use a coil master 3mm rod for contact coils, and a fine thread machine screw for spaced coils.

HTH, good luck!
 

Lost

Silver Contributor
Member For 4 Years
Member For 3 Years
fine thread machine screw for spaced coils

[hangs head low] Considering what I do for a living... probably should have come to that conclusion on my own. Did not. Heading to the garage to get the fasteners right now. Brilliant.
 

DevAuto

Gold Contributor
Member For 4 Years
ECF Refugee
Reviewer
Vape Media
[hangs head low] Considering what I do for a living... probably should have come to that conclusion on my own. Did not. Heading to the garage to get the fasteners right now. Brilliant.
LOL!
 

wally

Gold Contributor
Member For 4 Years
ECF Refugee
Lost your a 100% right on that build. Note very important to make sure the cotton has not been rolled and it needs to be cut close like you say and the cotton needs to be lightly pulled around the outer holes to make sure there is no cracks where the juice will escape. (carefully sealed because this is where the flooding is). On all mine I cut the holes larger to increase the juice flow so, I have to deal with a larger hole but with a larger hole you don't have to worry about dry burns and you get much better flavor.
 

Garemlin

Gold Contributor
Member For 4 Years
ECF Refugee
When I wick my Subtank RBA, which look just like the Nebox RBA, I just feed the cotton through the outside sleeve, through the coil and out the other side. I snip both sides leaving maybe 2mm of cotton. Juice the wick at the sides then the coil. Wait for it to expand a little then tuck the cotton in to the holes using an in and down push. When looking at the inside you should be able to see just a little light at the top of the wick. Sometimes it does require another little tuck after a few puffs due to expansion. Also I have found that a 3mm ID coil works best.


Tap'd from my 6 Plus
 

Lost

Silver Contributor
Member For 4 Years
Member For 3 Years
I've found with mine that a 3mm internal diameter coil gives the best amount of cotton to fill the holes

The pre-built Kanger RBA
2.5mm, 5 wrap, .32 ohm. Set at 290 degrees.

New Ti coil
26 gauge, 3mm, 6 wrap, .25 ohm. Switched Nebox to Ti, she changed temp to 190 degrees.

Yeah, way more cotton. Plenty of room for the 3mm coil. Steam engine predicted .27 ohm, so it was pleasantly close. Didn't use the machine screw though... just the jig. Worked fine. She's got 12mg/ml in there. Three drags and my teeth are tingling.

If I have time later, I'll upload pics. Thanks all.
 

DevAuto

Gold Contributor
Member For 4 Years
ECF Refugee
Reviewer
Vape Media
The pre-built Kanger RBA
2.5mm, 5 wrap, .32 ohm. Set at 290 degrees.

New Ti coil
26 gauge, 3mm, 6 wrap, .25 ohm. Switched Nebox to Ti, she changed temp to 190 degrees.

Yeah, way more cotton. Plenty of room for the 3mm coil. Steam engine predicted .27 ohm, so it was pleasantly close. Didn't use the machine screw though... just the jig. Worked fine. She's got 12mg/ml in there. Three drags and my teeth are tingling.

If I have time later, I'll upload pics. Thanks all.
Sounds good, how does it hit? I tend to use the machine screw because I SUCK at building spaced coils with a jig. I've found that my coils seem to perform better in TC mode with them. Contact coils and NI 200 aren't a great combination in my book, they'll get the job done if I'm in a hurry, but don't perform as well, and need rebuilding more frequently.
 

Lost

Silver Contributor
Member For 4 Years
Member For 3 Years
Sounds good, how does it hit? I tend to use the machine screw because I SUCK at building spaced coils with a jig.

Hits well. Airflow fine, flavor fine. Firing is just as zippy as it was with the Ni200. Definitely needed the temp adjustment.

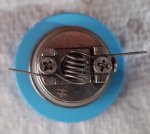
Used the jig, but still hand-wrapped it. Just pulled the coil apart with my fingers and pushed it back together with both parts of the jig. It snapped back almost perfectly.

Once in the RBA, I had to pull the sides out a bit to keep every coil spaced. The pic makes it look like the coil is bowed along the length, but it's actually dead-straight across.

Ti Coil Nebox 6 wrap.jpg
 

DevAuto

Gold Contributor
Member For 4 Years
ECF Refugee
Reviewer
Vape Media
Hits well. Airflow fine, flavor fine. Firing is just as zippy as it was with the Ni200. Definitely needed the temp adjustment.

Used the jig, but still hand-wrapped it. Just pulled the coil apart with my fingers and pushed it back together with both parts of the jig. It snapped back almost perfectly.

Once in the RBA, I had to pull the sides out a bit to keep every coil spaced. The pic makes it look like the coil is bowed along the length, but it's actually dead-straight across.

View attachment 37507
I still manage to really screw up my coils trying it that way. I have probably wasted 3 feet of wire trying, so I stick to what works ... :D
 

VU Sponsors

Top