Become a Patron!
You are using an out of date browser. It may not display this or other websites correctly.
You should upgrade or use an alternative browser.
You should upgrade or use an alternative browser.
Nos Creare Draco
- Thread starter Absolute-Wood
- Start date
- Status
- Not open for further replies.
Good Day all-
Well, this will be a story about how this custom Mod will come to be. An illustrated story of sorts. You will be witness to the major decisions made, the process, and a step by step of the manufacture. Here we go -
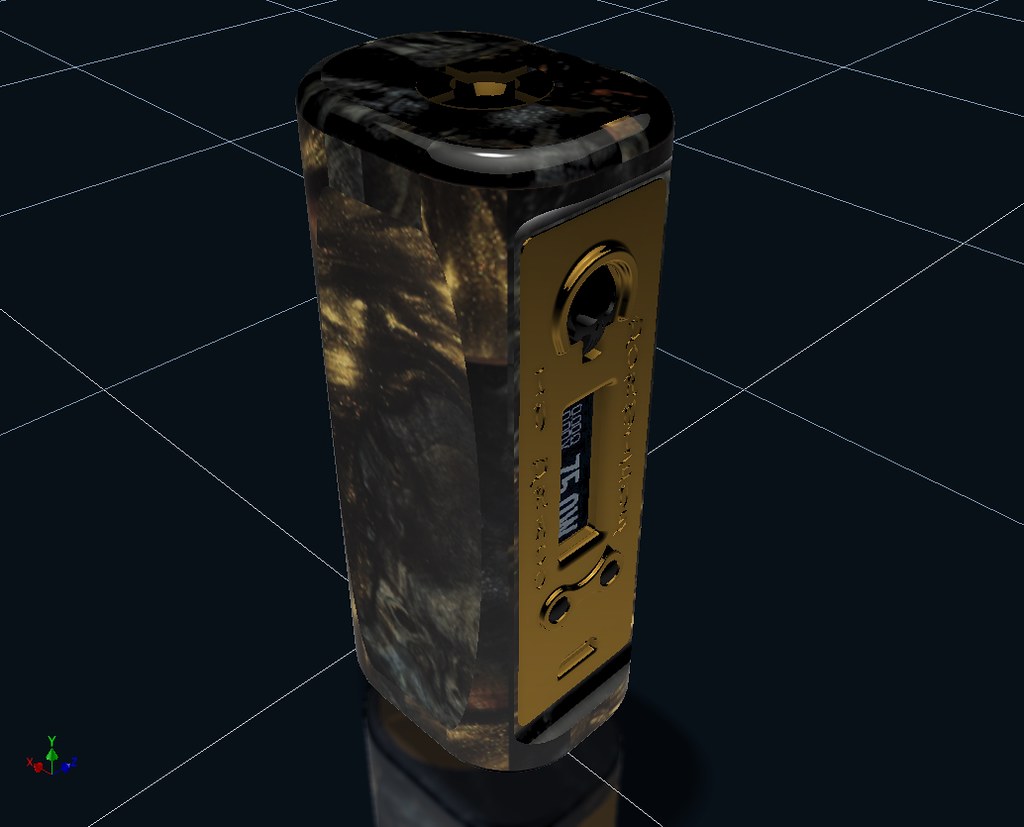
Earlier, a vaper saw and fell in love with a particular hybrid blank that we had in stock. A conversation was started about their likes and dislikes when it came to vape gear. We exchanged pics and ideas about what would be desirable, harmonious design choices that would make it a daily driver. The first decision was for a DNA75 chipset to go "under the hood".
Compact size was a major driver with the choice of PV style. It was decided that our Mod V was the best starting point as it's the smallest design that we have. 26650 was chosen for not appreciably increasing the size in this design.
Another design trait the customer liked was the rounding of both edges on the Side by Side designs, like the currently in-process Squonk Proto. The Mod V had only one rounded edge, the faceplate edge was flat, giving the body a "D" shape. It was decided that we could extend the body slightly beyond the flat for the faceplate, and round the protruded edges. We even found a little room to reduce the overall depth. This is very similar to the shape of the Provape Radius device.
An early desire was that the Mod had to have the skull fire button. The faceplates designed for this button have the ability to have some text inset into them. Because they are 3D printed, this text could be anything that was desired within the restraints of the area available. This is where we came to the dragon theme - the owner is a reptile fan, and decided on a latin inscription that reads "The Sleeping Dragon".
Along with the connector and battery tube, brass was chosen as the material for the faceplate as we could add raised areas around the buttons to safeguard against accidental actuation. The faceplate is actually 3D printed in wax with a special high definition printer. The wax print is then encased in plaster and the wax is melted away - creating a very exact mold. 2000 degree molten brass is then poured into the mold. After casting, the piece is extensively polished by hand. The exposed battery tube is also highly polished by hand.
So, we've made decisions about function, form and aesthetics. A number of pics and rendered images and drawings went back and forth between us as the decisions were made.
Next we'll gather the drawings needed, get the raw size of our blank locked down, and have a look at our blank to decide where excess material will be removed to get it to the working size. Consideration will be taken to see if we can get a chunk of material removed that can be used to make a matching drip tip.
I'll be back! With pics and drawings!
Rick
SnapDragon NY
Senior Moderator
Staff member
Senior Moderator
VU Donator
Diamond Contributor
Press Corps
Member For 5 Years
VU SWAT
Wow forza, so excited for you! Beautiful piece of stabwood you chose! That is the worst part of most of the stabwoods for sale, that you cannot choose the exact stabwood you want.
It is so great that you found a custom mod builder here on VU and be able to have the mod of your dreams built! Love the Dragon theme too, dragons are my favorites!
It is going to be cool- and can hardly wait to watch this process!
It is so great that you found a custom mod builder here on VU and be able to have the mod of your dreams built! Love the Dragon theme too, dragons are my favorites!
It is going to be cool- and can hardly wait to watch this process!
Last edited:
Thank you @SnapDragon NY I am SO FREAKING EXCITED!!
When I first saw that piece of wood I was *in love*

It's going to be such an amazing mod and actually getting to follow the building process is just the coolest thing.
Woot!!
Sent from my SAMSUNG-SM-G935A using Tapatalk
When I first saw that piece of wood I was *in love*


It's going to be such an amazing mod and actually getting to follow the building process is just the coolest thing.
Woot!!
Sent from my SAMSUNG-SM-G935A using Tapatalk
Hey-
You may have noticed I did some housecleaning of this thread - some posts didn't make sense anymore, so they were deleted - just so you know!
Made a new video:
Rick
You may have noticed I did some housecleaning of this thread - some posts didn't make sense anymore, so they were deleted - just so you know!
Made a new video:
Rick
Hey gang,
The third video is done - excuse the editing, a new and obviously beginner skill for me. Not to mention being on the other side of a lens feels weird.
This 4+ minute video is just the choosing, setup and cutting of a "slab" from the edge, preparing the blank for operations on the milling machine. The slice taken will be considered for making of a matching drip tip -
Or who knows what...
Rick
The third video is done - excuse the editing, a new and obviously beginner skill for me. Not to mention being on the other side of a lens feels weird.
This 4+ minute video is just the choosing, setup and cutting of a "slab" from the edge, preparing the blank for operations on the milling machine. The slice taken will be considered for making of a matching drip tip -
Or who knows what...

Rick
I want a Squonker.....
Yup - I'm working on it, but along with three stands (just got a new one), a couple accessories, and three Mods.
For the squonker, the 3D model gets updated first, then the initial 3D printed parts can get ordered. I can continue machining the proto body after the model of the body is complete.
The squonker is a complicated design, and the redesign meant pretty much starting from scratch because all the 3D printed stainless had to be changed. That sucks because of the lead time with printing stainless - a couple weeks. Plus the material has some shrinkage when made that is hard to design to. This usually means the part will be printed at least a couple times before it fits right. One thing I have determined is the tube holding the squonk bottle will need to be brass because of machining constraints. It can still have a stainless cap if SS is used for the rest of the Mod. The squonker is being followed in this thread.
I haven't placed the option on the website, but the Model II (2x18650) which is a basic rectangular Box Mod, could be squonked by replacing one of the batteries with an 18650 sized bottle, and boring a finger hole in the cover. FDV have the bottles that fit in the battery tray. Too bad they don't make a 26650 version.
Rick
Just amazing to watch it start coming to life. Slowly but surely. Always the best idea. Looking good.
Sent from my SAMSUNG-SM-G935A using Tapatalk

Actually already further down the road, just need to edit the video and see if more work needs to be added.
Back to the land of exotic woods and sharp metal teeth everywhere -
Rick
Hey Guys-
Been working and shooting video - only managed to get the first video edited. Had a rough week with pain, lost a few days. This video is the milling just after the last video of the (band) saw... I've gotten further yet - after a few more operations, the battery hole is drilled now, and the rounding of the edges is in progress. I'll edit the videos or shoot a couple still pics soon - this video is about 3 minutes:
Rick
OK - got a little more done, shot video again. The following video (3:30) represents reducing over two or three hours of machining time to about three and a half minutes - still more to go!
Rick
Rick
 ____________________________________
 ____________________________________
Just checking in to let y'all know we should have another machining update in a day or two -
Had a couple "no work - I hurt" days... oh well. The wood continues to call...
Rick
Hey all -
Just for info - I moved a couple posts that mentioned the squonker to the general box mods thread where we are following the development of that particular model. I left the first post as I answered it.
I would like to keep this thread specific to the Sleeping Dragon Mod.
Thanks,
Rick
ps: am working on the video for the next couple machining operations for the Dragon -
Hey Gang -
Man - it was friggin' hot today - almost 90! And still technically Winter...
OK, I need to apologise for being a bit disconnected the last nine or ten days... let me explain.
My older son, Evan, has been in the Navy for almost six years now. He and his twin sister, Taylor, will turn 24 next week. He has been stationed in Virginia the whole time. Needless to say, we don't get to see him very often. It's been over two years since last time. Well, he has been home for the last week and a half because he just left for his new assignment yesterday - Japan. Two years. So, we've been doing a lot with him. Japan is even farther out of reach for visits, so this time was special for us. Not to mention all the scary shit North Korea is doing just across the water from them.
I've actually gotten quite a bit farther with the Dragon, but the editing of the videos takes considerable time, and I haven't gotten to it yet. I do have a short clip of removing the body from the clamps, and looking at it for a few seconds. You will see there are only a few operations left before it's time to break out the sanding stuff! Here 'ya go:
Rick
Well, crap...
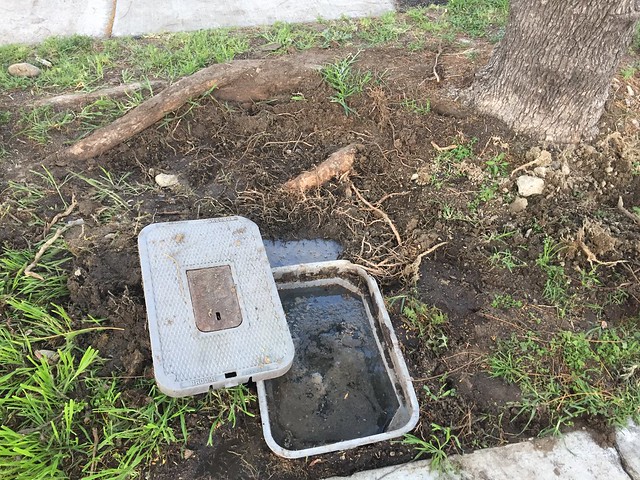
This is our water meter (water main) coming into the house. Also the trunk and roots of an older city tree. They don't get along so well... Root intrusion somewhere very near the box. Not the first time for root problems with this tree -
Just above the box in the pic, when drained, it is a solid mass of roots everywhere. Our plumber / friend needs a big, 12" deep chunk of roots removed to make an interim fix. I save a bunch by doing the excavation myself... (can't blame him - lol)
So...
I'm having to take a couple days to get that done - I know it'll be a a tough, dirty job. Then we have our marathon tax appointment on Friday - so much for having time to get prepared for that. Might have to hold the roots till after I'm ready for the tax guy.
I hope to be back on things this coming weekend.
Yay
Rick
Ha! It's funny how we have some parallels - A long, long time ago (in a galaxy far away), when I was in High School we had a septic tank backup and my Dad and I dug it up - Roger that, gross...That sucks. When I was in High School a tree on our property grew up through the septic tank. It was a mess. And ...Oh so very gross. Good luck.
Sent from my SAMSUNG-SM-G935A using Tapatalk
The repair is done, and I just turned the water on. Should be good for some years. The total fix would be to remove the tree, and tear it all out up to the house and replace the PVC with copper. Maybe later, big bucks. Already spent over 15k a couple years ago fixing root intrusion on the house mainline to the sewer.
Tax people later, learn our fate once again...
Remember, never let Yesterday use up too much of Today -
Rick

Hope to be active again soon - Rick
Just a note, rant, whatever - it's important - many may have gotten the CASAA email about this.
My thoughts on the matter, you're welcome to use any or all of it if you like -
The measure that keeps existing vapor products on the market (Cole-Bishop amendment) is seriously being considered for the new fiscal year budget. This saves the vapor market and thousands of small American companies - notably mine. Millions of lives are at stake. Everyone will be affected. Our representatives need to hear from us.
Favorable data from scientific groups around the world is pouring in (consensus of 95% safer than smoking) and overwhelming the cries of those entities that will lose billions of dollars if vapor products are widely adopted as the safer alternative to tobacco use.
State governments receiving payments from large tobacco companies (Tobacco Master Settlement) and pharmaceutical companies making stop smoking aids will lose the most. The tobacco companies seem to know this is their future and are quietly supporting parts of the vapor industry.
Elimination of the vapor market will have a direct, negative impact on more than ten million individuals in the US, and many more will experience indirect negative consequences. More than 99% of the products will disappear from the market in August 2018 if this is allowed to transpire. Many jobs and small businesses lost, many who will reluctantly return to smoking. Removing the right to choose for future tobacco users. A billion people are expected to die from tobacco use this century. Vapor products might cut that number in half.
If this is "whined" or complained out of the budget by a group of politicians and activists, the possibility of the most profound boon to public health in decades or even centuries will be nearly choked from existence.
This seems the equivalent of ignoring the promise of great good coming from something new, not generally understood and almost magic like with it's ability to save lives - like penicillin.
We can't let money and power win this time, it hurts us all.
Rick Hageman
Absolute-Wood.com
I like big bumps and I cannot lie!
Hey Gang - No real news - Wanted to fill 'ya in.
Had a couple feeling crappy off days, and we've had the last few days with temps just below 100f (last day today, possible rain this w/e). Too hot in the shop to work - can't take the heat like I used to!
The Dragon Mod will come off the mill shortly; sanding next... The new Oba Mod (custom Mod II LiPo) will be introduced to the bandsaw!
Rick
On the topic of progress and wood chip pile diving...
Again, I've been experiencing some off days mostly horizontal... Also, I have been trying to get a couple holders clear coated so I can send them on to their new homes:
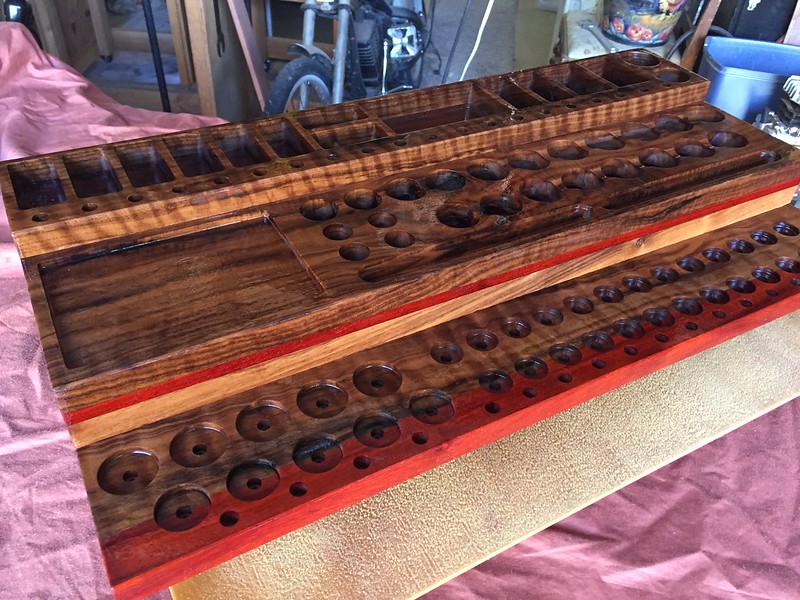
There are two, almost twins. Very special wood, months in the making (September); they really need to go home. It will take a couple or few days with the right temps to get them sprayed and polished.
I will construct a jig to sand the radii on the side of the Dragon MOD, and should post some pics / video of the ongoing process soon.
Expect to see occasional pics of a new MOD just starting production as well -
Toots!
Rick
Again, I've been experiencing some off days mostly horizontal... Also, I have been trying to get a couple holders clear coated so I can send them on to their new homes:

There are two, almost twins. Very special wood, months in the making (September); they really need to go home. It will take a couple or few days with the right temps to get them sprayed and polished.
I will construct a jig to sand the radii on the side of the Dragon MOD, and should post some pics / video of the ongoing process soon.
Expect to see occasional pics of a new MOD just starting production as well -
Toots!
Rick
Hey Dudes & Dudettes -
Been busy; the big holders pictured above - cutting foam & cardboard to cover all holes before the clear coat. Almost there.
Last weekend was Mom's day - lots of activities for us, plus the day prior was my wife, Chell & my anniversary. Busy weekend!
I designed & built a jig to sand the large radius "scoops" that are on the side of the Dragon. It will also work for many other size radii... Here's a three minute video of the 3D model, then the actual jig in the shop -
Back to work!
Take care of each other,
Rick
Hey all,
Hope you had a good Memorial Day weekend. Take time to thank a Vet - or give them a thumbs up.
I've tested the radius jig with a single piece and it seems to work flawlessly. Soon, I'll radius sand the Dragon body and be ready to start the hand sanding and finishing of the body. Some polishing will take place too - both to finish off the body, and for the battery tube and the connector base.
I've had some "sick" days - most recently, this weekend, I had the beginnings of lower back spasms. Not wanting to miss the holiday and really wanting to get the clear coat finished on the two large holders, I decided to work with my occasional assistant, Tramadol...
Got the holders clear coated and stayed upright until yesterday noon or so. Back to a non-medicated state (well, relatively) LOL... I'll be spending a couple days off my feet as the now released pain will hold me down for a day or two. A lower back muscle injury from when I used to race MX back in the day.
Rick
Hey all,
Hope you had a good Memorial Day weekend. Take time to thank a Vet - or give them a thumbs up.
I've tested the radius jig with a single piece and it seems to work flawlessly. Soon, I'll radius sand the Dragon body and be ready to start the hand sanding and finishing of the body. Some polishing will take place too - both to finish off the body, and for the battery tube and the connector base.
I've had some "sick" days - most recently, this weekend, I had the beginnings of lower back spasms. Not wanting to miss the holiday and really wanting to get the clear coat finished on the two large holders, I decided to work with my occasional assistant, Tramadol...
Got the holders clear coated and stayed upright until yesterday noon or so. Back to a non-medicated state (well, relatively) LOL... I'll be spending a couple days off my feet as the now released pain will hold me down for a day or two. A lower back muscle injury from when I used to race MX back in the day.
Rick
Sorry to hear about your resurgence. Hang in there and hang tough!
Sent from my iPhone using Tapatalk
Hey all,
Haven't put the Dragon body on the sander yet - the jig needed some fine tuning - and I hate to say that my old back injury has continued to plague me.
I keep trying to get up and work as soon as it hurts a little less and Tylenol suppresses it enough - worse when it wears off LOL. Hard to stay idle, but I'm trying to be lazy, and it's getting better. Feels OK for a while before fatiguing - better than this last week's attempts!
I'll check in again soon and hopefully have some video of the radius jig in action sanding the body - should be a short one!
Rick
Hey bud, let's party...
About 90% back to normal - been busy. The large twin holders are complete; soon, I'll deal with packing for shipping. They're pretty heavy.
No edited video yet, but the radius sanding on the Dragon is done. The exposed battery tube is produced with the same sander - just sand through (by hand) the right amount.
I need to put the top of the body to the router table to put a 3mm radius around the edge. Then lots of hand sanding will follow.
I'll get some video edited and put up, and will include some pics or video of the battery tube expose.
I've also started a new Mod - cool Afzelia burl block from Africa:
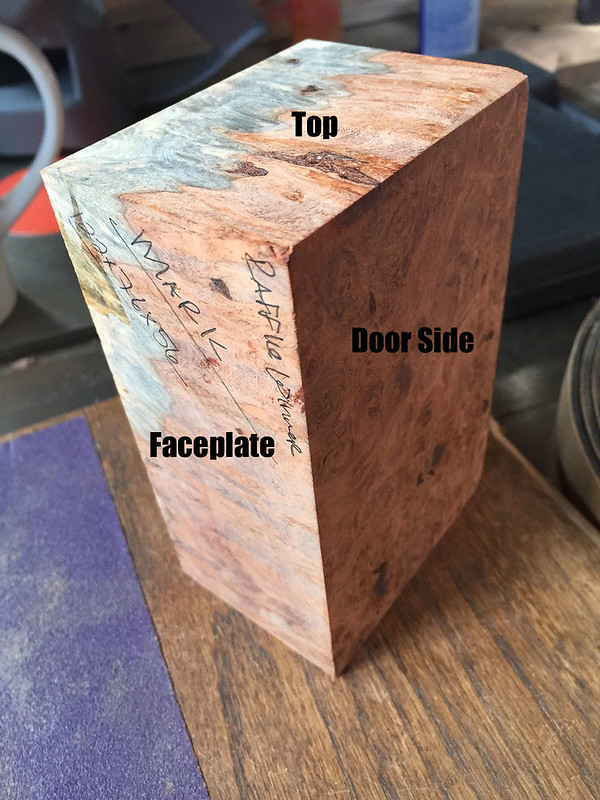
It'll be a DNA250 Model II. We've named it the Oba Mod, Oba meaning King from the area of Africa where most Afzelia grows.
Talk soon,
Rick
About 90% back to normal - been busy. The large twin holders are complete; soon, I'll deal with packing for shipping. They're pretty heavy.
No edited video yet, but the radius sanding on the Dragon is done. The exposed battery tube is produced with the same sander - just sand through (by hand) the right amount.
I need to put the top of the body to the router table to put a 3mm radius around the edge. Then lots of hand sanding will follow.
I'll get some video edited and put up, and will include some pics or video of the battery tube expose.
I've also started a new Mod - cool Afzelia burl block from Africa:

It'll be a DNA250 Model II. We've named it the Oba Mod, Oba meaning King from the area of Africa where most Afzelia grows.
Talk soon,
Rick
Hey Gang -
Hope everyone had a great Father's Day weekend. We hung around home and tried to stay cool...
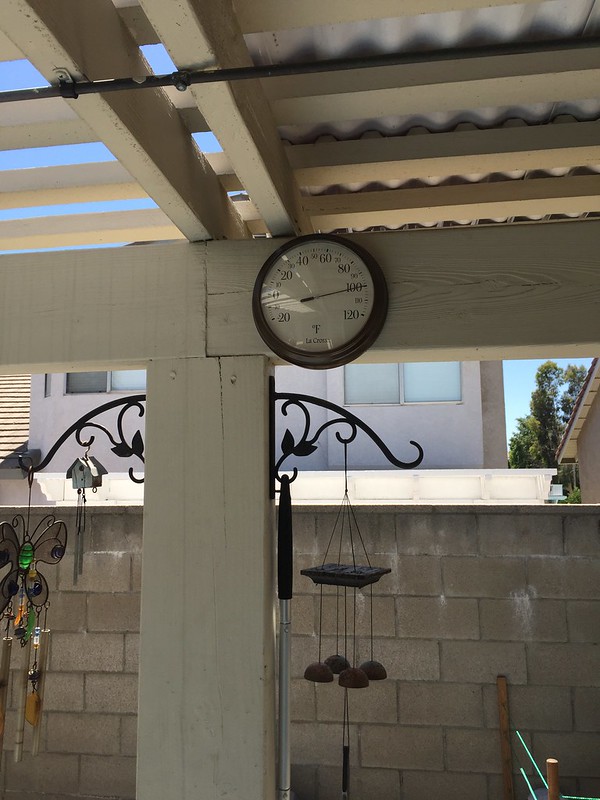
This was two days ago, I think. Always in the shade, just above our little summertime inflatable pool.
It was the start of our current heatwave! About 102 yesterday, should be a little higher today and the peak is supposed to be Wednesday - with 108 forecast.
The (uninsulated) shop was about 120 yesterday! I've been doing some work early before the temps rise too much. Doesn't get much below 90 until nearly midnight. So there's that...
I noticed a blemish in the finish on one of the large holders that I previously reported as being finished. No worries I thought; some sanding to the one edge, and a quick spray with a touch up gun.
Long story short - Some older blue 2" wide painters tape (not supposed to adhere - just lightly stick) adhered to the holder where applied to prevent overspray. It was on the holder less than two minutes and it pulled the clear finish off in several places. Grrrr. Now a one hour rework job has turned into several hours. The old tape must have summer heated too much and the adhesive became much more sticky. In the trash it went - the tape, not the holder!
Some light on the horizon! Well, with the heat at least. I just bought a "giant" portable evaporative cooler to try and help with our sometimes $600+ electric bills during the summer months because of central A/C use. Our humidity is very low out here (as low as 10-15%), and the initial results look good - no A/C use the last couple days with 100+ temps.
A side benefit is the unit is a Honeywell C060PM indoor/outdoor unit, and I'm eyeing it for cooling the shop. Sure would help this time of year.
So, blistering heat this week - sure to see this from time to time for the next few months. Hopefully, the cooler helps put me in the shop more hours this summer.
Talk to 'ya later -
Rick
Hope everyone had a great Father's Day weekend. We hung around home and tried to stay cool...

This was two days ago, I think. Always in the shade, just above our little summertime inflatable pool.
It was the start of our current heatwave! About 102 yesterday, should be a little higher today and the peak is supposed to be Wednesday - with 108 forecast.
The (uninsulated) shop was about 120 yesterday! I've been doing some work early before the temps rise too much. Doesn't get much below 90 until nearly midnight. So there's that...
I noticed a blemish in the finish on one of the large holders that I previously reported as being finished. No worries I thought; some sanding to the one edge, and a quick spray with a touch up gun.
Long story short - Some older blue 2" wide painters tape (not supposed to adhere - just lightly stick) adhered to the holder where applied to prevent overspray. It was on the holder less than two minutes and it pulled the clear finish off in several places. Grrrr. Now a one hour rework job has turned into several hours. The old tape must have summer heated too much and the adhesive became much more sticky. In the trash it went - the tape, not the holder!
Some light on the horizon! Well, with the heat at least. I just bought a "giant" portable evaporative cooler to try and help with our sometimes $600+ electric bills during the summer months because of central A/C use. Our humidity is very low out here (as low as 10-15%), and the initial results look good - no A/C use the last couple days with 100+ temps.
A side benefit is the unit is a Honeywell C060PM indoor/outdoor unit, and I'm eyeing it for cooling the shop. Sure would help this time of year.
So, blistering heat this week - sure to see this from time to time for the next few months. Hopefully, the cooler helps put me in the shop more hours this summer.
Talk to 'ya later -
Rick
Well, it's been "warm" here on the left coast -
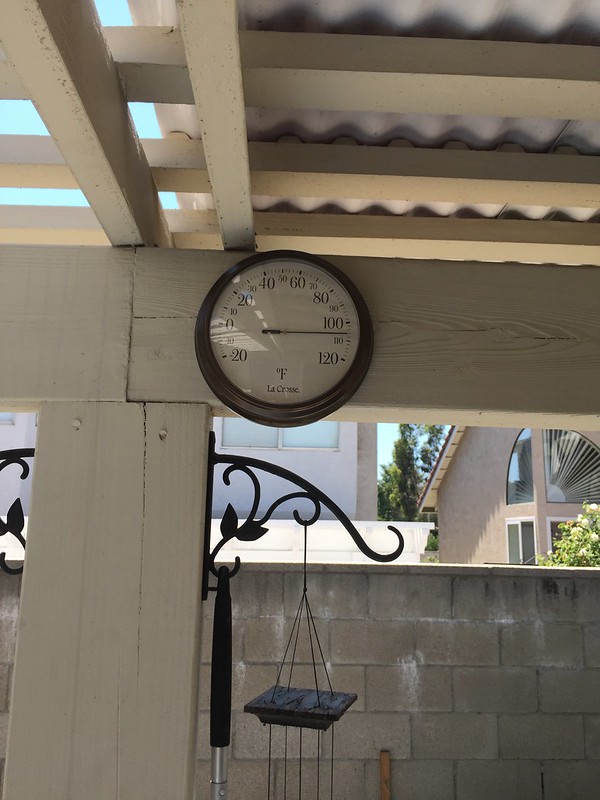
107 yesterday at around 4:00pm or so. Shot while standing in the pool. Not too bad if you can sit in a couple feet of water.
Then there was the shop - took a reading out there
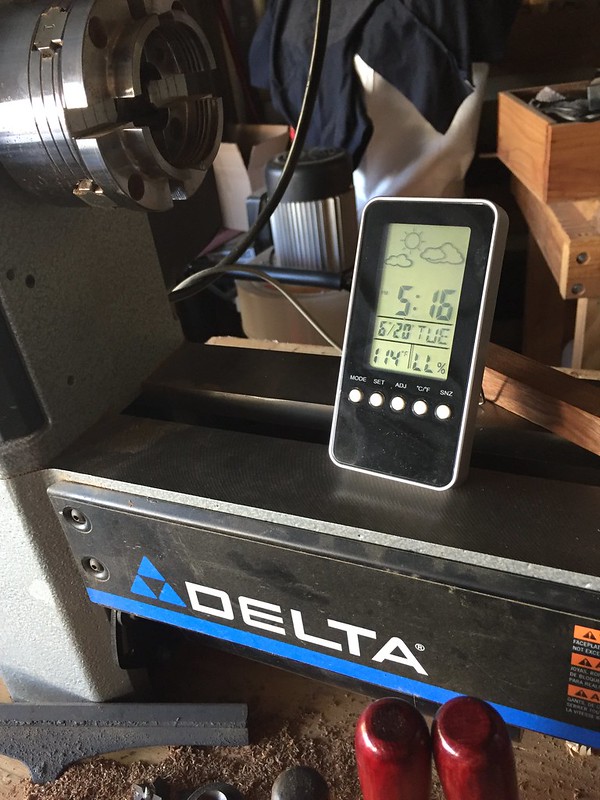
Ah, NO - A furnace - humidity was below 5%, can't read it. Everything metal was considerably hotter. I keep thinking about spontaneous combustion - LOL
So, I've been doin' some in the early mornings - rounding and hand sanding the Dragon body; it hits about 90 in the shop by 8:00 or so. The new cooler helps to extend that some. The big metal bay door of the shop faces west, so the heating starts pretty early. We should be back to normal double digit temps soon.
You may have guessed by the last pic that I might be practicing at turning some small objects... hmmm
Aloha from Hell -
Rick

107 yesterday at around 4:00pm or so. Shot while standing in the pool. Not too bad if you can sit in a couple feet of water.
Then there was the shop - took a reading out there

Ah, NO - A furnace - humidity was below 5%, can't read it. Everything metal was considerably hotter. I keep thinking about spontaneous combustion - LOL
So, I've been doin' some in the early mornings - rounding and hand sanding the Dragon body; it hits about 90 in the shop by 8:00 or so. The new cooler helps to extend that some. The big metal bay door of the shop faces west, so the heating starts pretty early. We should be back to normal double digit temps soon.
You may have guessed by the last pic that I might be practicing at turning some small objects... hmmm
Aloha from Hell -
Rick
Hey Vapers -
Been busy with the Dragon body:
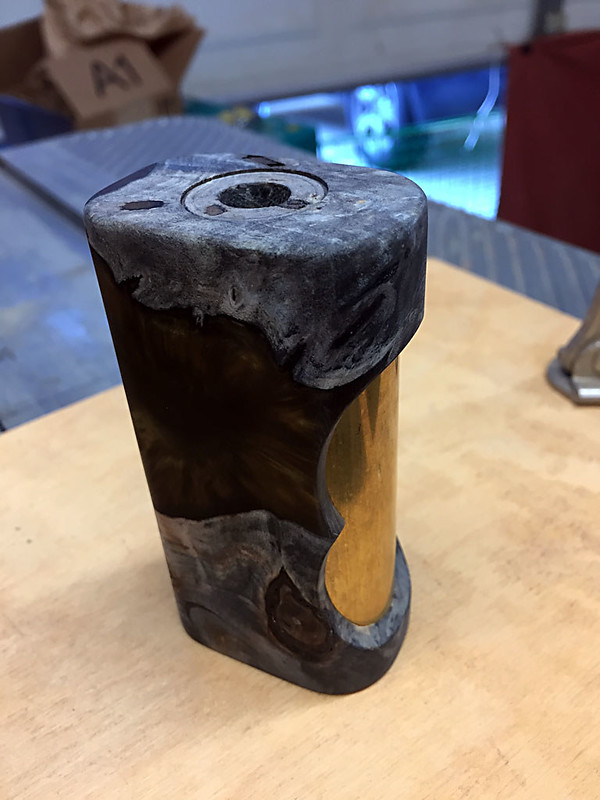
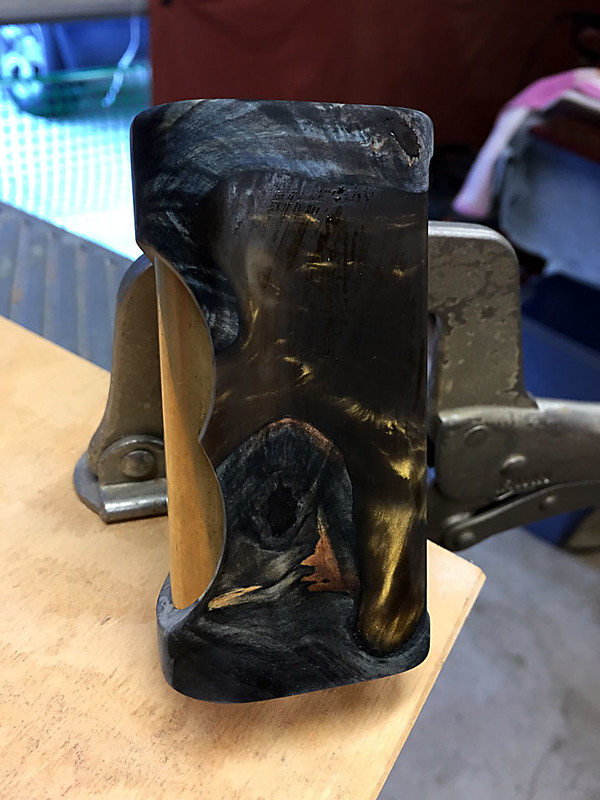
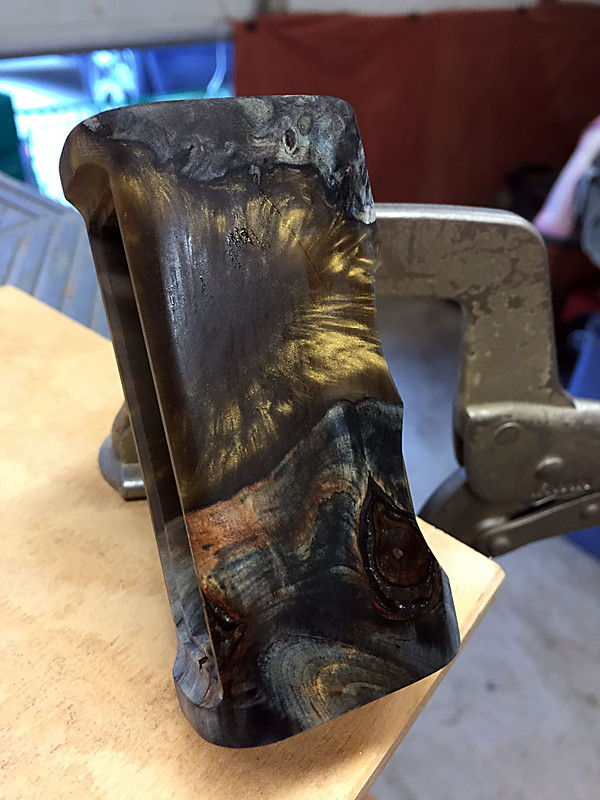
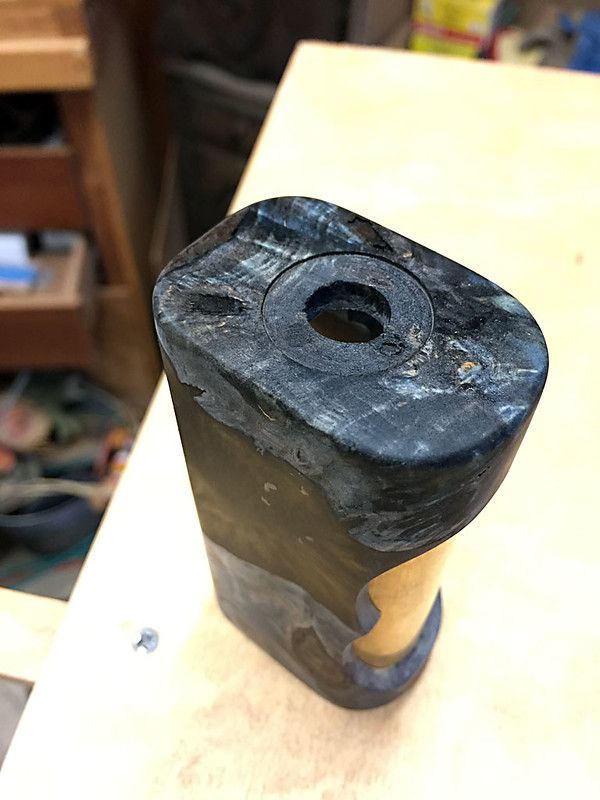
Three of the images have had the body wiped quickly with a wet paper towel to show the detail in the body better. This is sanded up to 400 grit. Eventually, I'll finish with 12000 grit paper! Looks like glass when done.
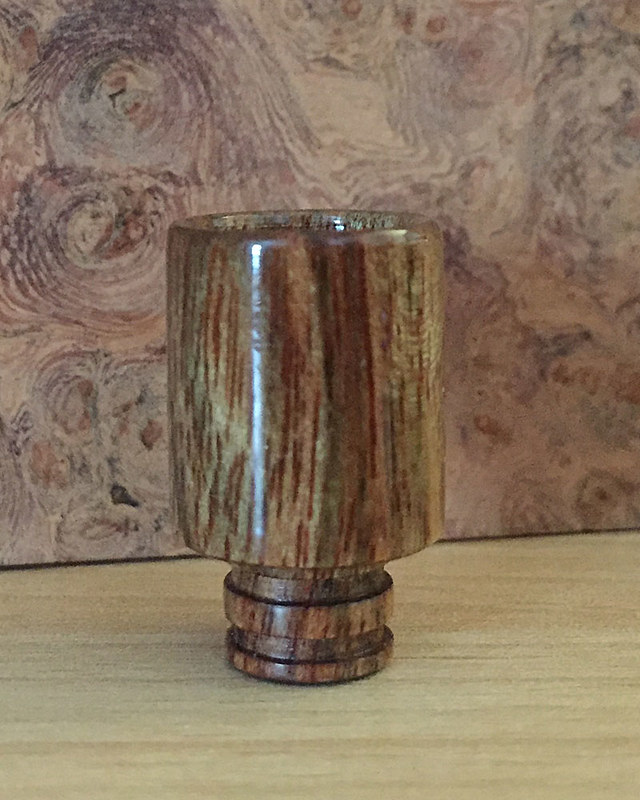
I recently made a drip tip from Caribbean Rosewood, finished with CA (super glue) and sanded up to 8000 grit paper (so so pic):
Next, I'll need to polish the battery tube and connector base - then the body. After that, I can start pre-assemblies (faceplate, soldering assemblies, etc). We're getting close to the white glove work!
It's starting to look pretty cool.
Rick
Been busy with the Dragon body:


Three of the images have had the body wiped quickly with a wet paper towel to show the detail in the body better. This is sanded up to 400 grit. Eventually, I'll finish with 12000 grit paper! Looks like glass when done.
I recently made a drip tip from Caribbean Rosewood, finished with CA (super glue) and sanded up to 8000 grit paper (so so pic):

Next, I'll need to polish the battery tube and connector base - then the body. After that, I can start pre-assemblies (faceplate, soldering assemblies, etc). We're getting close to the white glove work!
It's starting to look pretty cool.
Rick
They were saying on the news that folks out there are getting 2nd and 3rd degree burns just sitting in a car touching the steering wheel. Good lord!! Just be safe. Nothing on earth more important than that.
Sent from my SAMSUNG-SM-G935A using Tapatalk
Doin' better now - only in the low 90's today. No more frying eggs on the sidewalk, rocks, car hoods... Birds spontaneously combusting in the sky - people running after them with dinner plates
That ...that is... the most beautiful mod in existence ever.Hey Vapers -
Been busy with the Dragon body:


Three of the images have had the body wiped quickly with a wet paper towel to show the detail in the body better. This is sanded up to 400 grit. Eventually, I'll finish with 12000 grit paper! Looks like glass when done.
I recently made a drip tip from Caribbean Rosewood, finished with CA (super glue) and sanded up to 8000 grit paper (so so pic):

Next, I'll need to polish the battery tube and connector base - then the body. After that, I can start pre-assemblies (faceplate, soldering assemblies, etc). We're getting close to the white glove work!
It's starting to look pretty cool.
Rick


Sent from my SAMSUNG-SM-G935A using Tapatalk
Thanks! And those were just on the spot hand held crappy cell phone pics with the body still kinda rough.That ...that is... the most beautiful mod in existence ever.
Sent from my SAMSUNG-SM-G935A using Tapatalk
I'll set up pro strobes / umbrellas and shoot it with a good camera after it's all polished and shiny -

Take it outside - everybody nearby gonna need sunglasses

Got hot again, 105 then 107 yesterday; wife said I should go cool off in the pool...
Probably should just relax when trying to cool off. Cooled a bit today, mid 90's. Things going well.
Cheers -
Rick
Probably should just relax when trying to cool off. Cooled a bit today, mid 90's. Things going well.
Cheers -
Rick
Thanks! And those were just on the spot hand held crappy cell phone pics with the body still kinda rough.
I'll set up pro strobes / umbrellas and shoot it with a good camera after it's all polished and shiny -
Take it outside - everybody nearby gonna need sunglasses
Beautiful!
Sent from my iPhone using Tapatalk
Happy Independence Day Vapers!
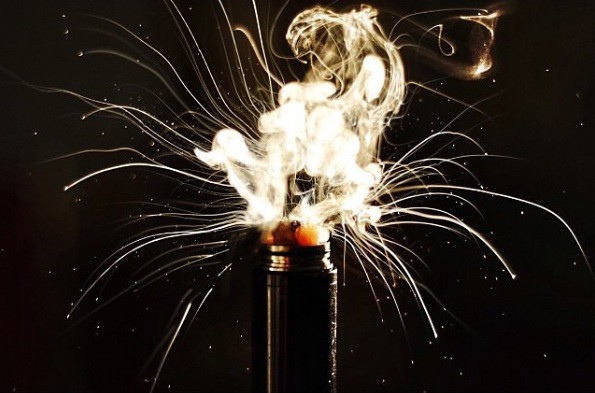
Have a great day - enjoy some fireworks tonight
Be responsible and don't let children play with fireworks
Leave that to the adults - that have been drinking all day


C Ya-
Rick

Have a great day - enjoy some fireworks tonight
Be responsible and don't let children play with fireworks
Leave that to the adults - that have been drinking all day


C Ya-
Rick
Someone left the furnace on again! 102 yesterday, and the peak is supposed to hit 109-110 degrees on Saturday!!
That's great for relaxing the day away in the pool with a drink - but sucks for trying to stay in the shop much past 9am even with the big, new cooler. Doesn't cool off out there till pretty late in the evening as well.
I've since hand sanded the Dragon body up to 600 grit, and can find no scratch marks on it. Next, several coats of CA (super glue) will be painted on the body, then a little sanding before hitting the buffing wheels.
Stay cool and vaped!
Rick
Yup, it arrived alright...
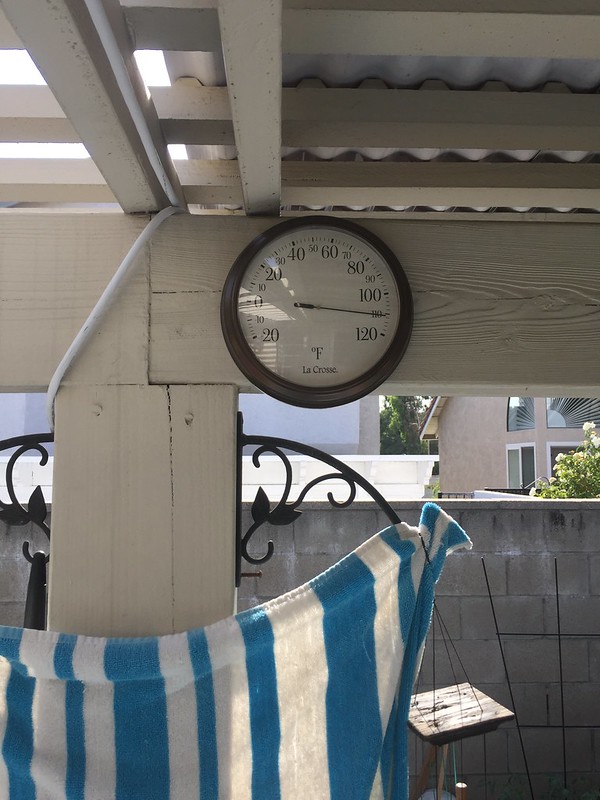
Two days at this, a few on either side at 3-10 degrees cooler.
I've just started machining on the Oba Mod (Model II LiPo), and was looking at the thin pieces left over - wondering how I could use these for drip tips when nothing big enough was left over. I've done lots of laminations with our Vape Stands and decided to do it on a smaller scale for drip tips.
I prepared the thin pieces left from the Dragon blank and used 16ga (.051") brass sheet to alternate when gluing. Cut them into 3/4" squares.
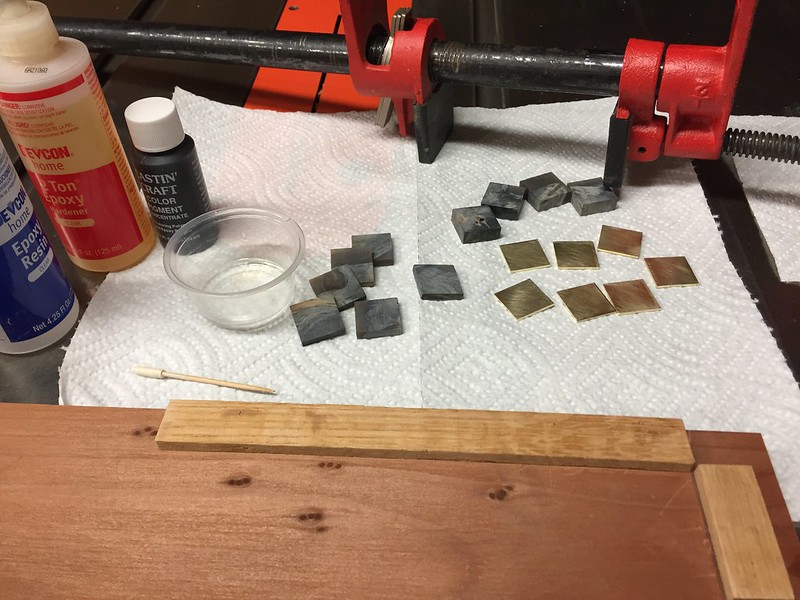
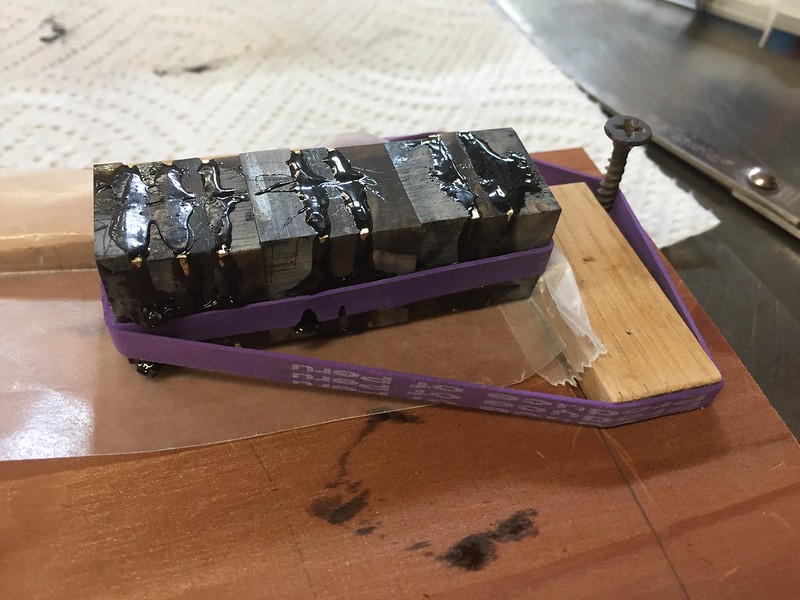
Mixed up some black epoxy and started the messy job of coating, stacking and putting some light pressure on the groups. Very thin coats of glue squeezed tightly by hand then rubber banded for an hour or so.
Later, more pressure was provided with pipe clamps.
Final prep was to glue the individual laminations atop oak pieces for clamping in the lathe.
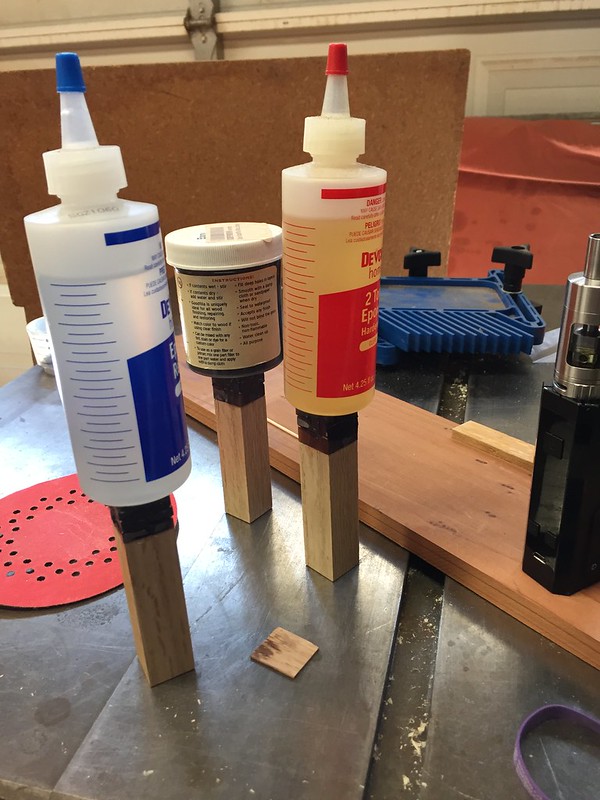
Into pipe clamps after an hour or so:
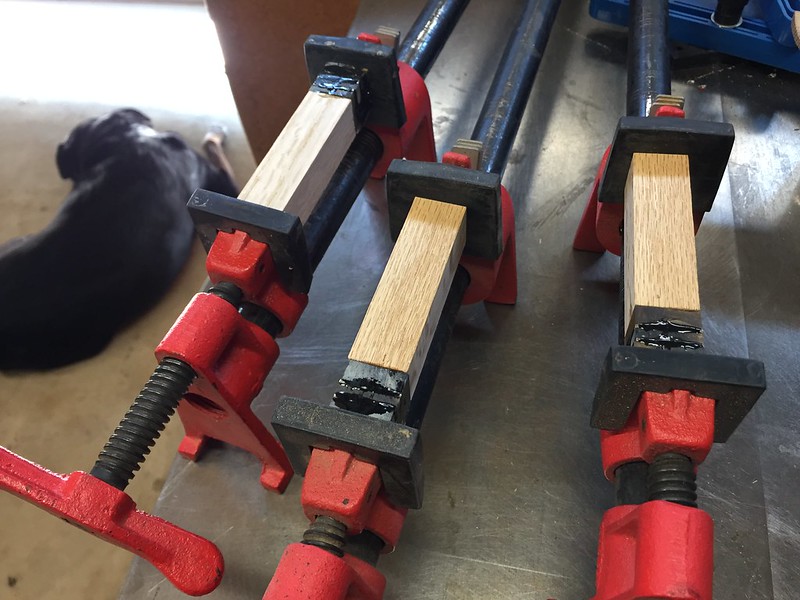
After turning the assembly to a cylinder shape on the lathe -
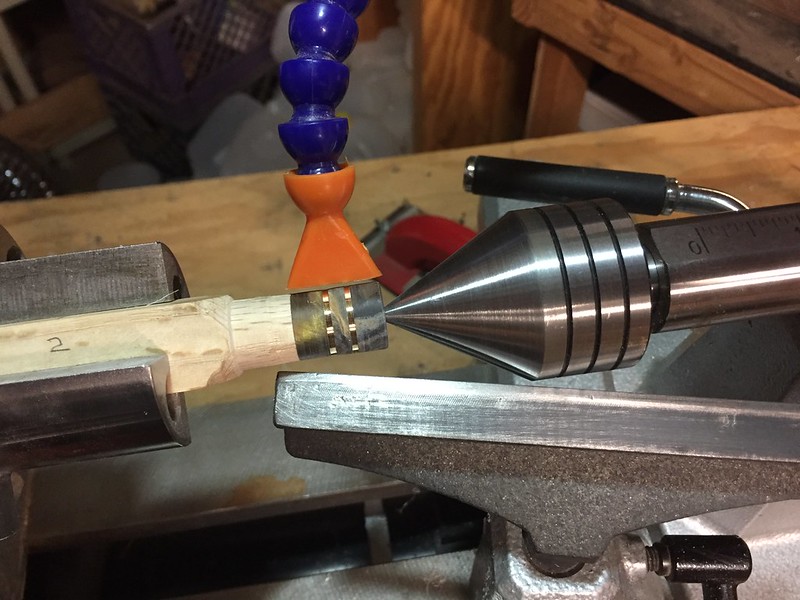
The brass heats up very quickly, and must be taken in steps slowly to prevent melting or catching the stabwood on fire! The orange nozzle provides cool air under pressure to cool the brass while spinning. The cylinder is 17-18mm in diameter - just under 3/4". They will be bored for SS cores with dual o-rings.
I'll probably take this further and put a drip tip section on the website and add tips when I can.
Talk to you guys soon - try to stay safe! Lates -
Rick

Two days at this, a few on either side at 3-10 degrees cooler.
I've just started machining on the Oba Mod (Model II LiPo), and was looking at the thin pieces left over - wondering how I could use these for drip tips when nothing big enough was left over. I've done lots of laminations with our Vape Stands and decided to do it on a smaller scale for drip tips.
I prepared the thin pieces left from the Dragon blank and used 16ga (.051") brass sheet to alternate when gluing. Cut them into 3/4" squares.

Mixed up some black epoxy and started the messy job of coating, stacking and putting some light pressure on the groups. Very thin coats of glue squeezed tightly by hand then rubber banded for an hour or so.

Later, more pressure was provided with pipe clamps.
Final prep was to glue the individual laminations atop oak pieces for clamping in the lathe.

Into pipe clamps after an hour or so:

After turning the assembly to a cylinder shape on the lathe -

The brass heats up very quickly, and must be taken in steps slowly to prevent melting or catching the stabwood on fire! The orange nozzle provides cool air under pressure to cool the brass while spinning. The cylinder is 17-18mm in diameter - just under 3/4". They will be bored for SS cores with dual o-rings.
I'll probably take this further and put a drip tip section on the website and add tips when I can.
Talk to you guys soon - try to stay safe! Lates -
Rick
Hey Everyone -
Sheesh! So much time has gone by. A few things have / are happening / happened. I'll start with the "aw crap" stuff - my pain disorder reared it's ugly head a few times in the last month leaving me horizontal for 2-4 days each time. Managed to stay out of the hospital and off morphine this time. Thank God for Tramadol! I hate losing time this way, but I do the best I can with the situation.
The second time eater was my previous occupation - I'm a semi-retired Mechanical Engineer ( I do consulting / contract occasionally),and I was called on to build a 3D model / illustration for a set of technical documents for a valve on a rocket for NASA! Couldn't say no - always wanted to work on something that goes into space. That occupied a little over a week of my time. Came out awesome. Wish I could share some renderings, but I had to sign a non-disclosure and have to keep things under wraps. There's a little hint hidden in a pic in this post...
Unfortunately, the brass laminated drip tips had to be abandoned. I tried several times, but there was an issue with glue adhesion at the brass joints:
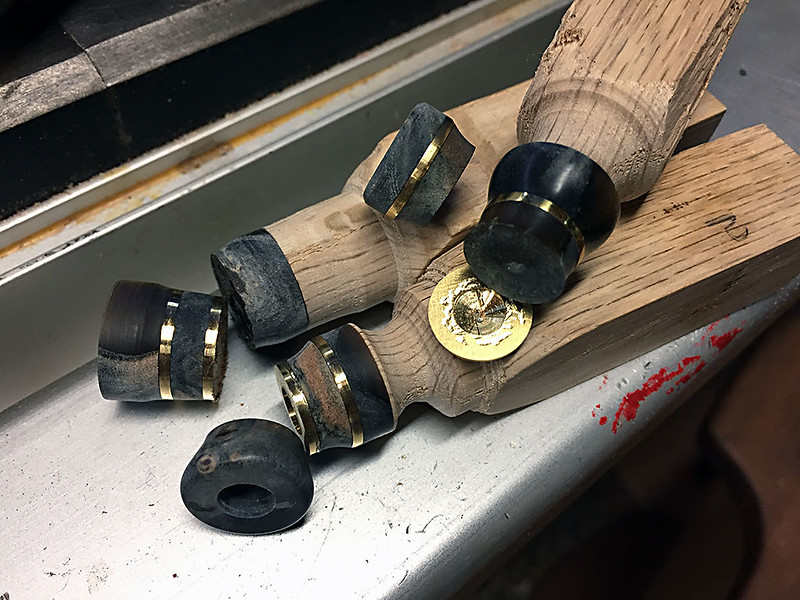
They all broke more than once at the brass. I decided they were too fragile to continue to attempt. I might give it one more try if I can "dowel" them with small brass rods to pass through all the layers. Maybe later...
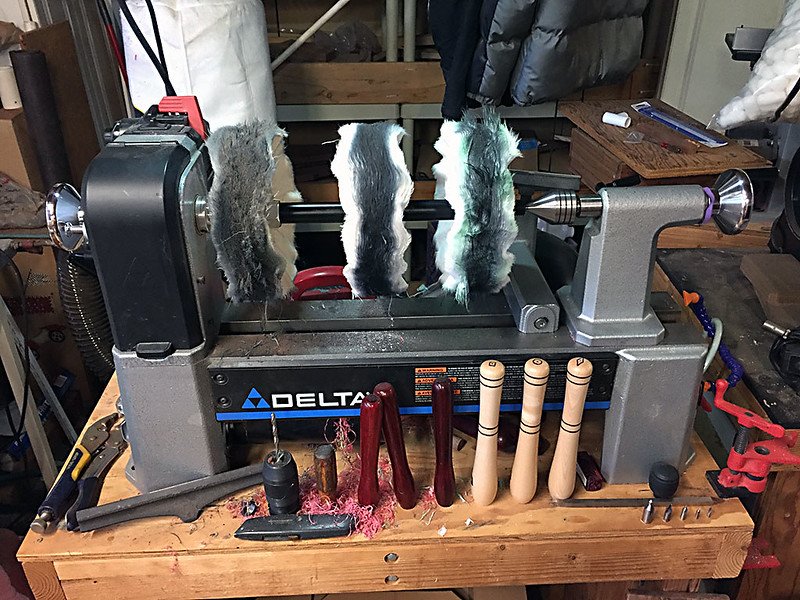
I've also been busy with polishing as well - I have a setup that goes on my lathe that allows from rough to finish polish in one operation:
Here's the brass 26650 battery tube after meeting all three wheels:
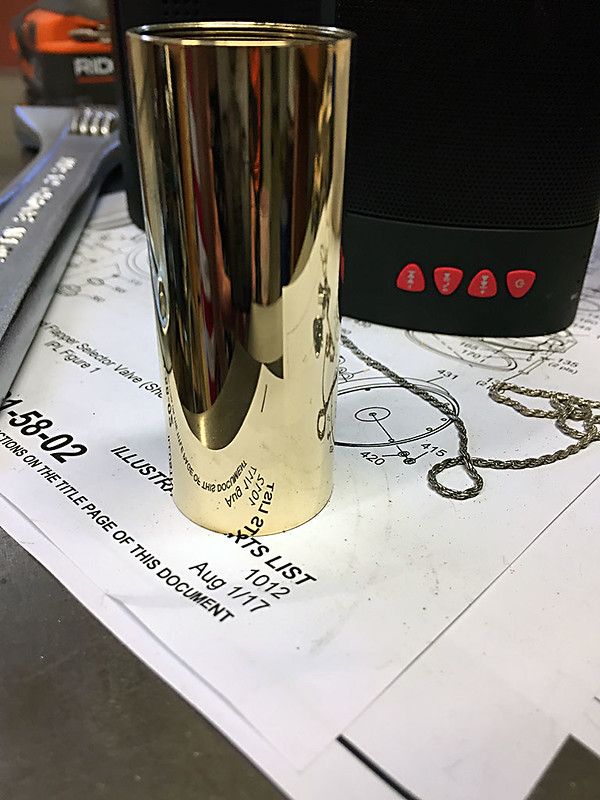
Looks much better than when it was in the body in an earlier post -
I'm polishing on the Dragon body now, and will post a short video of some of the polishing. Also working on milling of the next Mod - Oba.
Later -
Rick
Sheesh! So much time has gone by. A few things have / are happening / happened. I'll start with the "aw crap" stuff - my pain disorder reared it's ugly head a few times in the last month leaving me horizontal for 2-4 days each time. Managed to stay out of the hospital and off morphine this time. Thank God for Tramadol! I hate losing time this way, but I do the best I can with the situation.
The second time eater was my previous occupation - I'm a semi-retired Mechanical Engineer ( I do consulting / contract occasionally),and I was called on to build a 3D model / illustration for a set of technical documents for a valve on a rocket for NASA! Couldn't say no - always wanted to work on something that goes into space. That occupied a little over a week of my time. Came out awesome. Wish I could share some renderings, but I had to sign a non-disclosure and have to keep things under wraps. There's a little hint hidden in a pic in this post...
Unfortunately, the brass laminated drip tips had to be abandoned. I tried several times, but there was an issue with glue adhesion at the brass joints:

They all broke more than once at the brass. I decided they were too fragile to continue to attempt. I might give it one more try if I can "dowel" them with small brass rods to pass through all the layers. Maybe later...
I've also been busy with polishing as well - I have a setup that goes on my lathe that allows from rough to finish polish in one operation:

Here's the brass 26650 battery tube after meeting all three wheels:

Looks much better than when it was in the body in an earlier post -
I'm polishing on the Dragon body now, and will post a short video of some of the polishing. Also working on milling of the next Mod - Oba.
Later -
Rick
- Status
- Not open for further replies.

