Become a Patron!

KingPin!

In my defence, I was left unsupervised ^^
VU Donator
Platinum Contributor
Member For 4 Years
VU Challenge Team
Reviewer
Hi Folks,

Back in July 2017 Smoant ran a competition to design a mod on multiple sites (including Vaping Underground). The winning entry was from FreakeSport on Reddit, who put forward an idea for a dual battery Squonker with a gargantuan bottle inside it. I have to say the concept was very nice, and he deservedly won the comp. At the time everyone was excited at the thought of getting a dual battery Squonker out of Smoant whatever the final form would take.

I have no idea whether or not they pursued a collaboration to design this kit before me, sadly it was never announced. In the end, and over a year and a half later; Smoant decided to ditch the concept, keep the Battlestar format and integrate a bottle into it pump style.

The original Battlestar was really well received and for good reason, except for a single batch issue I’m aware of (which Smoant put right quickly), it was a proper beater mod, and many loved its simplicity and form…it put Smoant on the map as a community favourite, and they secured a good level of trust along with it...the best part being they haven’t squandered it along the way like others have.

Since then they have developed their ANT chipset through numerous iterations. I’ve always found them to be solid as we’ve moved forward. So with the release of the Battlestar Squonk is this a leap forward or a step back for Smoant, let’s find out….

In honour bound tradition Smoant kindly sent me this for the once over. I don’t like to make recommendations in my reviews, instead ill present you with my findings should you be interested in the product.

As with all kit reviews ill cover the RDA first then the Mod
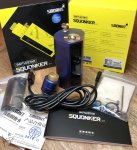
4522661D-3AAC-4C5C-99B8-7F4AD16FA78B.jpeg

(Please note: photos appear normal size when logged in)

What’s in the box?
  • 1 x Smoant Battlestar Squonker Mod
  • 1 x Smoant Battlestar Squonker RDA
  • 2 x 7ml Squonk Bottles
  • 1 x coils and cotton
  • 1 x spare O-rings, post screws, dripping pin
  • 1 x USB Cable
  • 1 x User Manual
  • 1 x Warranty Card
  • 1 x Certified card
  • 1 x Battery Warning Card
Product Information: http://smoant.com/battlestar-dual-18650-regulated-squonker-kit/index.html
Available Colours: Black, Gunmetal, Yellow, Gradient Blue available

Part 1 - The Battlestar Squonker RDA

RDA Specifications
  • Height 29.14mm (with drip tip)
  • Diameter 24mm
  • Thread Length: 4.7mm
  • Airflow: Two adjustable (each 11mm x 3mm)
  • Juice Well Depth: 6mm
  • Post to Post max coil length: 9.5mm
  • Post to Deck width: 5.5mm
  • Post hole size: H1.9 x W2.2mm
  • Materials in construction: Stainless Steel (SS)304, gold plating, Resin Drip Tip, peek insulators
  • Drip Tip: Resin (Visible Height: 7mm, Width at the tip : 16mm, Tapered Bore 10mm up to 11mm)
  • Positive Pin: gold plated SS304
Build Quality and Impressions

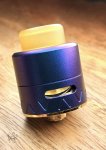
Whilst Smoant were busy retro fitting the Battlestar to make it squonkable, they must have thought “while we’re at it” with the RDA because this is the original Battlestar RDA released in 2017 with a different top cap! Ijoy also used this deck design in their Combo, and Combo Triangle RDA’s that same year….I guess if the RDA works then so be it, although it's all about the details and effort for me.
7C95049C-D574-41BB-95B4-3283BC2673BD.jpeg

So nothing new to report really, and I’m going to make this short and sweet as a result. All you need to search for is Battlestar RDA and you’ll have access to reams of information out there as to what this RDA is all about.

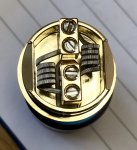
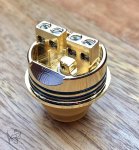
Deck wise it uses a similar post system the Twisted Messes V2, mounting is very easy as each lead has its own post. The slotted screws are fine to use.
0C3E4108-620A-48F0-B02C-32BF2A869148.jpeg
D863C4CD-C112-4585-A7E7-A7E1B41847C6.jpeg

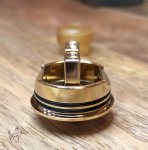
You’ll get gold plating throughout with angled up airflow each side. It’s worth noting that the wide open airflow will suit only those who like breathing through a snorkel, or vaping at really high wattages...if you want to reduce it down then you will need to offset your coils, and that can make fitting in really big builds a tad tricky with the positioning of the posts.

Fit and finish is “acceptable” throughout, and the paintwork matches the mod precisely. I did find some pitted areas inside the top cap that I couldn’t get clean, also machining is a bit hit and miss in places.
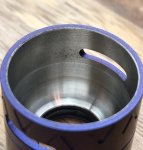
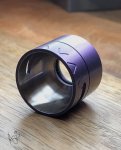
36A4C67D-AAF6-4AEE-97A5-1840967017DD.jpeg
55C5CC07-4D95-49A0-8AFF-050E6B796BB5.jpeg

The deck area was absolutely fine, and the plating was adhered well, in addition the O-ring resistance is good and the stock 810 drip tip is comfortable to use.
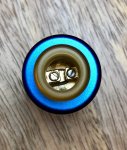
49052066-056A-47DB-A410-86D04EA164C3.jpeg

The squonk pin doesn’t sit flush with the deck, but using it on the Battlestar squonk mod it’s kind of moot point, since juice does not get sucked back into the bottle anyway, you are at the mercy of not overdoing it…thankfully the juice wells are actually pretty forgiving thanks to being 6mm deep, so I’ll give it a pass on that one, especially with the accuracy of the pumper.

The RDA breaks down into 14 pieces should you want to fully dismantle and clean. Also the positive pin sits proudly underneath.
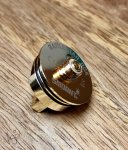
B5C4E76A-D2EA-42CD-BC76-6CC8AA0D5194.jpeg
 
Last edited:

KingPin!

In my defence, I was left unsupervised ^^
VU Donator
Platinum Contributor
Member For 4 Years
VU Challenge Team
Reviewer
Coil Building & Wicking

As I mentioned above you’ll need to offset your coils further than where they naturally sit if you want to make the most of reduced airflow, unfortunately this can make wicking a little tricky on one side.

When I mount a coil on this deck I find it’s worth pre-measuring and snipping each lead such that you allow yourself a little slack for movement, otherwise you might have a problem pulling the coil over.

52977C06-B943-43E0-B7E0-9E167D300E94.jpeg

I’d say a 3mm inner diameter coil is perfect for the deck, any larger and you’ll be pushing the coil too far down into the deck to make the most of the airflow. In addition you only have approx. 5.5mm of room between the post and inner edge of the juice well.

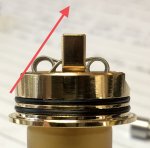
I have the coil positioned such that I can rest my screwdriver on the angled air intake and it sits nicely on top of the coil angled towards the centre of the drip tip…like so

C414EFDB-6509-4893-AAA3-6C1397F5DB01.jpeg

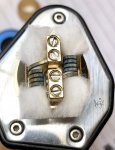
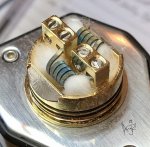
Wicking wise I cut the ends fairly short …just outside of the decks edges, and then angle cut them so it makes folding the ends down and round much easier, plus it ensures you don’t create an unnecessary ball of cotton in the juice well, which would stop the coils sucking up juice.

E74C7A0A-F7D1-44AF-BBE2-FDB1D3B3133F.jpeg
6265F17D-F37B-4524-89D6-8714F75DF9ED.jpeg

How’s it Vape?

Whilst the RDA is a re-hash they did a good job of it first time round…so I guess “if it ain’t broke don’t fix it”

I don’t like how airy it is wide open personally, it’s just unnecessary because you can’t go too crazy on the build front anyway. Even with framed staples coming out at 0.17 ohms at 90W, I only need the airway open a 3rd of the way.

Having said that at 90 watts, and with staple type coils mounted this RDA is capable of putting out both great flavour and clouds, giving you a really good balance of the 2 areas. Be prepared for constant pumping action though as this sort of build is thirsty.

I couldn’t say the same of smaller builds though (like the coil you get with it), it really needs that large surface area to make the most of that angled air which could be a problem for new starters.

Draw noise is loud wide open, but pretty quiet tightened up to a third, I think it has a nice feel to it with that sort of restriction.

Tank Pro’s
  • Dense vapour production
  • Good for those who like mid to high wattages (80+watts)
  • Nice Flavour
  • Nice paintwork
  • Raised Squonk pin suits the RDA as you want to keep that cotton soaked
  • Naturally offset coils thanks to the mounts
  • Drip tip suits the RDA
  • Decent recessed post screws
Tank Cons
  • Huge unnecessary airflow
  • Same RDA, different packaging
  • Quite a tight build deck for the type of coils it needs
  • Be prepared to pump/squonk often if you want to get the most from it.
  • Finishing inside the top cap could have been better
Battlestar Squonker RDA - Final Conclusion

Short and sweet finish – The Battlestar Squonker RDA is fine for a starter kit, you’ll get a good idea of what RDA’s are about, it not too taxing to learn on, will teach you the importance of positioning, coil size and wicking, puts out nice flavour certainly with fruits, and if you want to chase clouds to get over the initial hump of giving up cigarettes this will do it for you.

On the other hand if you want something a little less in your face, uses up less juice, lower wattage and is easier on the first go; there are single coil RDAs out there that will cater for you perfectly.

In terms of performance personally I like the Battlestar RDA, I think it does a good job of it for a starter kit and vapes really nicely for a dual coil, although I would like to have seen better machine finishing across some areas.

.....onto the mod
 
Last edited:

KingPin!

In my defence, I was left unsupervised ^^
VU Donator
Platinum Contributor
Member For 4 Years
VU Challenge Team
Reviewer
Part 2 - The Battlestar Squonker Mod

Manufacturer Specs
  • Size: 40.5mm(D) X 44.5mm(W) X 87.5mm(H)
  • Push Button Height: 8.3mm
  • Batteries: Takes 2 x 18650
  • Display: 0.96 inch OLED display
  • Output range: 1 – 200 W
  • Output modes: VW / VV/ VW Curves / Temp (Ni, Ti, SS) / TCR
  • Resistance range: 0.05 – 3.0 Ohm
  • Temperature control: 100 – 300°C / 200 – 600°F
  • Voltage output – 6 - 8.4V
  • Chip Efficiency: 95%
  • Charging Rate: 2A
  • 510 connector: Plate size 22mm (set flush)
  • Pass-through available
  • Reverse protection/ Over-heating protection/ Low voltage protection/ Overload/Short-circuit protection/ Over-time protection
Product Information: http://smoant.com/battlestar-dual-18650-regulated-squonker-kit/index.html
Available Colours: Black, Red, Stainless, and Rainbow, Pink, Green, Gradient Blue available

Impressions, Build Quality

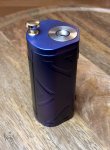
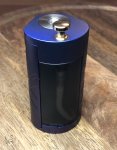
I was sent the gradient blue variant, and I have to say if I could have this colour paint on all my other Smoant mods I wouldn’t hesitate in a heartbeat. I absolutely love the way it transitions from blue to purple in different lights. In addition the paint has been applied inside and out well, it’s nice and thick and hasn’t chipped, worn or faded during my 6 weeks of testing…cracking job there Smoant!

1AF3F0A3-CB9C-4878-9E54-6CB6F7E6E8A2.jpeg

This must be one of the smallest dual 18650 squonkers on the market, ergonomically it’s very comfortable to hold and use, being it’s made from Zinc alloy it has a nice weight to it as well. When I first started using it I was absolutely loving the precision of having a pumper, I’ve not used the Asmodus version, so this was a real pleasure to use, I don’t recall having a single accident in the 6 weeks of solid use from it, that’s some sort of record for me.

FCBCD664-C55F-49B2-A4F9-43630E62CA24.jpeg

I’ve also never used the original Battlestar before, but I get now why everyone was raving about it at the time. I like the styling of the fire button for is square 10x10mm size, it engages well and has a good tactile feel to it, having said that I don’t like the up and down buttons, these could have been a little bit larger for those of us with sausage fingers.

Unfortunately I was unable to take the mod apart to take a look inside to check how well sealed everything is, I could manage to lift the top a little and can see the plate is secured by a nut, but couldn’t see much else, I’m going to assume here it’s very much like the original Battlestar internally, except with some sealing going on around the 510 plate…but I don’t believe those front buttons will be sealed so watch for spillages, especially as I don’t know if the board is waterproof coated or not.

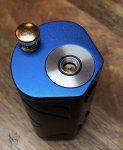
The pumper on top is gold plated, I would like to have seen this in a stainless steel or black finish as it’s a bit garish for my liking. The button at the top does unthread though, so I could even go to the local DIY store and see if they have something that It can be replace it with.

When you first fill the bottle with juice (refill or from new), it takes a little while to get the seal to take effect, it eventually catches like hand soap dispensers, so don’t panic it isn’t working…I found it best to slowly depress the button and hold before trying again and it picks up quite quickly.

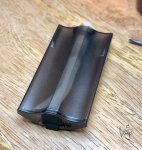
During my 6 weeks of testing my first squonk bottle ceased up after 2 weeks of use. I purposely ran through all the types of juice I could think of, to test the durability of it i.e. high sugared commercial juices, citric juices, bakery and fruity juices. I tried to leave it soaking to loosen up, but to no avail. Fortunately the pump mechanism is inside the bottle itself, so there isn’t much on the mod to worry about here, load a new bottle on and it’s like new….this could have just been a single unit thing, but it’s definitely something to research further into first, after all who wants to pay for replacing proprietary bottles every few weeks!.

8161A87A-4925-4B01-9C62-33EC384F1105.jpeg

My second bottle has stood up going into week 4 now (I wanted to make sure!), although after that time I’ve seen signs of cracking both sides on the edges of the bottle. This could from citric juices or from stress…either way it’s not great, and this is where my main bone of contention is with the Battlestar Squonker.

B3E4E24A-6D10-48B3-B3D6-F43EA919A64D.jpeg

However I do think they missed a few tricks when it comes to certain things on the mod:

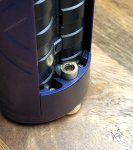
1 – The bottle rattles far too easily, it’s not secured well inside the mod….there should have been a track, or runners for the bottle to sit behind, this I believe definitely contributed to the spring getting knackered early due to a repeated downward force trying to eject the bottle outwards via the white connecting weak point.

C5D0FDAD-8BA1-4E11-8F07-59C13DC40711.jpeg

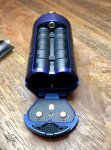
2 – Every time you refill and open the battery door, you will need to hold the mod upside down to make sure your batteries don’t drop out, make sure you vape the RDA right down here or you will experience leaking. I would have preferred a 2 part piece here; one for the batteries, one for the Squonker. Having said that the bung is located at the base of the bottle so you don’t actually have to remove it to refill. It’s worth taking a tissue with you as there will be some residue left that needs wiping away after you put the bung back in.

3 – The squonk bottle is completely sealed (except for where you refill), whilst this makes for storing of different flavours great, they don’t come with any caps so my options are limited here, also in addition I want to be able to break it down and service it/clean it, especially if the bottle is proprietary.

4 - Personally I don’t like mods that aren’t serviceable, all squonkers should be, if the feed tube ever gets dislodged, splits, or just starts getting a bit manky, I have no way to swap it out and the mod effectively becomes a paperweight, unless of course people are happy using it as a normal regulated device of course. They could have made it so the plastic back panel can be removed on its own exposing the tube, if they wanted to keep the chipset hidden away.

AFFAE3EB-49CD-410E-95A2-DC0990493D90.jpeg

5 – As you get towards low juice in the bottle it stops pumping, this happened to me about a quarter juice left every time, so transitioning flavours in the bottle can be a pain.

FC30AAD1-680C-4337-89B3-0486B94ACD99.jpeg

6 – Every now and again, as I went to fire the mod I encountered a “no atomiser” message on the front screen, it seems to be if I’m chain vaping and hitting that button too frequently, but under paced vaping conditions its fine. So there might be some auto cut out here protecting the user which is a little irritating.

7 – The O-ring found on the 510 plate pops out too easily after removing the atomiser from the mod, and could be easily lost

2515E389-0D58-4C57-9DD0-09B795A71703.jpeg

8 - I’m almost certain this is the same chipset as the original Battlestar, it has the same sort of cut off people were reporting, similar performance drop around half, slower firing delay, ok the screen has changed a little bit, but its missing the features registered later on in the ANT series such as boost settings, and that super easy interface.


It’s not all bad though the mod does have good points as well outside of those already listed at the top.

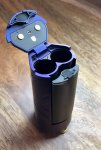
1 - The battery door is a little wobbly when open, and the batteries are fairly loose in the tubes, but it’s very secure once closed. I’ve never had the door accidently pop open on me.

D85C62D0-32D2-4240-A369-99C4F54BE9D8.jpeg

2 – Despite the tinted plastic cover the OLED display screen is bright enough except in direct sunlight conditions. In addition the information on the screen gives you everything you need to know, it’s very similar to the Dovpo Topside, Geekvape Aegis, Coilart Lux screens.

3 – The squonker is solid and will take knocks, granted I wouldn’t want to drop it from a height, but for your everyday wear and tear, it should hold up well (except maybe the bottle).

4 – It supports pass through vaping (charging and vaping) should you need to.

5 – The squonk bottle is sealed, has ample 7ml capacity, and it doesn’t leak. It’s very easy to refill and get going again if you use gorilla style bottles (twist top bottle don’t fit)

6 – O-rings and rubber stops at all the points you’d expect to see leaking occurring seals the mod up relatively well from juice getting to your battery compartment, or inside the mod itself.

7 – I was getting balanced charging and discharging during my testing. Although the full charge cuts out a little too early.

8 – it’s overall size and the bottle being integrated so well into the lines of the mod, you could easily forget this was even a dual battery Squonker, especially with the bottle being darker.

D9F0E983-83CC-4962-9F99-2496656A08A0.jpeg

9 – Squonking is accurate…learn how many pumps an RDA takes to re-prime and your away, you will never need to worry about overfilling, this is really handy while travelling. Normally I don’t ever squonk outside of the house because it’s a hassle if there’s a problem, but I had no concerns with this.

10 – Menu navigation is easy to learn for the basic modes, everything can be accessed within a few clicks.
 
Last edited:

KingPin!

In my defence, I was left unsupervised ^^
VU Donator
Platinum Contributor
Member For 4 Years
VU Challenge Team
Reviewer
Navigation
  • Click Fire Button 5 times = Turn mod on/off
  • Click Fire Button 3 times = To access menu (mode symbol flashing)
  • Click Up or Down button 1 time whilst in menu = cycle mode options
  • Hold Fire button when in the menu = Exits menu / confirm selection
  • Hold up and down buttons together = locks/unlocks settings (you can still fire)
  • Hold up or down button = adjust wattage (VW) or temp (TI, SS, NI, TCR)
While in DVW Mode
  • Hold Fire button and Up button = Selects time
  • Hold Fire button and Down button = Select wattage
  • Whilst in either of the sub above press fire button once = cycle to the next curve block
  • Hold the fire Button = exit adjustment
While in TC modes
  • Hold Fire button and Up button = Selects wattage for pre heat
  • Hold Fire button and Down button = Selects TCR (only available in manual temp control TCR mode)

Power Mode

70BF6179-EAFB-496E-B889-796A5421CCE1.jpeg


Variable Wattage (VW) mode feels dated compared to what’s out these days; I’m talking about being spoilt with instant firing here because it takes about a 0.2 seconds to start firing. That doesn’t sound a lot, but trust me it’s noticeable, in addition I’ve always felt the Smoant chipset needs that “Hard” option to get going faster and to help with the performance drop off half way into the discharge cycle. Sadly these things seem to be missing, as I said earlier in my review this doesn’t feel the same as their latest chipset in the Naboo, personally I think it lacks the punch versus other Smoant mods in their range.

It’s possible to overcome this using the DVW (Custom Wattage Curves). To be honest though it’s a little painful to set up using the series of clicks required to get it going (see navigation above)…should you endure it you can create yourself an extra wattage boost to offset that missing initial punch in VW mode.

Variable Voltage (VV) mode cycles in 0.1 Volt increments, so it’s not as precise as wattage mode, having said that it seems to output a little better than VW mode (at least in a “feel sense” at a similar setting). You can see the wattage equivalent in small font as you fire. So it might well be worth going old school on the Battlestar Squonker here and stick to VV mode (I personally have).

Same as all Smoant mods - You will have to cycle through .1 increments of wattage selection outside of the curve mode up to 100watts. I feel up to 20 watts this is necessary for the MTL vapers, then between 21-80 half watt increments are acceptable, but beyond that it should just be whole watts as it takes more time to cycle through the settings.


Temp Control (TC)

There are three standard settings in temp control “Nickel, Titanium, Stainless Steel”, then you have the TCR (the manual dial it in yourself option).

The standard setting works nicely with my standard SS316L fused clapton build….I didn’t feel the need to push the temp up above 340.F. I just adjust the pre heat wattage above where id normally vape it in power mode to give it that initial boost then it settles down really smoothly.

Using the manual TCR setting with SS316L coils; I found setting the TCR value to 0.00092, temp at 340.F and preheat to 60W was a similar vape to the standard mode above.

I was expecting decent TC out of Smoant and again they delivered.


Charging and Batteries

I found there to be an accurate discharge between the cells both hitting an even low cut out of 3.36V (+/- 0.03V).

When charging via USB the cells seem to climb evenly to 4.12V inside 2 hours, and the mod remained cool throughout. After that though it takes the mod 5 hours to get the cells to just 4.16Vwhich is a little disappointing. Therefore although balanced I would say external charging is the way to go with the Battlestar Squonker.

Pros
  • Love that paintwork
  • Accurate temp control mode
  • Variable Voltage mode seems to make up for the max setting in wattage mode
  • Very comfortable to hold and fire in both hands
  • Fire button offers nice feedback
  • Battery door secures batteries well
  • Plenty of modes to choose from including basic curves
  • Easy to navigate menu system
  • More than adequate juice capacity
  • Very accurate squonking
  • Solid construction
  • Great threading on the 510 plate
  • Easy to refill and store flavours in the bottle ready to use
Cons
  • [personal] Up and down buttons could be a little larger
  • Squonk bottle ceased and stopped working within 2 weeks, the other one started cracking after 3 weeks.
  • Squonk bottle is too lose in the housing area
  • Unable to get inside the mod to service the squonk tube should it ever need it
  • [personal] wasn’t a fan of the gold/brass coloured push button, would have preferred matching mod paint, stainless steel or black
  • I suspect the chipset is from an older model - we are back to the 3.4V cut off , and I miss the max setting in power mode
  • The squonk bottle wont completely empty before is stops sucking juice out
  • The squonk bottle is sealed, so if there’s any problem, that’s your lot
  • Would like to have seen a case or cap for the extra bottle as a spare carry along
  • Charging wasn’t as accurate as other mods I’ve used
  • O-Ring on the 510 plate pops out a little too easily

Final Conclusion

Considering how long this mod has been on the cards, I think the Battlestar falls a little short….and most of that is centred around how they have approached the housing for the squonk bottle, and the bottle itself….if Smoant fixed this area in particular, the mod would be a viable long term option for me, as it stands I think the bottles will stop working long before the mod does which is disappointing.

The mod is very comfortable to use though, and I do want Smoant to take another crack at this to perfect it, but for now I’d say it worth doing plenty of research first, see if others are reporting similar findings to me...like anything perishables can be a single unit problem

20E7DDA0-A80A-4CA5-B740-E52E8F281900.jpeg

Thank you for reading my review. I hope you find the information useful, until next time KingPin!
 
Last edited:

VU Sponsors

Top