Thanks again for taking the time to view my review of the Steam Crave Glaz RTA V2 which was supplied directly from Steam Crave.
Specs:
Glaz V2 deck improvements:
In the box you will find:
Getting to know the Glaz V2
Having reviewed the original Glaz RTA almost 1 year ago my cons from that review are copied below:
Cons:
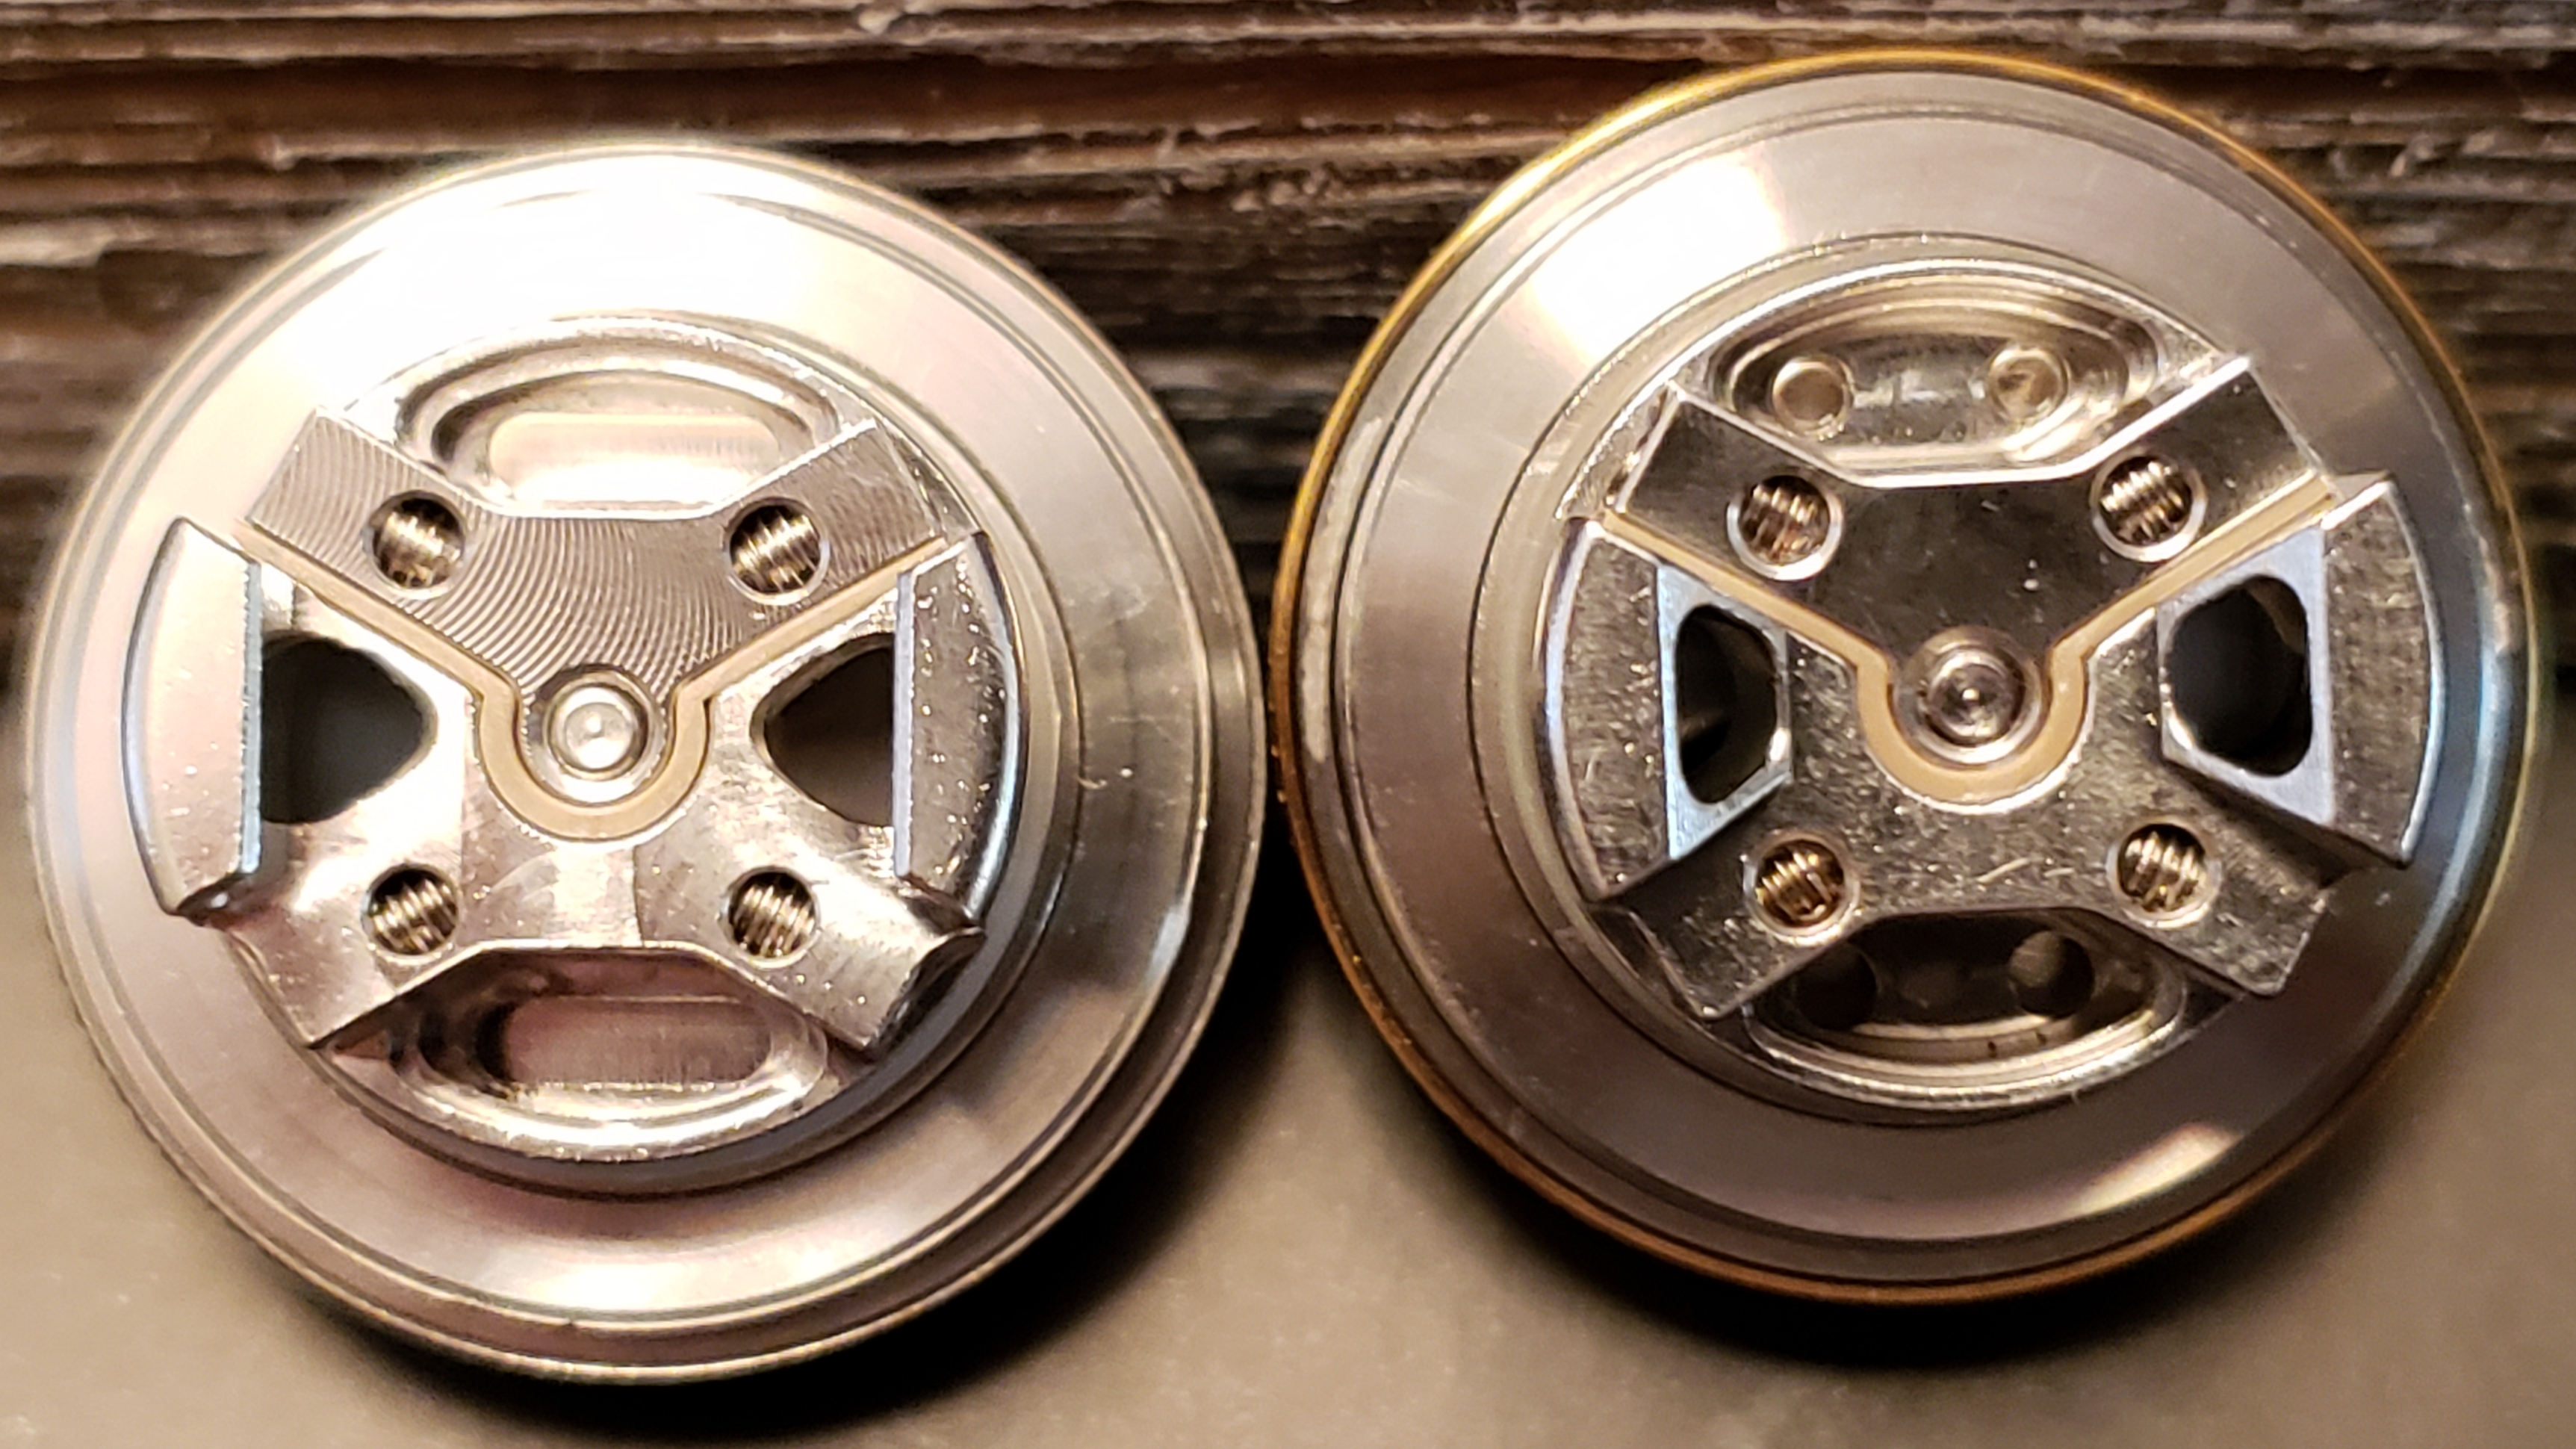
V1 deck to the left, V2 on the right, just remove the 510 and unscrew the old deck, screw in the new one, easy peasy:
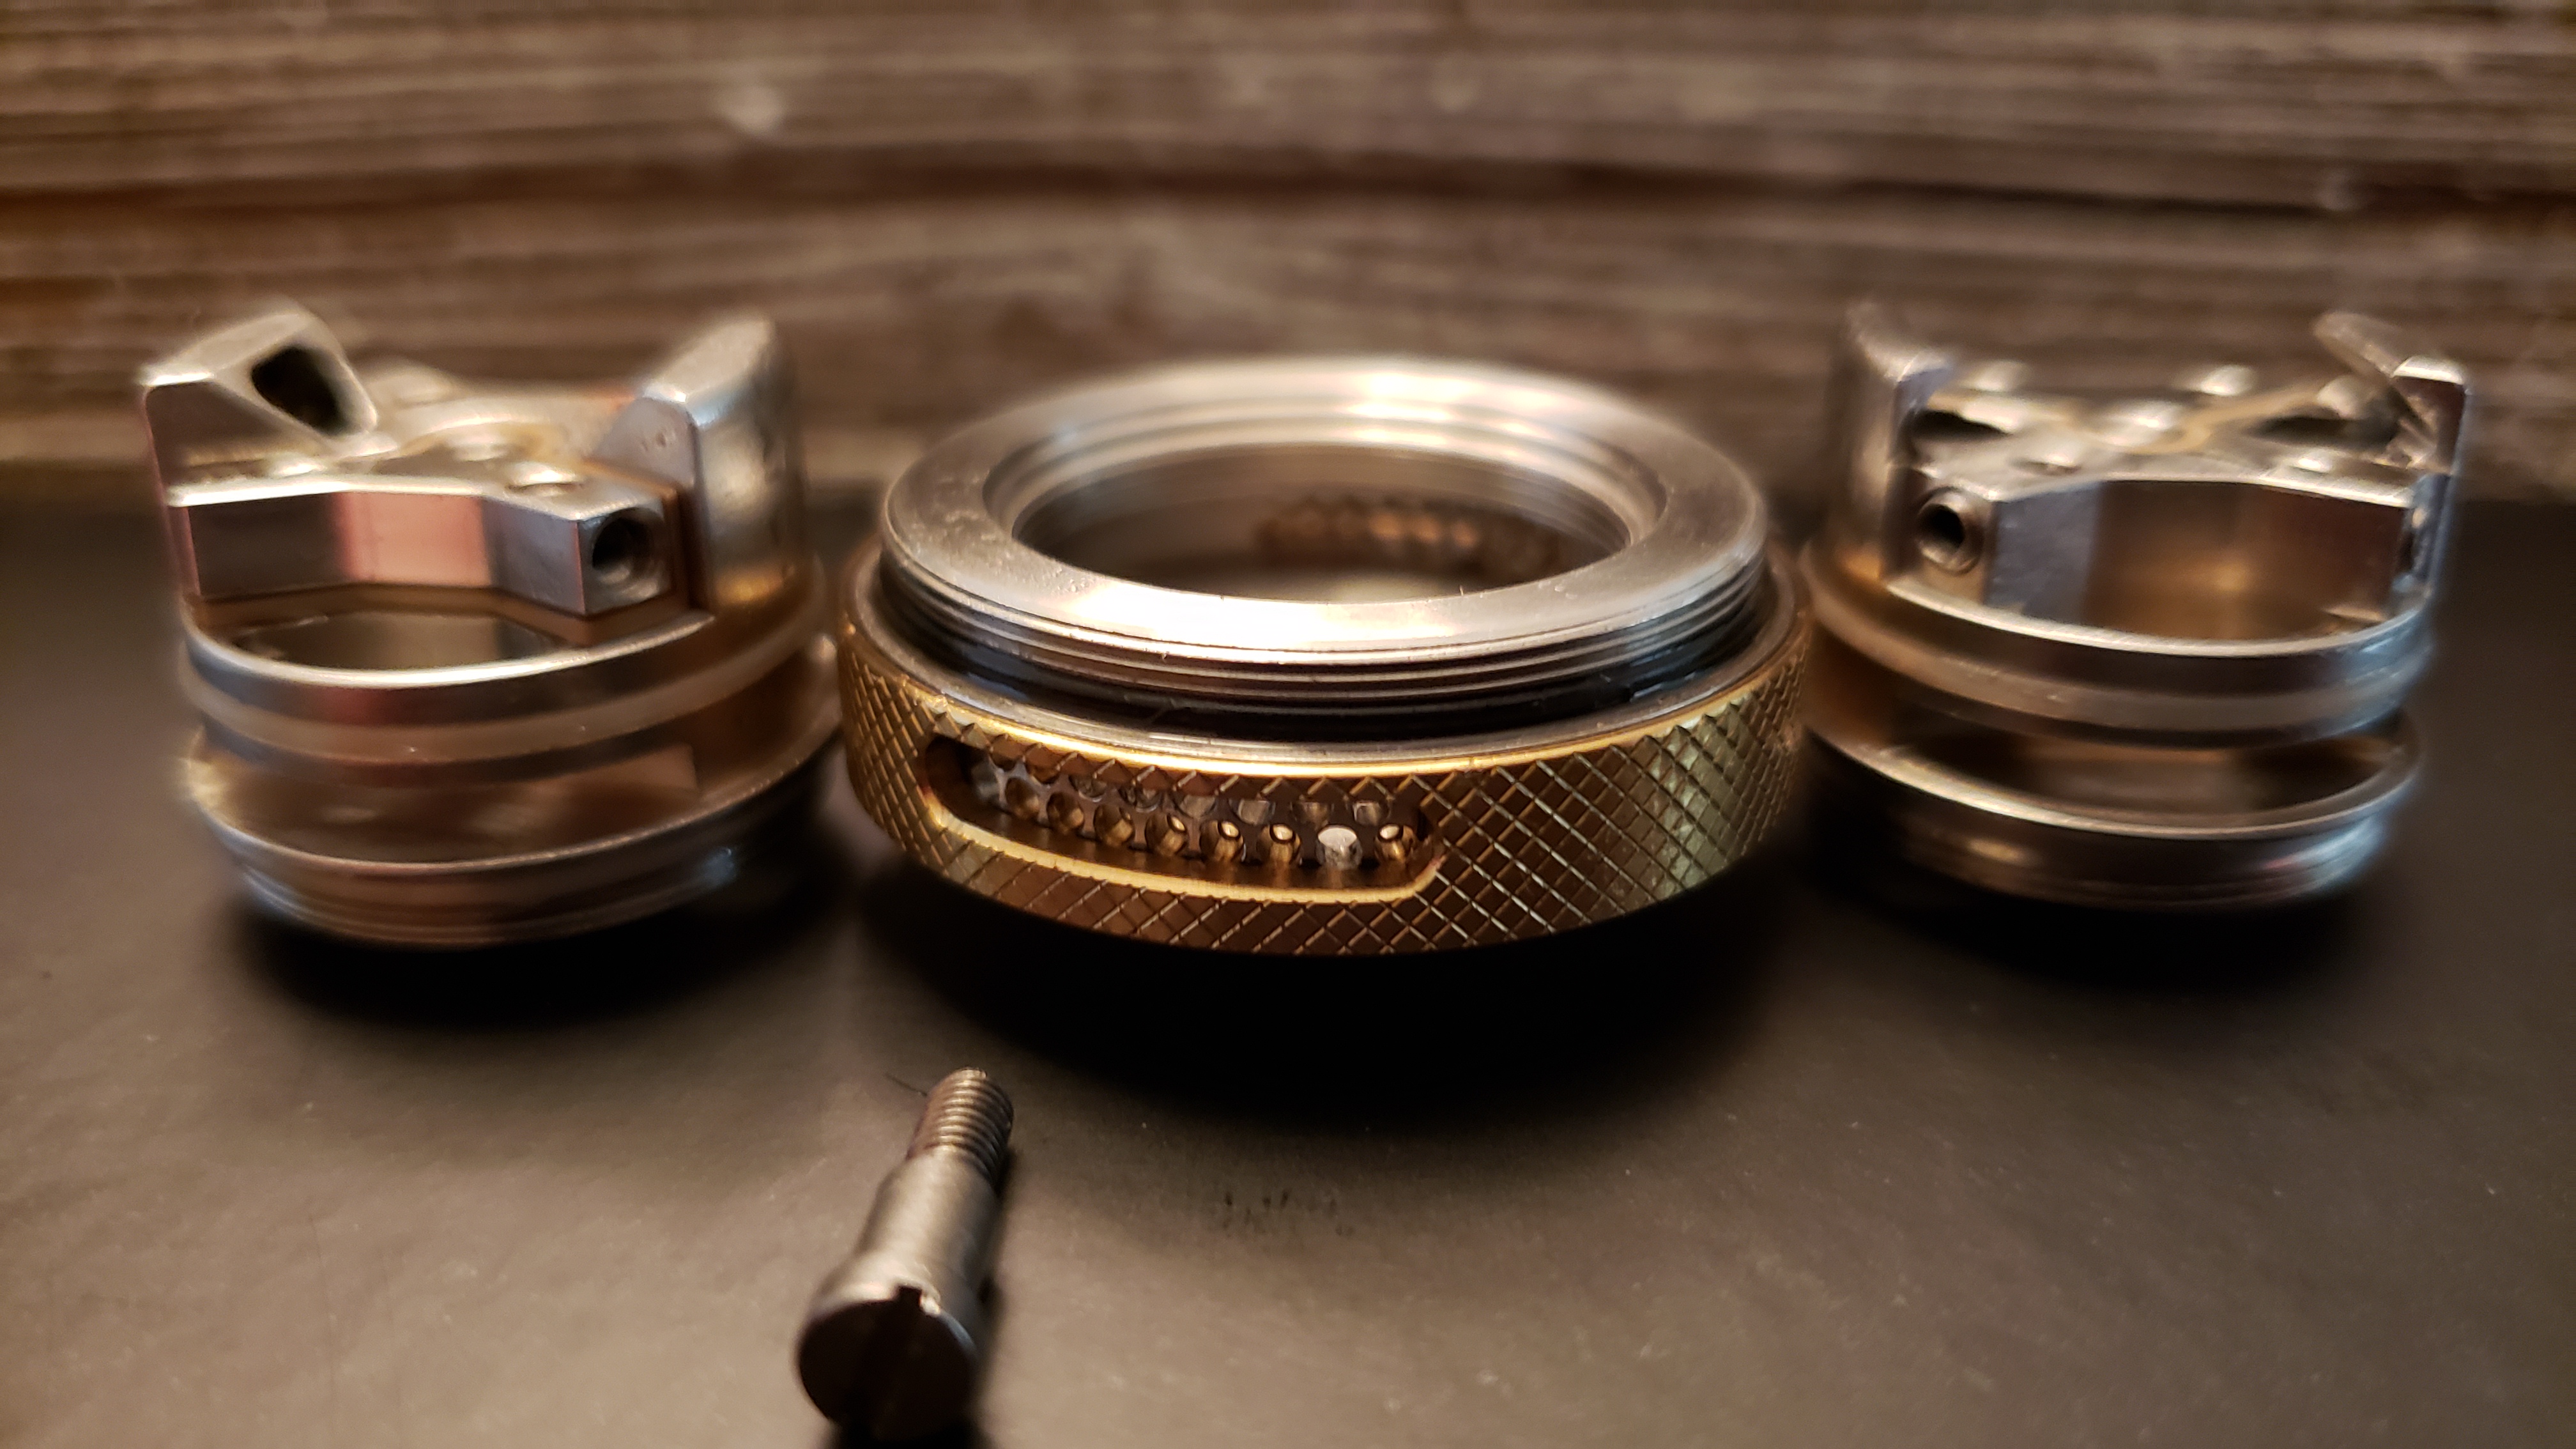
The airflow inlet on the V1 and 2 are the same, the increased airflow comes from the deck itself, you can see that in the bottom pic:
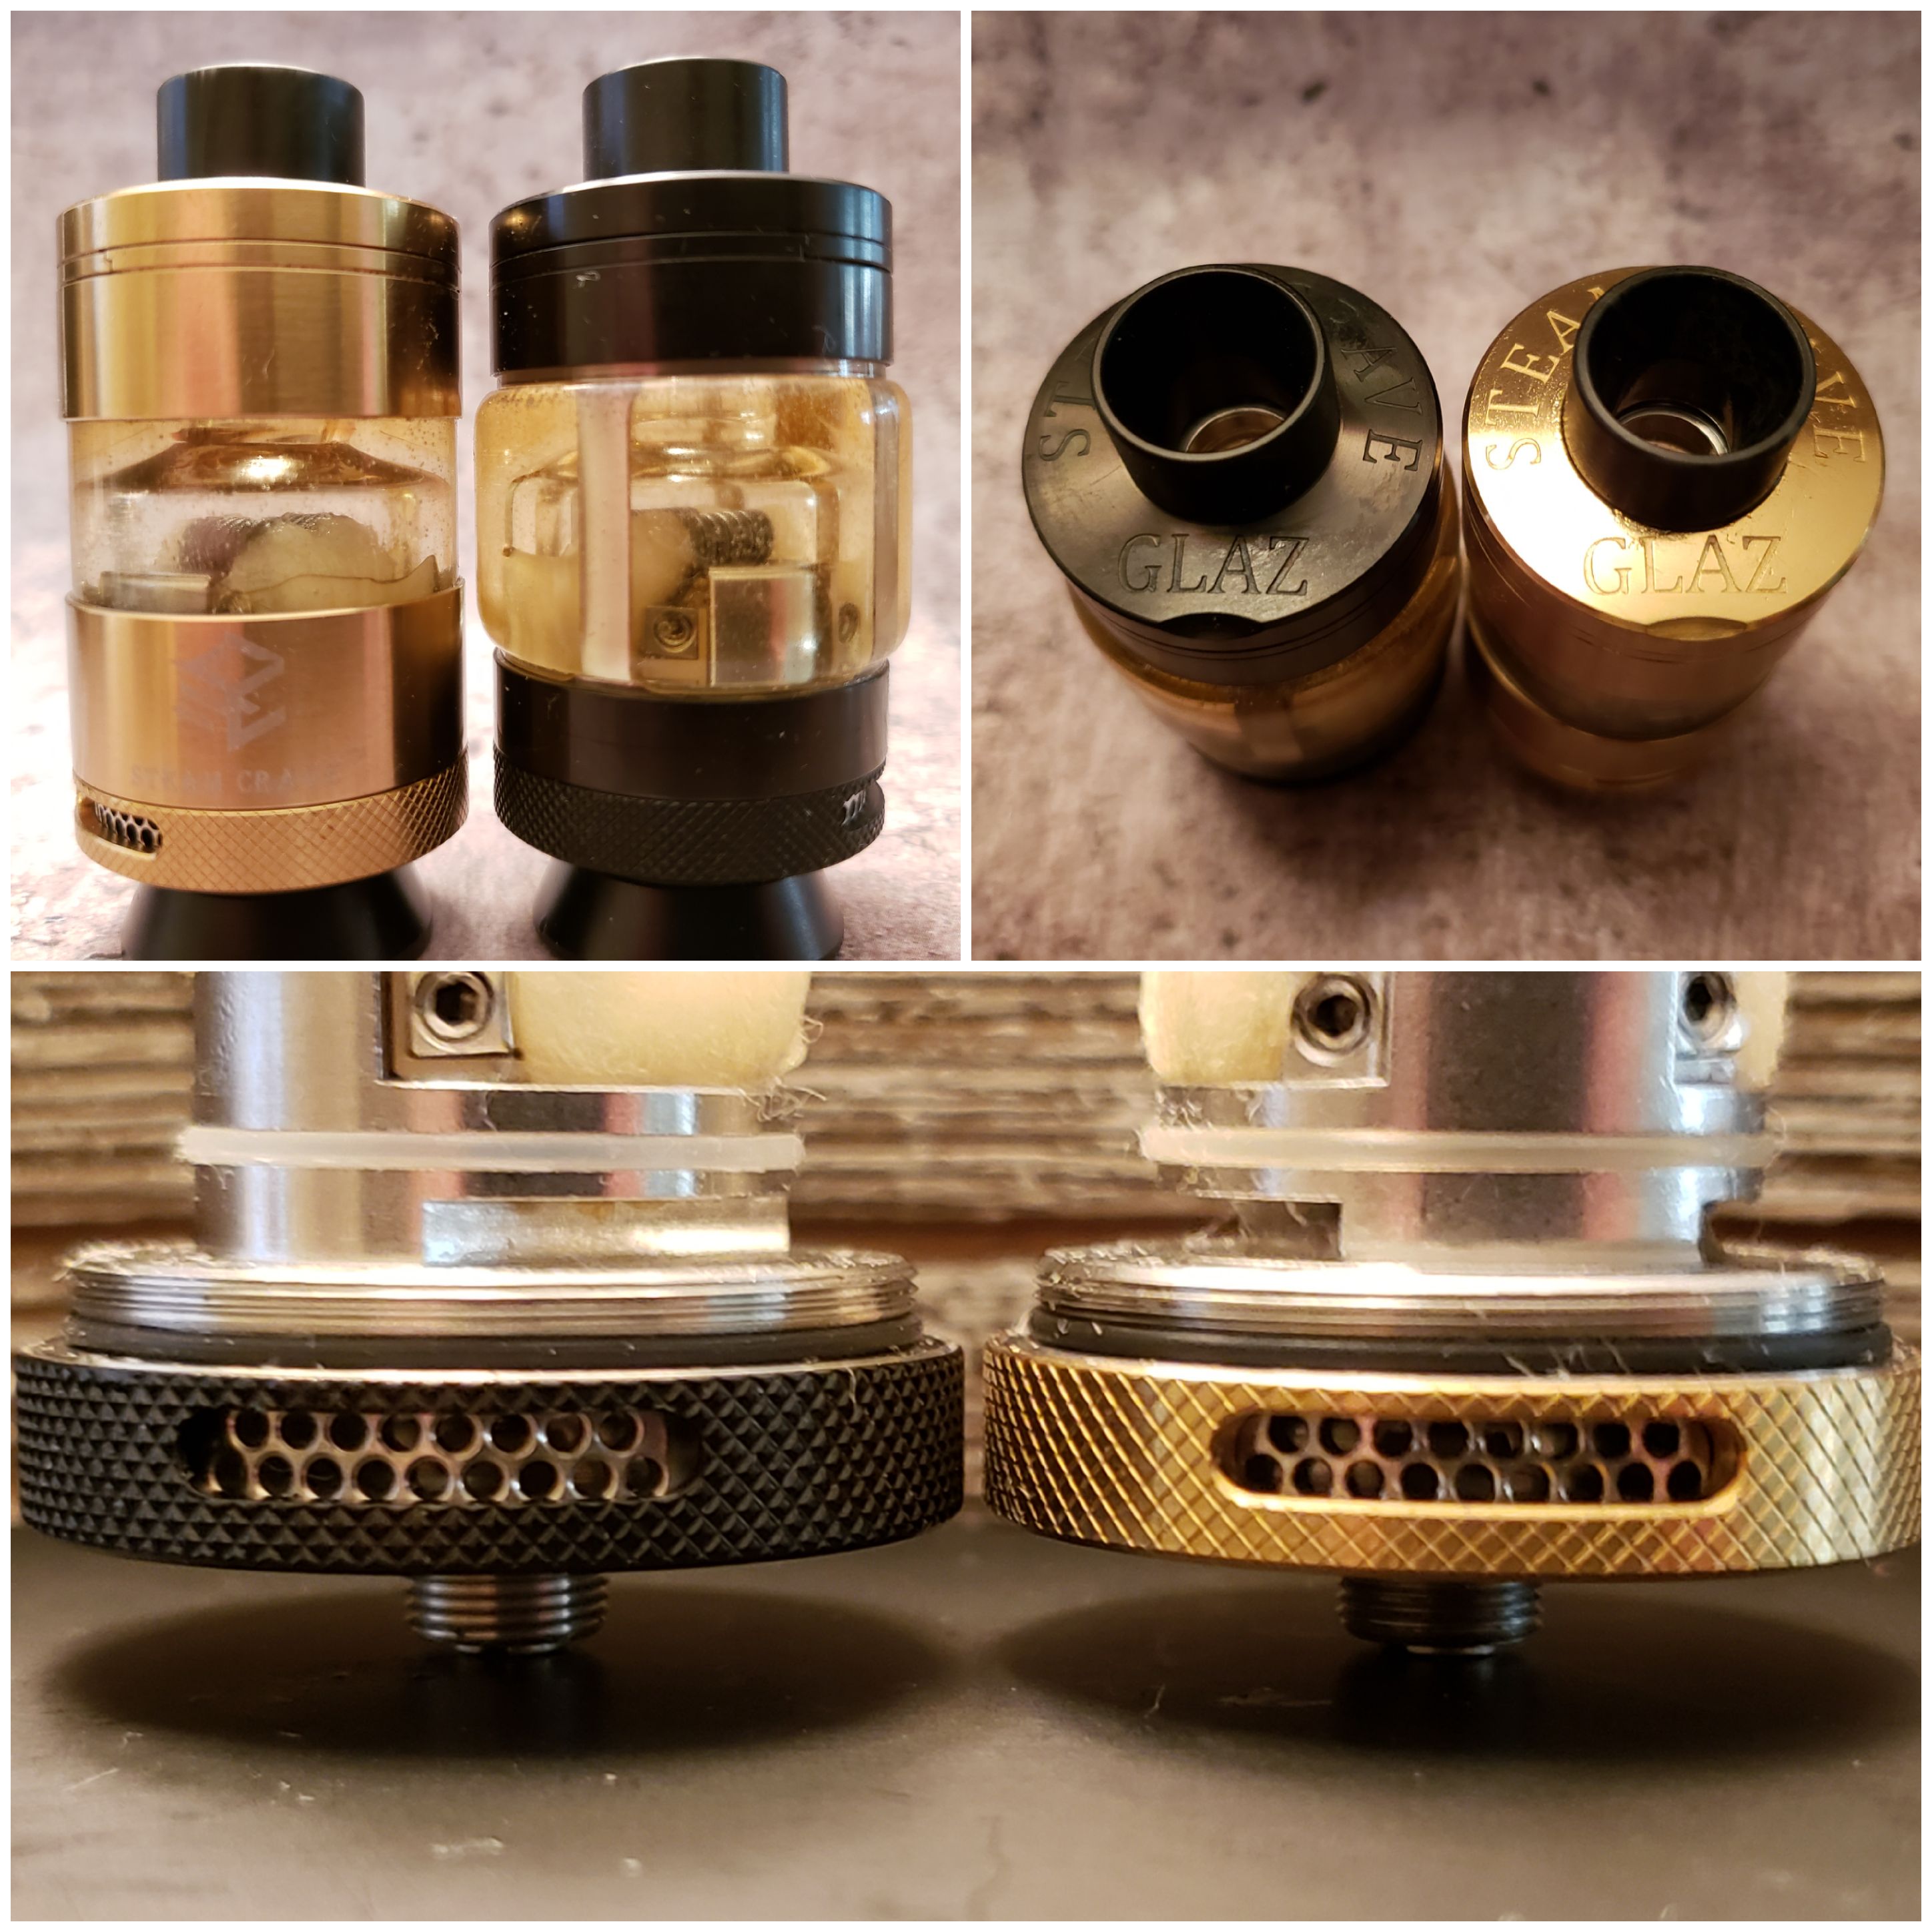
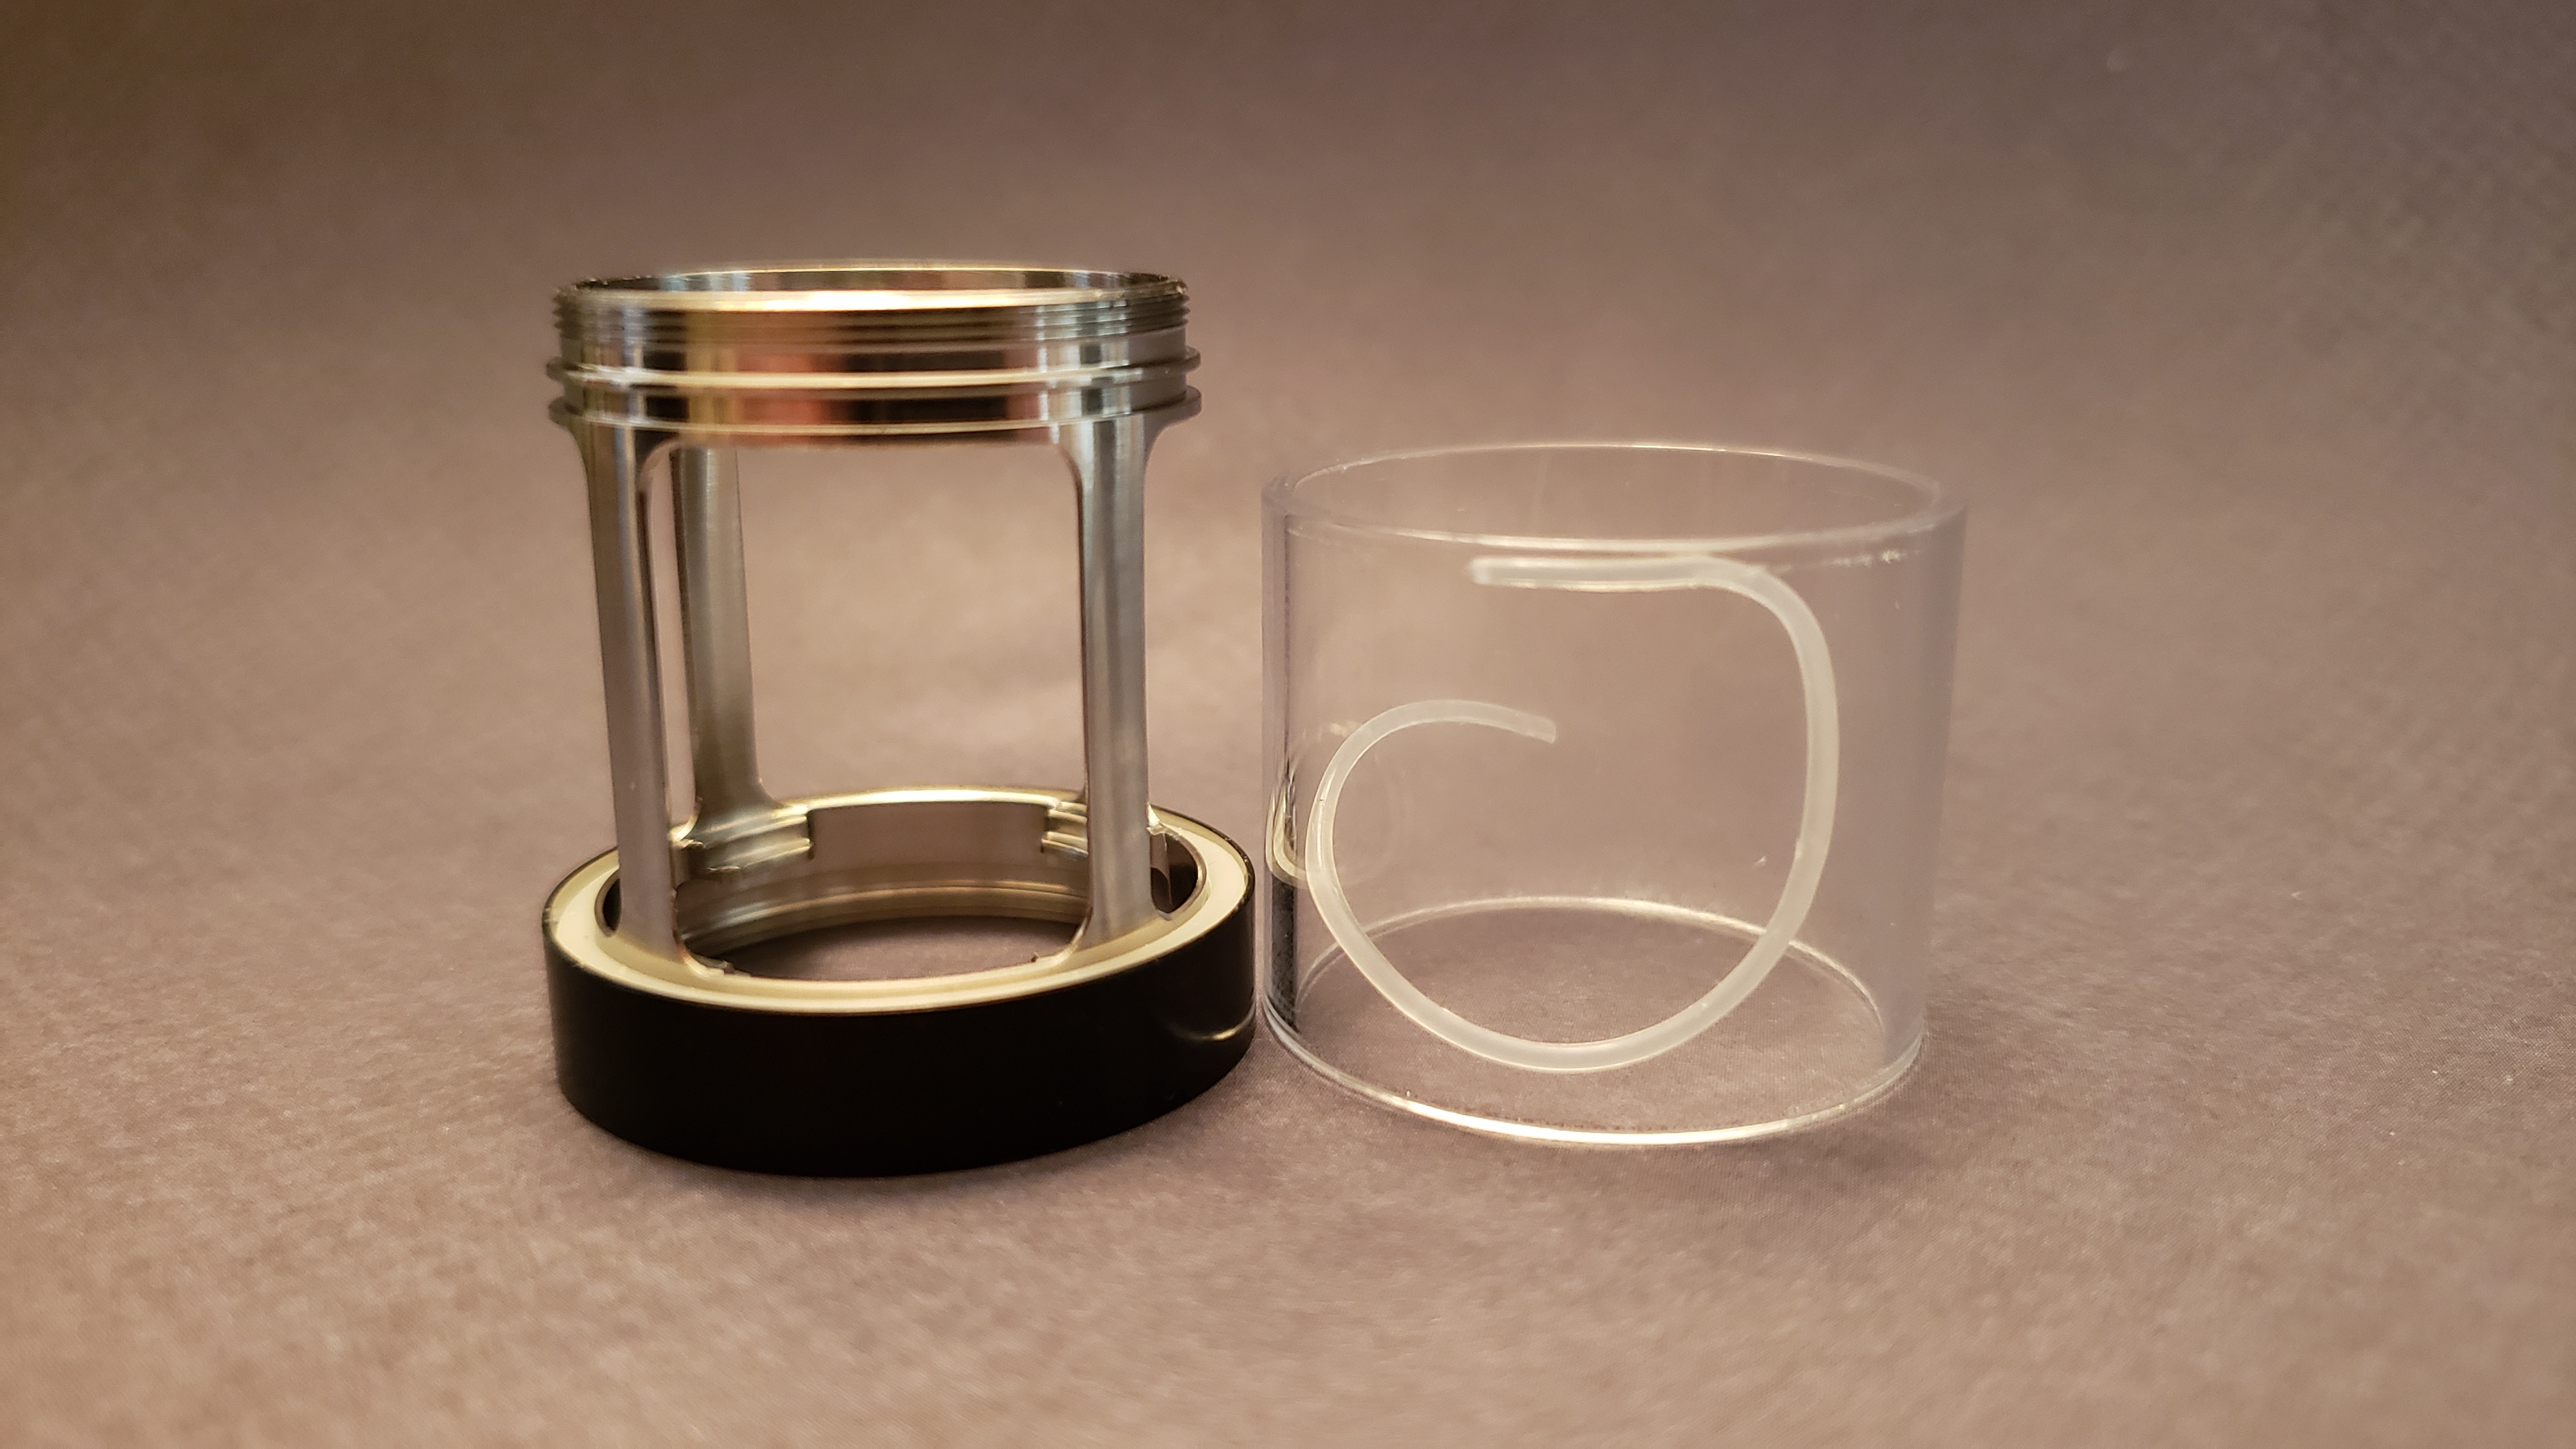
The gold is my V1, black is the V2. The V2 also improves by adding a steel cage which allows for them to get rid of the threaded glass chimney, that is now friction fit with an o-ring. They include a spare glass chimney, something the V1 did not. Only comes with (1) 10ml bubble glass and (2) 7ml straight glass, would have liked that the other way around, the bubble is more likely to break than the straight.
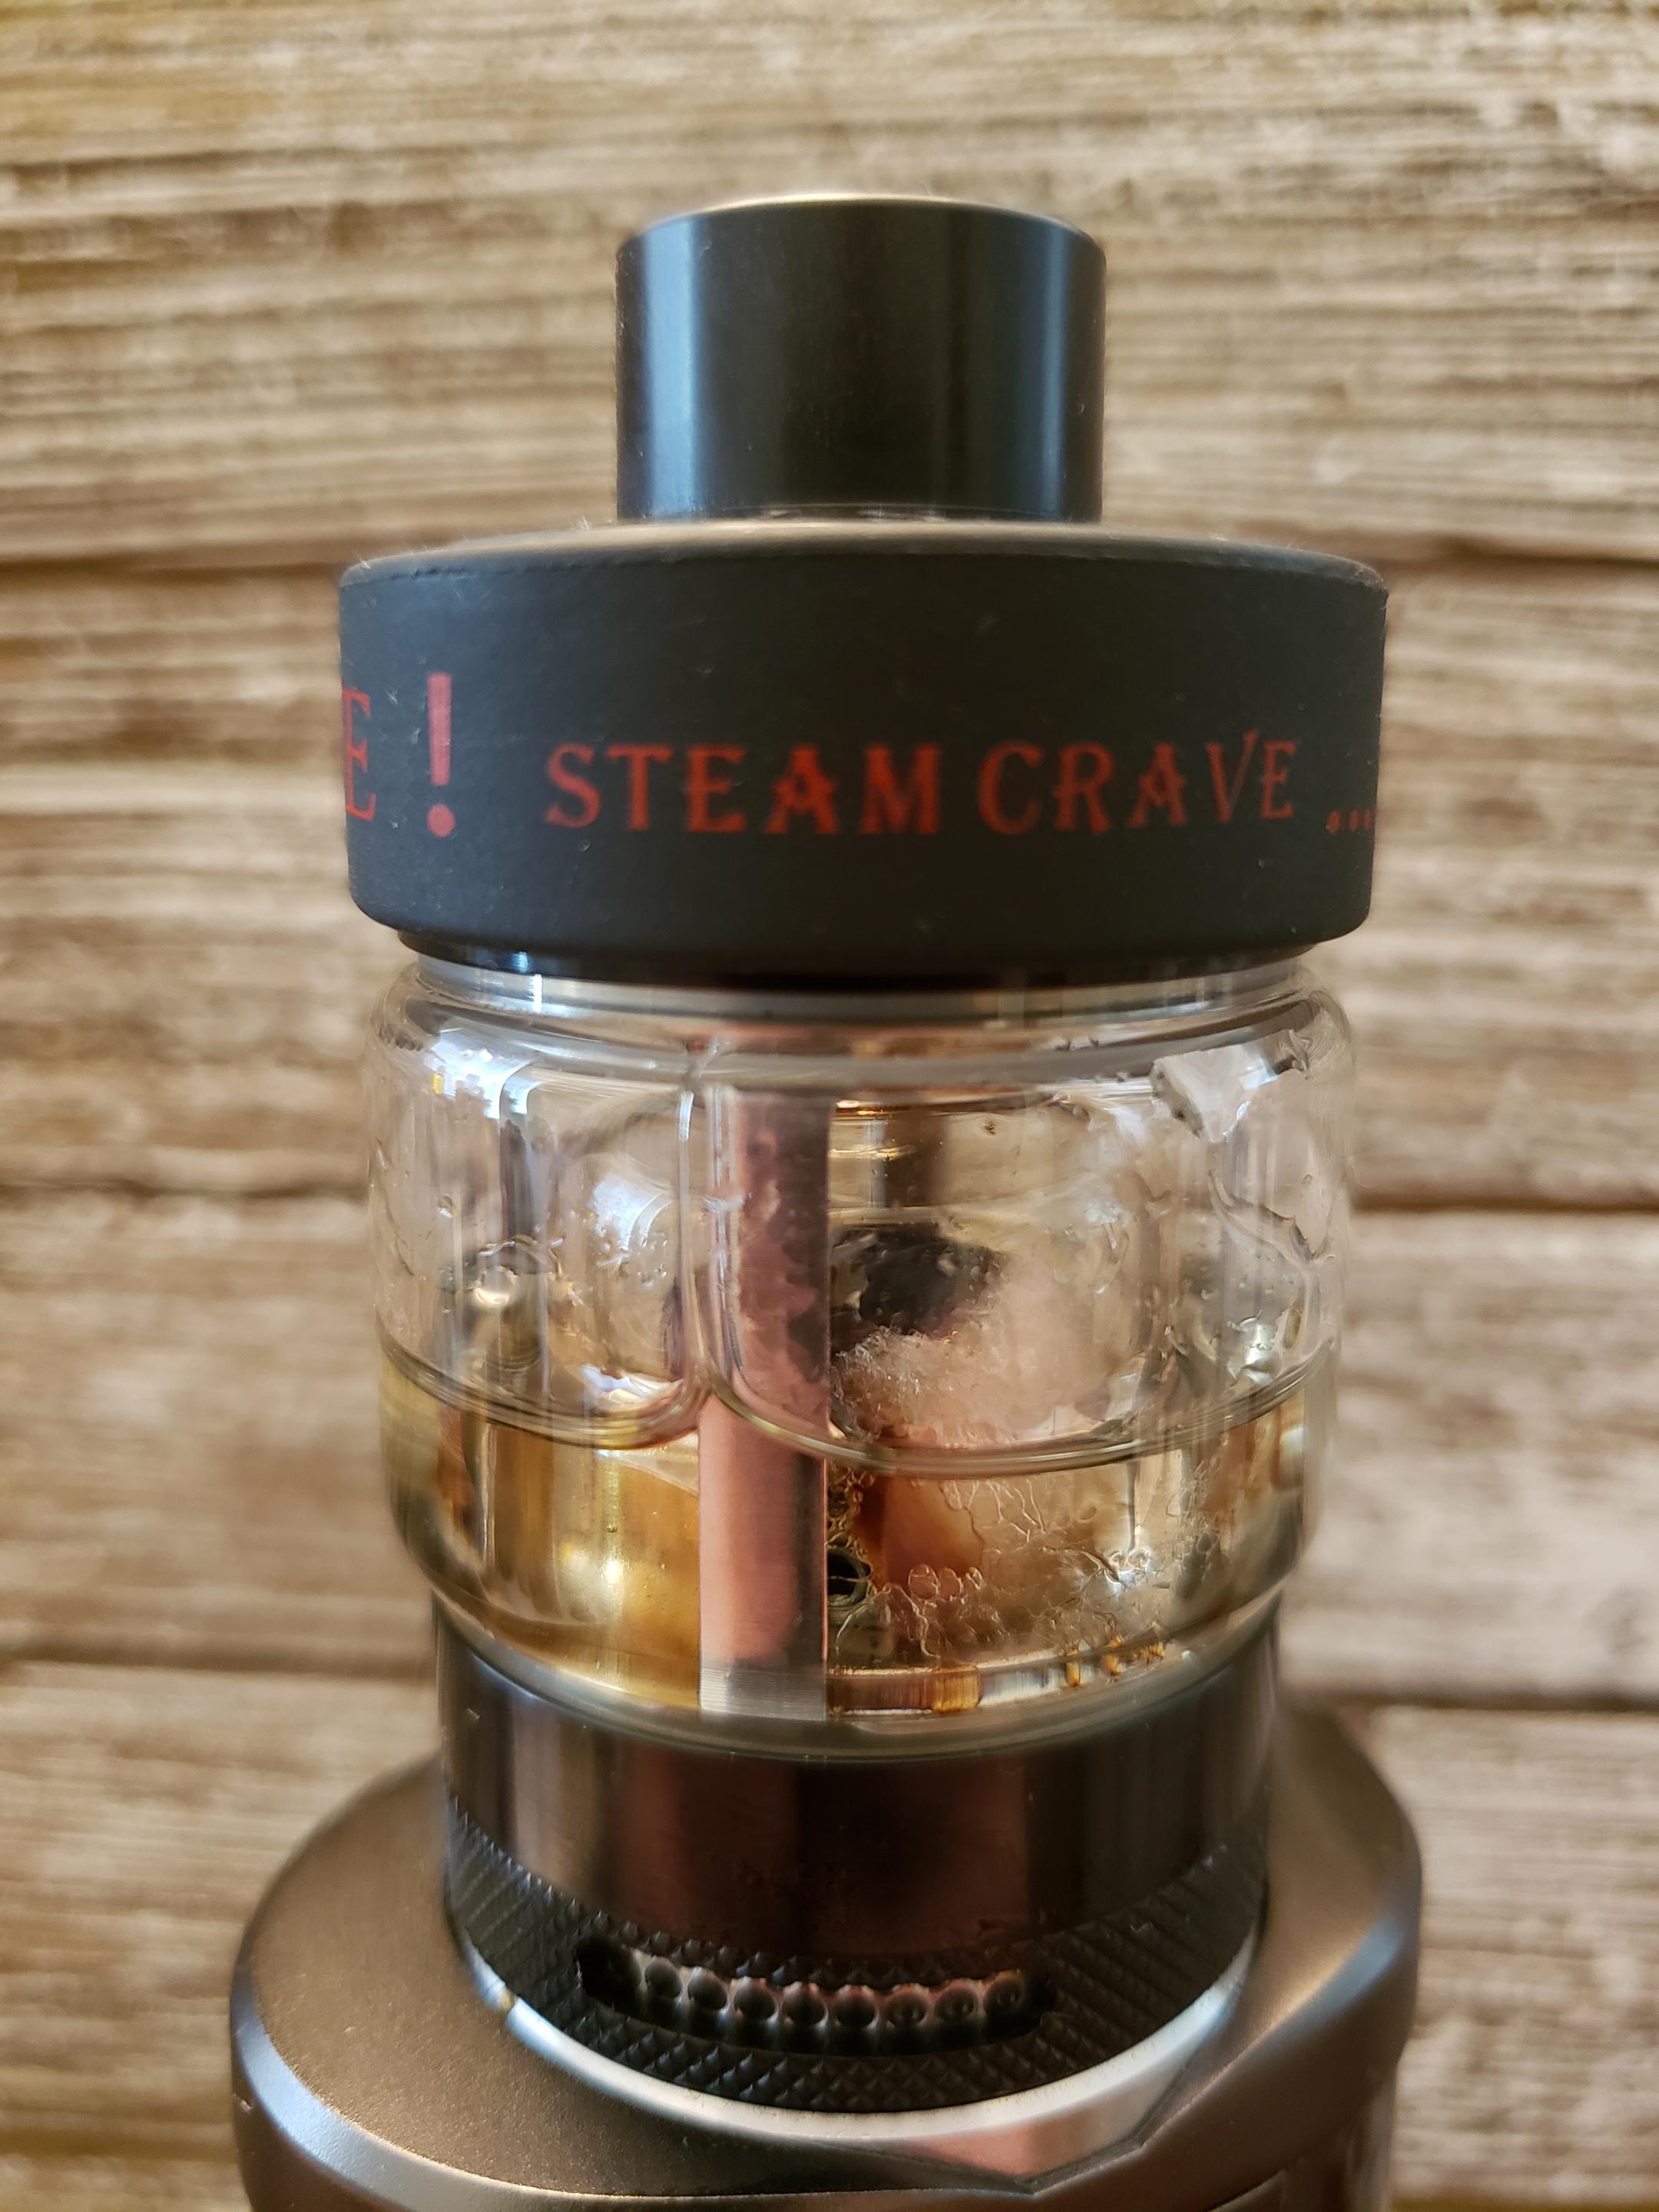
Still has the exact same sliding top-fill, something I constantly complain about in my reviews. For anyone carrying this tank in your pocket or purse use the included vape band to stop it from opening up.
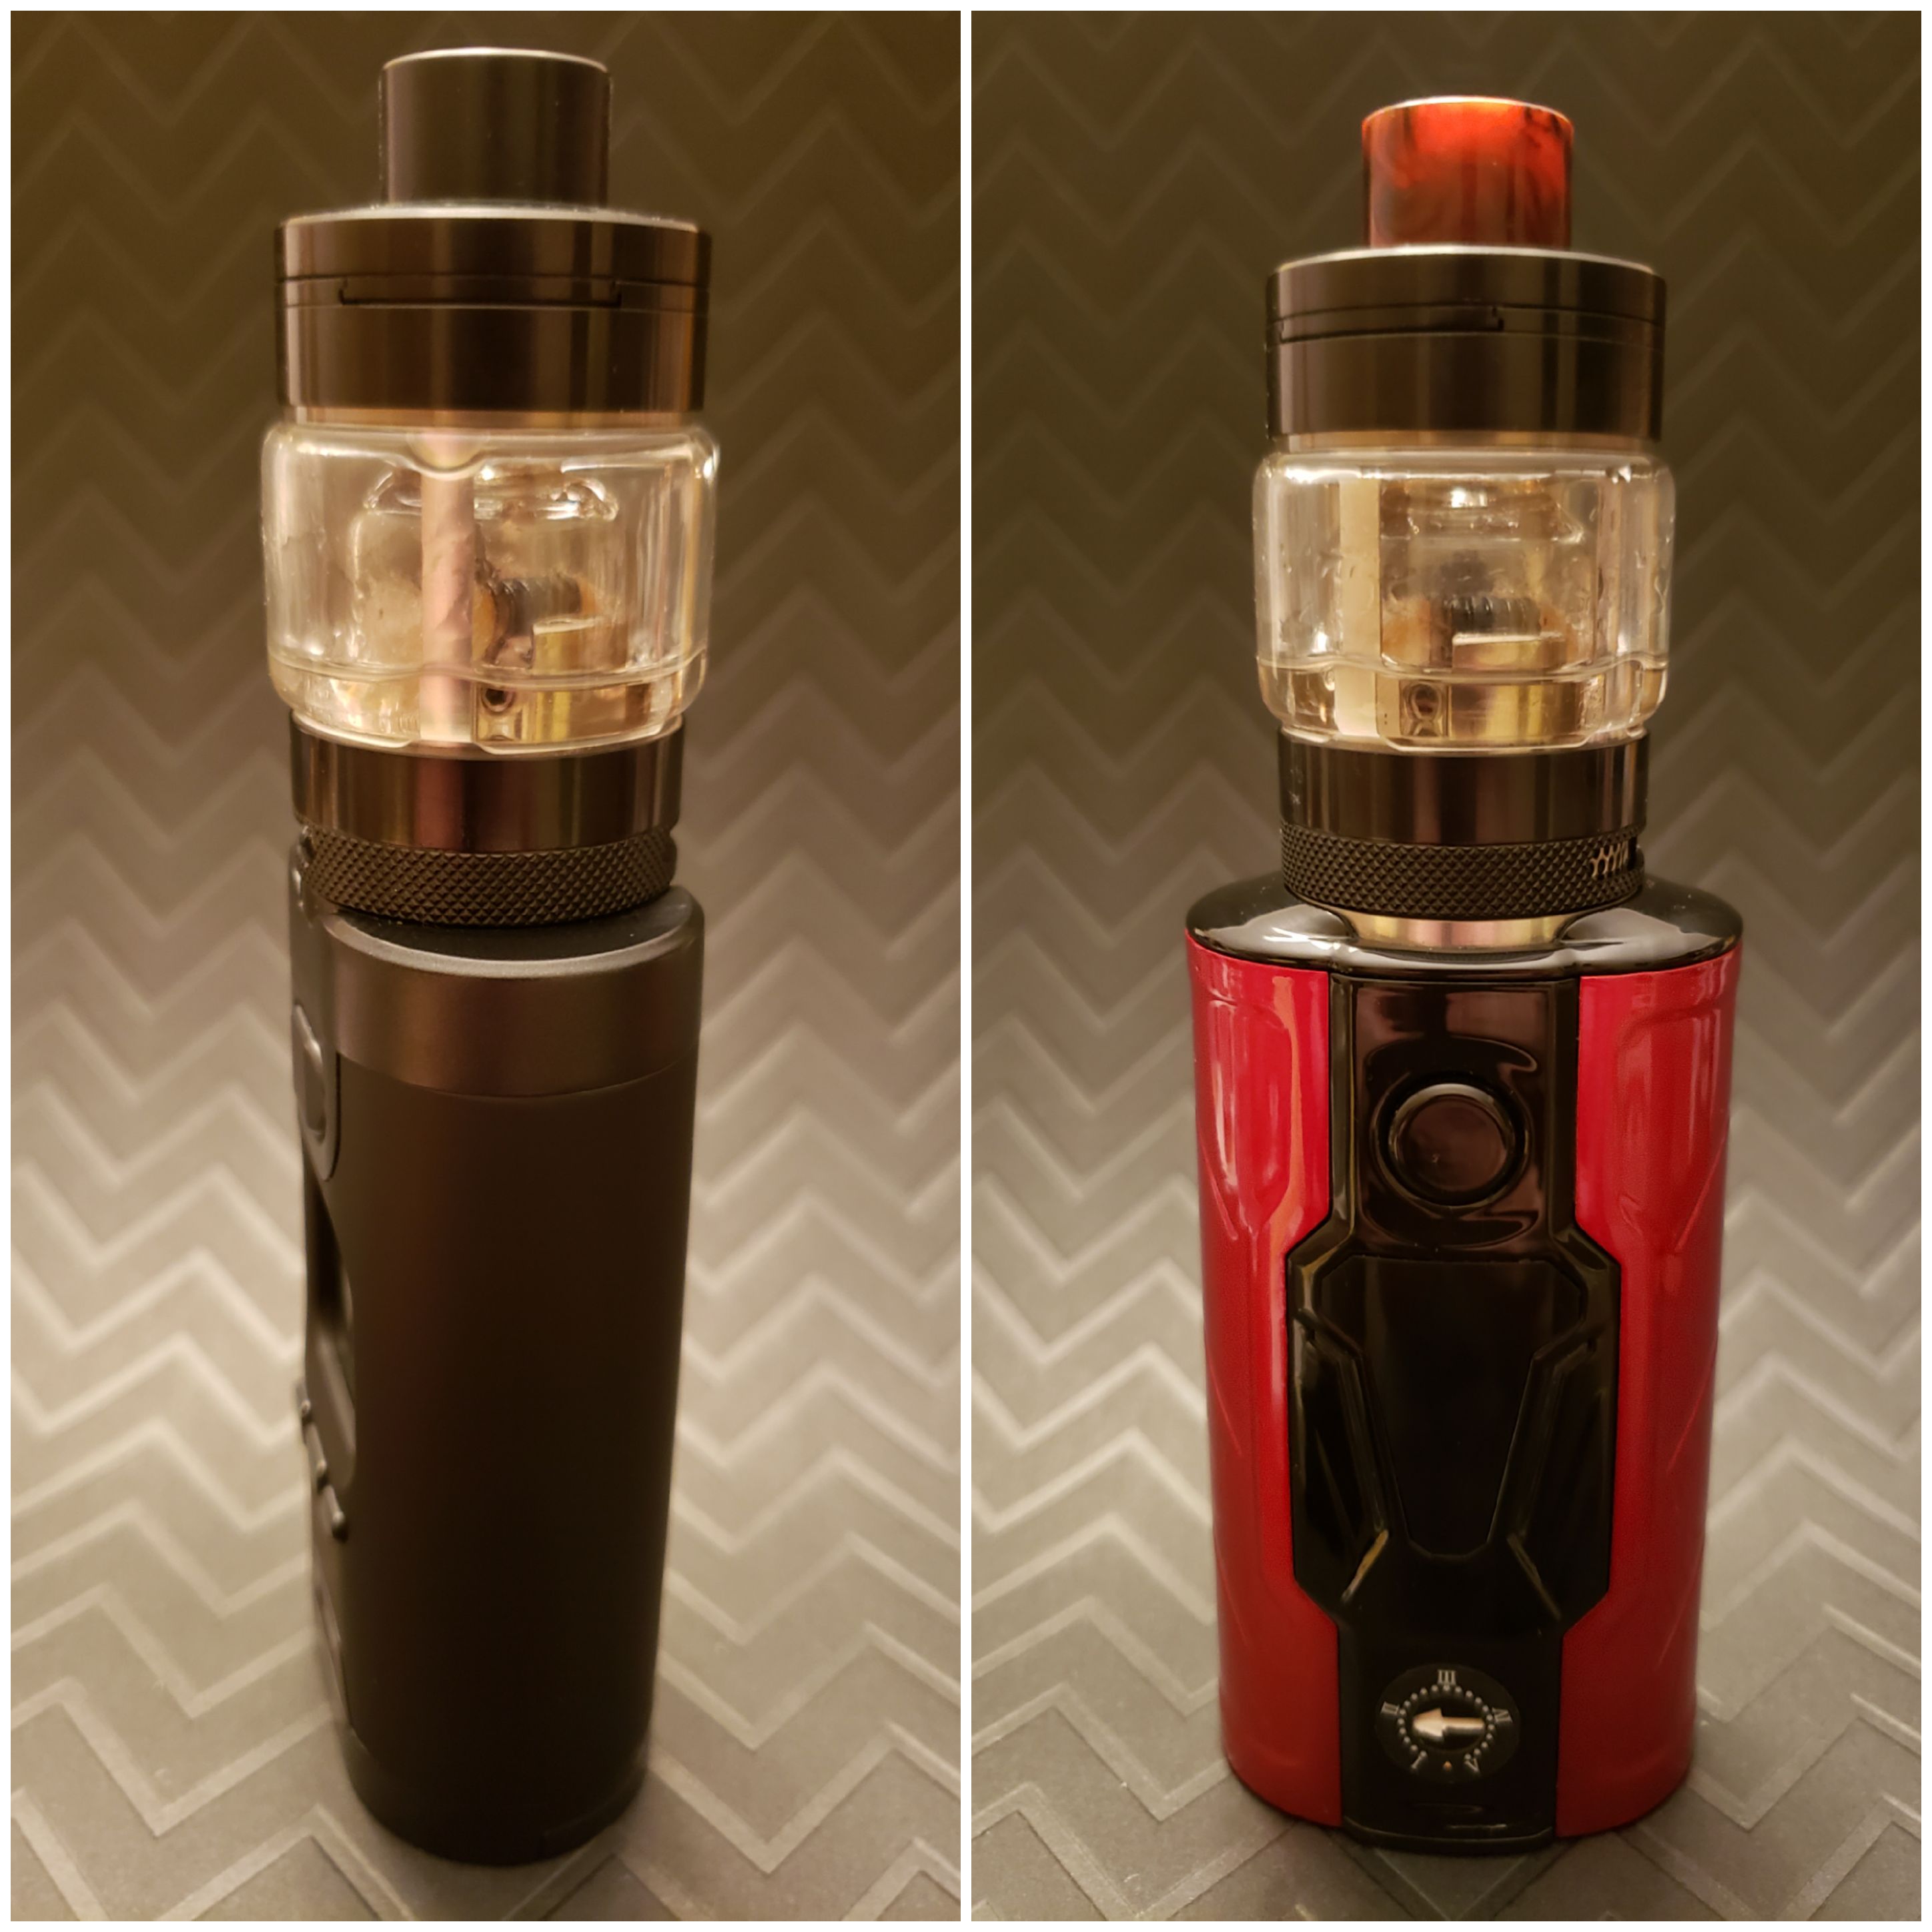
One thing I hate about sliding top-fill tanks as well is the opening is always smaller. Here is a pic with the Aromamizer Plus and it's screw-off top cap vs the opening on the Glaz V2.

I can pour my liquid directly into the Plus but have a hard time using bullnose juice bottles on the Glaz V2, I so prefer the wide-open kidney slots.
The improved deck on the V2 is the real star here. Not only have they increased and improved airflow, my biggest complaint on the V1, but they also made the wicking slots more efficient by increasing the size of the feed holes.
One thing that still bugs me, something I have mentioned in other reviews, the use of clear o-rings, they are known for not being as durable as the normal black. The first thing that happened to me when I went to clean the tank and install the bubble glass was this.
I had to force out the glass as it was stuck being careful not to break the glass in the process. Luckily Steam Crave includes a bunch of spare o-rings in the package. I then made sure and lubricated all of the o-rings with juice to prevent this in the future and didn't have another problem during the 6 to 8 builds I tried, I suggest you do the same.
They have not changed the 810, still need to use TFV style 810 drip tips with the dual o-rings, friction fit 810 drip tips will not work, too loose.
Builds and Performance
One thing I noticed with the original Glaz RTA was it was finicky with builds to get the best performance, unfortunately, the V2 is no different. The same can be said about a lot of RTA's, the build is the heart of any rebuildable but some are more forgiving like the Steam Crave Aromamizer Plus.
I tried just about anything and got good to meh results, the worst was trying the coil position higher than normal, muted flavor and it was ripped out after a single tank. What I did find was close to the airflow and edge of the sides with an opening, trying to get the airflow to go under the coil as much as possible. Fancy coils doing the best, the build below with some SS316L staple coils on the 3mm post.
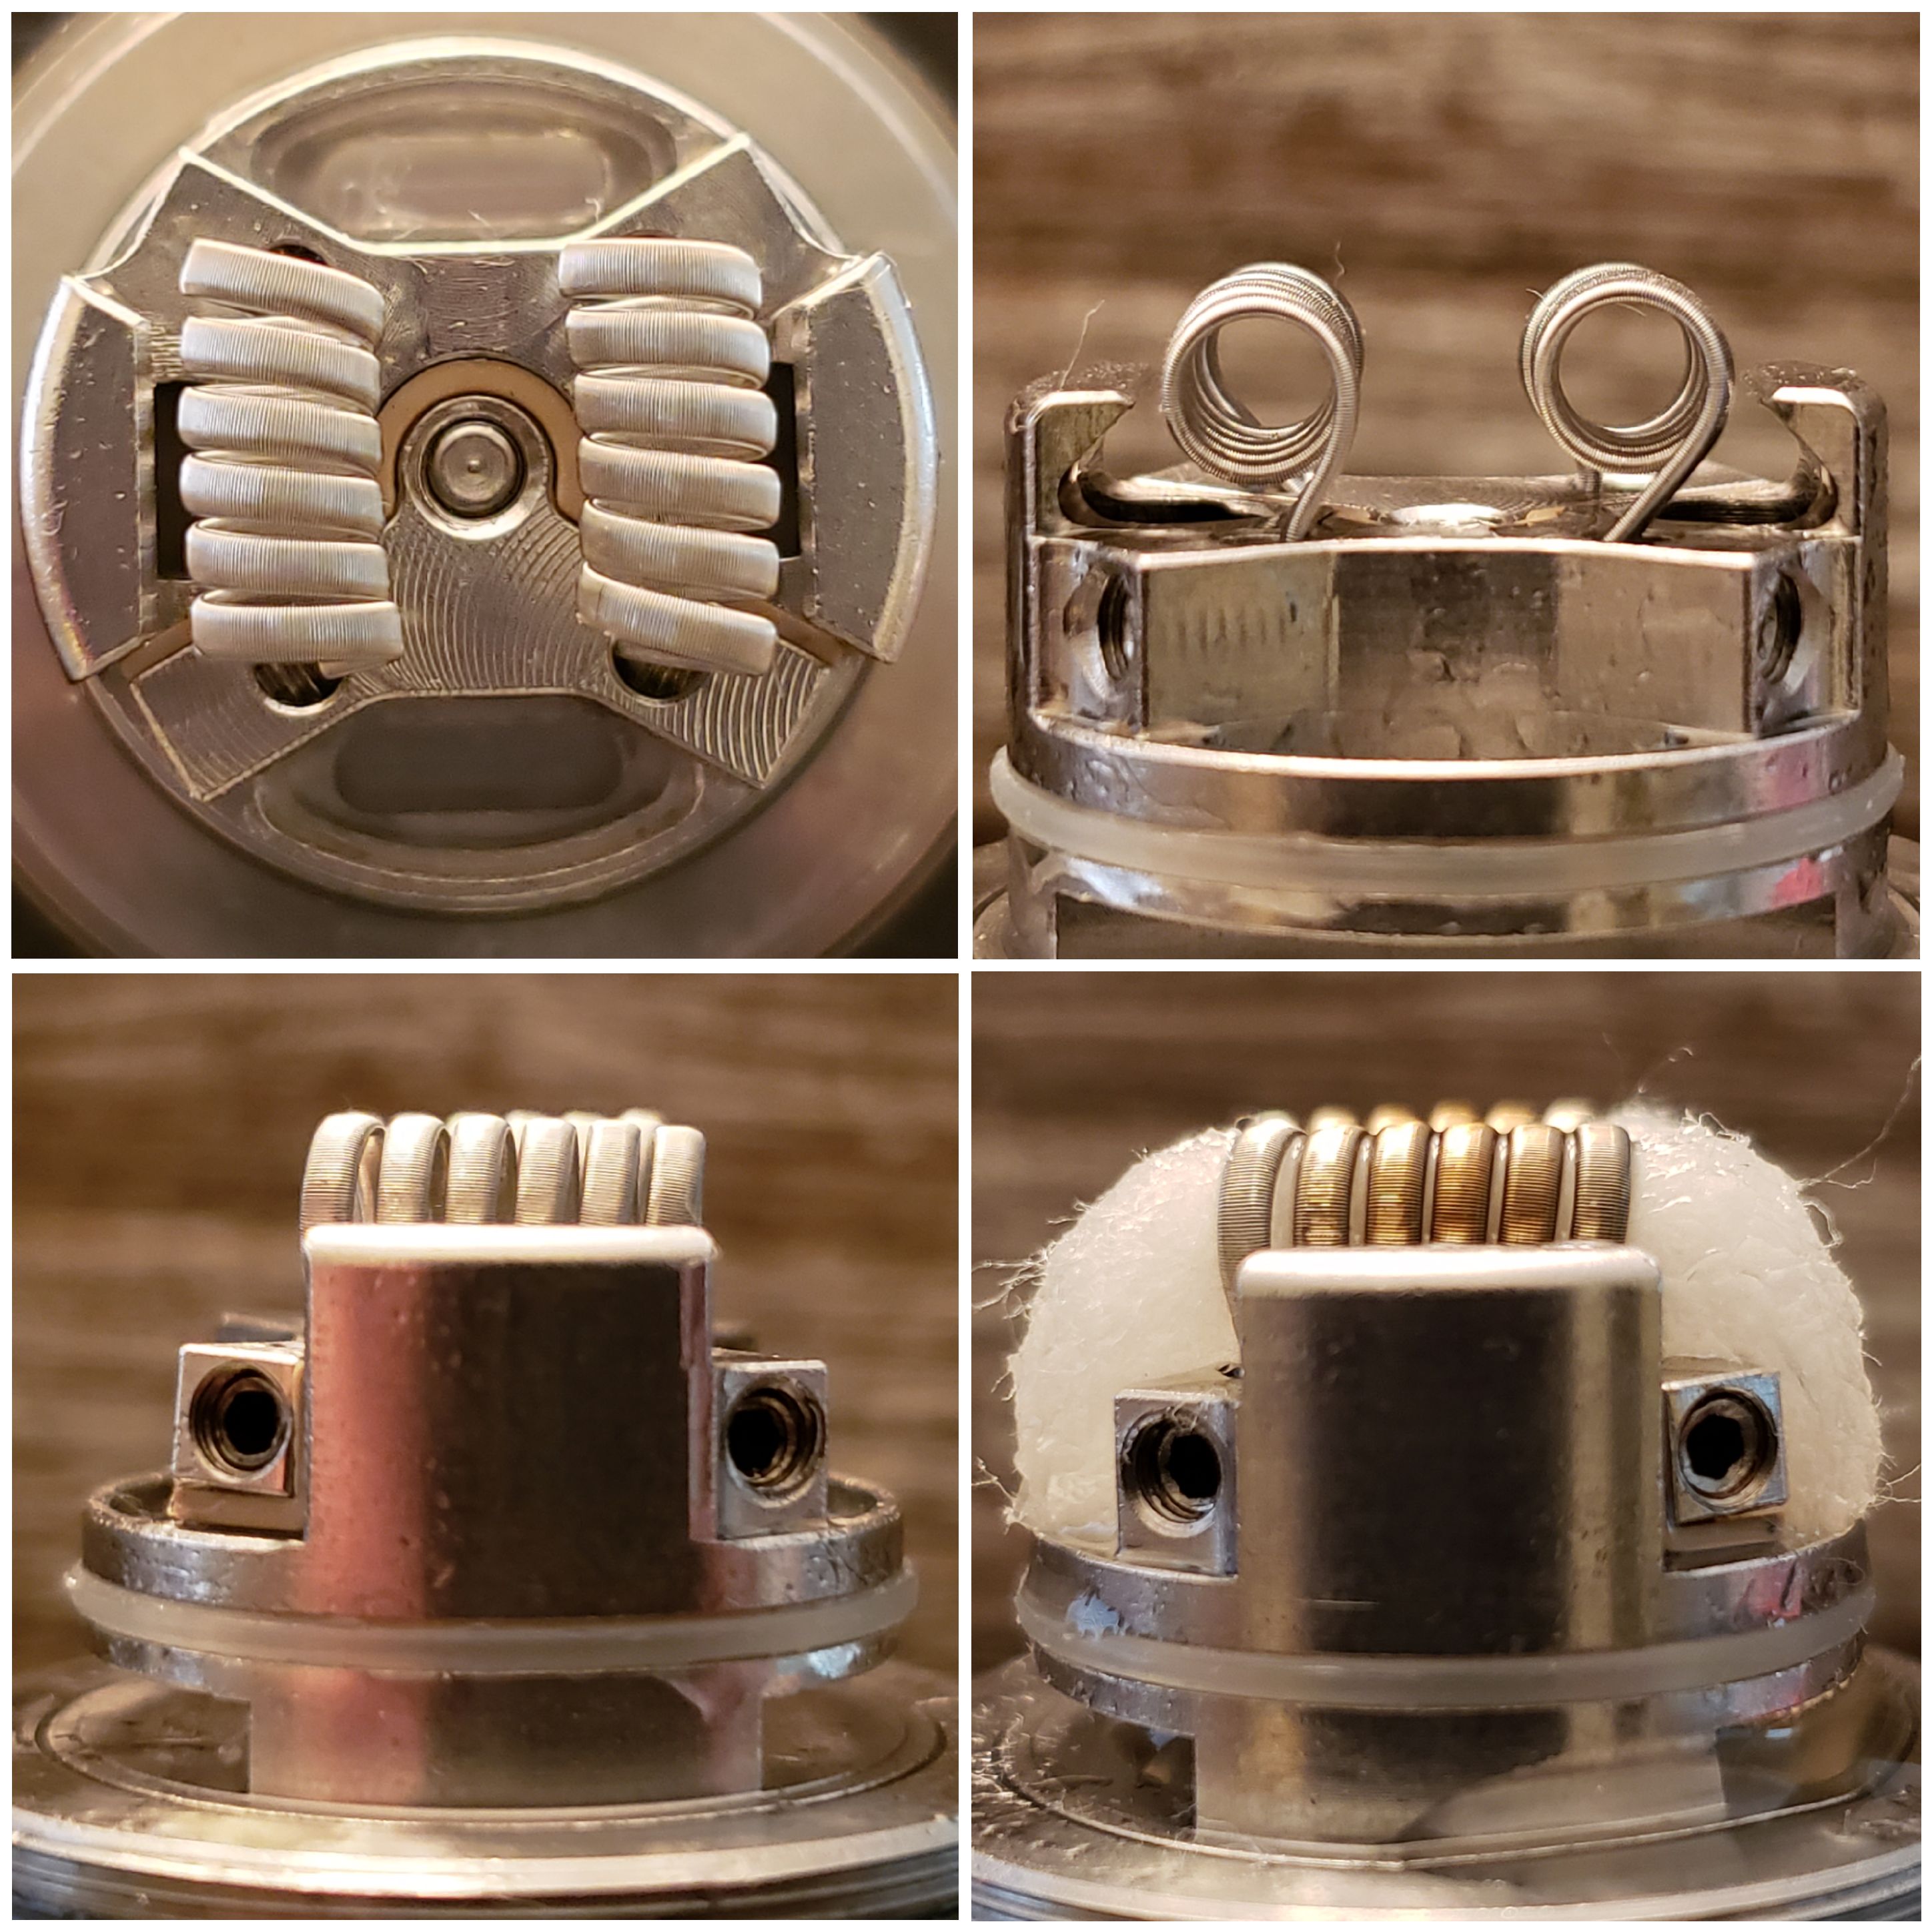
That was good but it wasn't until I used the same coil placement but this time with 32g 6 core 38g wrap SS316L fused claptons from Advanced Vape Supply on a 3.5mm post that the flavor really came alive, it definitely was the ah-ha moment for me.
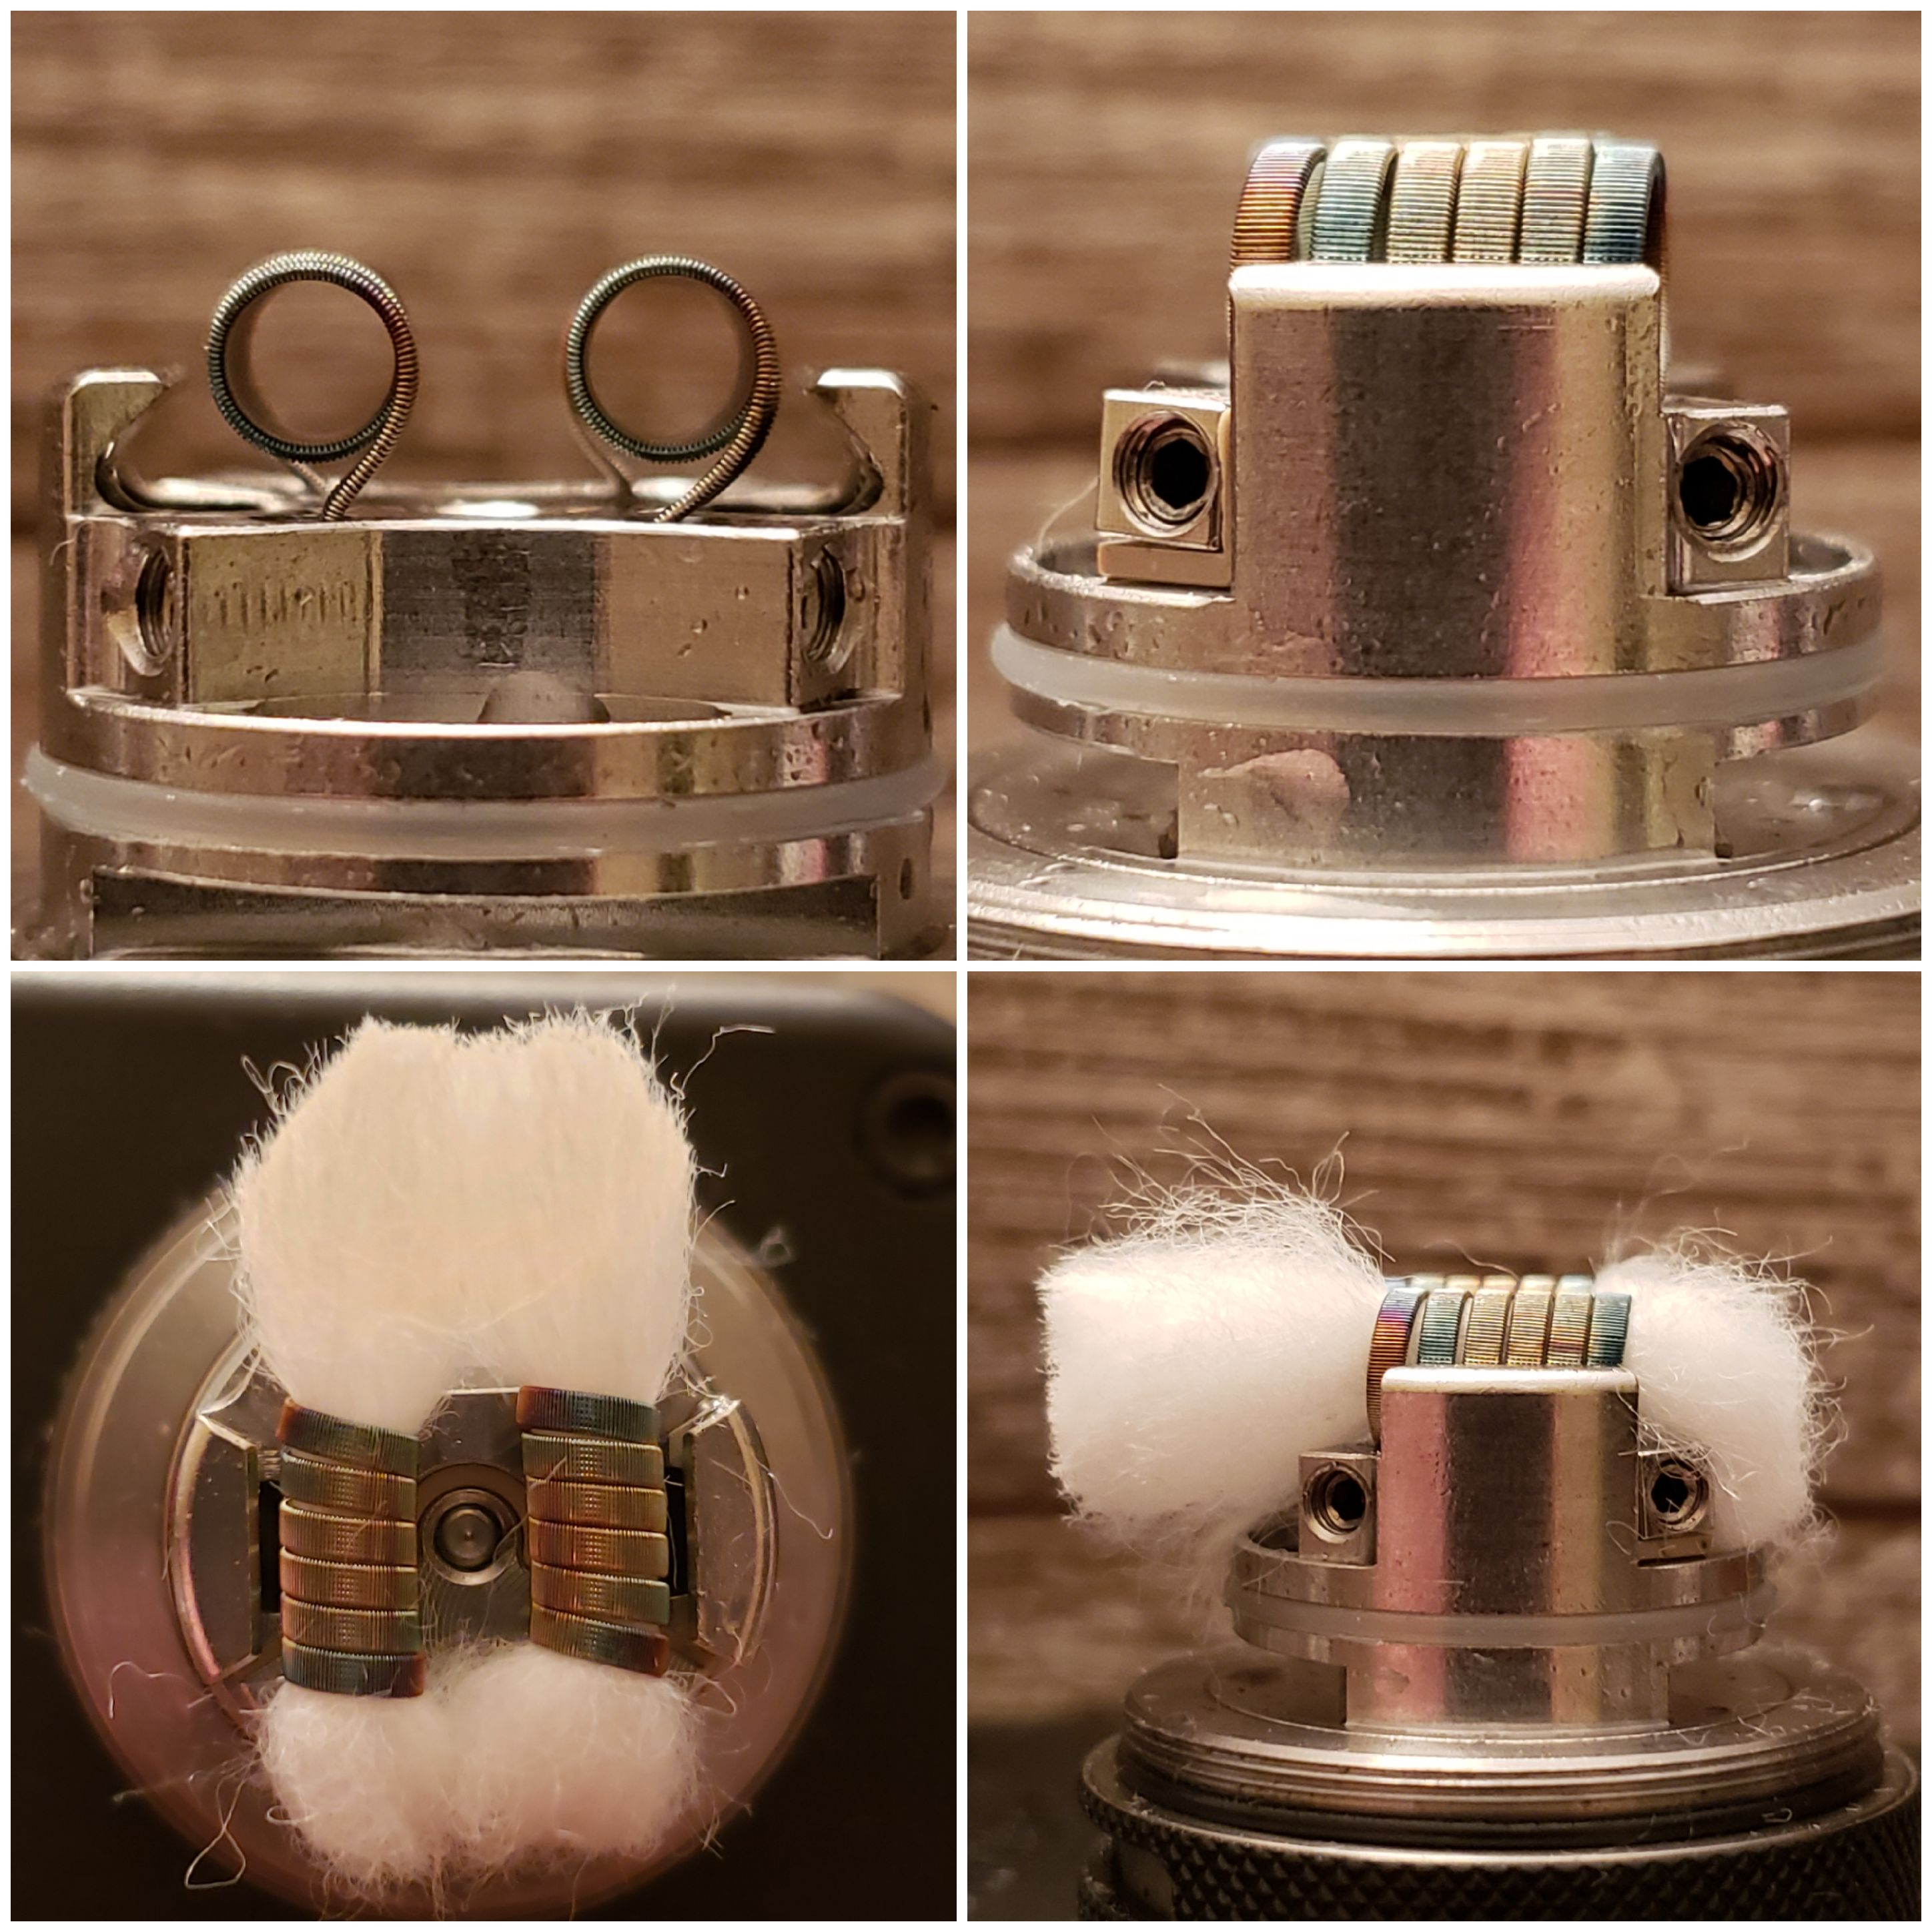
I currently have the same wire but with a 3mm post and it is good but the 3.5mm post build was better and that is what I will be going back to. All the builds used the same juice, I do that for consistency and it is a juice I know very well and make myself....DIY for life!
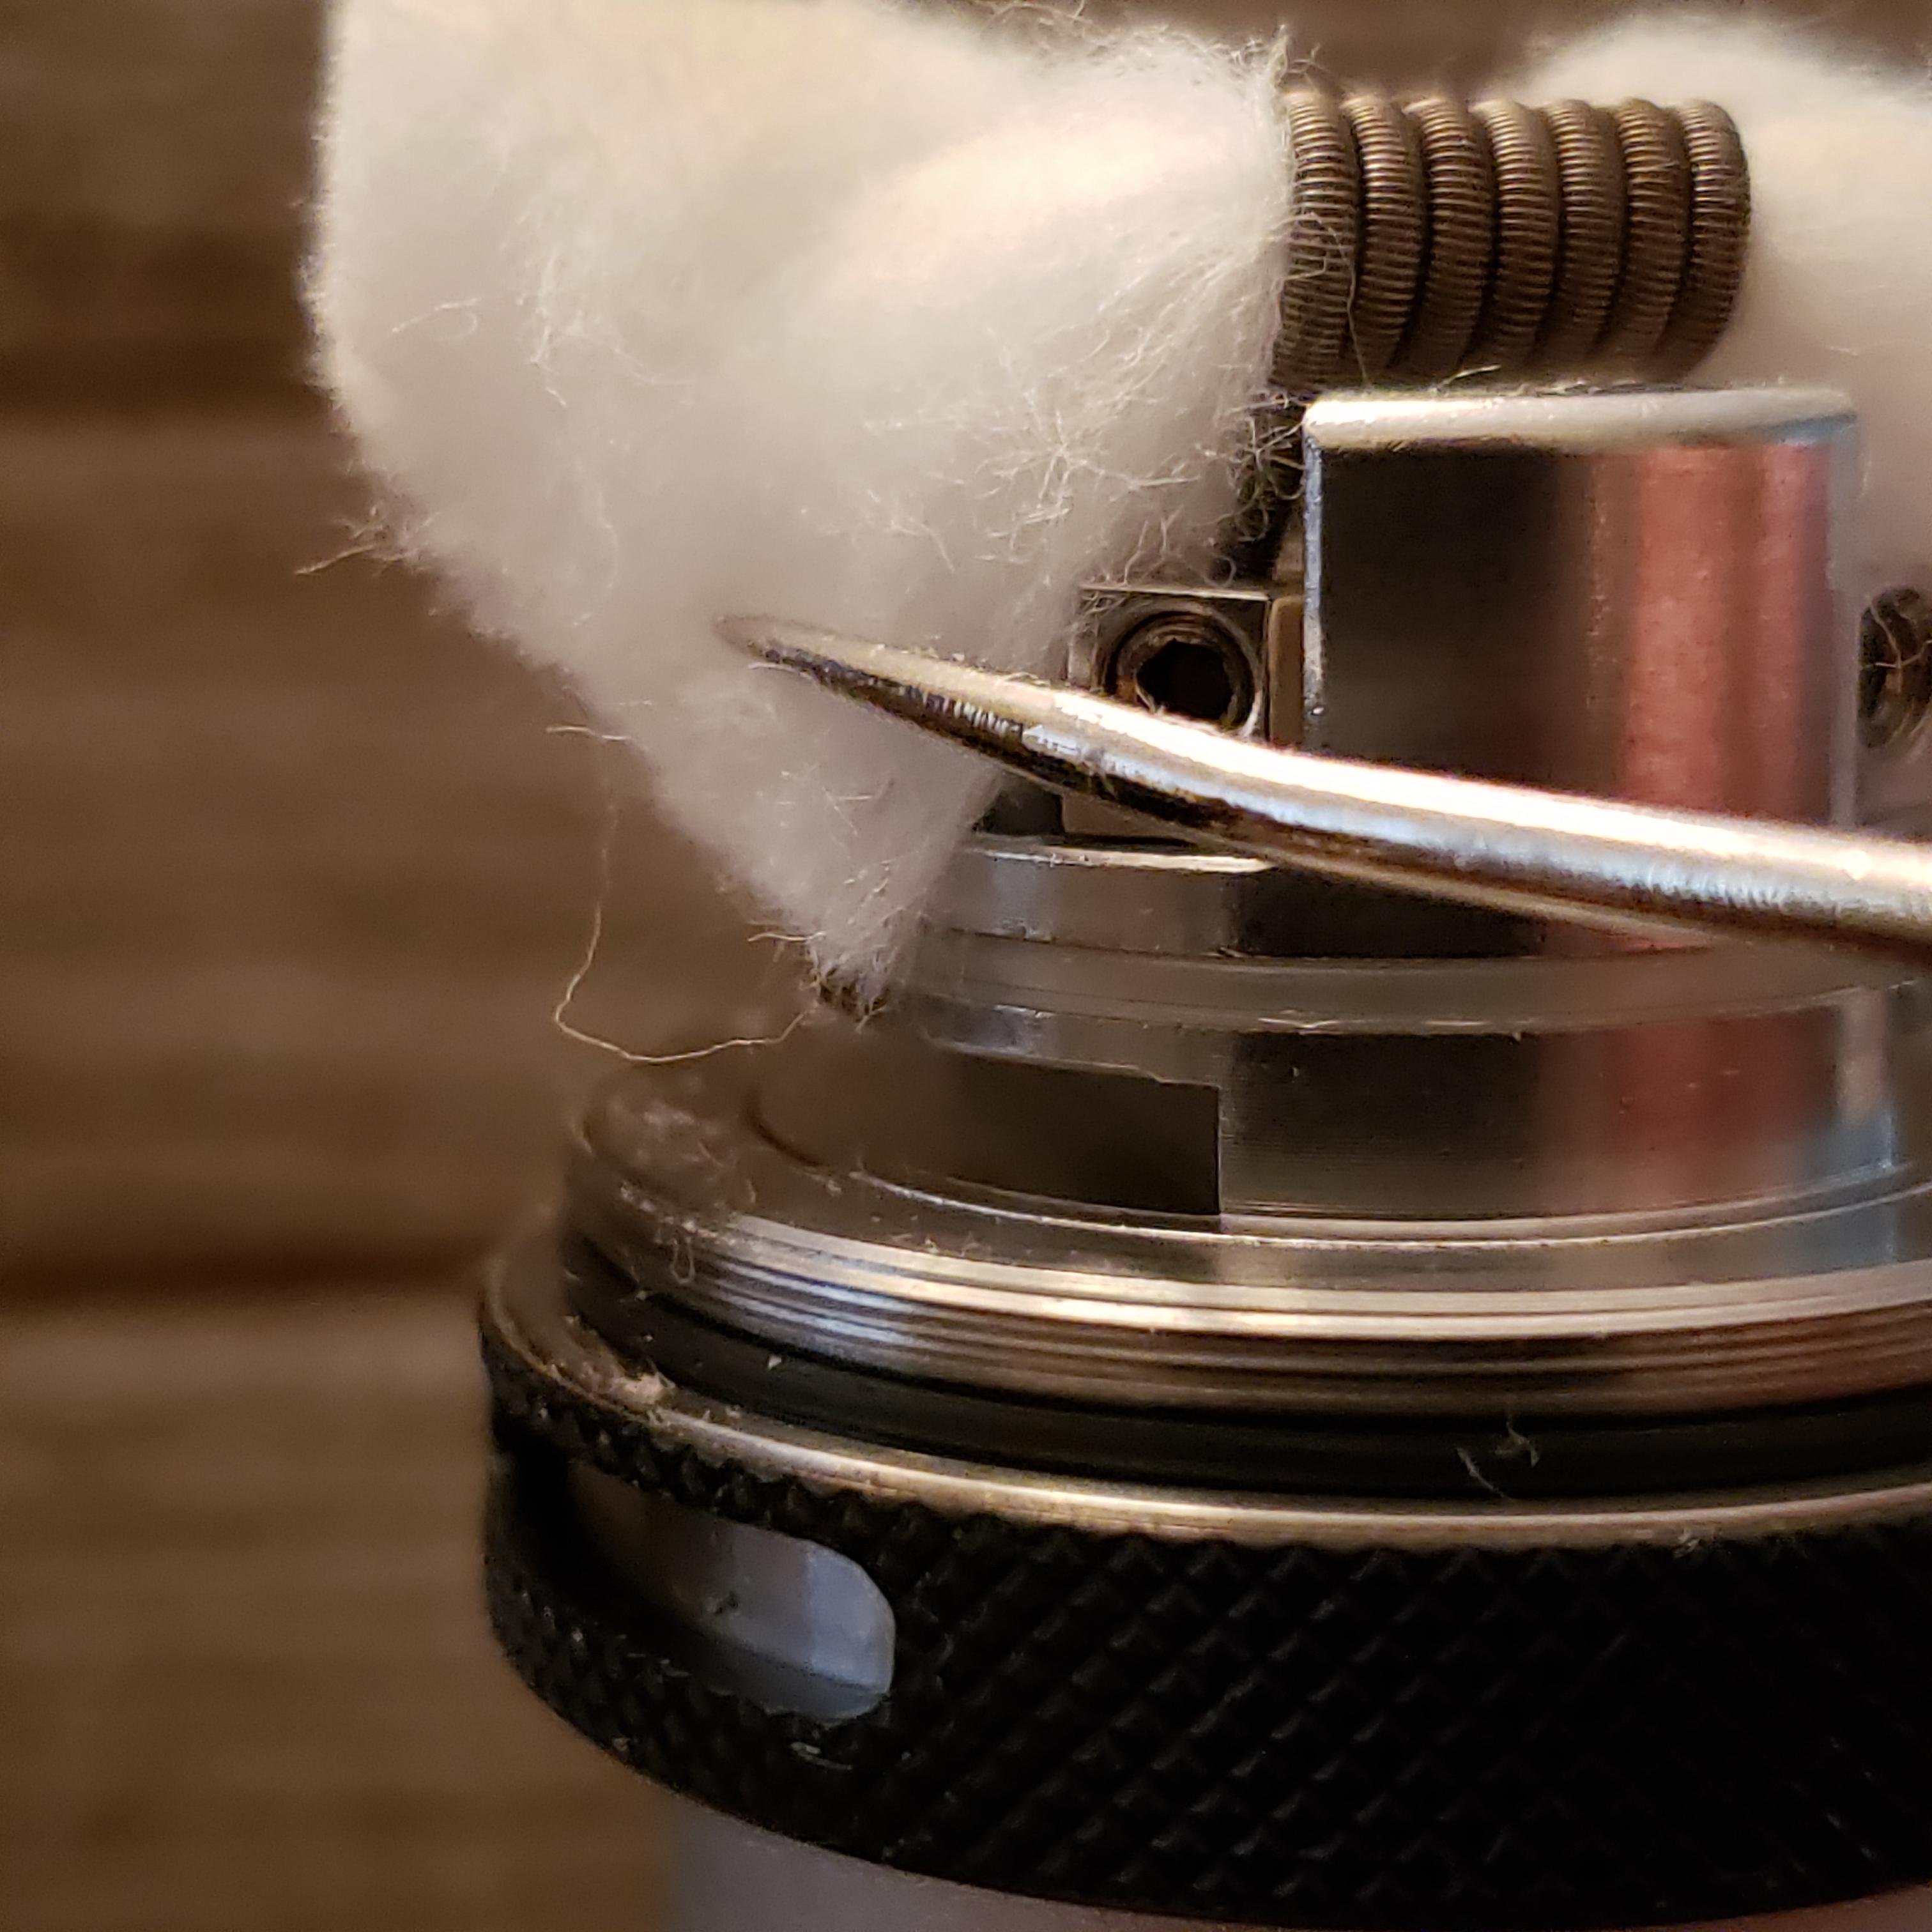
WIcking is not as simple as the Aromamizer Plus but not bad either. You want to cut your wicks right at the bottom o-ring like this.
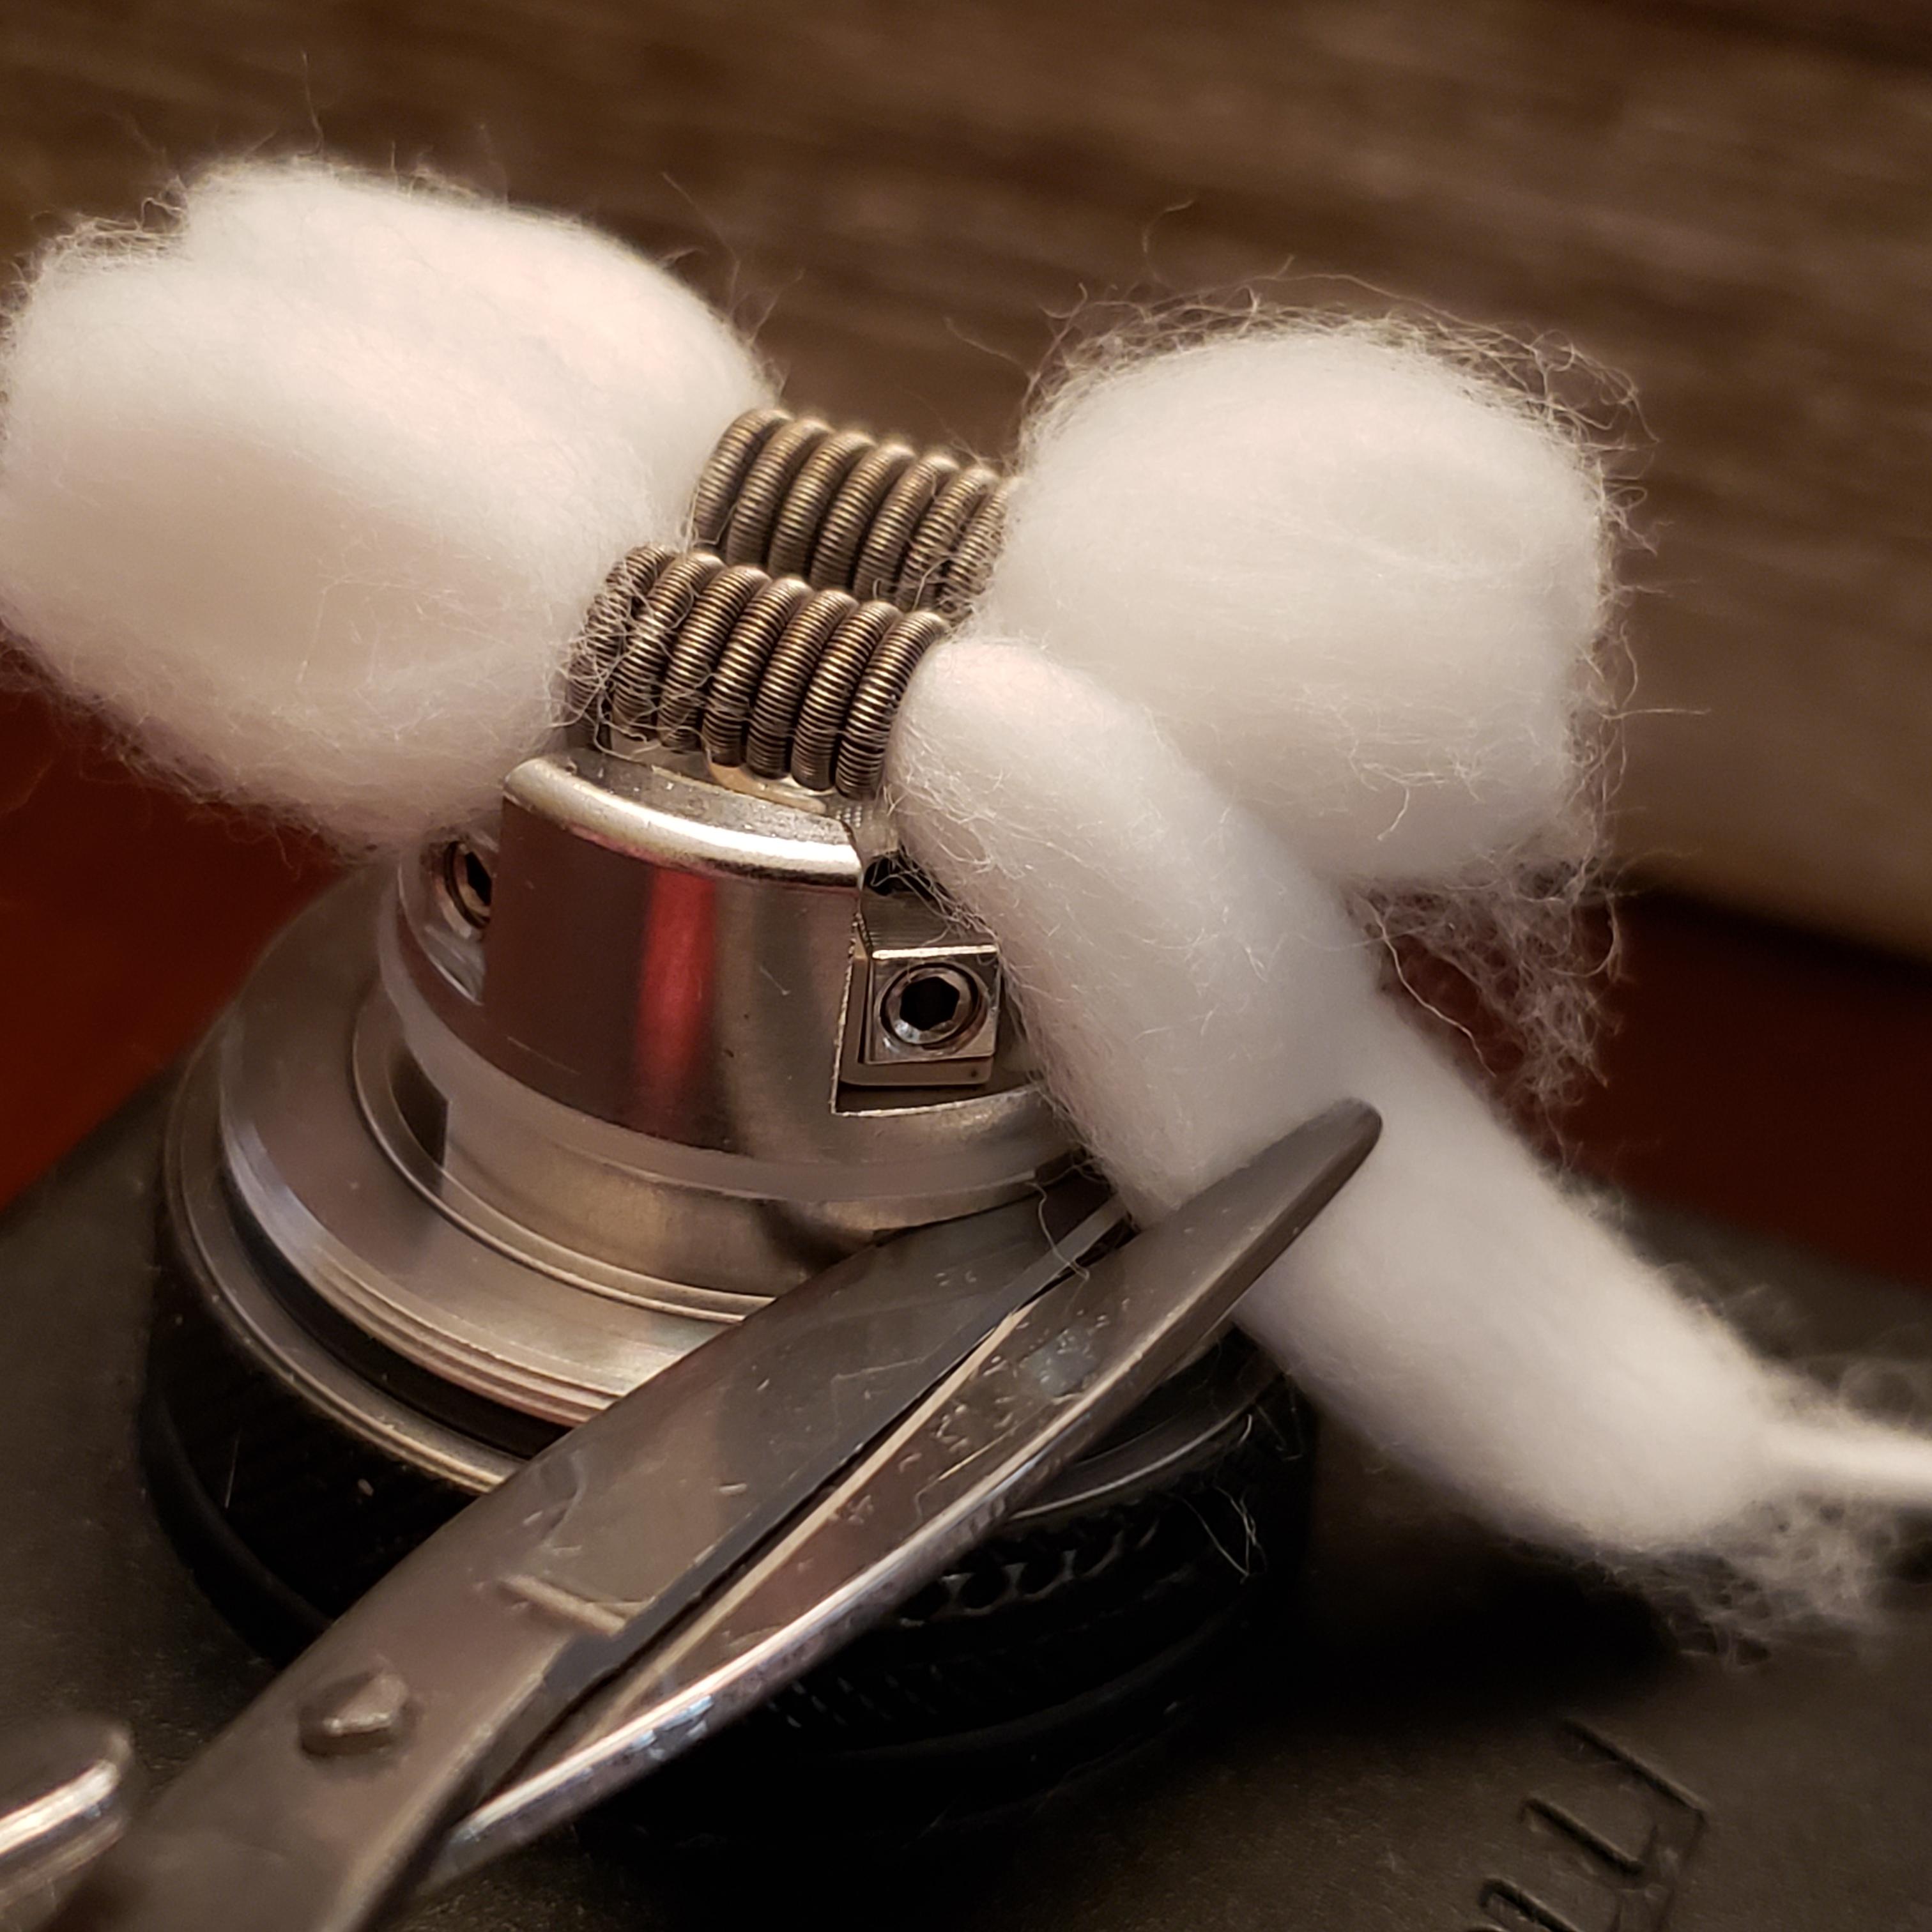
When the wicks drop down it should be right to that o-ring, not below.
If using 3.5mm coils make sure you thin out the wicks, when placing the wicks into the wicking slots they should not be tight, just enough to dam up the wicking slots.
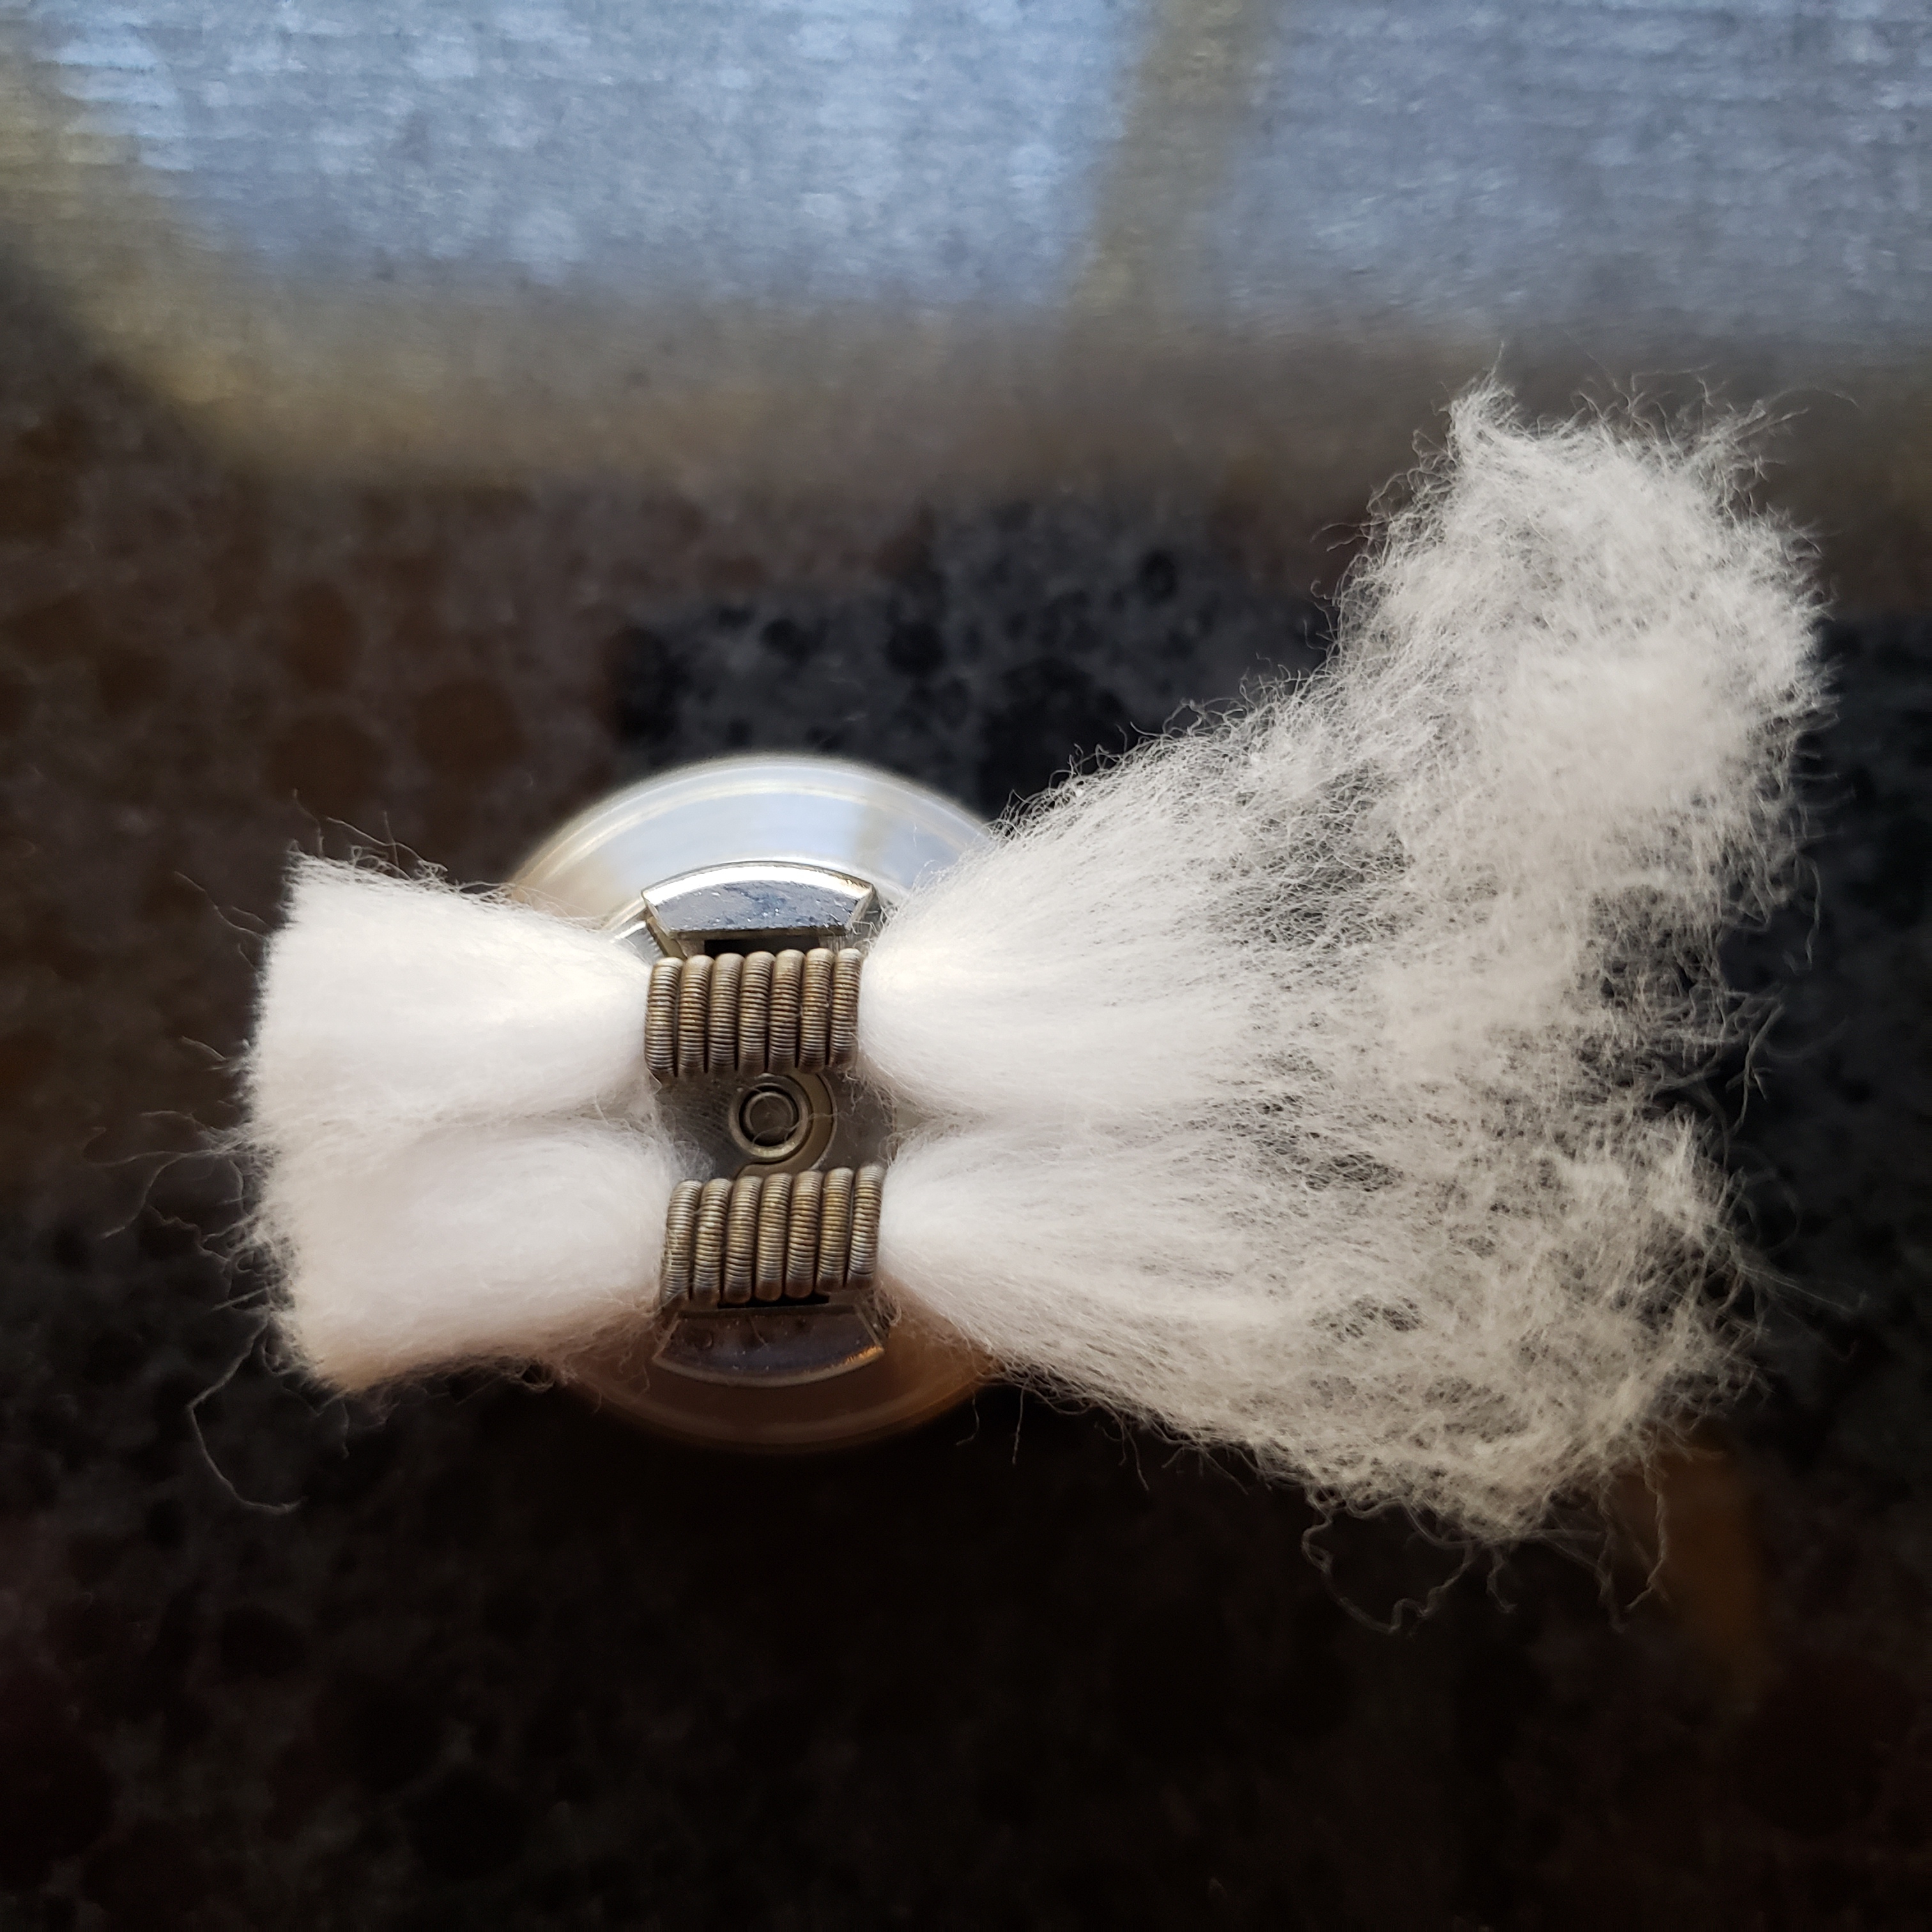
It does take a little practice but once you get it you can replicate much easier and get great results.
Specs:
- Diameter 31mm, juice capacity 7ml, bubble glass 10ml
- Cage metal frame with regular glass tube design instead of threading glass
- Extra glass chimney included
- Improved deck for more airflow and wider coils hitting(you can still get semi-restrictive airflow by AFC adjustment), compatible with Glaz V1.
- Available in Stainless Steel, Black and Gunmetal
Glaz V2 deck improvements:
- Wider air hole to hit wider coils
- bigger air holes for bigger airflow
- bigger juice holes
- Glaz V2 deck is compatible with V1
In the box you will find:
- Glaz RTA V2 whole unit
- Spare 7ml glass
- Spare 10ml bubble glass
- Spare chimney glass
- Vape band
- Allen Key
- Spare o ring and grub screws
- User manual
- Steam Crave sticker
Getting to know the Glaz V2
Having reviewed the original Glaz RTA almost 1 year ago my cons from that review are copied below:
Cons:
- Care has to be taken with the slide top, can easily open when in a bag or pocket (Not fixed with V2)
- No spare glass chimney included (Fixed with V2)
- I would have liked more airflow (Fixed with V2)
- Not as many options as the Glaz RSDA or Aromamizer Plus though that may change (Not fixed with V2)
- Only 7ml juice capacity for a 31mm tank, the Aromamizer Plus holds 10ml with the standard glass (Fixed with V2)
V1 deck to the left, V2 on the right, just remove the 510 and unscrew the old deck, screw in the new one, easy peasy:
The airflow inlet on the V1 and 2 are the same, the increased airflow comes from the deck itself, you can see that in the bottom pic:
The gold is my V1, black is the V2. The V2 also improves by adding a steel cage which allows for them to get rid of the threaded glass chimney, that is now friction fit with an o-ring. They include a spare glass chimney, something the V1 did not. Only comes with (1) 10ml bubble glass and (2) 7ml straight glass, would have liked that the other way around, the bubble is more likely to break than the straight.
Still has the exact same sliding top-fill, something I constantly complain about in my reviews. For anyone carrying this tank in your pocket or purse use the included vape band to stop it from opening up.
One thing I hate about sliding top-fill tanks as well is the opening is always smaller. Here is a pic with the Aromamizer Plus and it's screw-off top cap vs the opening on the Glaz V2.
I can pour my liquid directly into the Plus but have a hard time using bullnose juice bottles on the Glaz V2, I so prefer the wide-open kidney slots.
The improved deck on the V2 is the real star here. Not only have they increased and improved airflow, my biggest complaint on the V1, but they also made the wicking slots more efficient by increasing the size of the feed holes.
One thing that still bugs me, something I have mentioned in other reviews, the use of clear o-rings, they are known for not being as durable as the normal black. The first thing that happened to me when I went to clean the tank and install the bubble glass was this.
I had to force out the glass as it was stuck being careful not to break the glass in the process. Luckily Steam Crave includes a bunch of spare o-rings in the package. I then made sure and lubricated all of the o-rings with juice to prevent this in the future and didn't have another problem during the 6 to 8 builds I tried, I suggest you do the same.
They have not changed the 810, still need to use TFV style 810 drip tips with the dual o-rings, friction fit 810 drip tips will not work, too loose.
Builds and Performance
One thing I noticed with the original Glaz RTA was it was finicky with builds to get the best performance, unfortunately, the V2 is no different. The same can be said about a lot of RTA's, the build is the heart of any rebuildable but some are more forgiving like the Steam Crave Aromamizer Plus.
I tried just about anything and got good to meh results, the worst was trying the coil position higher than normal, muted flavor and it was ripped out after a single tank. What I did find was close to the airflow and edge of the sides with an opening, trying to get the airflow to go under the coil as much as possible. Fancy coils doing the best, the build below with some SS316L staple coils on the 3mm post.
That was good but it wasn't until I used the same coil placement but this time with 32g 6 core 38g wrap SS316L fused claptons from Advanced Vape Supply on a 3.5mm post that the flavor really came alive, it definitely was the ah-ha moment for me.
I currently have the same wire but with a 3mm post and it is good but the 3.5mm post build was better and that is what I will be going back to. All the builds used the same juice, I do that for consistency and it is a juice I know very well and make myself....DIY for life!
WIcking is not as simple as the Aromamizer Plus but not bad either. You want to cut your wicks right at the bottom o-ring like this.
When the wicks drop down it should be right to that o-ring, not below.
If using 3.5mm coils make sure you thin out the wicks, when placing the wicks into the wicking slots they should not be tight, just enough to dam up the wicking slots.
It does take a little practice but once you get it you can replicate much easier and get great results.