Become a Patron!

ORCHID MODIFICATION THREAD

TheWestPole

Gold Contributor
Member For 4 Years
Unless the cap is milled... I ordered one, so we'll see..

The other so-called V2.5s have had stock caps, and the bottom-up view appears to show one. No matter, all else is good, particularly the post screws IMO. Getting another V2 can't be anything but good. :) If you want a bona fide extra 1.5 ml for it, remember you can always use a Taifun GT nano tank with no modifications. :D
 
Last edited:

pwnby

Member For 4 Years
Member For 3 Years
Member For 2 Years
Member For 1 Year
Member For 5 Years
Preorder? No thanks. I played that game once, never again.
 

fq06

Gold Contributor
Member For 4 Years
I got the vox v2 orchid on pre order and it came in as expected, no issues.
The quality seemed to be better than my v1 tobeco, better threads. Chimney and posts. Better quality hex screws too.
Then again, maybe all v2's were better quality, don't know I only have one v2.

So I wonder how many versions have to come out before we get a damn 2 piece chimney??? V25 :confused:
 

TheWestPole

Gold Contributor
Member For 4 Years
I got the vox v2 orchid on pre order and it came in as expected, no issues.
The quality seemed to be better than my v1 tobeco, better threads. Chimney and posts. Better quality hex screws too.
Then again, maybe all v2's were better quality, don't know I only have one v2.

So I wonder how many versions have to come out before we get a damn 2 piece chimney??? V25 :confused:

There you go again, FQ "2-piece" 06! :D
 

fq06

Gold Contributor
Member For 4 Years
If I wish it enough... it will happen? Just can't believe through all these renditions it still doesn't exist.
They threw one on the fugly bastard child 28.5mm orchid... v1.
Screenshot_2014-11-01-19-39-15.png
 

TheWestPole

Gold Contributor
Member For 4 Years
If I wish it enough... it will happen? Just can't believe through all these renditions it still doesn't exist.
They threw one on the fugly bastard child 28.5mm orchid... v1.
View attachment 8319

Fugly bastard for sure, and feature castrated in the ventilation department. o_O Couldn't have been much demand for that thing, which is probably why there was no motivation to migrate any element from it. Meanwhile, I assume, the volume on one-piece versions where clipping along. Why change what's working?

Who knows when or if it might be offered. All these bogus versions and half-versions remind me to accept that what we have here is a wild-west market with few rules, no designing as such, and little thinking. Mindless manufacturing and marketing. And generally we benefit from it, not just with low prices but with a la carte selection. Whatever is missing in all that, well, I just put it on the DIY list and keep my sanity.

Never give up on your dream, bro! ;)
 
Last edited:

Private192

Member For 4 Years
Member For 3 Years
Member For 2 Years
Member For 1 Year
Member For 5 Years
the deck has not changed since v2. if it aint broke dont fix it..
;)
 
Last edited:
I'm actually vaping on a v4 as I type.

I got a v1 right when they came out (still vaping, .4ohm twisted) a v3 about two weeks ago when they first starting appearing on ebay (absolute perfection, .5ohm macro coils) and now i have two of these v4s.

they each have their issues, but each share the same core strength: ridiculously great vapor production, airflow, and flavor. oh, and they drink juice like a highschool kid at a kegger.

my impressions so far:

orchid v1: introduced me to an entire new world of vaping bliss. dropped my kayfuns, nautilus, and even my drippers. this became my main, and my fogger 4.1 and 4.4 became my backups. but oh my god how i hate those screws. mine came with the ULTRA weak hex screws that all stripped instantly. I struggle to get the thing built and STAY built. I finally took to twisting 26 gauge kanthal just to give the screws something to bite into. this build works alright, so long as i'm gentle when changing out wicks. vapes like a dream, just a complete pain to maintain. I replaced the top cap with that fasttech top-fill, which greatly enhanced the overall usability.

orchid v3: WOW. it's amazing what REAL ACTUAL SCREWS can do for an atomizer. this thing is rock solid. i've put several different builds on it, not because it needed rebuilding, but just because it's a joy to rebuild on after weeks of struggling with my v1 (not to mention my foggers. who the hell builds an atty without post holes??). capacity is about .3 ml less than the v1 (thanks to the inner structure of the included "nano" style tank) but i don't notice. i fill up all my orchids once a day anyway, so it's fine. everything else about the vape is identical, and therefore amazing. this is what vaping heaven is like.

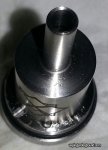
orchid v4: ok, so. the v4 is ostensibly just the v3 but with a longer chimney stem and tank, and therefore enhanced capacity. right now, i have no idea if that's actually true, because every time i try to fill this thing it leaks half the juice i put it, seemingly. It's got the bottom-fill port like the v3, but while the v3 is dead-simple to fill kayfun style, this thing seems to HATE taking juice into its precious interior. first i get killer backflow, like top-filling the v1. so i go slow, fine. but then it starts gushing out of the tip (holding it upsidedown). and i notice that the juice seems to sorta bunch up around the rim of the chimney, where it narrows down to the stem part. it's almost like there's a chokepoint and the juice can't really get past there. and in fact, as i hold up the v3 and v4, both half-filled, it really does look like the chimney on the v4 is closer to the PC window on the v4 than on the v4, so maybe there actually IS a chokepoint. the vape is still amazing, and if I can figure out how to actually fill this thing, it might be perfect. But i was expecting all the ease of the v3 (yep) with just capacity boost (yep) and no additional problems (oops).

so.

right now, the v3 is actually my favorite out of all these orchids. as soon as i finish off this half-tank in the v4, i'll try another fill method. I just opened my second v4 and measured the capacity using water. water via a syringe went into the bottom just fine, and it took almost 5.5 ml (!!) before overflowing. for giggles i went ahead and did the oldschool v1/kayfun topfill method and it took 5ml like a champ, so long as i covered both airholes while i filled. pretty dang impressive. if i can get the other v4 working perfectly (i really really hope i dont have to topfill) then I'll go head and build the second v4 and retire the v1. i think the v3 is sticking around for good though. old reliable now (two whole weeks, lol).

I will update as appropriate.

EDIT: i forgot to mention that the screws on the v3 and v4 are Philips-head, not hex. the spares for the v3 are also Philips, but the spares for both of my v4s are actually hex. so I guess i'll have to be good to these screws so i don't have to go back to the nightmare-fuel hex screws.
my v4 also leaks when I fill it up from the bottom base, if you can see in the picture the fill hole is drilled some what over the chimney not like my kayfun where its just over the tank area.
 

Attachments

  • 20141031_202559-2.jpg
    20141031_202559-2.jpg
    41.5 KB · Views: 56

TheWestPole

Gold Contributor
Member For 4 Years
my v4 also leaks when I fill it up from the bottom base, if you can see in the picture the fill hole is drilled some what over the chimney not like my kayfun where its just over the tank area.

Yup, all bottom fill versions are like that. Not ideal for filling with a nipple bottle. I needle fill with the tip all the way to the far end of the tank, which allows air to vent out without bubbling up juice. Recommend it. :)
 

Private192

Member For 4 Years
Member For 3 Years
Member For 2 Years
Member For 1 Year
Member For 5 Years
my v4 also leaks when I fill it up from the bottom base, if you can see in the picture the fill hole is drilled some what over the chimney not like my kayfun where its just over the tank area.

i could be 1 of 3 things in my experience.
if it's leaking from the fill hole, its a gasket issue.
if it's leaking from the air holes, you're not filling it correctly. plenty of tube videos on this.
last but not least, if it's leaking from the deck screw, you need to add a piece of rubber
around the screw at the base inside the channel. once you take it apart you'll understand what i'm talking about.

these are a few of the upgrades i made to this RTA that makes it hands down the benchmark for rebulidables.
will add some pics when i tear into one again. it functions just right, dont want to tinker with it....
 

Private192

Member For 4 Years
Member For 3 Years
Member For 2 Years
Member For 1 Year
Member For 5 Years
just curious what benefit would the pyrex chimney be?
Reatime status updates on my build; coil clean/dirty, is a rewick needed not to mention it would look really cool inside a m-tank. But thats just me thinking outside the box... FYI, they make these out of the tank material already but they dont hold up very well to heat; thus Pyrex. Plus they dont fit the orchid deck, ya dig??
 

TheWestPole

Gold Contributor
Member For 4 Years
Reatime status updates on my build; coil clean/dirty, is a rewick needed not to mention it would look really cool inside a m-tank. But thats just me thinking outside the box... FYI, they make these out of the tank material already but they dont hold up very well to heat; thus Pyrex. Plus they dont fit the orchid deck, ya dig??

It's nice and sometimes very helpful to see the build, as we can with the Kayfun's polycarbonate chamber. Thing is, in Orchid the coils are too close to the ID of the chamber, so I don't expect anybody to attempt it, even in Pyrex. But dream on, brother. :)
 
Last edited:

Eric DeCastro

Silver Contributor
Member For 4 Years
how would you put threads on the pyrex? sounds interesting just don't think you can thread pyrex unless they mold it in when making the pyrex. I am a set it and forget it guy so I wouldn't be in the market for one, but it would be nice to have more options and spare parts for these.
 

Private192

Member For 4 Years
Member For 3 Years
Member For 2 Years
Member For 1 Year
Member For 5 Years
It's nice and sometimes very helpful to see the build, as we can with the Kayfun's polycarbonate chamber. Thing is, the coils are too close to the ID of the chamber in Orchid, so I don't expect anybody to attempt it, even in Pyrex. But dream on, brother. :)
i'll see if i can have it fabricated in both chimney sizes with pyrex. the base may need to be SS to be able to tap. similar to the clear drip tips. to bad you cant turn pyrex like polycarbonate. BTW, do you know the tap size for the chimney?
 

TheWestPole

Gold Contributor
Member For 4 Years
i'll see if i can have it fabricated in both chimney sizes with pyrex. the base may need to be SS to be able to tap. similar to the clear drip tips. to bad you cant turn pyrex like polycarbonate. BTW, do you know the tap size for the chimney?

Not offhand, but easy enough to measure it. Likely a standard thread diameter and pitch. Good luck with a thread solution. SS thread ring would be the way to go. You can grind threads in glass I believe, but nobody's gonna do it because it's pretty much a guaranteed cracker with this little wall thickness.

While you are at it, see if they can make one of these bell caps in Pyrex:

628643deftoneskfbells.jpg


:)
 
Last edited:

Private192

Member For 4 Years
Member For 3 Years
Member For 2 Years
Member For 1 Year
Member For 5 Years
I was thinking whole chimney in pyrex with ss base for threading but your design sounds more modular & versatile.. let ya know how it plays out.
:D
 

DoctorIdiot

Member For 4 Years
Member For 3 Years
Member For 2 Years
Member For 1 Year
Member For 5 Years
heyo, sorry for vanishing so completely. it's been a busy couple of weeks here in DC... anywho, two things:

This tank works with the middle extended chimney in post #3. Will also work with V4 chimneys if tank is shortened by a few mm.

View attachment 8089

I don't use it because it feels too heavy. If I did use it I would chamfer the top and bottom edge to transition better between 23mm tank and the 22mm top cap and base. I do use it as a holder for top caps and bases when I'm working on them.

http://www.fasttech.com/products/0/10006709/1544800-stainless-steel-tank-for-taifun-gt-rba

have you actually tried this tank with a v4 chimney and confirmed that you'd have to shorten the tank, or are you basing that strictly on mathing it out? and if you did shorten the tank... how might one go about doing that without screwing up the threads? also, it seems like that specific tank is gone, as the link redirects to a base, and all i can find are PC tanks now, booo.

on another capacity tangent, does anyone have one of these laying around?

https://www.fasttech.com/products/0...-replacement-tank-for-30mm-kayfun-lite-kayfun

if i'm reading it correctly, you might be able to thread that massive tank onto the normal orchid v4 base and, using the v4 chimney (or replacement tall chimney) and end up with a five-gallon orchid. i think the only real question would be whether the base itself fits up into the little ring, and whether the airholes in said ring would choke off the airflow. perhaps they'd be drillable?

anyway, i was just thinking outloud there. if anyone does happen to have that tank and an orchid of any size, could you possibly see how the thing fits into the ring, if at all?

some report success with this one, after some modification: https://www.fasttech.com/products/3023/10009156/1808007

and yes, i realize that these tanks make the thing a fatty, but capacity is capacity, right? ;)
 

calibrae

Member For 4 Years
After taking some measurements, one could drill the airholes up to 2.8mm without the chimney becoming the bottleneck. I got another orchid on the way, I'll mess with it and keep you updated.

I sure wish my wicks would stop being pulled into the channels... I should cut them shorter but I fear some bad leaks.
 

TheWestPole

Gold Contributor
Member For 4 Years
have you actually tried this tank with a v4 chimney and confirmed that you'd have to shorten the tank, or are you basing that strictly on mathing it out? and if you did shorten the tank... how might one go about doing that without screwing up the threads? also, it seems like that specific tank is gone, as the link redirects to a base, and all i can find are PC tanks now, booo.

What's up, Doc? Welcome back. The SS GT tank does seem to have disappeared, at least for now. You would definitely have to shorten the tank 4-5mm with the V4 chimney. After shortening equal amounts from both ends you would want to chamfer the ID ~1mm to accommodate the base and top cap o-rings and make a lead-in for the threads. Easy to do with a die grinding stone like this, available everywhere and cheap:

image_13344.jpg

Should be just enough threading in the ID of the tank. If not chamfer the leading edge of base and top cap threads.

I personally haven't done it because I don't need to with my assortment of DIY extended chimneys. Honestly, I do think it's a better use of time and labor to DIY extended chimneys and leave your tank collection stock. It also gives you more options. For example, if you DIY a chimney long enough to work with Taifun GT tanks, it will also work with all regular Kayfun tanks, etc.
 
Last edited:

TheWestPole

Gold Contributor
Member For 4 Years
on another capacity tangent, does anyone have one of these laying around?

https://www.fasttech.com/products/0...-replacement-tank-for-30mm-kayfun-lite-kayfun

if i'm reading it correctly, you might be able to thread that massive tank onto the normal orchid v4 base and, using the v4 chimney (or replacement tall chimney) and end up with a five-gallon orchid. i think the only real question would be whether the base itself fits up into the little ring, and whether the airholes in said ring would choke off the airflow. perhaps they'd be drillable?

anyway, i was just thinking outloud there. if anyone does happen to have that tank and an orchid of any size, could you possibly see how the thing fits into the ring, if at all?

some report success with this one, after some modification: https://www.fasttech.com/products/3023/10009156/1808007

and yes, i realize that these tanks make the thing a fatty, but capacity is capacity, right? ;)

Right. If you want big cap easy with the stock V4 chimney--and don't mind the fat and fugly--very little tinkering needed with these. The only issue I can see is the V4 chimney is 4mm longer than regular Kayfun. You will have to make clearance for that extra chimney length in the top cap between the o-ring and the drip tip. Also your standard drip tips might not insert all the way. Both easy fixes IMO.

There's a gap around the base OD to allow for airflow. That wouldn't concern me.
 
Last edited:

Midniteoyl

Gold Contributor
Member For 4 Years
Member For 3 Years
Member For 2 Years
Member For 1 Year
Member For 5 Years

calibrae

Member For 4 Years
I don't really care if it's a stolen idea as long as they address the multiple issues one may have with our dear RTAs.
It does look really nice, I hope you can unscrew the deck without taking the chimney with it.
 

TheWestPole

Gold Contributor
Member For 4 Years
I don't really care if it's a stolen idea as long as they address the multiple issues one may have with our dear RTAs.
It does look really nice, I hope you can unscrew the deck without taking the chimney with it.

I don't care either. The whole thing is a jumble of borrowed ideas tweaked this way and that, except perhaps the "cyclops" air vents. It's all about whether their tweaks add up to a substantial improvement. Certainly there is an even more open draw possible for lung hits. Beyond that, who knows. I do wonder whether the juice channel placement is better or worse for wicking.

Re the unscrewing, looks like a definite maybe. ;) But certainly not designed in like Rose, Penelope/Euphoria and some others I suppose.
 
Last edited:

Midniteoyl

Gold Contributor
Member For 4 Years
Member For 3 Years
Member For 2 Years
Member For 1 Year
Member For 5 Years
I dont care either.. Just saying..

Looking at mine, its not exactly the same.. Mine has the ss top and bottom tank sections:

10525655_665649420195890_602957595712285140_n.jpg


And no, the chimney unscrews with the top.. maybe.. sometimes.. it can be a mess. I think with the o-ring on the chimney, it'll tend to stay with the top cap more often. Great for looking/playing with your setup while not losing juice, but terrible at keeping your build in one shape if you like the way its working and try to top fill.
 
Last edited:

TheWestPole

Gold Contributor
Member For 4 Years
I dont care either.. Just saying..

Looking at mine, its not exactly the same.. Mine has the ss top and bottom tank sections:

10525655_665649420195890_602957595712285140_n.jpg


And no, the chimney unscrews with the top.. maybe.. sometimes.. it can be a mess. I think with the o-ring on the chimney, it'll tend to stay with the top cap more often. Great for looking/playing with your setup while not losing juice, but terrible at keeping your build in one shape if you like the way its working and try to top fill.

Hmmm. New to me. :) I can see certain advantages for Kayfun. Not sure what that might bring to the Orchid table, that is, existing Orchid parts.
 

Midniteoyl

Gold Contributor
Member For 4 Years
Member For 3 Years
Member For 2 Years
Member For 1 Year
Member For 5 Years
Ya.. Its great for having a glass tank where the o-rings arent used to hold the glass in place, like the current quartz kits..
 

moecat

Platinum Contributor
Member For 4 Years
Member For 3 Years
Member For 2 Years
Member For 1 Year
Member For 5 Years
It looks like the white area at the base of the deck is a big gasket / modified O-ring that should hold the pyrex tube in place and create a seal to prevent leaking at this area. I'm correct, this would allow one to simply dump juice from the top without needing to use the bottom fill screw.

Kind of like with the Smoktech RSBT (you can see the thin O-ring on the bottom assembly below) ...
Smok_RSBT_Hybrid_Adjustable_Airflow_Pyrex_Glass_RBA-3.JPG
 

TheWestPole

Gold Contributor
Member For 4 Years
It looks like the white area at the base of the deck is a big gasket / modified O-ring that should hold the pyrex tube in place and create a seal to prevent leaking at this area. I'm correct, this would allow one to simply dump juice from the top without needing to use the bottom fill screw.

Kind of like with the Smoktech RSBT (you can see the thin O-ring on the bottom assembly below) ...
Smok_RSBT_Hybrid_Adjustable_Airflow_Pyrex_Glass_RBA-3.JPG

I'm sure you're right @moecat, though bottom fill issues with Orchid (backwash while filling, etc.) may be resolved with this angular fill port clearing the seal area. But that too is a maybe.

IMG_1999__21200.1415163620.1280.1280.png

I personally don't have bottom-fill issues, and find bottom filling to be the best mess-less way to go. That's with needle filling. The bottom-fill issues appear to arise when using nipple bottles.
 
Last edited:

TheWestPole

Gold Contributor
Member For 4 Years
That said, the tank and tank seals add to the list of proprietary components with this atty. Which, all things considered, makes it less appealing in the long run IMO. :( Orchid's thrifty clonitude and promiscuous compatibility cannot be ignored. :D
 
Last edited:

Eric DeCastro

Silver Contributor
Member For 4 Years
Orchid insulator dimensions.

View attachment 8259

Top insulator: 6mm OD* x 4mm ID x 2.5mm L.
Bottom insulator: 5.5mm OD x 4mm ID x 5.5mm L.

*All dimensions are nominal. The top insulator's OD is a .2mm dia. interference press fit. All other diameters are slip fit. Substituting a 6mm slip fit top insulator would work fine IMO, because it is the tightness of the 510 screw that holds the center posts into position.
just did the fat daddy modification and works perfectly. no more melted insulator.
 

CurlyxCracker

Gold Contributor
Member For 4 Years
Member For 3 Years
Member For 2 Years
Member For 1 Year
Member For 5 Years
I've looked around a bit and not sure what I need exactly... I have the v3 but capacity is my largest issue. I've read some people are using a single plastic tank section but I don't know what size I should get since I know it's shorter than a regular kayfun. Could somebody point me in the right direction of what I need for my v3?
 

TheWestPole

Gold Contributor
Member For 4 Years
Orchid is the first RTA I have never drilled out the air holes on. But this morning I woke up thinking I wanted to see what Orchid would be like with it's airflow maxed out. So I took a spare V1 base and drilled out the air holes on the deck as much as possible without getting into trouble with the insulator or threads. I then drilled out the side vents to the same size. The result was a finished hole size of 2.8mm for all (using a 7/64" carbide bit). This adds up to a total vent area of 12.30 square mm. By comparison, the area of the chimney ID is 12.56 square mm. So it is right at the maximum airflow possible with the stock chimneys.

PB071902 edit.jpg PB071888 edit.jpg

After doing a .5 ohm build and luxuriating in the easiest draw I have ever had with an RTA (mmm...oooh...aaah! :)) I'm now wondered whether I have finally reached the point of diminishing returns from open air flow. To get an idea what the draw is like, just remove a stock chimney and inhale through it. That's it exactly. It's fantastically open. But is it also finally plenty or even a bit more than I need? Gonna take it out tonight alongside a stock tank and see how I feel after some time with the two.
 
Last edited:

VU Sponsors

Top