Become a Patron!

ORCHID MODIFICATION THREAD

heateris

Bronze Contributor
Member For 4 Years
Ok fellas, my Tobeco v4 orchid needs to bit of help. My fill screw o-rings are both trashed. Anyone have any leads on replacements? Maybe for screws and o-rings?

As a stop gap, I wrapped the screw real good with some Teflon tape. Seems to be holding, but will need constant attention.


Sent from my iPhone using Tapatalk
 

TheWestPole

Gold Contributor
Member For 4 Years
Ok fellas, my Tobeco v4 orchid needs to bit of help. My fill screw o-rings are both trashed. Anyone have any leads on replacements? Maybe for screws and o-rings?

As a stop gap, I wrapped the screw real good with some Teflon tape. Seems to be holding, but will need constant attention.


Sent from my iPhone using Tapatalk

I've used this eBay source for Buna-N o-rings. They're good and have a big selection. I don't use o-rings on fill screws but one of these two sizes is probably right.

www.ebay.com/itm/Metric-Buna-O-rings-1-x-1mm-Price-50pcs-/201170208458?pt=LH_DefaultDomain_0&hash=item2ed6adc6ca
www.ebay.com/itm/Metric-Buna-O-rings-2-x-1mm-Price-100pcs-/160787339344?pt=LH_DefaultDomain_0&hash=item256fac1850
 

heateris

Bronze Contributor
Member For 4 Years
Thanks west, I know you would have some info! I'm gonna send you a PM. I have a question about a different atty.


Sent from my iPhone using Tapatalk
 

VapeTechnologies

VapeTechnologies LLC Advanced Custom Boxes
VU Donator
Member For 4 Years
Member For 3 Years
Member For 2 Years
Unlisted Vendor
Modding genny's and orchids? Oh wow, one of my favorite hobbies :)

Here's a few, gotta get some photos of my latest though..

20150328_182318.jpg
20150328_181749.jpg

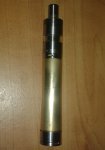
Kayfun top, modified orchid chimney and deck, 18350 vape lyfe tube re-threaded and fitted.. holds at least 10 ml I haven't really measured it precise yet..

20150328_182036.jpg
I've got a collection of modded RSST's and such but this one is my favorite and preforms beyond any expectations. Thanks for watching! Great work guys, wish I seen this thread long ago but there's always room to learn and grow!

20150328_182115.jpg
20150328_182234.jpg
Oh, ps...
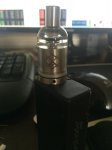
Just for fun, slightly modded orchid on my mosfet g-box. . My ADV 90% of the time
20150329_145120.jpg

Edit- gonna have to edit this post once I'm on desk top, my mobile device always uploads them way too big :(
 

TheWestPole

Gold Contributor
Member For 4 Years
Modding genny's and orchids? Oh wow, one of my favorite hobbies :)

Here's a few, gotta get some photos of my latest though..

View attachment 17889
View attachment 17890

Kayfun top, modified orchid chimney and deck, 18350 vape lyfe tube re-threaded and fitted.. holds at least 10 ml I haven't really measured it precise yet..

View attachment 17891
I've got a collection of modded RSST's and such but this one is my favorite and preforms beyond any expectations. Thanks for watching! Great work guys, wish I seen this thread long ago but there's always room to learn and grow!

View attachment 17894
View attachment 17895
Oh, ps...
Just for fun, slightly modded orchid on my mosfet g-box. . My ADV 90% of the time
View attachment 17897

Edit- gonna have to edit this post once I'm on desk top, my mobile device always uploads them way too big :(

Very very nice! Welcome to the thread. Never seen that top cap before. Do you have a link?

Very clean work on the chimney. :)

The threads on the tank look like 20mm x 1. That fits the top cap? I'm confused. :confused:
 
Last edited:

VapeTechnologies

VapeTechnologies LLC Advanced Custom Boxes
VU Donator
Member For 4 Years
Member For 3 Years
Member For 2 Years
Unlisted Vendor
Very very nice! Welcome to the thread. Never seen that top cap before. Do you have a link?

Very clean work on the chimney. :)

The threads on the tank look like 20mm x 1. That fits the top cap? I'm confused. :confused:

Thanks, you've got some very nice builds as well. The threads barley catch but they catch just enough to hold things together and let the o-rings keep things sealed. If I ever dropped it though, that would be a whole 'nother story.

In other words, if I took it apart too much, I might wear down the threads and I would no longer get that "tight" seal. I need the right tool for the job to get the threads to form a "true" fit.

The top cap is a relic. It was supposedly a kayfun clone but looked nothing like a kayfun. I bought it years ago and it's been in the parts drawer for years now until I recently went fishing for a top that would work with this set up. I think I got it off madvapes but it was during an era that's long gone so I doubt I could find it now :/
 

TheWestPole

Gold Contributor
Member For 4 Years
Thanks, you've got some very nice builds as well. The threads barley catch but they catch just enough to hold things together and let the o-rings keep things sealed. If I ever dropped it though, that would be a whole 'nother story.

In other words, if I took it apart too much, I might wear down the threads and I would no longer get that "tight" seal. I need the right tool for the job to get the threads to form a "true" fit.

The top cap is a relic. It was supposedly a kayfun clone but looked nothing like a kayfun. I bought it years ago and it's been in the parts drawer for years now until I recently went fishing for a top that would work with this set up. I think I got it off madvapes but it was during an era that's long gone so I doubt I could find it now :/

:D Making it work is making it work. I have yet to find a tap for Orchid/Kayfun, etc. tanks, 19mm x .5 as I recall. If I had I'd be threading my tanks out of polycarbonate tube to whatever length I want. Oh, well. :rolleyes:
 

TheWestPole

Gold Contributor
Member For 4 Years
Last edited:

VapeTechnologies

VapeTechnologies LLC Advanced Custom Boxes
VU Donator
Member For 4 Years
Member For 3 Years
Member For 2 Years
Unlisted Vendor
That topcap is from a Rocket atty. The OG kayfun clone. -
Your memory is much better than mine, that's exactly what it was. The "rocket" supposedly kayfun clone.

edit- since you mentioned it, it's all coming back to me now, and I'm remembering I had the blue one too, which means I just might have another cap somewhere! I'll have to go fishing tomorrow and see if I can find it.
 
Last edited:

TheWestPole

Gold Contributor
Member For 4 Years
:D My memory is getting bad. It's a 20mm x .5, and it wasn't that I couldn't find it, rather I was too cheap to buy it at the time! :rolleyes: Don't feel that way now because I have a real need to make some custom PC tanks without using thread rings. Thanks for checking, IMI. You are one helpful bugger. :)

View attachment 17909

www.amazon.com/gp/product/B00MIBK5KY/ref=ox_sc_act_title_1?ie=UTF8&psc=1&smid=A1VKUIWWBIDKZ9

Derp! Ugg, ships from China, takes over a month. That's why I didn't order it!
 

InMyImage

Gold Contributor
Member For 4 Years
Member For 3 Years
Member For 2 Years
Member For 1 Year
Member For 5 Years
:D My memory is getting bad. It's a 20mm x .5, and it wasn't that I couldn't find it, rather I was too cheap to buy it at the time! :rolleyes: Don't feel that way now because I have a real need to make some custom PC tanks without using thread rings. Thanks for checking, IMI. You are one helpful bugger. :)

View attachment 17909

www.amazon.com/gp/product/B00MIBK5KY/ref=ox_sc_act_title_1?ie=UTF8&psc=1&smid=A1VKUIWWBIDKZ9
That is one thing I have been called...

Derp! Ugg, ships from China, takes over a month. That's why I didn't order it!
Didn't notice that... really hate it when that happens with Amazon and there isn't an easy way that I know of to identify it or prevent those results from popping up. :mad:

On another note, I rebuilt one of my Orchid v4's earlier this week and found a build that seems to be working better for me. 26g .6 ohms with a 2.4mm ID. Bugger just barely fits inside the chamber which cuts down the airflow considerably :)
 

TheWestPole

Gold Contributor
Member For 4 Years
Didn't notice that... really hate it when that happens with Amazon and there isn't an easy way that I know of to identify it or prevent those results from popping up. :mad:

On another note, I rebuilt one of my Orchid v4's earlier this week and found a build that seems to be working better for me. 26g .6 ohms with a 2.4mm ID. Bugger just barely fits inside the chamber which cuts down the airflow considerably :)

Amazon has to get it's shit together on that like eBay did. I've already been fooled twice. o_O
 

InMyImage

Gold Contributor
Member For 4 Years
Member For 3 Years
Member For 2 Years
Member For 1 Year
Member For 5 Years
Amazon has to get it's shit together on that like eBay did. I've already been fooled twice. o_O
Was really surprised when I order a pack of 12g dispensing needles for like a $1 including shipping and they came from China :confused:
 
I have been following this thread for a while and really appreciate the great posts from everyone. I've been lurking and tweaking my orchids using the information available here.
Months ago I ordered the V3 orchid from FT and gave up in frustration. I couldn't get it to wick with the tiny amount of clearance between the tank and chimney. It didn't help that the guy at the local shop advised wicking it with the juice channels stuffed, so I gave it away. Weeks later someone gave me a version 4 that had auto-fired on his mod, baking the insulators, drip tip and tank. I found this thread and ordered new insulators and a kayfun m-style tank. I used it for a few days after learning how to wick it properly, but I'm used to dripping and wanted to chain vape lung hits.
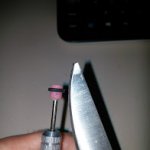
So, I decided to drill out my airflow holes after reading the post by TheWestPole. I absolutely ruined my deck despite using a cobalt bit (1/8" is too large!), so I ordered a new orchid V4 which included the pc tank. That tank is essential in getting this beast to wick or even fill properly. My new orchid came in and I drilled it out to 3/32". Not bad, but I wanted more airflow so I ordered the V6 two piece chimney. The inner and outer diameter of it's upper shaft is a lot larger. I haven't measured it, but it increased the airflow a lot. But it doesn't fit the V4 top cap. The cap has a lip above the o-ring that won't let the V6 chimney pass through. Some folks have been filing the chimney down, but I wanted to keep the option of having some juice flow control. I carefully removed the excess material in the top cap by hand using a conical engraving bit for my dremel. The bit is 1/4" at it's widest and comes to a point. I just held the bit with pliers, put the bit into the cap and rolled the top cap with my palm, removing a uniform amount. The o-ring in the top cap won't fit the V6 chimney, so I modified the old one by putting it on a drum shaped sanding bit from my dremel kit, turning the dremel full blast and holding a knife blade to the o-ring to reduce it's diameter. I found out later that the clear o-ring from the bottom of a protank coil fits perfectly. That's how large the chimney is.
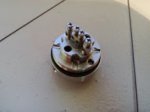
Today, I used a cylinder shaped cutting bit and attacked the juice channels. I made them deeper and twice as wide. Now it wicks enough to keep up with the airflow and hasn't leaked at all. It looks like a goblin deck, almost.orchid deck.jpg
Sorry for the long post. I just had to finally throw in my two cents.
 

TheWestPole

Gold Contributor
Member For 4 Years
View attachment 17973

i see what you mean about trimming the chimney. gonna shave the chamber as much as i can and trim the rest to fit the bell cap. right now using the v3 chimney

Go for it. I've been using 10mm as a minimum for the height inside the chamber. Could go a bit lower if you are careful with your builds and positive post screws. :)
 
Last edited:

TheWestPole

Gold Contributor
Member For 4 Years
I have been following this thread for a while and really appreciate the great posts from everyone. I've been lurking and tweaking my orchids using the information available here.
Months ago I ordered the V3 orchid from FT and gave up in frustration. I couldn't get it to wick with the tiny amount of clearance between the tank and chimney. It didn't help that the guy at the local shop advised wicking it with the juice channels stuffed, so I gave it away. Weeks later someone gave me a version 4 that had auto-fired on his mod, baking the insulators, drip tip and tank. I found this thread and ordered new insulators and a kayfun m-style tank. I used it for a few days after learning how to wick it properly, but I'm used to dripping and wanted to chain vape lung hits.
So, I decided to drill out my airflow holes after reading the post by TheWestPole. I absolutely ruined my deck despite using a cobalt bit (1/8" is too large!), so I ordered a new orchid V4 which included the pc tank. That tank is essential in getting this beast to wick or even fill properly. My new orchid came in and I drilled it out to 3/32". Not bad, but I wanted more airflow so I ordered the V6 two piece chimney. The inner and outer diameter of it's upper shaft is a lot larger. I haven't measured it, but it increased the airflow a lot. But it doesn't fit the V4 top cap. The cap has a lip above the o-ring that won't let the V6 chimney pass through. Some folks have been filing the chimney down, but I wanted to keep the option of having some juice flow control. I carefully removed the excess material in the top cap by hand using a conical engraving bit for my dremel. The bit is 1/4" at it's widest and comes to a point. I just held the bit with pliers, put the bit into the cap and rolled the top cap with my palm, removing a uniform amount. The o-ring in the top cap won't fit the V6 chimney, so I modified the old one by putting it on a drum shaped sanding bit from my dremel kit, turning the dremel full blast and holding a knife blade to the o-ring to reduce it's diameter. I found out later that the clear o-ring from the bottom of a protank coil fits perfectly. That's how large the chimney is.
Today, I used a cylinder shaped cutting bit and attacked the juice channels. I made them deeper and twice as wide. Now it wicks enough to keep up with the airflow and hasn't leaked at all. It looks like a goblin deck, almost.View attachment 18121
Sorry for the long post. I just had to finally throw in my two cents.

Halfway through reading this I was thinking "I hope this story has a happy ending." So glad that it did. I wasn't following all of it, like the wide chimney on the V6 (pics?) which I'm scratching my head on, but I love that you wouldn't take no for an answer. :D One glance at your deck and I can see you've got the juice flow keeping up with the air. What you have is probably better than a Goblin deck because the Orchid build area is a bit bigger.

Cheers and welcome.
 

Wabah58

Silver Contributor
Member For 4 Years
Whats up Orchid lovers. Had to pop in and see what kind of things @TheWestPole has been modifying, since my last visit here. Sadly I have no new updates to my Orchid since i tweeked it. Waiting for the trippy tips plasma to come out for the Orchid, it is awesome on the kayfun, should be spectacular on the orchid.
 

TheWestPole

Gold Contributor
Member For 4 Years
Whats up Orchid lovers. Had to pop in and see what kind of things @TheWestPole has been modifying, since my last visit here. Sadly I have no new updates to my Orchid since i tweeked it. Waiting for the trippy tips plasma to come out for the Orchid, it is awesome on the kayfun, should be spectacular on the orchid.

How you? Been awhile. Well, speaking for myself, this one is making me very happy. Huge chimney, external juice flow control, no drip tip. Making a handful of the chimneys for various sized tanks. :)

imag0357_picmonkeyed-1-jpg.17520


http://vapingunderground.com/threads/orchid-modification-thread.20819/page-28#post-386260
 

VapeTechnologies

VapeTechnologies LLC Advanced Custom Boxes
VU Donator
Member For 4 Years
Member For 3 Years
Member For 2 Years
Unlisted Vendor
How you? Been awhile. Well, speaking for myself, this one is making me very happy. Huge chimney, external juice flow control, no drip tip. Making a handful of the chimneys for various sized tanks. :)


http://vapingunderground.com/threads/orchid-modification-thread.20819/page-28#post-386260
No drip tip?! So the chimney comes right up through the top and serves as a tip I'm guessing? You, sir, are a genius.

Have you worked with steel epoxy putty at all? It's just a roll of putty that you knead to soften. I just found some the other day and picked up a small tube of it. Very interesting stuff and takes high temps. I haven't used it yet because I need to find some time to sit down and research all the ingredients in the stuff, I'm hoping it's safe, but like I said, I've got some research to do first..
 

TheWestPole

Gold Contributor
Member For 4 Years
No drip tip?! So the chimney comes right up through the top and serves as a tip I'm guessing? You, sir, are a genius.

Have you worked with steel epoxy putty at all? It's just a roll of putty that you knead to soften. I just found some the other day and picked up a small tube of it. Very interesting stuff and takes high temps. I haven't used it yet because I need to find some time to sit down and research all the ingredients in the stuff, I'm hoping it's safe, but like I said, I've got some research to do first..

Hi and welcome. Correct on the chimney. Don't have to use epoxy on those anymore. Just a press fit.

I have not tried that putty and not sure what I would use it for. The name suggests it's conductive. Is that the case? Otherwise it might be useful for emergency fixes of insulators. Post pics of how you are using it if you get a chance, okay?
 
Wow. Sorry everyone for the long post. Looked OK until I saw it on my phone.
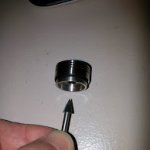
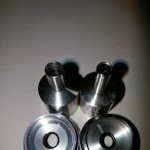
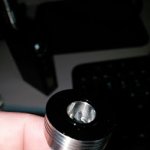
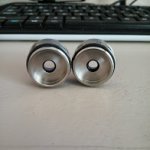
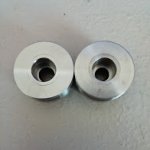
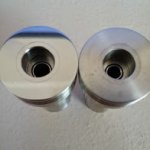
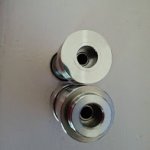
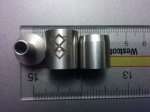
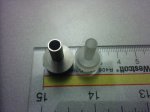
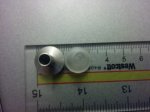
Here are some photos to better explain what I was talking about. You can see the modified o-ring inside the top cap on the left. The top down view shows how much material I removed from the cap.
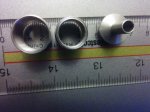
I just got the Goblin in the mail. Here are the chimney openings side by side.
 

Attachments

  • 1.jpg
    1.jpg
    6.5 KB · Views: 25
  • 4.jpg
    4.jpg
    8.3 KB · Views: 25
  • 2.jpg
    2.jpg
    6.2 KB · Views: 24
  • 3.jpg
    3.jpg
    6.6 KB · Views: 23
  • 6.jpg
    6.jpg
    9.4 KB · Views: 23
  • 7.jpg
    7.jpg
    7.6 KB · Views: 22
  • 8.jpg
    8.jpg
    8.3 KB · Views: 23
  • 9.jpg
    9.jpg
    6.7 KB · Views: 24
Last edited:

M5amhan

Silver Contributor
Member For 5 Years
Been thinking about trying that on my Orchid V4 myself.
just do straight blunt cuts to the edge over the juice channels. ive gotten to where i just cut it right to the juice channels, wet it down and pop the chimney on. maybe do a little beauty work after a wet it but not necessary. works flawlessly everytime, can rewick in like a minute probably with cotton already rolled
 

TheWestPole

Gold Contributor
Member For 4 Years
Orchid V6 center pins: fixed or adjustable?

Just to be clear, I do not like and do not want adjustable center pins on my Orchid bases. They are too loose fitting, screw down too low, and compromise current flow and ohm readings. I want them fixed, tight and to spec., such as those on V1-V4, and adjustment should be on the mod side. This is my opinion and may not apply to you.

That said, I thought it would be good to provide a guide to center pins on the V6 models, which are mixed between adjustable and fixed. Hopefully this will also provide a visual guide to models from other sources that do not specify center pin type in their descriptions.

Style A: adjustable copper pin.

Screenshot 2015-04-02 at 10.47.54 AM.png


Style B: fixed brass pin.


Screenshot 2015-04-02 at 10.49.10 AM.png


Style C: fixed brass pin.


Screenshot 2015-04-02 at 10.50.07 AM.png


Style D: adjustable copper pin.


Screenshot 2015-04-02 at 10.51.15 AM.png
 
Last edited:

TheWestPole

Gold Contributor
Member For 4 Years
Orchid V6 center pins: fixed or adjustable?

Just to be clear, I do not like and do not want adjustable center pins on my Orchid bases. They are too loose, screw down too low, and compromise current flow and ohm readings. I want them fixed, tight and to spec., such as those on V1-V4, and adjustment should be on the mod side. This is my opinion and may not apply to you.

That said, I thought it would be good to provide a guide to center pins on the V6 models, which are mixed between adjustable and fixed. Hopefully this will also provide a visual guide to models from other sources that do not specify center pin type in their descriptions.

Style A: adjustable copper pin.

View attachment 18257
Style B: fixed brass pin.

View attachment 18258
Style C: fixed brass pin.

View attachment 18259

Style D: adjustable copper pin.

View attachment 18260

Now, anybody want to trade any V2-6 base with a fixed center pin for a V6 Style D base? :D
 

M5amhan

Silver Contributor
Member For 5 Years
i agree about the adjustable pin thing. should be on the mod to be able to adjust and on the atty to have a solid connection

the v3/v4 base i just got is adjustable and i wish it wasnt
 

cindycated

Bronze Contributor
Member For 4 Years
I hate wobbly pins, so I whittled down some nylon washers to put in there before screwing the pin in. This allows me to get the pin to stick out and still get enough torque to tighten it. I used to do this with tiny rubber o-rings, but they weren't rigid enough (too squishy). I think O-rings & More carries 3/16" OD TEFLON o-rings that would probably do the job better.
 

TheWestPole

Gold Contributor
Member For 4 Years
Would you be interested in a trade? Maybe for a modified top cap and chimney?

Not now but maybe soon. Haven't decided yet if I will replace my 3/8" chimneys with 1/2" chimneys and top caps. Will let you know, but it will be a better trade than for a single base. ;)
 

sohkis

Member For 4 Years
Member For 3 Years
Member For 2 Years
Member For 1 Year
Member For 5 Years
Now, anybody want to trade any V2-6 base with a fixed center pin for a V6 Style D base? :D

I've got 2 of the D style - https://www.fasttech.com/products/3028/10009514/2086200 atty's sitting on my coffee table that belong to a friend of mine. he wants me to open up the air holes for him. I could see if he would like to trade one for a v4.

the v6 definitely has some differences compared to the v4's i'm used to. the 2 piece chimney has a wider bore than the v4 as someone mentioned recently which pressed against the bottom of the o-ring in the cap as opposed to sliding into it.
 

TheWestPole

Gold Contributor
Member For 4 Years
I've got 2 of the D style - https://www.fasttech.com/products/3028/10009514/2086200 atty's sitting on my coffee table that belong to a friend of mine. he wants me to open up the air holes for him. I could see if he would like to trade one for a v4

Well if you pass the V4 along to me I'll give him another Style D base. :) The good thing about it is you don't have to drill out the air holes in the deck, just the sides. Pull out the plastic air tubes and the deck holes are an excellent size.

The v6 definitely has some differences compared to the v4's i'm used to. the 2 piece chimney has a wider bore than the v4 as someone mentioned recently which pressed against the bottom of the o-ring in the cap as opposed to sliding into it.

Weird. I never noticed a wider bore on the Style D chimney. o_O When I got the atty I took the long bell cap off and used it elsewhere. Then I took the stock chimney and immediately converted it to one of my wide JFC chimneys. Never noticed the stock chimney being wider. Looked the same as all the rest of the two piece chimneys I've had. :confused:
 

sohkis

Member For 4 Years
Member For 3 Years
Member For 2 Years
Member For 1 Year
Member For 5 Years
Well if you pass the V4 along to me I'll give him another Style D base. :) The good thing about it is you don't have to drill out the air holes in the deck, just the sides. Pull out the plastic air tubes and the deck holes are an excellent size.

ooooh nevermind, apparently I misread. I thought you wanted to trade one of your v4 bases for a v6-D style. I've got my own v4's & he has 2 of the v6-D style. personally I think I prefer the v4 as the positive pin extends beyond the negative threads, on one of his D-style atty's it looks almost as if the positive pin is recessed which would make it unusable w/a hybrid cap.


Weird. I never noticed a wider bore on the Style D chimney. o_O When I got the atty I took the long bell cap off and used it elsewhere. Then I took the stock chimney and immediately converted it to one of my wide JFC chimneys. Never noticed the stock chimney being wider. Looked the same as all the rest of the two piece chimneys I've had. :confused:

yeah the D-style is definitely different, the chimney doesn't taper toward the top at all. on my avid vaper 2-piece chimney, it tapers down to the same size/threading as a kayfun chimney. the v6-Dstyle chimney is the same threading at the top as the bottom where it screws onto the deck. the chimney diameter is slightly larger than the v4, which is why it won't pass through the o-ring & into the hole in the bellcap. it sits up against a larger o-ring instead. I'll see if I can snap some side-by-side pics of the v4 vs v6-D, but I don't have calipers to take measurements.
 

TheWestPole

Gold Contributor
Member For 4 Years

sohkis

Member For 4 Years
Member For 3 Years
Member For 2 Years
Member For 1 Year
Member For 5 Years
here's some quick shots of the the v6 D-style chimney vs my avid vaper 2-piece chimney (had to use the kayfun chimney topper as the avid vaper chimney top is currently in use in my silverplay)
IMG_20150406_215059.jpg IMG_20150406_215221.jpg IMG_20150406_215455.jpg IMG_20150406_215505.jpg
 

TheWestPole

Gold Contributor
Member For 4 Years
here's some quick shots of the the v6 D-style chimney vs my avid vaper 2-piece chimney (had to use the kayfun chimney topper as the avid vaper chimney top is currently in use in my silverplay)
View attachment 18396 View attachment 18397 View attachment 18398 View attachment 18399

Hmmm. Yes the upper chimney OD on the two piece V6 measures almost 1mm bigger than the Kayfun. I've run into a lot of variation between the Orchid and Kayfun chimney types which are supposed to be compatible. I have to chalk this difference up to that variation. Bummer if this makes certain top caps a no fit.

This doesn't change my opinion about the V6 Style D. Slightly bigger chimney bore is not a real improvement. That takes 6mm and up. The Silverplay for example is 6mm.

I'm still waiting for them to offer the Style D's tall bell cap. I really like it, and it's unique in the vaping world as far as I know. Have no idea what's taking them so long. o_O

Screenshot 2015-04-07 at 9.42.08 AM.png
 
Last edited:

Eric DeCastro

Silver Contributor
Member For 4 Years
@TheWestPole when you "glue/epoxy" the tubing to extend a chimney, do you fill the inside and just drill out the epoxy? that is the plan I have for extending my KF4 evaporation chamber. if there is a better way please let me know.
 

TheWestPole

Gold Contributor
Member For 4 Years
@TheWestPole when you "glue/epoxy" the tubing to extend a chimney, do you fill the inside and just drill out the epoxy? that is the plan I have for extending my KF4 evaporation chamber. if there is a better way please let me know.

Depends. On the 3/8" chimneys, I would tack the surfaces chimney OD to the drilled bore with a little epoxy, then add a bead on the inside for strength. After full cure I would grind out the excess.

On the 1/2" chimneys there is no epoxy, just a press fit. This is possible because drilling that size through the upper part of the two part chimney provides a lot of insertion interference area.

Be extra careful with your setup. The challenge here is to keep everything concentric, aligned and straight.
 

TheWestPole

Gold Contributor
Member For 4 Years
No really good reason to post this. I just like the little thing.

IMAG0393.jpg

LPG, Orchid, Kayfun Bell Cap. Total length including drip tip: 98mm. :)
 

Eric DeCastro

Silver Contributor
Member For 4 Years
Depends. On the 3/8" chimneys, I would tack the surfaces chimney OD to the drilled bore with a little epoxy, then add a bead on the inside for strength. After full cure I would grind out the excess.


Be extra careful with your setup. The challenge here is to keep everything concentric, aligned and straight.

I'm going to try (when I get it in) is just add to the stock evaporation chamber of the KF4 so I can use a full sized tank. so I might try putting a glob of epoxy in and around the top of the chimney and add the extension on and after it cures, drill out the epoxy from the inside. since I'll be just using an old orchid V4 chimney for the extension, I won't have a lot of tubing to work with.
 

Eric DeCastro

Silver Contributor
Member For 4 Years
ok, I found a piece (well made) a piece of tubing that is .19" and drilled the center with a #23 drill bit. I'm ready to extend my evaporation chamber. just have to wait for vape mail!!!
 

VU Sponsors

Top